Transcription
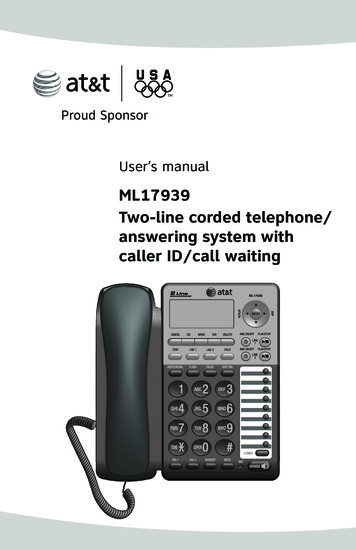
User’s manualML17939Two-line corded telephone/answering system withcaller ID/call waiting
Congratulationson purchasing your new AT&T product. Before using this AT&T product,please read Important safety information on page 66 of this user’s manual.Please thoroughly read the user’s manual for all the feature operations andtroubleshooting information you need to install and operate your new AT&Tproduct. You can also visit our website at www.telephones.att.com orcall 1 (800) 222-3111. In Canada, dial 1 (866) 288-4268.Model #: ML17939Type: Two-line corded telephone/answering system with caller ID/call waitingSerial #:Purchase date:Place of purchase:Both the model and serial numbers of your AT&T product can be found onthe bottom of the telephone base.Compatible withHearing Aid T-CoilTelephones identified with this logo have reduced noise and interference whenused with most T-coil equipped hearing aids and cochlear implants. The TIA-1083Compliant Logo is a trademark of the Telecommunications Industry Association.Used under license.TTIA-1083The ENERGY STAR program (www.energystar.gov)recognizes and encourages the use of products thatsave energy and help protect our environment. Weare proud to supply this product with the ENERGYSTAR qualified power adapter meeting the latestenergy efficiency guidelines.Clearspeak is a trademark of Advanced American Telephones. 2010 Advanced American Telephones. All Rights Reserved. AT&T andthe AT&T logo are trademarks of AT&T Intellectual Property licensed toAdvanced American Telephones, San Antonio, TX 78219. Printed in China.
Parts checklistYour telephone package contains the following items. Save your sales receiptand original packaging in the event warranty service is necessary.Telephone baseHandset with coiledhandset cordTelephone line cords: clear(2-conductor) and black (4-conductor)Replacementdirectory cardUser’s manualPower adapterMounting bracketQuick start guide
User’s manualML17939Two-line corded telephone/answering system withcaller ID/call waitingTable of contentsGetting startedQuick reference guide.2Optional backup batteryinstallation.4Telephone installation.5Telephone base installation.5Data port.8Installation options.9Tabletop to wall installation.9Wall to tabletop installation.11Optional headset.13Directory card.13Menu setupTelephone settings.14Menu overview.14Ringer volume.15Ringer melody.15LCD language.16LCD backlight.16Date and time.16Key tone.17Scroll rate.17Call settings.18Set the primary line.18Turn automatic line selectionon or off.18Turn auto speaker on or off.18Choose the preferred mode.19Set home and local area codes.19Choose how to store repeat callsin the call history.20Select tone or pulse dialing.20Answering system settings.21Answer on/off.21Announcement selection.21Announcement A andannouncement B.22Announcement A and B timesettings.23Call screening.24Number of rings.24Incoming message length.25Remote code.25Priority code.26Message alert tone.26Voicemail indicator settings.27Voicemail indicator.27Clear voicemail indication.27Turn COVM (central officevoicemail) on or off.28Telephone operationBasic operation.29Making, answering or endinga call .29On hook dialing (predialing).30Clearspeak dial-in-basespeakerphone.30Switching between the handset,headset and speakerphone.30Temporary ringer silencing.30Redial.31Auto redial.32Options while on calls.33Volume control.33
Flash/call waiting.33Mute.33Hold.33Temporary tone dialing.34Switching between lines.34Conference calls.34Two-way recording.35Chain dialing.36Speed dialSpeed dial memory overview.37Speed dial operation.38Storing a number in a speed diallocation.38Reviewing a speed dial number.38Editing a speed dial number.39Dialing a speed dial number.39Deleting a speed dial number.40DirectoryDirectory overview.41Directory memory capacity.41Character chart.41Directory operation.42Creating a directory entry.42Reviewing directory entries.42Searching by name.43Editing directory entries.43Copying directory entries to speeddial memory.44Dialing directory entries.44Deleting directory entries.44Caller IDAbout caller ID.45Information about caller ID withcall waiting.45How caller ID history (call log)works.46Caller ID operation.47Memory match .47Missed calls indicator.47Reviewing call history.47Dialing options.48Dialing a call history entry.48Deleting call history entries.48Saving a call history entry to thedirectory.49Saving a call history entry to aspeed dial location.50Reasons for missing caller IDinformation.51Answering systemAnswering system and voicemail.52Answering system operation.53Message capacity.53Answering system new messageindication.53Call screening .53Call intercept.53Priority code.53Message playback.54Options during playback.54Delete all old messages.55Record and play memos.55Remote access.56AppendixScreen icons and indicator lights.57Indicator lights.57Screen icons.57Screen display messages.58Troubleshooting.60General product care.65Important safety information.66Safety information.66Especially about cordedtelephones.66FCC and ACTA information.67Part 15 of FCC rules.69Limited warranty.70Technical specifications.72Index.73Remote access wallet card.75
Getting startedInstallation preparationYou must install the poweradapter before using thetelephone.See pages 6-7 for easyinstructions.If you subscribe to high speed Internet service (DSL - digital subscriber line)through your telephone line, you must install a DSL filter between eachtelephone line cord and telephone wall jack (pages 6 and 7). The filterprevents noise and caller ID problems caused by DSL interference. Pleasecontact your DSL service provider for more information about DSL filters.Your product may be shipped with a protective sticker covering the telephonebase display - remove it before use.For customer service or product information, visit our website atwww.telephones.att.com or call 1 (800) 222-3111. In Canada, dial1 (866) 288-4268.Avoid placing the telephone base too close to: Communication devices such as television sets, VCRs, or cordless telephones. Excessive heat sources. Noise sources such as a window with traffic outside, motors, microwaveovens, refrigerators, or fluorescent lighting. Excessive dust sources such as a workshop or garage. Excessive moisture. Extremely low temperature. Mechanical vibration or shock such as on top of the washing machine orwork bench.
Getting startedQuick reference guideDELETEENTERPress to delete the displayed directory, or call history entry (pages 44and 48).Press to selecta menu item orpress to save asetting (page 14).Press to backspace and erase a digit or character (pages 38 and 42).During message playback, press to delete the message currentlyplaying (page 54).When the telephone is idle, press to delete all old messages (page 55).DIRPress to enter the directory (page 42).menuPress to enter the main menu (page 14).CIDPress to display call history information(page 47).CANCELPress to cancel an operation and go backto the previous menu (page 14).Press and hold to return to idle mode(page 14).ConfholdPress to initiate a three-way conference call (page 34).Press to place a callon hold (page 33).line 1, line 2Press to make or answer a call on the selected line (page 29)./SKIPPress to skip to the nextmessage (page 54)./REPEATWhile playing messages,press to repeat the message,or press twice to hear theprevious message (page 54).While entering names ornumbers, press to move thecursor to the right (pages 38and 42).While entering names ornumbers, press to move thecursor to the left (pages 38and 42).While in the menu, press toscroll up or down (page 14).Press to go back to theprevious menu (page 14).Press and hold to scrollthrough options.//ANS ON/OFF LINe1/LINE2/PLAY/STOP LINE1/LINE2Press to turn the built-inanswering system on or off(page 21).Press to start or stopmessage playback (page 54).Press to stop recording amemo (page 55).
Getting startedQuick reference guideFLAShPauseDuring a call, press to answer an incoming callwhen you receive a call waiting alert (page 33).Press to insert a two-seconddialing pause in a number storedin the directory or speed dialmemory (pages 38 and 42).(auto) redialDISP DIALPress to dial the last number dialedwhen the telephone is off hook(page 31).Press to dial the numbercurrently displayed(page 30).When the telephone is idle, press todisplay the last five numbers dialed(page 31).Press to begin auto redial (page 32).vol During a call, press to increase thelistening volume (page 33).While the telephone is not inuse, press to increase the ringervolume for both lines (page 15).During message playback, pressto increase the playback volume(page 54).volDuring a call, press to decreasethe listening volume (page 33).While the telephone is not inuse, press to decrease the ringervolume for both lines (page 15).During message playback, pressto decrease the playback volume(page 54).SPEAKERHEADSETPress to turn thebase speakerphoneon or off (page 29).Press to activate the headsetwhen a corded headset isconnected (pages 13 and 29).lowerMUTEDuring a call, press to mute themicrophone (page 33).Press to enter the lowerlocations of the speed dialkeys (page 37).When a call is ringing, press tomute the ringer (page 30).Speed dial keysPress to dial or review a storedspeed dial number when thetelephone is idle (pages 38 and 39).
Getting startedOptional backup battery installationInstall three AA alkaline batteries (purchased separately) to use this telephonein the event of a power failure. If power fails with working batteries installed,all functions work properly except for the display illumination.If power fails and no batteries are installed, you can make or answer calls online 1 using only the handset. Last number redial and speed dialing are alsosupported, but the screen display will be dimmer than usual.Install the batteries as shown below:1. Press the tab and pull to remove the battery compartment cover. Insertthree AA alkaline batteries (purchased separately) following the polaritymarkings in the battery compartment.2. Replace the battery compartment cover.NOTE: If no backup batteries are installed and the power adapter is connected,steady on the screen. appears
Getting startedTelephone installationTelephone base installation1. Install the mounting bracket for tabletop use.Option 1: Insert the tabs into slots a and b to install your telephone ina low tabletop position. Press the flexible tabs A and B on the mountingbracket until it clicks into place.BAAOption 1: Low tabletop positionOption 2: Rotate the mounting bracket 180 degrees. Insert the tabs into slotsc and d to install your telephone in a high tabletop position. Press theflexible tabs A and B on the mounting bracket until it clicks into place.cABAOption 2: High tabletop position
Getting startedTelephone installation2. Connect the telephone line cord(s) and the power cord to the telephone base.If you subscribe to high speed Internet service (DSL - digital subscriber line)through your telephone line, you must install a DSL filter between eachtelephone line cord and telephone wall jack. The filter prevents noise andcaller ID problems caused by DSL interference. Please contact your DSL serviceprovider for more information about DSL filters.Option 1: If you have a two-line wall jack, install your telephone base asshown below.Plug the other end of theblack telephone line cord (4conductor) into the wall jack.Plug the largeend of the poweradapter into anelectrical outletnot controlled bya wall switch.L1 L2If you have DSLhigh speed Internetservice, a DSL filter(not included) isrequired.Plug one end of theblack telephone linecord (4-conductor)into the jack labeledLINE 1/L1 L2 onthe back of thetelephone base.Plug the small endof the power adapterinto the power jackon the back of thetelephone base.Plug the other end of thecoiled handset cord into theleft side of the telephone base.One end of the coiled telephoneline cord has already been pluggedinto the handset. Make sure it isplugged in firmly.NOTES: Use only the power adapter supplied with this product. To order a replacement powerwww.telephones.att.com, or call1 (800) 222-3111. In Canada, dial 1 (866) 288-4268.adapter, visit our website at The power adapter is intended to be correctly oriented in a vertical or floor mount position.The prongs are not designed to hold the plug in place if it is plugged into a ceiling, underthe-table or cabinet outlet.
Getting startedTelephone installationOption 2: If you have two one-line wall jacks, install your telephone base asshown below.Plug the other end ofthe clear telephoneline cord (2-conductor)into the wall jack.L1Plug the other end ofthe black telephoneline cord (4-conductor)into the wall jack.L2Plug the largeend of the poweradapter into anelectrical outletnot controlled bya wall switch.If you have DSL highspeed Internet service,a DSL filter (notincluded) is required.Plug one end of theclear telephone linecord (2-conductor)into the jack labeledLINE 1/L1 L2 onthe back of thetelephone base.Plug one end of theblack telephone linecord (4-conductor)into the jack labeledLINE 2 on the back ofthe telephone base.Plug the smallend of the poweradapter into thepower jack onthe back of thetelephone base.Plug the otherend of thecoiled handsetcord into theleft side of thetelephone base.One end of the coiledtelephone line cordhas already beenplugged into thehandset. Make sure itis plugged in firmly.NOTES: Use only the power adapter supplied with this product. To order a replacement powerwww.telephones.att.com, or call1 (800) 222-3111. In Canada, dial 1 (866) 288-4268.adapter, visit our website at The power adapter is intended to be correctly oriented in a vertical or floor mount position.The prongs are not designed to hold the plug in place if it is plugged into a ceiling, underthe-table or cabinet outlet.
Getting startedData portIf you want to connect another device (such as a modem or fax machine) tothe wall jack, use the jack labeled DATA on the back of the telephone base.The data port uses line 2 only.DATA port
Getting startedInstallation optionsIf you want to mount your telephone on a wall, connect the telephone baseto a standard dual-stud telephone wall mounting plate. If you do not havethis mounting plate, you can purchase one from many hardware or consumerelectronics retailers. Professional assistance may be required to install themounting plate.Tabletop to wall installationTo install your telephone base in the wall installation position, make sure youfirst unplug the power adapter from the electrical outlet and the telephoneline cord from the wall outlet.1. Hold down the switch hook on the telephone base, then slide the handsettab upwards to remove it from the slot. Rotate the handset tab 180 degrees.Push the handset tab down into the slot until it locks into position.Switch hook2. Press in the direction indicated by the arrows to release the mountingbracket. Remove the mounting bracket from the telephone base.Option 1: Low tabletop positionOption 2: High tabletop position
Getting startedInstallation options3. Plug the coiled handset cord into the handset and the telephone base.Plug the small end of the power adapter cord into the power jack on theback of the telephone base.4. Plug the telephone line cords into the wall jacks.Option 1: If you have a single two-line wall jack, use only the blacktelephone line cord (4-conductor).Plug one end of the black telephone line cord into the jack labeledLINE 1/L1 L2 on the back of the telephone base. Plug the large end of thepower adapter into an electrical outlet not controlled by a wall switch.If you have DSL highspeed Internet service,a DSL filter (notincluded) is required.L1 L2Option 2: If you have two separate one-line wall jacks, use both telephoneline cords.Plug one end of the clear telephone line cord into the jack labeledLINE 1/L1 L2 on the back of the telephone base. Plug one end of theblack telephone line cord into the jack labeled LINE 2. Plug the other endof the clear telephone line cord and the other end of the black telephoneline cord into the wall jacks.L1L2If you have DSL high speedInternet service, a DSL filter(not included) is required.10
Getting startedInstallation options5. Wrap the telephone line cord as show below. Mount the telephone on themounting plate until it is held securely into position. Plug the large end ofthe power adapter into an electrical outlet not controlled by a wall switch.Wall to tabletop installationTo return the telephone base from wall installation to tabletop position:1. Unwrap the telephone line cord. Remove the telephone base from thewall. Unplug the telephone line cord from the telephone wall jack and thepower adapter cord from the electrical outlet.11
Getting startedInstallation options2. Hold down the switch hook on the telephone base, then slide the handsettab upwards to remove it from the slot. Rotate the handset tab 180 degrees.Push the handset tab down into the slot until it locks into position.Switch hook3. Follow the steps in Telephone base installation on pages 5-7 to installyour telephone for tabletop use.12
Getting startedOptional headsetYou can use this telephone hands free when you install any industry standard2.5mm corded telephone headset (purchased separately). The telephoneplays an error tone if you press HEADSET when a headset is not plugged intothe headset jack.For best results, use an AT&T 2.5mm headset. To order an AT&T 2.5mmheadset, visit our website at www.telephones.att.com or call1 (800) 222-3111. In Canada, dial 1 (866) 288-4268.Plug a 2.5mm headsetinto the jack on the rightside of the telephonebase (beneath the smallrubber flap).Directory cardUse the directory card to record the names of the speed dial numbers you stored.To write names on the directory card:1. Remove the clear plastic cover by inserting the tip of a small item such asa paperclip into the hole at the top edge of the cover.2. Pull out the directory card.3. Write the information on the directorycard.4. Replace the directory card and theplastic cover.To replace the directory card:1. Follow steps 1 and 2 above to removethe old directory card.2. Insert the new directory card andreplace the plastic cover.13
Menu setupTelephone settingsMenu overviewUse the menus to change the telephone settings.1. When the telephone is idle, press MENU to enter the main menu.2. Pressor to scroll to the feature to be changed. Press ENTER.3. Pressor to scroll to the desired settings.4. Press ENTER to save your selection. The telephone plays a confirmationtone and returns to the previous menu. Press /REPEAT to go back to theprevious menu. To exit without making changes, press CANCEL.-ORPress and hold CANCEL to return to idle mode.NOTE: If no key is pressed within 30 seconds, the telephone automatically returns toidle mode.Menu structureRinger volumeRingersLCD languageRinger melodyLCD backlightSet date/timeKey toneDirectoryCall logSpeed dialPhone settingsCall settingsAnswering sysVoicemailScroll ratePrimary lineAuto line selAuto speakerPreferred modeChoose anncSet area codeRepeat callsDial modePlay messagesAnnouncementMailbox 1Delete all oldMailbox 2Record memoAnswer ON/OFFAns sys setupClr voicemailL1 covm ON/OFFL2 covm ON/OFF14Annc AAnnc BSet annc A timeSet annc B timeCall screening# of ringsMsg lengthRemote codePriority codeMsg alert tone
Menu setupTelephone settingsRinger volumeYou can set the ringer volume level (1-6) or turn the ringer off. When theringer is off, Ringer muted appears on the screen.PHONE SETTINGS1. When the telephone is idle, press MENU.Ringers2. Press or to scroll to Phone settings. Press ENTER. LCD languageLCD backlight3. Press or to scroll to Ringers. Press ENTER.4. Press or to scroll to Ringer volume. Press ENTER.RINGERS5. Press or to select the desired line (Line 1,Ringer volumeRinger melodyLine 2 or Lines 1 & 2). Press ENTER.6. Press , , VOL or VOL- to adjust the ringer volumefor the selected line.Ringer volume7. Press ENTER to save your setting. The telephoneLine 1plays a confirmation tone and returns to theLine 2Lines 1 & 2previous menu.RINGER VOLUMENOTES: Pressing VOL or VOL- when the telephone is idle adjusts theringer volume for both lines. If the ringer for either or both lines is muted,for thecorresponding line or both lines flashes on the screen when the telephone is idle.Ringer melodyUse this feature to choose one of the 10 ringer melodies for incoming calls.You can choose different ringer melodies for each line or the same ringermelody for both lines.RINGERS1. When the telephone is idle, press MENU.Ringer volume2. Press or to scroll to Phone settings. Press ENTER. Ringer melody3. Press or to scroll to Ringers. Press ENTER.4. Press or to scroll to Ringer melody. Press ENTER.Ringer Melody5. Press or to select the desired line (Line 1, Line 2 Line 1or Lines 1 & 2). Press ENTER.Line 2Lines 1 & 26. Press or to select the desired ringer melody.The telephone plays each ringer melody as you scrollRinger Melodythrough the choices.Ringer 07. Press ENTER to save your selection. The telephoneRinger 1plays a confirmation tone and returns to theRinger 2previous menu.NOTE: If you turn off the ringer volume, you do not hear ringer melody samples.15
Menu setupTelephone settingsLCD languageUse this feature to change the display language that is used in all menus andscreens. This telephone is set to use English for display by default.1. When the telephone is idle, press MENU.PHONE SETTINGS2. Press or to scroll to Phone settings. Press ENTER. Ringers3. Press or to scroll to LCD language. Press ENTER. LCD languageLCD backlight4. Press or to select English, Français or Español.5. Press ENTER to save your selection. The telephoneLCD languageplays a confirmation tone and returns to theEnglishprevious menu.FrancaisLCD backlightUse this feature to turn the LCD backlight on or off.1. When the telephone is idle, press MENU.2. Press or to scroll to Phone settings. PressENTER.3. Press or to scroll to LCD backlight. Press ENTER.4. Press or to select On or Off.5. Press ENTER to save your selection. The telephoneplays a confirmation tone and returns to theprevious menu.EspanolPHONE SETTINGSRingersLCD languageLCD backlightLCD backlightOnOffDate and timeThe telephone plays the date and time a message was received by theanswering system. If you subscribe to caller ID service provided by yourtelephone service provider, the date, month and time are set automaticallywith each incoming call. The year must be set so that the day of the week canbe calculated from the caller ID information. Before using the answeringsystem, set the date and time as follows.1. When the telephone is idle, press MENU.PHONE SETTINGS2. Press or to scroll to Phone settings. Press ENTER. LCD languageLCD backlight3. Pressor to scroll to Set date/time.Set date/timePress ENTER to set the date.4. Use the dial pad keys to enter the date. To enter adigit that is less than 10, enter a 0 before the digit. Set Date/ /Press /REPEAT or /SKIP to move the cursor to theMM/DD/YYleft or right.-ORPress or to scroll to the desired digit. Press ENTER Setto moveTimeon to set thenext digit. Press /REPEAT or /SKIP to move the cursor to theleft or:right.16
Set date/timeMenu setupSet Date/ /MM/DD/YYTelephone settings5. Press ENTER to move to the time setting.6. Use the dial pad keys to enter the time. To enterSet Timea digit that is less than 10, you have to enter a 0:before the digit. Press /REPEAT or /SKIP to movethe cursor to the left or right.-ORPress or to scroll to the desired digit. Press ENTER to move on to set thenext digit. Press /REPEAT or /SKIP to move the cursor to the left or right.7. Pressor to select AM or PM.8. Press ENTER to save the setting. The telephone plays a confirmation toneand returns to the previous menu.NOTE: The telephone plays an error tone if the date and time you entered is invalid.Key toneUse this feature to turn the key tone on or off. The telephone is set to beepwith every key press by default.PHONE SETTINGS1. When the telephone is idle, press MENU.Set date/time2. Pressor to scroll to Phone settings.Key tonePress ENTER.Scroll rate3. Pressor to scroll to Key tone. Press ENTER.4. Pressor to select On or Off.KEY TONEOn5. Press ENTER to save your selection. The telephoneOffplays a confirmation tone and returns to theprevious menu.Scroll rateUse this feature to set the scroll rate when you press and hold the desiredbutton ( , , /REPEAT, /SKIP) to scroll through options.1. When the telephone is idle, press MENU.PHONE SETTINGS2. Pressor to scroll to Phone settings.Set date/timePress ENTER.Key toneScroll rate3. Pressor to scroll to Scroll rate. Press ENTER.4. Pressor to select Slow, Medium or Fast.5. Press ENTER to save your selection. The telephone Scroll RateSlowplays a confirmation tone and returns to theMediumprevious menu.Fast17
Menu setupCall settingsSet the primary lineUse this feature to select the default telephone line to be used when youmake calls. The primary line is set to Line 1 by default.1. When the telephone is idle, press MENU.Call Settings2. Press or to scroll to Call settings. Press ENTER. Primary lineAuto line sel3. Press or to scroll to Primary line. Press ENTER. Auto speaker4. Press or to select Line 1 or Line 2.5. Press ENTER to save your selection. The telephone Primary LineLine 1 plays a confirmation tone and returns to theLine 2previous menu.Turn automatic line selection on or offWhen Auto line sel is turned on and both telephone lines are connected, thetelephone automatically selects the first available line to use when making acall. The Auto line sel feature is set to On by default. To change the setting:1. When the telephone is idle, press MENU.Call Settings2. Press or to scroll to Call settings. Press ENTER. Primary lineAuto line sel3. Press or to scroll to Auto line sel.Auto speakerPress ENTER.4. Press or to select On or Off.AUTO LINE SEL5. Press ENTER to save your selection. The telephoneOnOffplays a confirmation tone and returns to theprevious menu.NOTE: If only one line is connected and not set as the primary line, the telephone will notautomatically select the line even if you turn on the automatic line selection feature.Turn auto speaker on or offIf you set Auto speaker to On, when you press a speed dial key with astored number, the telephone automatically dials the number using thepreferred mode you set (see Choose the preferred mode on page 19). TheAuto speaker fe
Connect the telephone line cord(s) and the power cord to the telephone base. If you subscribe to high speed Internet service (DSL - digital subscriber line) through your telephone line, you must install a DSL filter between each telephone line cord and telephone wall jack. The filter prevents noise and caller ID problems caused by DSL interference.