Transcription
Cbeyond SIP Trunks Configuration GuidePBX Platform: KX-TDE/NCP2/4/2010Rev21
OverviewThis document describes the configuration procedures required for the KX-TDE100/200/600 andNCP500/1000 to make full use of the capabilities of Cbeyond SIP Trunks Services.The SIP trunks services of the TDE/NCP PBX are provided through virtual CO line cards (VSIPGW16) which are designed to be easily integrated into an Internet Telephony Serviceprovided by an ITSP (Internet Telephony Service Provider).This guide describes the specific configuration items for the virtual SIP Gateway card in additionto the PBX basic configuration related to SIP trunks functionality. It also describes basic Networkconfiguration to familiarize dealers with the network setup. It does not describe the purpose anduse of all configuration options on the virtual SIP Gateway card. For those details, see the KXNCP500/1000 and KX-TDE100/200/600 Programming Manual for Virtual SIP CO Line Card andthe KX-TDE100/200/600 and KX-NCP500/1000 Manuals available from PanasonicCommunication Solutions.DSP card and Activation keys9 The PBX has to be equipped with a DSP card in order to providecommunication between the TDM side of the PBX and the SIP trunks.9 Activation keys for SIP-Trunks has to be installed in the PBX to provide theSIP-trunks functionalityTo check the number of activation keys installed into the PBX and add new licensesplease refer to Page 12 in this guide2/4/2010Rev22
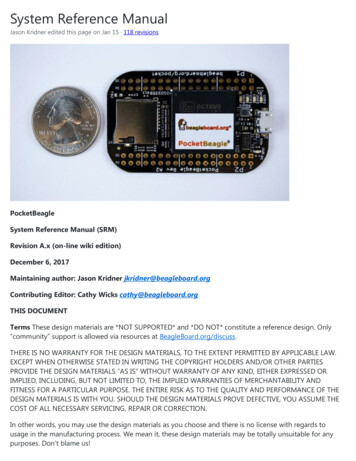
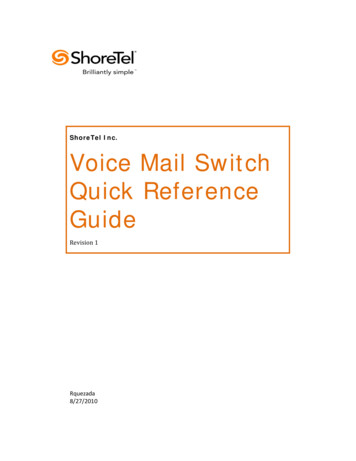
Architecture OverviewThe following diagram illustrates simple VOIP networks connecting the TDE/NCP PBX:The Case of Cbeyond Setup: Cbeyond will provide its services over a dedicated Circuitterminated at the CPE devicesipconnect.mia0.cbeyond.netDefault GW 192.168.0.1MPR IP Address 192.168.0.101VOIP IP Address 192.168.0.1022/4/2010Rev23
Basic V-SIPGW16 Settings for Cbeyond1-Install the PBX Maintenance console into your PCThe maintenance console should be available to certified dealers; Dealers can get thelatest version of the UPCMC from www.btsdealer.com2- Connect to the PBXo Start the UPCMCo Click Connect and choose the method of connection using either LAN , RS232, Modem, or USB to Connect to your PBX for interactive configuration** We will be using the LAN method throughout this guide**Provide the IP address of the MPR card and the password of the INSTALLER Level2/4/2010Rev24
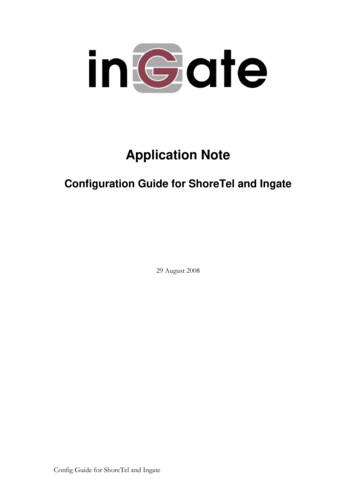
o Go to 1-Configuration, 1-Slot, move your mouse over the MPR card andselect the card propertyMake sure that the default gateway should be the end router LAN IP addressMake sure that you have a valid DSP-VOIP LAN address2/4/2010Rev25
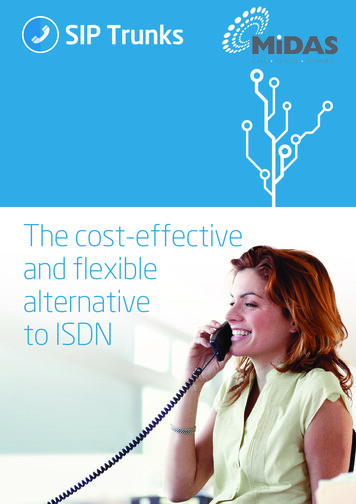
3- Installing V-SIP W16 cardo Go to 1-Configuration, 1-Slot, move your mouse towards the IPCMPR virtualshelf and click on select shelfHighlight the V-SIPGW16 card from the cards list in the left sideo Drag the VSIPGW16 card into the trunk portion of the virtual shelf by usingthe PC mouse lift button2/4/2010Rev26
o Release the Mouse lift button and click Yes on the dialogue boxo Take the V-SIPGW16 card OUS in order to be able to enter the followingsettings4-Configuring the VSIP-GW16 cardo Move the mouse over the VSIPGW16 card and choose shelf propertyThe following settings are required for Cbeyond SIP trunk services on the shelfproperty:2/4/2010Rev27
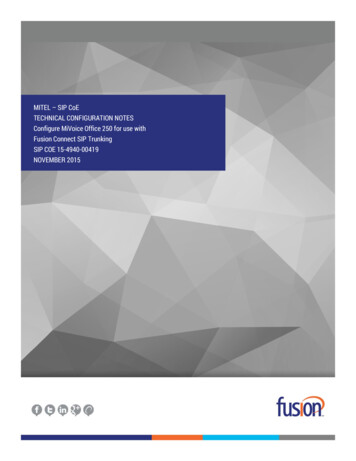
** (SIP Client Port Number 5060 and NAT-Keep Alive Packet sendingability Enable)o Click Apply and then OKo Move you mouse over the VSIPGW16 card and choose Card propertyo Click on Common settingso DNS Server IP address method is Manaulo Provide your Cbeyond DNS serevers IP addresses. You can find the DNSinformation in your Cbeyond Install profile by logging ontoCbeyondOnline.net or from Cbeyond Service Coordinator2/4/2010Rev28
o Click Apply and then OKo Click Cancel on the card property- Virtual SIP gateway screen to exit thisscreeno Move you mouse over the VSIPGW16 card and choose port property2/4/2010Rev29
Basic Channel setup:Please locate the SIP Connect Settings details in your Install Profile fromCbeyondOutbound Proxysip-proxy.mia0.cbeyond.net1234567890o Main tab: According to the account info above, we need to configure theBasic Channel Port as follows:123456o123-Port 1 channel attribute Basic channelProvider name CbeyondSIP Server Name SIPConnect Domain “sip-proxy.mia0.cbeyond.net”SIP server port number 5060SIP service Domain “sipconnect.mia0.cbeyond.net”Subscriber number 1234567890 (Optional)Account tab:user name PBX Username 1234567890Authentication ID same as PBX Username 1234567890Password PBX Password RNJORNJO Æ Case Sensitive Entryo Register Tab:12345-Register abilty EnableRegister sending interval 3600secUnregister ability when port INS EnableRegister server name/IP address Blank (No settings)Register server port 5060o NAT Tab:Same as defaulto Option Tab:Same as defaulto Calling Party tab:Same as defaulto Called party Tab:Same as defaulto Voice/Gax Tab:1- IP Codec priority (1st G.729A, 2nd G.711u, 3rd None)2- Fax Sending method G.711 Inband3- Fax Detection Ability Enable2/4/2010Rev210
o RTP/RTCP Tab:Same as defaulto T.38, T.38 OptionSame as defaulto DSP, Supplementry services:1- CLIR Yes2- CNIP (Send) Yes3- CNIP (Receive) YesAdditional DID’sPlease set the channel attribute for number of ports depending on the number ofactive SIP lines as”additonal channel for channel 1”1234567890Since there are 16 active SIP lines, the number of V-SIPGW ports to be set asan”additonal channel for channel 1”will be 15 ports2/4/2010Rev211
Essential PBX Configuration:To Assign the DID numbers destinations, Go to 10-3.CO & Incoming CallÆ DID tablePlease locate your DID information in the Cbeyond Install Profile under the TrunkGroup Information sectionImportant note:Make sure that you provide the 10 digits DID number in the DID number field to be able tomake use of the additional DID’s assigned by the Provider.SIP trunks Activation keys:1- The DSP card installed onto the PBX MPR Card has preinstalled number of SIPtrunks activation keys (DSP4 and DSP16 have 4 IP trunks and DSP64 has 16 IPtrunks)2- To obtain additional activation keys, you need to purchase the appropriateactivation key codes (For IP Trunks) and access the Key Management System. Youcan download the activation keys as an activation key file from the KeyManagement System. To download the activation keys, enter the MPR ID numbershown on the IPCMPR Card in the PBX, and activation key number and registrationID provided on each activation key code.3- To check the Number of Activation Keys Installed into your systemGo to 1- Configuration, 1-Slot, click on Activation Keys (Top of the PBX image)2/4/2010Rev212
Minimum System Software requirements:UPCMCNCPTDE 100/200/600V5.1.2.3(Latest as of 1/14/10)V1.0101 and higherV 2.0104 and higherUseful Hints:1- Update your system software once the update is available through the Dealerwebsite to make use of added features and improved functionality2- Update your PCMC (Maintenance Tool) with the latest version available on the BTSwebsite and through Panasonic Tech support department3- Back up your configuration file with the Good known settings4- Consult with your network administrator prior to installation to guarantee a smoothsetup for your system over the existing network2/4/2010Rev213
CbeyondOnline.net or from Cbeyond Service Coordinator . 2/4/2010 9 Rev2 o Click Apply and then OK o Click Cancel on the card property- Virtual SIP gateway screen to exit this screen o Move you mouse over the VSIPGW16 card and choose port property . 2/4/2010 10 Rev2 .