Transcription
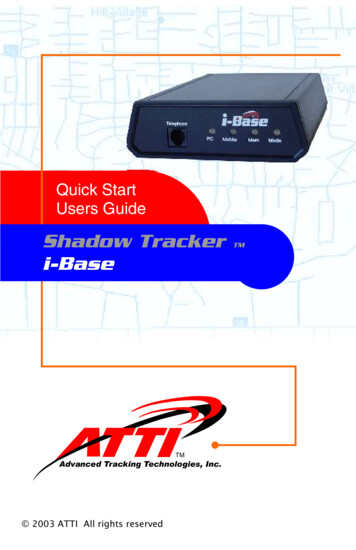
Quick StartUsers GuideQuick StartUsers GuideShadow Trackeri-BaseTMAdvanced Tracking Technologies, Inc. 2003 ATTI All rights reservedTM
Copyright 2003, Advanced Tracking Technologies, Inc.All rights reserved. No part of this publication may be reproduced ortransmitted in any form or by any means without the prior writtenpermission of Advanced Tracking Technologies, Inc.ATTI, Advanced Tracking Technologies and Shadow Tracker areregistered trademarks of Advanced Tracking Technologies, Inc.Microsoft, Windows and the Windows logo are registered trademarksof the Microsoft Corporation.Pentium is the registered trademark of Intel Corporation.All other trademarks and brand names are the property of theirrespective proprietors.www.AdvanTrack.com
Federal Communications Commission (FCC) NotificationThis device contains Transmitter Module FCC ID: PHO-CDR915 andcomplies with part 15 of the FCC rules. Operation is subject to thefollowing two conditions:1. This device may not cause harmful interference.2. This device must accept any interference received, includinginterference that may cause undesired operation.FCC RF Exposure StatementThis device complies with FCC radiation exposure limits as set forthfor an uncontrolled environment.This device should be installed and operated with a minimumseparation distance of 20 cm between the radiator and your body.FCC Compliance WarningChanges or modifications to the i-Base not expressly approved byAdvanced Tracking Technologies, Inc. could void the user's authorityto operate this product.Note: This equipment has been tested and found to comply with thelimits for a Class B digital device, pursuant to part 15 of the FCCRules. These limits are designed to provide reasonable protectionagainst harmful interference in a residential installation. Thisequipment generates and can radiate radio frequency energy and, ifnot installed and used in accordance with the instructions, may causeharmful interference to radio communications. However, there is noguarantee that interference will not occur in a particular installation.If this equipment does cause harmful interference to radio ortelevision reception, which can be determined by turning theequipment off and on, the user is encouraged to try to correct theinterference by one or more of the following measures:!!!!Reorient or relocate the receiving antenna.Increase the separation between the equipment and receiver.Connect the equipment into an outlet on a circuit differentfrom that to which the receiver is connected.Consult the dealer or an experienced radio/TV technician forhelp.
Minimum System RequirementsWindows 95, 98, NT (Service Pack 6 or higher),2000 (Service Pack 3or higher), MEPentiumII - 350 Mhz (or higher recommended)32 MB min. (64 MB recommended)850 MB of free Hard Drive spaceCD-ROMSVGA MonitorWindows compatible printer (color recommended)Open 9 pin Com port
TABLE OF CONTENTSIntroductionGetting Started . 1Hardware Components .2Software Install TypesStandAlone . 4Client/Server . 4Software InstallationBegin Installation. 6Default Login and Password.7Software SettingsAdding the Tracking Units . 8Set Base Configuration .12Adding Driver/Employee Information .13Adding Vehicle Information .14Assigning the Tracker to a Vehicle. 15Assigning the Driver/Employee to a Vehicle. 17Specifications and Features . 18Technical Support .20Appendix 1TC
INTRODUCTIONGETTING STARTEDThis Users Guide has been designed to provide you with a brief, butcomprehensive overview of the following:1. How to install your Shadow Tracker Professional softwareprogram as either an i-Base Standalone or i-Base Client/Serverinstall type.2. How to add and validate the Shadow Tracker 2000 unit(s) tothe software.3. How to setup and configure the i-Base.4. How to add the necessary driver and vehicle information to theShadow Tracker Professional software.When these four steps are completed and the ShadowTracker 2000 unit(s) have been installed in the vehicles, you will be1
INTRODUCTIONready to begin collecting and processing the GPS data for yourvehicles.HARDWARE COMPONENTSYou should have the following items before you begin Setup.i-BaseBase radio unit6 ft. RS-232 cableA/C power supply 12vDipole radio antenna *PN#PN#PN#PN#H-93115G-40120A-40103G-39270Shadow Tracker 2000Mobile tracking unitDownload/Validation cableA/C power supply 12vPN# H-71556PN# D-38105PN# A-40106*Real Time capable i-Base comes with the following parts substitutedfor theG-39270 antenna:50 ft. RG-8U coax cablePole mount base antennaPN# G-40107PN# G-392512
INTRODUCTIONBase radio unitH-931156 ft. RS-232 cableG-40120Dipole radio antennaG-39270A/C power suppy 12vA-40103Mobile tracking unitH-71556Download/Validation cableD-38105A/C power supply 12vA-401063
SOFTWARE INSTALL TYPESMounting hardwareSMA connectorPN# G-39260PN# G-40140Shadow Tracker Professional software can be installed as either anon-networked Standalone or as a networked Client/Serverinstallation. The software can be installed on any computer whichmeets the minimum system requirements.STANDALONEA Standalone install places all of the software on one computer.If you intend to install Shadow Tracker Professional software as aStandAlone system and intend to download wireless and non-wirelesstracking units, it is recommended that the computer you use have aleast (2) open 9-pin Com ports. One used exclusively for the i-Baseand the second used to handle the non-wireless downloads.CLIENT/SERVERA Client/Server install places the Mapping and Reporting software onthe Client Computer and the Administrative tools and Databases areinstalled onto the Server Computer.If you intend to install the software as a Client/Server system, thecomputer on which you install the Server system will need at least (1)open 9-pin Com port for the i-Base. If you intend to download nonwireless tracking units as well, this will be performed using the Clientsystem. The Client Computer will need (1) open 9-pin Com port.STEPS TO INSTALL THE CLIENT/SERVER SYSTEMIf you are performing a Client/Server system install it must beperformed in the following order:1. Install the Server system on the Server Computer.2. On the Server Computer, enable the Shadow4
SOFTWARE INSTALL TYPESTracker Professional program folder (STRT- default location:C:\Program Files\STRT) as a shared network resource. (top right)3. Before installing the Client system, on the Client Computer, map adrive letter to the shared Shadow Tracker Professionalprogram folder on the Server Computer from step 2. (below)4. Install the Client system on the Client Computer.Note: If you are not sure how to perform these steps, contact5
SOFTWARE INSTALLATIONBEGIN INSTALLATION1. Insert the Shadow Tracker Professional software CD into theCD-ROM drive of your computer.2. From the Windows Desktop click Start, then click Run.3. In Open: type the drive letter of your CD-ROM drive and":\Setup.exe”(example - D:\Setup.exe.).Or click Browse and navigate to the Setup.exe. (below)4. Click OK to begin the installation and follow the instructions onyour screen.5. Click Next at the Welcome screen.6. Click Yes to accept the License Agreement.7. At the Registration screen enter your Name, Company and theProduct CD-Key (located on the rear of the CD case) in the spaceprovided. Click Next.8. Select your Install type: Client System, Server System or ShadowTracker StandAlone, click Next.6
SOFTWARE INSTALLATION9. Click Next to accept the default location for the ShadowTracker Professional program (recommended) or click Browseand select another folder. Setup will begin.Note: If you are installing the Client system, you will be promptedto set the “Server System program files data path”. Click Browseand navigate to the mapped network drive that points to the STRTfolder you enabled as a shared network resource on the Server.(below). Click Next.10. When prompted click OK to reboot your computer. On reboot thesoftware installation will be complete.DEFAULT LOGIN AND PASSWORDTo open a Shadow Tracker Professional program:From the Windows Desktop click Start, point to Programs, point toShadow Tracker Professional and click the program you wish toopen.To gain access to the Administrator or Shadow Tracker programsyou need a user name and password.The default login is:7
SOFTWARE SETTINGSADDING THE TRACKING UNITSEach tracking unit must be validated to the ShadowTracker Professional software before you can begin collecting andprocessing GPS and other data.To add each unit:1. Connect and power a Shadow Tracker 2000 tracking unit toyour computer. (see Appendix 1)2. Open the Administrator program.Note: In a Client/Server system the Administrator program islocated on the Server Computer.From the Windows Desktop click Start, point to Programs, point toShadow Tracker Professional, click Administrator.3. Log into the program using the default username and password.8
SOFTWARE SETTINGSClick ATTI.(above)4. Click Shadow Tracker from the menu bar and then clickSet Communications Port.a) If you know the Com Port # the tracking unit is connected to:-If the Com Port # displayed is correct, click Close to returnto the previous menu.-If the Com Port # displayed is not correct, click Edit andselect the correct Com Port # from the drop-down menu.Click Save and then click Close to return to the previousmenu.b) If you Do Not know the Com Port #:- Click Detect. Administrator will attempt to locate thecorrect port.Note: Make sure there are no other devices connected to anyother Com Ports when using the Detect feature. Do not attemptto detect a port without a unit connected to it.9
SOFTWARE SETTINGSYou will be given confirmation once the connection ismade. (below)Click Close to return to the previous menu.Important: Make a note of the Com Port # you use for this step.This is the Com Port # that will be used to Set Base Configurationon page 12.5. From the Administrator program click Shadow Tracker , clickMaintenance and then click Add Shadow Tracker . (below left)6. In the Tracker Maintenance window select “True” for EVM Enabledif you purchased the Equipment\Vehicle Monitoring softwaremodule. (above right)7. Click Add. Administrator will attempt to communicate with your10
SOFTWARE SETTINGSunit and add it to the database for future reference. Whensuccessfully completed you will receive a confirmation message.(below)Connect each tracking unit one at a time and repeat the aboveprocess until all of your tracking units have been validated for use.11
SOFTWARE SETTINGS8. When all of the tracking units have been successfully validatedthey may be installed into their respective vehicles. Click Close toexit Tracker Maintenance.Important: Use the i-Base System documentation you received(below) to document which vehicle each tracking unit will beinstalled into. It is also a good time to decide whichDriver/Employee will be assigned to which Vehicle. This will beimportant in completing the remaining steps.9. Disconnect the Download/Validation cable from the computer andnote which Com Port connection was used.SET BASE CONFIGURATIONIn a StandAlone system the i-Base will be connected to theStandAlone Computer. In a Client/Server system the i-Base will beconnected to the Server Computer.In order to establish communications with your i-Base theAdministrator program will need to know which Com Port # will beused to connect to the i-Base.To begin:1. Connect and power the i-Base to your computer. (see Appendix2)Important: Be sure to connect the RS-232 Serial connection cable12
SOFTWARE SETTINGSThe last step to complete your system is to setup yourEmployee/Driver information and Vehicle information into theShadow Tracker Professional software. When the data from thetracking unit is extracted, the Driver/Vehicle relationships you definehere are used to display the GPS tracking data on the map and inreports. For more detailed information regarding this section, pleaserefer to the Shadow Tracker Professional software manual.Note: In a Client/Server system, this portion of the setup can beaccessed through the Client system only.ADDING DRIVER/EMPLOYEE INFORMATION1. From the Windows Desktop click Start, point to Programs, point toShadow Tracker Professional, click Shadow Tracker .2. Log into the program using the default username and password.Click Start.(below)3. From the program menu bar click File, point to Open and clickEmployeeRecords.13
SOFTWARE SETTINGS4. Click File and then click New Employee.5. Add the appropriate information for the Driver/Employee. (below)Click Save.Repeat this process for each Driver/Employee.When you are finished click File and Exit to close Employee Records.ADDING VEHICLE INFORMATIONEach vehicle must be assigned to a group. You can have multiplegroups of vehicles or just one.1. From the program menu bar click File, point to Open and clickVehicle Records.2. To create a Group, click File and then click New Group. Indicate a14
SOFTWARE SETTINGSGroup Name, Description and select a color to display on the mapfor the group.Click Save. (below)3. Once you have all of the groups you need, you may begin addingthe vehicles. Click File and then click New Vehicle/Equipmentfrom the menu bar. In the New Vehicle window fill in thenecessary information regarding each vehicle. Click Save. (below)ASSIGNING THE TRACKER TO A VEHICLEOnce the Vehicle record has been saved it must be assigned to aShadow Tracker 2000 unit.15
SOFTWARE SETTINGS1. Open the vehicle record you just created by clicking the Licensenumber in the Vehicle Records window. (below)2. In the Edit A Vehicle window select the tracker serial number to beassigned to this vehicle. Click the down arrow beside the Tracker# text box and click the correct serial number. (below) Click Saveand then click Close.3. Repeat this process until a Vehicle Record has been created foreach vehicle and each Vehicle Record has been assigned to theappropriate Shadow Tracker 2000.16
SOFTWARE SETTINGSNote: When making these selections, refer to the i-Base Systemdocumentation you modified earlier to track which Vehicle eachtracking unit would be installed into.ASSIGNING THE DRIVER/EMPLOYEE TO A VEHICLEIn order to view historical tracks and create reports, it is necessary tocreate a record of which Driver/Employee will be assigned to whichVehicle for a given time frame. This is called Vehicle Issue.1. From the Vehicle Records window click File and then click VehicleIssueNote: When making these selections, refer to the i-Base Systemdocumentation you modified earlier to track whichDriver/Employee would be assigned to which Vehicle.2. In the Vehicle Issue window click Add. Fill in the information toassociate an employee with each vehicle. Select a vehicle Licenseand a Driver from the drop down menus. In Date from: the dateentered should be at least one day prior to when you begancollecting data with the tracking unit. Usually Date thru: is set forat least one year after Date from:. Time from: should be set to00:00:00 and Time thru set to 23:59:00 to cover the entire day.(below) Click Save.3. Repeat this process until all of the Driver/Employees have beenassigned to the appropriate Vehicle. Click Close to exit theVehicle Issue window.17
SPECIFICATIONS AND FEATURESi-Base SPECIFICATIONSLength . 7.3 inchesWidth . 5.0 inchesHeight . 1.6 inchesWeight . 14 ouncesTransmission Rate. 902-908 mHZPeak Current . 700mAMemory. 8 MB/800 travelhours maximumWireless Data Download Rate . 115200 baudA/C AdapterInput . 120V AC 60Hz 9WOutput . 12V DC 500mADepending upon your specific needs, ATTI offers a variety of antennapackages and options that may increase or improve your coverage area.For more information contact ATTI Sales.i-Base FEATURESAutomatic Historical Data DownloadSupports up to 40 vehiclesCost EffectiveShadow Tracker Professional Software supported18
SPECIFICATIONS AND FEATURES12341. PCRed:The i-Base is receiving data without the aid of acomputer.Green: The i-Base is connected to a computer and isdownloading its data into the software.2. MobileOff:Blinking:Listening for mobile tracking units.Extracting data from mobile tracking unit(s).3. MemRed:When the i-Base memory is full, this light will be red.Green: Normal operating color is green.4. ModeRed:This denotes that the i-Base is in Update mode.19
T E C H N I C A L S UPPORTTechnical Support is available Monday - Friday from 8AM - 5PMCentral Time*.Please contact us at:Main: (713) 353-6065Tech: (713) 353-6020Sales: (800) 279-0035Fax:(713) 353-6050E-Mail: Tech@AdvanTrack.com20
APPENDIX 1CONNECTING THE ShadowTracker 2000To connect the Shadow Tracker 2000:1. Connect one end of the Download / Validation cable (PN# D38105) to a Com Port on the computer.Connect the other end to the connection marked “Terminal” onthe back of the tracking unit. (below)2. Plug the A/C power supply 12v (PN# A-40106) into a 120V wallsocket.Connect the other end to the connection marked “Power” on theback of the tracking unit. (below)Note: There are two instances when the Shadow Tracker 2000needs to be temporarily connected to the computer.-Validating the Shadow Tracker 2000 to the ShadowTracker Professional software.-Utilizing the Com Port Detect feature in determining the Com21
APPENDIX 2CONNECTING THE i-BaseTo connect your i-Base:1. Connect the Dipole radio antenna (PN# G-39270) into the back ofthei-Base at the connection marked “Ant”. (below) Tighten securely.2. On the StandAlone or Server Computer, connect one end of the 6ft. RS-232 Serial connection cable (PN# G-40120) to the sameCom Port connection used to add the tracking units. (page 9)Connect the other end to the connection marked “Com” on theback of thei-Base. Tighten securely.3. Plug one end of the A/C power supply 12v (PN# A-40103) into a120V wall socket.Connect the other end to the connection marked “Power” on theback of thei-Base. You should see the LED indicators on the unit light up.22
APPENDIX 3TROUBLESHOOTING CHECKLISTMinimum requirements for GPS Data collection by a ShadowTracker 2000 mobile unit in the vehicle1. Constant 12 volt DC power to the RED wire. This can be verifiedby looking at the LED lights on the front of the unit, are any LED'slit?2. GPS satellite signal acquisition. This can be verified by looking atthe GPS LED. The LED will be RED when the unit has NOT acquireda signal and it will be GREEN when the unit HAS acquired a signal.If the GPS LED is RED check the location of the GPS antenna on thevehicle, try moving to another location. Keep in mind that whenfirst powered up the unit may take up to 15 minutes to acquire aGPS satellite signal3. Switched ignition power to the blue reference wire. This can beverified by connecting the direct connect harness to the HarnessTester and verifying the RED LED is on when the vehicles ignitionis on and the vehicle is running.Note: Some vehicle circuits are on timers meaning they willsupply power for a time then remove power. We recommend onproblem vehicles to actually drive the vehicle for at least twominutes monitoring the LED lights on the Harness tester.4. Vehicle speed must be above 11 miles per hour. This minimumspeed is adjustable but this should only be a concern on vehiclessuch as street sweepers or other slow moving vehicles. ContactTech Support for help if you must adjust this setting.Minimum requirements for Data Transmission from the ShadowTracker 2000 mobile unit to the i-Base.1. Mobile units must have minimum memory usage of 00.19% beforethey can transmit historical data to the i-Base. This is about 102319
APPENDIX 3minutes of actual driving. The mobile unit will transmit a realtime/status packet every minute even when empty.2. Radio signal strength must meet the minimum threshold currentlyset in thei-Base. To view the actual radio signal strength the i-Base mustbe put into monitor mode. This is done by running the IBaseActivity Monitor program which can be found at "C:\ProgramFiles\Strt\Inboundwire\IBaseMon.exe". While in monitor modenote the Radio ID and its current signal strength, if the currentsignal strength is below the configured minimum threshold onlyreal-time data will be sent. Once the signal strength is above theconfigured minimum threshold then the mobile will begin todownload historical data. The minimum threshold is set in theAdministrator program. Click Shadow Tracker, click Maintenanceand then click Base Unit Configuration, the current setting will bedisplayed there. (see page 12) If you change this setting it willonly be updated in the i-Base after the next download isrequested.Data flow through the system.The i-Base wirelessly downloads and stores the historical data fromthe Shadow Tracker 2000 mobile units independently, without theneed for a computer. The historical data remains in non-volatilememory in the i-Base until a download is requested by the ShadowTracker Professional software program.24
APPENDIX 3When a download is either requested or scheduled from the i-Basethe WirelessGrabber executes the IBase Data Extractor program,which handles the communications and data transfer between theComputer and the i-Base. (below)The IBase Data Extractor program downloads the data from the iBase and writes a binary file, with a .BIN extension, into theInboundWire folder then the i-Base is erased. The binary file is thendecompressed into a text file, with a .GPS extension, which is placedinto the same InboundWire folder.After this GPS file is written the IBase Data Extractor program will25
APPENDIX 3close and the Wireless Grabber program will pickup the file and run itagainst several validation checks for data integrity. (below)If the GPS file passes the validation checks it is replicated and placedinto the Processing folder with a .FP and .GPP extension. Once thefiles are placed into the Processing folder and the Data Processorprogram is requested to "Process Files" it picks up the file andprocesses it line by line into the database. (below)If either the Wireless Grabber or Data Processor programs encounter aproblem with the file it will be moved to the Unprocessed folder andan error will be written into the database for this file.If you are seeing downloads from certain units in the IBase DataExtractor program but are not able to view historical data for aparticular vehicle then it may be that the files are in Unprocessed.Unprocessed files can be viewed in the Administrator program. Byclicking on the file name in the Download Errors List you will see thereason why the file did not process, i.e. “Unit not Validated for use26
USER NOTES27
USER NOTES28
i-BaseQuick Start User GuideManual Number: M-21810Revision: 5/06/2003J Landa
TMAdvanced Tracking Technologies Inc.P.O. Box 168Sugar Land, Texas 77487Tel: (713) 353-6065Fax: (713) 353-6050www.AdvanTrack.com
2. How to add and validate the Shadow Tracker 2000 unit(s) to the software. 3. How to setup and configure the i-Base. 4. How to add the necessary driver and vehicle information to the Shadow Tracker Professional software. When these four steps are completed and the Shadow Tracker 2000 unit(s) have been installed in the vehicles, you will be