Transcription
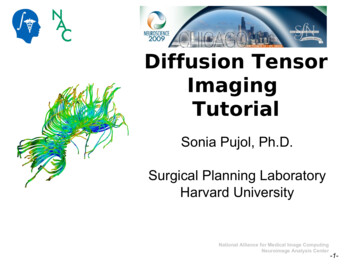
Diffusion TensorImagingTutorialSonia Pujol, Ph.D.Surgical Planning LaboratoryHarvard UniversitySonia Pujol, PhDNational Alliance for Medical Image ComputingNeuroimage Analysis Center-1-
DTI tutorialThis tutorial is anintroduction to theadvanced Diffusion MRcapabilities of theSlicer3 software formedical image analysis.Sonia Pujol, PhDNational Alliance for Medical Image ComputingNeuroimage Analysis Center-2-
OutlineThis tutorial guides youthrough the process of loadingdiffusion MR data, estimatingdiffusion tensors, andperforming tractography ofwhite matter bundles.Sonia Pujol, PhDNational Alliance for Medical Image ComputingNeuroimage Analysis Center-3-
OutlineThe processing pipeline uses 9image analysis modules of Slicer3.41.Data2.Volumes3.Diffusion Tensor Estimation4.Diffusion Tensor Scalar Measurements5.Editor6.LabelMap Seeding7.Fiber Bundles8.Fiducials9.Fiducial SeedingSonia Pujol, PhDNational Alliance for Medical Image ComputingNeuroimage Analysis Center-4-
Tutorial DatasetThe Diffusion MR tutorial dataset is composed of aDiffusion Weighted MR scan of the brain acquiredwith 2 baseline and 12 gradient directions.DiffusionSensitizingGradientsSonia Pujol, PhDDiffusionWeightedImagesNational Alliance for Medical Image ComputingNeuroimage Analysis Center-5-
DTI Processing PipelineDWIAcquisitionSonia Pujol, nal Alliance for Medical Image ComputingNeuroimage Analysis Center-6-
Start Slicer3Linux/Mac usersLaunch the Slicer3executable located inthe Slicer3.4 directoryWindows usersSelectStart All Programs Slicer3 3.4 2009-05-21 Slicer3Sonia Pujol, PhDNational Alliance for Medical Image ComputingNeuroimage Analysis Center-7-
Slicer WelcomeThe SlicerWelcome module is themodule displayed by default.This module gives an overview of theGUI of Slicer3, and data loading & savingfunctionality.Sonia Pujol, PhDNational Alliance for Medical Image ComputingNeuroimage Analysis Center-8-
Part 1:Si S0 eSonia Pujol, PhD bgˆi T D gˆ iDiffusion dataloading andtensorestimationNational Alliance for Medical Image ComputingNeuroimage Analysis Center-9-
Loading the DWI volumeSelect Add Volume from the File menuSonia Pujol, PhDNational Alliance for Medical Image ComputingNeuroimage Analysis Center-10-
Loading the DWI volumeBrowse to the location of the Diffusion tutorial datasetdirectory and select the dwiDataset.nhdr fileClick on Apply to load the volumeSonia Pujol, PhDNational Alliance for Medical Image ComputingNeuroimage Analysis Center-11-
Loading the DWI volumeSlicer displays the anatomicalviews of the baseline volume ofthe diffusion dataset in the 2DSlice Viewer.Sonia Pujol, PhDNational Alliance for Medical Image ComputingNeuroimage Analysis Center-12-
Tensor EstimationLeft click on the menu Modules andselect All Modules to display the listof 95 modules available for imageanalysis and 3D visualization.Select the module Diffusion TensorEstimation.Sonia Pujol, PhDNational Alliance for Medical Image ComputingNeuroimage Analysis Center-13-
Tensor EstimationSelect the Input DWI Volume dwiDatasetLeft click on OutputDTIVolume and select‘Create New Diffusion Tensor Volume’Left click on Output Baseline Volume andselect ‘Create New Volume’Left click on Otsu Threshold Mask andselect ‘Create New Volume’Sonia Pujol, PhDNational Alliance for Medical Image ComputingNeuroimage Analysis Center-14-
Tensor EstimationSelect the Tensor EstimationAlgorithm to LS (Least Squares)and click on Apply to estimatethe tensors.Sonia Pujol, PhDNational Alliance for Medical Image ComputingNeuroimage Analysis Center-15-
Tensor EstimationLeft click on Diffusion Tensor Volume 1to display the list of volumes that havebeen computed by SlicerSonia Pujol, PhDNational Alliance for Medical Image ComputingNeuroimage Analysis Center-16-
Tensor EstimationDiffusion Tensor Estimation Volume is thevolume of estimated tensorsDiffusion Tensor Estimation Volume 1 isthe Baseline volumeDiffusion Tensor Estimation Volume 2 isthe tensor mask (blue)Sonia Pujol, PhDNational Alliance for Medical Image ComputingNeuroimage Analysis Center-17-
Tensor EstimationClick on the Link icon, left click on DiffusionTensor Volume 2 and select NoneSonia Pujol, PhDNational Alliance for Medical Image ComputingNeuroimage Analysis Center-18-
Tensor EstimationSelect the module Volumes in the modules toolbarSonia Pujol, PhDNational Alliance for Medical Image ComputingNeuroimage Analysis Center-19-
Tensor EstimationSelect the Active Volume ‘Diffusion TensorEstimation 1’ and click on the Display tabSonia Pujol, PhDNational Alliance for Medical Image ComputingNeuroimage Analysis Center-20-
Tensor EstimationSet the Window/Level to Manual and adjust theparameters of the baseline volume using the sliderSonia Pujol, PhDNational Alliance for Medical Image ComputingNeuroimage Analysis Center-21-
Tensor EstimationBrowse through the baseline images, whichcorrespond to the volumes that have beenacquired without gradient.Sonia Pujol, PhDNational Alliance for Medical Image ComputingNeuroimage Analysis Center-22-
Part2:ScalarMeasurementsSonia Pujol, PhDNational Alliance for Medical Image ComputingNeuroimage Analysis Center-23-
Scalar MeasurementsSelect the category Diffusion from thelist of modules, and left click on theDiffusion Tensor ScalarMeasurement module.Sonia Pujol, PhDNational Alliance for Medical Image ComputingNeuroimage Analysis Center-24-
Scalar MeasurementsSelect the Input DTI Volume toDiffusion Tensor Estimation VolumeSelect the Output Scalar Volume‘Create New Volume’Select the Operation to FractionalAnisotropy and click on ApplySonia Pujol, PhDNational Alliance for Medical Image ComputingNeuroimage Analysis Center-25-
Fractional AnisotropyVolumeLeft click on the Slicer Viewer Menu icon,and select Show label volume outlinesSonia Pujol, PhDNational Alliance for Medical Image ComputingNeuroimage Analysis Center-26-
Fractional AnisotropyVolumeSlicer displays the outlineof the tensor maskoverlaid on the FractionalAnisotropy volumeSonia Pujol, PhDNational Alliance for Medical Image ComputingNeuroimage Analysis Center-27-
Fractional AnisotropyVolumeMove the mouse over theFractional Anisotropymap to explore the FAvalues which range from0 to 1, and are displayedin the bottom corner ofthe active (Bg) window.Sonia Pujol, PhDNational Alliance for Medical Image ComputingNeuroimage Analysis Center-28-
Part 3:Region ofInterest basedTractographySonia Pujol, PhDNational Alliance for Medical Image ComputingNeuroimage Analysis Center-29-
LabelMap GenerationSelect the module Editorin the modules’ menu.Select the Source VolumeDiffusion Tensor ScalarMeasurements VolumeSelect the label mapvolume Working and clickon Create Label MapSonia Pujol, PhDNational Alliance for Medical Image ComputingNeuroimage Analysis Center-30-
LabelMap GenerationLeft click on the Slicer Viewer Menu icon,and select Don’t show label volume outlinesSonia Pujol, PhDNational Alliance for Medical Image ComputingNeuroimage Analysis Center-31-
LabelMap GenerationSelect the label 2 (pink),click on the icon Paint , setthe radius to 2 and draw aregion of interest within thecorpus callosum in thesagittal viewSonia Pujol, PhDNational Alliance for Medical Image ComputingNeuroimage Analysis Center-32-
LabelMap SeedingSelect the moduleLabelmap Seeding fromthe Modules’ menuSonia Pujol, PhDNational Alliance for Medical Image ComputingNeuroimage Analysis Center-33-
LabelMap SeedingSelect the Input DTI volume ‘DiffusionTensor Estimation Volume’Select the Input Label Map ‘Working’Select Output Fiber Bundle ‘Create NewFiber Bundle’Sonia Pujol, PhDNational Alliance for Medical Image ComputingNeuroimage Analysis Center-34-
LabelMap SeedingSet the Seed Spacing to 2 mm andselect the Stopping Mode FractionalAnisotropyUse the default parameters for theminimum and maximum tract length,stopping value and stopping trackcurvature.Set Seeding label to 2, and click onApplySonia Pujol, PhDNational Alliance for Medical Image ComputingNeuroimage Analysis Center-35-
LabelMap SeedingThe tracts generated withinthe corpus callosum regionappear in the 3DViewer.The color map usedrepresent the FA valuesalong the tracts.Sonia Pujol, PhDNational Alliance for Medical Image ComputingNeuroimage Analysis Center-36-
LabelMap SeedingSelect the module FiberBundles,and click on the tab Tube in theDisplay panelCheck the Visibility box.Sonia Pujol, PhDNational Alliance for Medical Image ComputingNeuroimage Analysis Center-37-
LabelMap SeedingSlicer displays the computedtracts as tubes colored with FAvalues.Sonia Pujol, PhDNational Alliance for Medical Image ComputingNeuroimage Analysis Center-38-
Part 4:Tractographyon-the-flySonia Pujol, PhDNational Alliance for Medical Image ComputingNeuroimage Analysis Center-39-
Fiducial SeedingSelect the module FiducialsSonia Pujol, PhDNational Alliance for Medical Image ComputingNeuroimage Analysis Center-40-
Fiducial SeedingSet Fiducial List to Create New FiducialListSonia Pujol, PhDNational Alliance for Medical Image ComputingNeuroimage Analysis Center-41-
Fiducial SeedingLeft click on FiducialListand select RenameSonia Pujol, PhDNational Alliance for Medical Image ComputingNeuroimage Analysis Center-42-
Fiducial SeedingEnter the new name Seedand click on ApplySonia Pujol, PhDNational Alliance for Medical Image ComputingNeuroimage Analysis Center-43-
Fiducial SeedingClick on the cross icon to adda fiducial to the Seed listSonia Pujol, PhDNational Alliance for Medical Image ComputingNeuroimage Analysis Center-44-
Fiducial SeedingThe fiducial Seed-P1appears in the 3D ViewerSonia Pujol, PhDNational Alliance for Medical Image ComputingNeuroimage Analysis Center-45-
Fiducial SeedingPosition the fiducial in thecingulum region locatedabove the corpus callosum.Press the P key and leftclick on the gray scaleimage.Sonia Pujol, PhDNational Alliance for Medical Image ComputingNeuroimage Analysis Center-46-
Fiducial SeedingSelect the Seed-P1 fiducial:we will use this fiducial todrive the tractographySonia Pujol, PhDNational Alliance for Medical Image ComputingNeuroimage Analysis Center-47-
Fiducial SeedingSelect the module FiducialSeedingSonia Pujol, PhDNational Alliance for Medical Image ComputingNeuroimage Analysis Center-48-
Fiducial SeedingSet the DTI Volume to DiffusionTensor Estimation VolumeSelect the Fiducial List SeedSet the Output FiberBundleNode toCreate New FiberBundleSonia Pujol, PhDNational Alliance for Medical Image ComputingNeuroimage Analysis Center-49-
Fiducial SeedingSet the Stopping Mode toFractional Anisotropy and set thetractography parameters to thevalues that we used for the corpuscallosum:Stopping Value: 0.1Stopping Track Curvature: 0.8Step Length: 0.8 mmMinimum Length: 10 mmFiducial Stepping Size: 1.5 mmSonia Pujol, PhDNational Alliance for Medical Image ComputingNeuroimage Analysis Center-50-
Fiducial SeedingSlicer displays the tracts seededfrom the Fiducial Seed-P1.The tracts correspond to the regionof the cingulum located above thecorpus callosum.Sonia Pujol, PhDNational Alliance for Medical Image ComputingNeuroimage Analysis Center-51-
Fiducial SeedingMove the fiducial Seed-P1 from theleft cingulum to the correspondingregion in the right cingulum in thecoronal slice.Sonia Pujol, PhDNational Alliance for Medical Image ComputingNeuroimage Analysis Center-52-
Fiducial SeedingSlicer displays the right cingulumtracts which are seeded from thenew position of the fiducial Seed-P1Sonia Pujol, PhDNational Alliance for Medical Image ComputingNeuroimage Analysis Center-53-
Part 5:Saving a DTISceneSonia Pujol, PhDNational Alliance for Medical Image ComputingNeuroimage Analysis Center-54-
DTI SceneSelect the module DataSlicer displays the list ofvolumes and modelsgenerated in this tutorialSonia Pujol, PhDNational Alliance for Medical Image ComputingNeuroimage Analysis Center-55-
Saving a DTI SceneSelect Save from the FilemenuSonia Pujol, PhDNational Alliance for Medical Image ComputingNeuroimage Analysis Center-56-
Saving a DTI SceneBrowse to the directorySlicerData to save the data andclick on Save SelectedSonia Pujol, PhDNational Alliance for Medical Image ComputingNeuroimage Analysis Center-57-
Saving a DTI SceneSelect File Close Scene toclose the current DTI SceneSonia Pujol, PhDNational Alliance for Medical Image ComputingNeuroimage Analysis Center-58-
Loading a DTI SceneSelect File Load Scene and browseto the location where you saved thescene SlicerScene1.mrmlSonia Pujol, PhDNational Alliance for Medical Image ComputingNeuroimage Analysis Center-59-
Loading a DTI SceneSelect SlicerScene1.mrml and clickon OpenSonia Pujol, PhDNational Alliance for Medical Image ComputingNeuroimage Analysis Center-60-
Loading a DTI SceneSelect the module DataSonia Pujol, PhDNational Alliance for Medical Image ComputingNeuroimage Analysis Center-61-
Loading a DTI SceneSlicer loads all the elementsof the DTI Scene that werepreviously computed.Sonia Pujol, PhDNational Alliance for Medical Image ComputingNeuroimage Analysis Center-62-
ConclusionThis tutorial guided youthrough some of theDiffusion MR capabilities ofthe Slicer3 software.For more tutorials andteaching events, please visitspujol@bwh.harvard.eduSonia Pujol, ntsNational Alliance for Medical Image ComputingNeuroimage Analysis Center-63-
AcknowledgmentsNational Alliance forMedical Image ComputingNIH U54 EB005149Neuroimage Analysis CenterNIH P41 RR13218Sonia Pujol, PhDNational Alliance for Medical Image ComputingNeuroimage Analysis Center-64-
Slicer3 software for medical image analysis. Sonia Pujol, PhD-3-National Alliance for Medical Image Computing Neuroimage Analysis Center Outline . Tutorial Dataset The Diffusion MR tutorial dataset is composed of a Diffusion Weighted MR scan of the brain acquired with 2 baseline and 12 gradient directions.
