Transcription
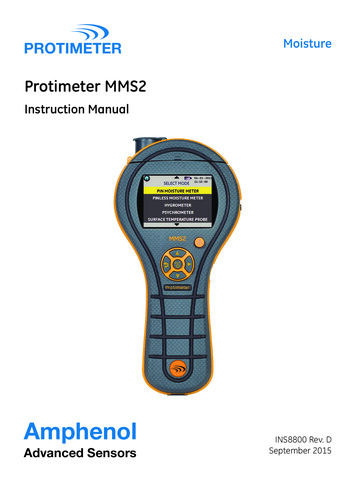
PROTIMETERMoistureProtimeter MMS2Instruction ManualAmphenolAdvanced SensorsINS8800 Rev. DSeptember 2015
Protimeter MMS2Moisture Measurement SystemInstruction ManualINS8800 Rev. DSeptember 2015
[no content intended for this page]
Contents1. Introduction . . . . . . . . . . . . . . . . . . . . . . . . . . . . . . . . . . . . . . . . . . . . . . . 12. Safety Considerations . . . . . . . . . . . . . . . . . . . . . . . . . . . . . . . . . . . . . . . . 13. Product Components and Accessories . . . . . . . . . . . . . . . . . . . . . . . . . . . 23.1 Switching the MMS2 ON and OFF . . . . . . . . . . . . . . . . . . . . . . . . . . 44. MMS2 Modes . . . . . . . . . . . . . . . . . . . . . . . . . . . . . . . . . . . . . . . . . . . . . . 54.1 Pin Moisture Meter - Selection and Use . . . . . . . . . . . . . . . . . . . . . . 54.2 Pinless Moisture Meter — Selection and Use . . . . . . . . . . . . . . . . . . 84.3 Hygrometer - Selection and Use . . . . . . . . . . . . . . . . . . . . . . . . . . . 104.4 Psychrometrics - Selection and Use. . . . . . . . . . . . . . . . . . . . . . . . . 124.5 Condensator . . . . . . . . . . . . . . . . . . . . . . . . . . . . . . . . . . . . . . . . . . . 134.6 Logging - Selection and Use . . . . . . . . . . . . . . . . . . . . . . . . . . . . . . 154.7 Settings - Selection and Use . . . . . . . . . . . . . . . . . . . . . . . . . . . . . . 165. Diagnostic Procedure Guidelines . . . . . . . . . . . . . . . . . . . . . . . . . . . . . . 206. Calibration Checking . . . . . . . . . . . . . . . . . . . . . . . . . . . . . . . . . . . . . . . 227. Care and Maintenance . . . . . . . . . . . . . . . . . . . . . . . . . . . . . . . . . . . . . . 238. Displaying the MMS2 Information . . . . . . . . . . . . . . . . . . . . . . . . . . . . 249. Technical Specifications . . . . . . . . . . . . . . . . . . . . . . . . . . . . . . . . . . . . . 259.1 Operating Conditions . . . . . . . . . . . . . . . . . . . . . . . . . . . . . . . . . . . . 259.2 Measurement Specifications . . . . . . . . . . . . . . . . . . . . . . . . . . . . . . 259.3 Physical Specifications . . . . . . . . . . . . . . . . . . . . . . . . . . . . . . . . . . 279.4 Regulatory Compliance . . . . . . . . . . . . . . . . . . . . . . . . . . . . . . . . . . 279.5 User Interface. . . . . . . . . . . . . . . . . . . . . . . . . . . . . . . . . . . . . . . . . . 27INS8800 Rev. Diii
ContentsivINS8800 Rev. D
Protimeter MMS2 Instruction Manual1.IntroductionThe Protimeter Moisture Measurement System2 (Protimeter MMS2) is apowerful and versatile instrument for measuring and diagnosing dampness inbuildings and building materials. This product enables building surveyors andother practitioners to measure moisture levels of building elements such aswalls, floors and building environments simply by switching between the fivedifferent modes of operation. In this way, a detailed understanding of themoisture condition of the property can be obtained.2. Safety ConsiderationsCaution note for the WME pins - The Pin Moisture measurement pins areextremely sharp and the instrument should be handled with due care. Thepins should be covered with the cap provided with the unit when thefunction is not in use. IR temperature measurement - Please note that the readings are indicativereadings outside the measurement range of the IR temperature mode andthe accuracy of the measurement is not guaranteed outside the range. Calibration of unit - The accuracy specifications of the product are validfor one year after the date of calibration, and the product requiresrecalibration after this period.Laser pointers are effective tools when used properly, but the followingconsiderations must be observed when using laser pointers: 2.Never look directly into the laser beam.Never point a laser beam at a person.Do not aim the laser beam at reflective surfaces.Never view a laser beam using an optical instrument, such as binocularsor a microscope.Safety Considerations (cont.)INS8800 Rev. D1
Protimeter MMS2 Instruction Manual Do not allow children to use laser pointers unless under the supervision ofan adult. Use only laser pointers meeting the following criteria:3. Labeled with FDA certification stating “DANGER: Laser Radiation”for Class 3R lasers or “CAUTION: Laser Radiation” for Class 2lasers. Classified as Class 2 or 3R according to the label. Do not use Class 3bor Class 4 products. Operates at a wavelength between 630 nm and 680 nm.Has a maximum output less than 5 mW, the lower the better.Product Components and AccessoriesThe MMS2 instrument measures the different parameters in the buildings:room temperature, room humidity, building material moisture, surfacemoisture and surface temperature (contact and non-contact method). Tomeasure all the above mentioned parameters, MMS2 uses different sensors,along with a variety of accessories for convenient measurements. Thefollowing external connections are found on the instrument (see Figure 1 onpage 3):A - This edge connection socket is for use with a Hygrostick Quikstick orShort Quikstick probe.B - This jack connection socket is for use with a moisture probe, deep wallprobes or a Hammer electrode.C - This jack connection socket is for use with the Direct Contact SurfaceTemperature Sensor.2INS8800 Rev. D
Protimeter MMS2 Instruction Manual3.Product Components and Accessories (cont.)D - This USB socket is for connection to a PC when using the optional MMS2logging software.CBASearch Mode SensorDLaserNon-contact Surface Temperature Sensor (IR)Figure 1: Connections for Probes and Sensors The Hygrostick (POL4750), Quikstick (POL8750) and Short Quikstick(POL8751) probes measure relative humidity (%RH) and ambient airtemperature in rooms or materials. They can be connected to the MMS2instrument either directly or by means of the extension lead. The surface temperature sensor is used when investigating condensationsituations. The moisture probe is used to obtain percent moisture content values inwood or wood moisture equivalent (WME) values in other nonconductive materials. Multiple probe types are available, including hammer probes and deepwall probes.INS8800 Rev. D3
Protimeter MMS2 Instruction Manual3.1 Switching the MMS2 ON and OFFPrior to initial use, ensure that a 9V battery is correctly inserted in the batterycompartment.Note:The battery status is indicated by an iconon the display. Whenthe LOW BATTERY message appears, replace the battery.To switch the MMS2 ON, press the power buttonNote:momentarily.The MMS2 switches OFF automatically after 2 minutes if no activity isobserved, unless the default settings are changed (see Section 4.7c,“Auto Off”, on page 17 for instructions).To switch the instrument OFF immediately, press3 seconds. Onceand hold for at leasthas been depressed for 3 seconds or more, the text stringSWITCHING OFF THE DEVICE appears on the display. Whentext string disappears and the unit switches OFF.is released, theWhenever the battery voltage falls below the threshold value, the LOWBATTERY message appears. If the battery voltage falls below the operatinglevel, the instrument prompts with the message:LOW BATTERYSWITCHING OFF THE DEVICE4INS8800 Rev. D
Protimeter MMS2 Instruction Manual4.MMS2 ModesThe Protimeter MMS2 can be used to detect and measure moisture innon-conductive solid materials such as wood, drywall and masonry. TheMMS2 can measure the different parameters in building applications: roomtemperature, room relative humidity, surface temperature with contact andnon-contact method, qualitative measurements and precise and localizedmoisture content measurements in wood or WME values in materials otherthan wood.4.1 Pin Moisture Meter - Selection and UseNavigate to SELECT MODE - PIN MOISTURE METER and pressto select thePin Moisture Meter mode. Connect the moisture probe, deep wall probe, orHammer electrode into socket B of the MMS2 instrument.The instrument can now be used to take actual %MC (moisture content)readings in wood and %WME readings in non-conductive solid materials otherthan wood by placing the moisture probe pins in firm contact with the surfaceas shown in Figure 2 on page 6. The measured value is displayed and theprogress bar indicates whether the material is in a DRY, AT RISK or WETcondition.Table 1: MC Readings and Progress IndicatorsMC%WMEDisplayIndicationProgress Bar 7.8---.- 7.8 but 17MC%WME valueDRYGreen 17 but 20MC%WME valueRISKYellow 20MC%WME valueWETRedNote:The MMS2 has the capability to show %MC value for 8 wood types.INS8800 Rev. D5
Protimeter MMS2 Instruction Manual4.1 Pin Moisture Meter - Selection and Use (cont.)When the instrument is in Pin Moisture Meter mode, by default it displaysWME WOODTYPE A (see the Protimeter wood calibration chart).Use the up and down buttons/to navigate between differentwood types. From Wood Type B to Wood Type H, if MC% is greater than30.0, ABOVE FIBER SAT will be displayed as the wood status, otherwise thewood status will not be displayed. When using the built-in pins, the operatorshould make firm contact on the surface. It is not necessary or recommendedto push the pins deeply below the surface.Figure 2: Using the Pin Moisture Meter6INS8800 Rev. D
Protimeter MMS2 Instruction Manual4.1a Using Auxiliary Deep Well Moisture Probes in Measure ModeTo take sub-surface readings in masonry, the deep wall probes should be usedinstead of the standard moisture probe. To use the deep wall probes, drill two1/4” (6 mm) diameter clearance holes, spaced 2-3 in. (50-75 mm) apart, to therequired depth. Push the two deep wall probes into the holes and press andhold the tips firmly against the bottom of the holes. Ensure that the probes areconnected to socket B and measure the %WME value as described inSection 4.1, “Pin Moisture Meter - Selection and Use”, on page 5.Note:The most convenient way to take sub-surface readings in wood is byusing an optional Hammer Electrode.4.1b Detecting Hygroscopic SaltsThe Protimeter MMS2 instrument can be used as a basic salts detector whenused with the moisture probe, filter papers and distilled water (not included).Moisten the filter paper with the water and take a reference reading across itwith the moisture probe. Then place the moistened filter paper against thesurface of interest and hold in place for 30 seconds. Remove the paper andplace the pins of the moisture probe across the paper again and observe thereading. Compare this reading with the original reference reading. If thedifference is more than 20 points, there is significant salts contamination thatmay warrant further investigation.INS8800 Rev. D7
Protimeter MMS2 Instruction Manual4.2 Pinless Moisture Meter — Selection and UseNavigate to SELECT MODE - PINLESS MOISTURE METER and pressselect the Pinless Moisture Meter mode.toThe instrument can be used to take relative moisture readings in solid,homogenous materials (such as walls and floors) by holding the surface of thesensor bulge against the surface (see Figure 3 below). Relative readingsranging from 60-999 appear on the LCD together with a progress bar thatindicates whether the material is in a DRY, AT RISK or WET condition.Note:When holding the meter at the bottom, away from any objects, itshould not show any reading.Figure 3: Taking Relative Moisture Readings8INS8800 Rev. D
Protimeter MMS2 Instruction Manual4.2 Pinless Moisture Meter — Selection and Use (cont.)As reliable readings are obtained only if the sensor bulge is in direct contactwith the surface, the Search mode is not suitable for surveying texturedfinishes. The nominal depth of penetration is up to19 mm (3/4”) in dense,homogeneous materials. Readings taken through low-density coverings(carpets, polystyrene tiles, etc.) will not be representative of the moisture levelin the substrate itself. When using the MMS2 in Pinless mode, it isrecommended that no attachments are connected. This practice will minimizereading errors and the potential for electromagnetic interference with otherelectronic equipment. When the Pinless Moisture Meter mode is selected, thedevice will display the surface moisture in terms of Wood MoistureEquivalent count.Note:Place the MMS2 on the surface, but do not slide it. Sliding will wearout the back of the meter, as well as possibly mark the wall.AquantTable 2: Aquant IndicatorsDisplayIndication 60---- 60 but 170Aquant valueDRYGreen 170 but 200Aquant valueRISKYellow 200 but 999Aquant valueWETRed 999999WETRedINS8800 Rev. DProgress Bar9
Protimeter MMS2 Instruction Manual4.2 Pinless Moisture Meter — Selection and Use (cont.)In Search mode, the device has the capability to give comparativemeasurement.Note:If metal is present below the surface, the MMS2 may give a falsepositive.Comparative measurement helps in measuring whether the surfacemoisture/material is wetter or dryer than the Reference surface/ material. Ifthe surface moisture/material is wetter than the reference surface/ material,then the progress bar is red, or if it’s dryer, then the progress bar is green.This method takes four steps:1. Select Pinless Moisture meter under the Main Menu.2. Place the device on the material which has been chosen as the referencematerial.3. Press the right arrow buttonreference reading.for two seconds to store the reading as4. Now if the device is placed on any material, it indicates whether thematerial is wetter or dryer than the reference material.4.3 Hygrometer - Selection and UseNavigate to SELECT MODE - HYGROMETER and pressHygrometer mode.to select theTo use the Protimeter MMS2 as a Hygrometer (see Figure 4 on page 11),connect the Hygrostick, Quikstick or Short Quikstick probe into socket Aeither directly or indirectly with the extension lead.10INS8800 Rev. D
Protimeter MMS2 Instruction Manual4.3 Hygrometer - Selection and Use (cont.)Relative humidity and temperature measurements are made with theHygrostick, Quikstick or Short Quikstick probe, and the MMS2 instrumentuses these values to calculate a range of psychometric readings. When usingthe MMS2 to measure the conditions in air, the humidity probe is normallyconnected directly to the instrument. However, when it is impractical orawkward to use the instrument in this way, the extension lead may be used toconnect the Hygrostick, Quikstick or Short Quikstick to the instrument.Typically, the extension lead will be used when taking readings from probesthat have been embedded in structures such as walls and floors.Figure 4: MMS2 as a HygrometerNote:For best response time, do not store the MMS2 in excessively hot orcold locations, such as in a vehicle.INS8800 Rev. D11
Protimeter MMS2 Instruction Manual4.4 Psychrometrics - Selection and UseNavigate to SELECT MODE - PSYCHROMETRICS and pressPsychrometrics mode.to select theConnect the Hygrostick, Quikstick or Short Quikstick probe into socket A.The following parameters are displayed in this mode:4.4a Dew PointNavigate to SELECT MODE - PSYCHROMETRICS - DEW POINT and pressto get the Dew Point reading.4.4b Grains per Pound/Grams per KilogramNavigate to SELECT MODE - PSYCHROMETRICS - GRAMS PER KILOGRAM/GRAINS PER POUND and pressto get the Mixing Ratio reading.4.4c EnthalpyNavigate to SELECT MODE - PSYCHROMETRICS - ENTHALPY and pressget the Enthalpy reading.to4.4d Vapor PressureNavigate to SELECT MODE - PSYCHROMETRICS - VAPOR PRESSURE and pressto get the Vapor Pressure reading.Note:12Change the units in Settings (see page 16) to obtain both metric andnon-metric equivalents.INS8800 Rev. D
Protimeter MMS2 Instruction Manual4.5 CondensatorThe Condensator Mode enables the user to assess the risk of condensationoccurring on surfaces or to confirm whether or not condensation is present ona surface.The MMS2 can be used as a Condensator using two modes:4.5a Surface Temperature Probe (Contact Based) - Selectionand UseNavigate to SELECT MODE - SURFACE TEMPERATURE PROBE and pressselect the Surface Temperature Probe mode.toIn this mode, the MMS2 measures the surface temperature using an externalSurface Temperature probe inserted into socket C and making contact with thesurface to be assessed. In addition to the Surface Temperature probe, connecta Humidity probe into socket A for the MMS2 to show the Condensationstatus.TDIFF is a useful function when investigating condensation, as it tells the userhow many degrees a surface temperature is above or below the prevailing dewpoint temperature.4.5b Surface Temperature IR (Non-Contact Based) - Selectionand UseIn this mode, the MMS2 measures surface temperature using IR technologyConnect a humidity probe into socket A.Hold thebutton to enable the IR Thermometer. Release the button andpress it again within 1 second to enable the LASER pointer. The LASER pointerwill indicate the area on the surface where the measurement is being taken(see Figure 5 on page 14).INS8800 Rev. D13
Protimeter MMS2 Instruction Manual4.5b Surface Temperature IR (Non-Contact Based) - Selectionand Use (cont.)Figure 5: LASER Pointer14T. DIFF (DEGC)Table 3: TDIFF ReadingsCondensation StatusProgress Bar 0Condensation 0 but 3Risk of CondensationYellow 3No CondensationGreenRedINS8800 Rev. D
Protimeter MMS2 Instruction Manual4.6 Logging - Selection and UseThe MMS2 supports both continuous and manual logging.4.6a Manual LoggingIfis pressed at any of the measurement screens, the data and Timestamp atthat instant will be logged and a RECORD SAVED message will be displayed onthe bottom bar.4.6b Continuous LoggingContinuous logging is used to sample and store data continuously. Continuouslogging is enabled either by setting logging parameters through the Keypad orthrough a PC using MMS2 Logging Software. (see Section 4.7g, “Set LoggingParameters (Optional PC Logging Software Required)”, on page 19.)After the logging parameters are saved, logging starts after the START AFTERminutes have elapsed. The logging iconis displayed on the top rightcorner of the screen while logging is active.When logging is in progress, an option to stop logging is provided under theSETTINGS menu. Logging can be stopped either by selecting SELECT MODE - SETTINGS - STOP LOGGING in the instrument, by clicking STOP LOGGING inthe MMS2 Logging Software or when the instrument is turned OFF.INS8800 Rev. D15
Protimeter MMS2 Instruction Manual4.7 Settings - Selection and UseThe Protimeter MMS2 instrument has a range of user-selectable features.to configure theNavigate to SELECT MODE - SETTINGS and pressMMS2. The following options are available for configuring:4.7a Set UnitsMMS2 has the option to select between METRIC and NON METRIC units.Navigate to SELECT MODE - SETTINGS - UNITS and pressUnit options. Usepress/to open theto navigate between the options available, andto save the desired units.Table 4 below shows how the units and the parameters measured appear inmetric and non-metric units.Table 4: Metric and Non-Metric Units for ParametersMetricNon-MetricTemperature C FDew Point C FMixing Ratiog/kgg/lbEnthalpykJ/kgBTU/lbVapor PressurekPainHgSurface Temperature C FT. Diff C FAmbient Dew Point C F16INS8800 Rev. D
Protimeter MMS2 Instruction Manual4.7b Date and TimeNavigate to SELECT MODE - SETTINGS - DATE AND TIME and presschange the date and time. Use/toto navigate to the required field. Then, useto increment/decrement the value in that box.After entering the required date and time, pressto set the date and time.The new date and time are displayed at the top right corner of the screen. Dateand time can also be set up by connecting to a PC and using the optionalMMS2 logging software.4.7c Auto OffThe MMS2 will switch OFF automatically after auto switch off time, if noactivity/key press is observed. Navigate to SELECT MODE - SETTINGS - AUTO OFF and press to configure the Auto off time. Use/tonavigate between 0 to 6 minutes and pressto set the Auto off time. Todisable the Auto off feature, set the Auto switch off time to 0.Note:During continuous logging operation, auto switch off time isconsidered to be the display turnoff time.4.7d Set BrightnessNavigate to SELECT MODE - SETTINGS - SET BRIGHTNESS and pressset the Brightness level. Use/toto navigate between the differentbrightness levels (1 to 10) and pressto set the desired brightness.(Brightness level 2 is the default setting.)INS8800 Rev. D17
Protimeter MMS2 Instruction Manual4.7e Buzzer On-OffThis option is used to switch the Buzzer ON/OFF. When the Buzzer is ON: Any key press will make a beep sound.In WME/Aquant mode, a RISK/WET condition will be alerted.Instrument turn ON/OFF will be indicatedNavigate to SELECT MODE - SETTINGS - BUZZER ON-OFF and pressswitch the Buzzer on/off.Use/to navigate between the on and off options and presssave the desired configuration.4.7ftotoCalibrationThe Calibration option is unavailable to the user.18INS8800 Rev. D
Protimeter MMS2 Instruction Manual4.7g Set Logging Parameters (Optional PC Logging SoftwareRequired)Navigate to SELECT MODE - SETTINGS - SET LOGGING and pressthe following logging parameters: to setStart After: minutes after which logging should start (0 to 999).Sampling Interval: sampling interval in minutes (1 to 60).End After: minutes after which logging should stop after sampling begins(1 to 999). Job Number: 1 to 255Useto navigate to the required box. Then, useor decrement the value in that box and pressparameters.Note:/to incrementto save the entered loggingYou can also set up and conduct logging via the optional PCsoftware.INS8800 Rev. D19
Protimeter MMS2 Instruction Manual5.Diagnostic Procedure GuidelinesWhen diagnosing dampness in buildings, three key criteria must beconsidered, as outlined in Table 5 below.Item20Table 5: Diagnostic CriteriaCriteriaNotes1Is a wall or otherbuilding element ina safe air-drycondition?Air-dry is the moisture content that is normaland safe (from moisture-related deterioration ordecay) in buildings. When the ProtimeterMMS2 moisture meter modes are selected,measured values are identified as DRY, AT RISKor WET.2Is the surfacetemperature of awall or otherbuilding elementabove or below thedew point?Dew point is the temperature at which a givenquantity of air becomes saturated (100% RH)and forms dew, or condensation. If a surface iscolder than the dew point, condensation occurs.When the Protimeter MMS2 Condensator Modeis selected to measure TDIFF (the proximity ofa surface to the dew point) the instrumentidentifies either a NO CONDENSATION condition,an AT RISK condition, or a CONDENSATIONoccurring condition.3Is a wall surface orother buildingelementcontaminated withhygroscopic saltsor other conductivematerial?Artificially high moisture meter readings maybe obtained either in material that has beenheavily contaminated by hygroscopic salts or inmaterials that are conductive by nature. Thepresence or absence of nitrates and chloridesshould be established when investigatingsuspected rising dampness situations inparticular.INS8800 Rev. D
Protimeter MMS2 Instruction Manual5.Diagnostic Procedure Guidelines (cont.)Item 1: The Search and Measure modes (pinless and pin) should be used incombination to map out the extent of a moisture problem and to distinguishbetween surface and sub-surface moisture. The profile of readings obtainedwill give insight into the potential cause (e.g., condensation, lateral ingress orrising dampness) of a moisture-related problem.Far greater insight will be obtained from moisture readings taken in amethodical manner than from those taken in a random manner. When testingwalls, the user should start by taking readings at the lower levels and move upthe wall in regular steps of 4-6 in. (10-15 cm). When high subsurface relativereadings are obtained in the Search mode, the user is strongly recommendedto quantify these values in %WME terms by using the deep wall probes in theMeasure mode. If the depth of clearance holes is increased incrementally by anominal 0.4 in. (10 mm) at a time, the moisture profile through the wall can beestablished.Item 2: Condensation related moisture problems are common. When assessingthe risk of condensation, or confirming its existence, the proximity of theactual temperature of the surface under investigation to the dew point must beestablished. The TDIFF measurement in CONDENSATOR mode tells the userhow many degrees the temperature of a surface is above or below the dewpoint.As many condensation situations are transient, TDIFF readings should be takenin a methodical and regular manner, similar to moisture meter readings inmaterials. Ambient RH and temperature values should also be taken to assessthe moisture condition of the room as a whole. Dwellings and workingenvironments generally have an RH from 40% to 60%, so there may be causeto investigate environments that register RH values outside this range.INS8800 Rev. D21
Protimeter MMS2 Instruction Manual5.Diagnostic Procedure Guidelines (cont.)Item 3: Two hygroscopic salts, chlorides and nitrates, may build up on thesurface of walls where rising dampness or wicking occurs. As groundwatermoves through the wall and migrates to the surface, salts tend to accumulatewhere the rate of evaporation of this water is greatest. The salts themselvesare non-conductive, but when mixed with a small amount of moisture a highlyconductive solution is formed. The presence (or absence) of such salts shouldtherefore be established when rising dampness is suspected by using theProtimeter MMS2 in Measure mode as described. When required, theProtimeter Salts Analysis Kit (part number BLD4900) can be used to identifythe relative concentrations of nitrates and chlorides.In summary, effective dampness diagnosis is a process that draws on theknowledge and expertise of the surveyor. The Protimeter MMS2 kit enablesthe user to investigate moisture levels in materials and environments fromvarious perspectives that, in turn, permits a more thorough and reliablejudgment as to the cause of dampness related problems.6.Calibration CheckingCheck the moisture meter Measure Mode by holding the pins of the moistureprobe across the exposed wires of the calibration check device (Calcheck).The WME value of correctly calibrated instruments is 17-19. Instruments thatregister values outside this range should be returned to Protimeter forservicing.Note:Search mode can be checked against a stable area of wall. Forcomparative purposes, humidity and ambient temperature conditionsshould be stable and consistent.Working Hygrostick, Quikstick and Short Quikstick probes can be checkedagainst reference probes and/or over standard salt solutions.22INS8800 Rev. D
Protimeter MMS2 Instruction Manual7.Care and MaintenanceThe Protimeter MMS2 is a precision-built electronic instrument that willprovide many years of reliable service if the following points are observed: When not in use, keep the MMS2 instrument and its accessories in thefactory carry case. Store the case in a stable, dust-free environment andkeep it out of direct sunlight. If the instrument is to be stored for more than four weeks or if the lowbattery power symbol appears on the display, remove the batteries fromthe instrument. When using the MMS2 in Search mode, do not slide the bulge acrosssurfaces, as this may lead to rapid instrument case wear. The instrumentshould be lifted and placed in position to prevent such wear. Check the condition of the MMS2 accessories on a regular basis, andreplace them if they become worn or damaged. To preserve their calibration characteristics, Hygrostick probes should notbe exposed to saturated environments. If this is unavoidable, Hygrostickprobes should be replaced on a regular basis and their calibration shouldbe checked frequently.INS8800 Rev. D23
Protimeter MMS2 Instruction Manual8.Displaying the MMS2 InformationGo to SELECT MODE - VERSION to view the MMS2 information. Thefollowing information will be provided: Firmware version Battery status24Date of buildDevice Model and Serial numberCalibration date/status: Tair-RH-WME-Ts, Aquant, IR, surfacetemperatureINS8800 Rev. D
Protimeter MMS2 Instruction Manual9.Technical Specifications9.1 Operating ConditionsOperating Temperature RangeInstrument Only: 0 C - 50 CHumidity:0 to 95% non-condensing9.2 Measurement Specifications9.2a Humidity MeasurementHygrostick Data (Nominal)Relative HumidityRange: 30% to 40% RH,Range: 41% to 98% RH,Accuracy: 3% RH at 68 F (20 C)Accuracy: 2% RH at 68 F (20 C)TemperatureRange: 14 F to 122 F (-10 C to 50 C),Accuracy: 0.6 F ( 0.3 C)Short Quikstick Data (Nominal)Relative HumidityRange: 0% to 10% RH,Range: 10% to 90% RH,Range: 90% to 100% RH,Accuracy: 3% RH at 68 F (20 C)Accuracy: 2% RH at 68 F (20 C)Accuracy: 3% RH at 68 F (20 C)Temperature RangeRange: 14 F to 122 F (-10 C to 50 C),INS8800 Rev. DAccuracy: 0.6 F ( 0.3 C)25
Protimeter MMS2 Instruction Manual9.2b Moisture MeasurementFor Integrated and Remote Pin probesIntegrated pinsStrong and reliable integrated WME pins with cap,No effect on readings by surface moisturePin (% WME) 8% to 100%, readings over 30% are relativeNon-invasive (RF)Up to 3/4” (15 mm) deep, 60 to 999 (relative),Tolerance: 10 relative scale9.2c Surface TemperaturePlug in Temperature Probe Surface Temperature Probe - BLD5805Range 32 F to 158 F (0 C to 70 C)Accuracy at 77 F (25 C) /- 1.3 F (0.7 C)IR Based — With 12:1 (D:S) Ratio — With Laser PointerRange: 14 F to 122 F (-10 C to 50 C)Accuracy: 3.6 F ( 2 C) @77 F (25 C)26INS8800 Rev. D
Protimeter MMS2 Instruction Manual9.3 Physical Specifications9.3a PowerBattery9V Alkaline 550mAHBattery Life visual indication on LCD9.3b Size (H x W x D)7.5 in. x 3.7 in. x 2.2 in. (19.1 cm x 9.4 cm x 5.6 cm)9.3c Gross WeightInstrument only: 9.17 oz (260 g)9.3d Maximum Needle DepthFor WME Pins 0.4 in. (10 mm)9.3e BuzzerAudible buzzer for Key tone, WME/Aquant Measurement9.4 Regulatory ComplianceCE, RoHS, ETL9.5 User Interface9.5a KeypadPlastic/silicone keypad for easy navigation between different user menus onthe unit, separate key for IR
2 INS8800 Rev. D Protimeter MMS2 Instruction Manual Do not allow children to use laser pointers unless under the supervision of an adult. Use only laser pointers meeting the following criteria: Labeled with FDA certification stating "DANGER: Laser Radiation" for Class 3R lasers or "CAUTION: Laser Radiation" for Class 2 lasers. Classified as Class 2 or 3R according to .





![Welcome [f.hubspotusercontent00 ]](/img/30/prestonpointe-downloadable-brochure.jpg)
