Transcription
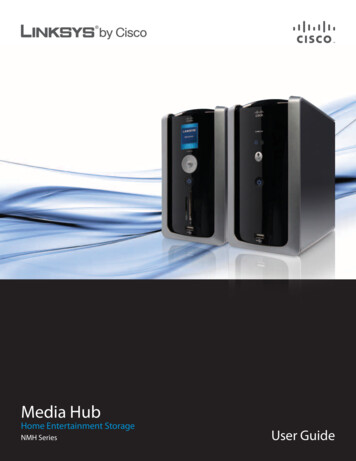
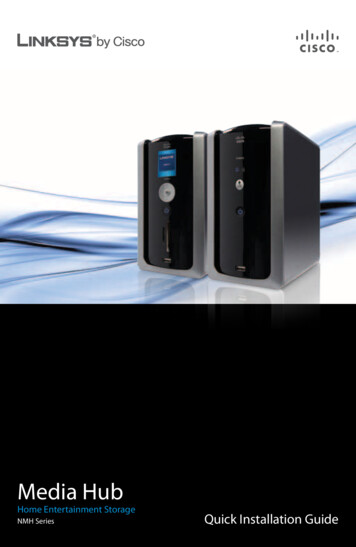
Media HubHome Entertainment StorageNMH SeriesQuick Installation Guide
Table of ContentsOverview. . . . . . . . . . . . . . . . . . . . . . . . . . . . . . . . . . . . . . . . . . . . . . . . . . . . . . . . . . 2Windows Installation . . . . . . . . . . . . . . . . . . . . . . . . . . . . . . . . . . . . . . . . . . . . . . 2Mac Installation . . . . . . . . . . . . . . . . . . . . . . . . . . . . . . . . . . . . . . . . . . . . . . . . . . . 8Setup of Additional Computers . . . . . . . . . . . . . . . . . . . . . . . . . . . . . . . . . . . 15Tools. . . . . . . . . . . . . . . . . . . . . . . . . . . . . . . . . . . . . . . . . . . . . . . . . . . . . . . . . . . . . 15Online ResourcesWebsite addresses in this document are listed without http:// in front of the addressbecause most current web browsers do not require it. If you use an older webbrowser, you may have to add http:// in front of the web omGlossarywww.linksysbycisco.com/glossaryNetwork linksysbycisco.com/supportCopyright and TrademarksLinksys, Cisco and the Cisco Logo are registered trademarks or trademarks of Cisco Systems,Inc. and/or its affiliates in the U.S. and certain other countries. Other brands and productnames are trademarks or registered trademarks of their respective holders. Mac and theMac logo are trademarks of Apple Computer, Inc., registered in the U.S. and other countries.Copyright 2009 Cisco Systems, Inc. All rights reserved.
OverviewOverviewThe Installation section explains how to install the Media Hub and set up yourcomputer for access to the Media Hub. For a Windows computer, proceed to theWindows Installation section. For a Mac, proceed to the Mac Installation section.The Setup of Additional Computers section explains how to set up additionalcomputers for access to the Media Hub. The Tools section describes differentways to take advantage of the Media Hub’s features.NOTE: The pictures in the Quick Installation Guide show the MediaHub with LCD (NMH400 Series); however, the instructions also applyto the NMH300 Series of the Media Hub.Windows InstallationOne hard disk drive is pre-installed. You should install the Media Hub beforeinstalling a second hard disk drive.A.Make sure the Media Hub ispowered off.Insert the Setup Wizard CD-ROMinto your computer’s CD-ROMdrive. The Setup Wizard shouldrun automatically, and the videoshould begin automatically. If itdoes not, click Start and thenRun. In the field provided, enterD:\setup.exe (if “D” is the letter ofyour CD-ROM drive).NOTE: The Media Hub Setup Wizard installs several programs thatenhance the functionality of the product. Software firewalls installedon your computer can block this communication between theprograms and the Media Hub. It is strongly recommended that youdisable your firewall software prior to installation of the Media Hub.B.2An introductory video plays. To bypass the video, click the X button in theupper right corner of the screen.Media Hub
The Welcome screen appears.To begin installation, click StartSetup.D.Read the License Agreement.To accept this agreement andcontinue with the installation,select I accept this agreement.Windows InstallationC.Click Next.E.Connect one end of the includedEthernet network cable to theEthernet port of the Media Hub.Click Next.F.Connect the other end of theEthernet network cable to oneof the local network ports on therouter or gateway.Click Next.Media Hub3
Windows InstallationG.Connect the included poweradapter to the Power port of theMedia Hub.Click Next.H.Plug the power cord into anelectrical outlet.Click Next.I.Please wait while the Media Hubboots up. This may take up to15 minutes.J.Create an administrativePassword to protect access to theMedia Hub. The password musthave 1-32 characters and mayonly contain numbers, letters,or punctuation (do not use anyspaces).Click Next.4Media Hub
Enter a descriptive name forthe Media Hub. (Examples:HomeMedia or Media1)Click Next.L.Windows InstallationK.Please wait while the SetupWizard configures the Media Hub.This may take a few minutes.M. The Setup Wizard saves thesettings of the Media Hub ina text file on your computer’sdesktop. Click OK.N.To set up your computer foraccess to the Media Hub, clickNext.Media Hub5
Windows InstallationO.The drive letter will be used toidentify the media folder of theMedia Hub on your computerfor convenient access. Keep thedefault drive letter, or select adifferent letter.A shortcut to the Media Hub willbe created on your computer’sdesktop. If you do not want ashortcut, deselect Add a shortcutto the desktop.Click Next.P.NTI Shadow is a backup tool youcan use to automatically create abackup of your files located in theDocuments folder (named “Users”in Windows Vista or “Documentsand Settings” in Windows XP).The default backup job has beencreated to run every hour to backup files to the \backup folder onthe Media Hub.NTI Shadow will be installed onyour computer. If you do notwant to install it, deselect InstallBackup Tool now.Click Next.NOTE: Refer to the Tools section for more information on how toback up your computer.6Media Hub
The Media Importer is an importtool you can use to automaticallyfind, copy, and update media filesto the \import folder on theMedia Hub.The Media Importer willcontinually monitor the selectedfolder(s) for any changes youmake or any new files you add,and it will automatically updatethe Media Hub with your latestchanges or files.Windows InstallationQ.To find and copy all media in the Documents folder, select All Media. (Thefolder is named “Users” in Windows Vista or “Documents and Settings” inWindows XP.) Then select the types of media files: Find all pictures, Findall music, and/or Find all videos.To specify folders, select Select Folders. Then click Select to specify thefolders that will be automatically searched for media files.If you do not want to use the import tool now, select Manual. You can copyfiles to the Media Hub later using your computer’s file browser or the MediaImporter.Click Next.NOTE: You can access the Media Importer through the systemtray; refer to the Tools section for more information.R.Watch the video to learn howto take advantage of the MediaHub’s features.Click Next.NOTE: To access the MediaHub through your webbrowser, use the FriendlyName and Password you setup during the Setup Wizard.Example: http://mediahubMedia Hub7
Mac InstallationS.The Media Hub has beenconfigured.Its Media Browser will launchautomatically. If you do not wantto access the Media Browser,deselect Access the MediaBrowser now.To exit the Setup Wizard, clickFinish.(You can register the Media Hub later at www.linksysbycisco.com/registration)The Media Browser requires Adobe Flash Player (version 10 or higher). If it is notinstalled on your computer, then you will be prompted to download and installit. Follow the on-screen instructions. (An active Internet connection is required.)Congratulations! Installation of the Media Hub is complete.Proceed to the Setup of Additional Computers section for instructions on how toset up additional computers for access to the Media Hub.Mac InstallationOne hard disk drive is pre-installed. You should install the Media Hub beforeinstalling a second hard disk drive.A.Make sure the Media Hub ispowered off.Insert the Setup Wizard CD-ROMinto your computer’s CD-ROMdrive.NOTE: The Media Hub Setup Wizard installs several programs thatenhance the functionality of the product. Software firewalls installedon your computer can block this communication between theprograms and the Media Hub. It is strongly recommended that youdisable your firewall software prior to installation of the Media Hub.B.8Double-click the CD on yourdesktop. Then double-click theMedia Hub icon.Media Hub
Your computer may ask you toconfirm installation of the MediaHub software. To confirm, clickContinue.D.A welcome video plays. To bypass the video, click Continue.E.The Introduction screen appears.Click Continue.F.Read the License Agreement, andthen click Continue.G.To accept the License Agreementand continue with the installation,click Agree.Media HubMac InstallationC.9
Mac InstallationH.The Setup Wizard will install theMedia Hub software on yourcomputer.Click Install.I.The Welcome screen appears.To begin installation, click StartSetup.J.Connect one end of theincluded Ethernet network cableto the Ethernet port of the MediaHub.Click Next.K.Connect the other end of theEthernet network cable to oneof the local network ports on therouter or gateway.Click Next.10Media Hub
Connect the included poweradapter to the Power port of theMedia Hub.Click Next.Mac InstallationL.M. Plug the power cord into anelectrical outlet.Click Next.N.Please wait while the MediaHub boots up. After the PowerLED stops flashing, click Next.O.The Setup Wizard searchesfor the Media Hub. After theSetup Wizard detects the MediaHub, click Next.Media Hub11
Mac InstallationP.Create an administrativePassword to protect access to theMedia Hub. The password musthave 1-32 characters and mayonly contain numbers, letters,or punctuation (do not use anyspaces).Click Next.Q.Enter a descriptive name forthe Media Hub. (Examples:HomeMedia or Media1)The Setup Wizard creates ashortcut to the Media Hub andsaves its settings in a text file onyour computer’s desktop. If youdo not want to save these itemsto the desktop, deselect Savesettings to your Desktop.Click Next.12R.Please wait while the SetupWizard configures the Media Hub.This may take a few minutes.S.The Media Hub is configured.Click OK.Media Hub
The Media Importer is an importtool you can use to automaticallyfind, copy, and update media filesto the \import folder on theMedia Hub.The Media Importer willcontinually monitor the selectedfolder(s) for any changes youmake or any new files you add,and it will automatically updatethe Media Hub with your latestchanges or files.Mac InstallationT.Click Continue.NOTE: You can access the Media Importer through its desktopiconU.; refer to the Tools section for more information.Select the folders you want theMedia Importer to monitor. Thenselect the types of media files:Music, Photos/Images, and/orVideos.Click OK.V.The Media Importer automaticallyopens. Minimize this screen andcontinue with the Setup Wizard.(Refer to the Tools section formore information.)Media Hub13
Mac InstallationW.Watch the video to learn howto take advantage of the MediaHub’s features.Its Media Browser will launchautomatically. If you do not wantto access the Media Browser,deselect Access the MediaBrowser now.Click Continue.(You can register the Media Hub later at www.linksysbycisco.com/registration)NOTE: The Media Browser requires Adobe Flash Player (version10 or higher). If it is not installed on your computer, then you willbe prompted to download and install it. Follow the on-screeninstructions. (An active Internet connection is required.)X.The installation of the Media Hubis complete.To exit the Setup Wizard, clickClose.NOTE: To access the MediaHub through your webbrowser, use the FriendlyName and Passwordyou set up during theSetup Wizard. Example:http://mediahub.localCongratulations! Installation of the Media Hub is complete.Proceed to the Setup of Additional Computers section for instructions on how toset up additional computers for access to the Media Hub.14Media Hub
To set up additional computers for access to the Media Hub, run the SetupWizard. On the Welcome screen, click Connect Computers and follow theon‑screen instructions. For a step-by-step explanation, refer back to theWindows Installation section (step O on page 6) or the Mac Installation section(step T on page 13).ToolsThe Media Hub offers different ways to take advantage of its features.Setup of Additional ComputersSetup of Additional ComputersVideo Player SupportThe Media Hub plays video content through a browser plug-in. Download andinstall your favorite media player to enable video playback within the MediaBrowser. Please note that media players have varying levels of support fordifferent video formats. If the video format you want to play is not supported,you may want to search the Internet for a media player that can run on yourcomputer and support the desired video formats. (Make sure you download thelatest version.) Some suggested players include QuickTime, VLC, and WindowsMedia Player.For more information about video support, visit www.linksysbycisco.com/supportRemote AccessIf you enable and set up the Remote Access service†, then you can access theMedia Hub and its files over the Internet. To set up the Remote Access service,follow these instructions:1.Windows: In your web browser,enter http:// Friendly Name (Example: http://mediahub)Mac: In your web browser, enterhttp:// Friendly Name .local(Example: http://mediahub.local)2.Click Configuration.††A period of Remote Access is included from date of activation. Fees may apply thereafter andare subject to change. Go to www.linksysbycisco.com for further information and details ofterms and conditions applicable to the Remote Access service.Media Hub15
Tools3.Enter the administrative Password you created during the Setup Wizard*.Click Submit.4.Click the Services tab.5.For the Remote Access section, click Configure.6.Select Enable Remote Access to the Media Hub.7.Enter the Remote Device Name you want to assign to the Media Hub. (Thisname can be different from the Media Hub’s Friendly Name.)8. Click Submit.The Remote Access service will be available in approximately two to fiveminutes. During this time, the Media Hub restarts itself, so it will not beavailable for streaming music or other functions until after the restart.To remotely access the Media Hub, follow these instructions:1.Open the web browser of the computer you are using.2.In the Address field, enter http://www.ciscomediahub.com andpress Enter.3.Enter the Remote Device Name of the Media Hub, and then click Go.4.Enter the administrative or Guest Password. (The administrative Passwordallows full access to the Media Hub; the Guest Password allows accessrestricted to the media content of the Media Hub and is set up through theConfiguration utility). Click Submit.Remote access to the Media Hub is now established.NOTE: Playing video files over remote access requires the sameplug-ins you have installed on your home computer. Video playbacksupport over remote access depends on the broadband speeds ofboth your home connection and remote connection. Video playbackshould be limited to smaller video files, as larger video files may takea long time to load and play.Media ServerThe Media Hub can stream media content to other UPnP AV‑enabled (orDLNA‑certified) devices, such as a digital media adapter or a gaming consolewith a built-in media player.Direct Connection of USB Storage DevicesYou can connect USB storage devices to the USB ports on the Media Hub,so you can access the files on the USB storage devices. (Direct connection ofmemory cards is also supported by the NMH400 Series of the Media Hub.)* If you did not change the administrative Password during the Setup Wizard, then you canenter the default Password, admin.16Media Hub
You can install a second hard disk drive to enhance your use of the Media Hub.Depending on the disk configuration you select, you can increase the storagespace or data protection of the Media Hub. For more information, refer to theUser Guide; visit www.linksysbycisco.com/mediahub/ug to download it.ToolsOption to Install a Second Hard Disk DriveMedia ImporterThe Media Importer is the import tool that was automatically installed. Itsupports most popular formats, such as mp3, jpg, and mpg files. Use the MediaImporter to automatically find, copy, and update media files to the MediaHub. In the future, any changes made or new files added will be automaticallyupdated on the Media Hub.Windows AccessDouble-click the system tray icon toaccess the Media Importer.Importer System Tray Icon (Active)If you do not see the icon, go to Start All Programs Cisco Media Hub Linksys Media Importer LinksysMedia Importer.Importer System Tray Icon (Offline orDisconnected)Mac AccessDouble-click the system tray icon toaccess the Media Importer.If you do not see the icon, double‑clickthe Macintosh HD icon on yourdesktop. Go to Application MediaImporter.Importer System Tray Icon (Active)Importer System Tray Icon (Offline orDisconnected)OptionsThe Media Importer offers the following options:Disconnect/Connect Connect or disconnect the Media Hub from the MediaImporter.Switch Media Hub Switch to a different Media Hub.Manage Media Importer Select the folders you want to copy to theMedia Hub. (Images smaller than 50 KB will not be imported.)Media Importer Status View the status of the file transfers to theMedia Hub.Media Hub17
ToolsCopy and PasteUse the copy-and-paste function to manually copy files to the Media Hub. Copyfiles of a single file type together at one time. Copy and paste music to theMusic folder, photos to the Photos folder, and videos to the Videos folder. (Thefiles you copy to the Media Hub can be accessed by all users of the Media Hub.)File transfers may take minutes or hours depending on file transfer speeds,which will vary, depending on network conditions, including use of wireless,and the number and size of the selected files.Windows AccessTo access the Media Hub, double‑click the Media Hub shortcuton yourcomputer’s desktop. If the shortcut is not available, then double-click theComputer or My Computer icon on your computer’s desktop. Double-click thedrive letter mapped to the Media Hub.To access the Media Hub through Windows Explorer:1.To open Windows Explorer, go to Start Programs Accessories Windows Explorer.2.During the Setup Wizard, you created a Friendly Name or device name forthe Media Hub.In the Address field of WindowsExplorer, enter the Friendly Nameof the Media Hub:\\ Friendly Name (Examples: \\mediahub)3.Press Enter.Mac Access1.Double-click the Macintosh HD icon on your desktop.2.During the Setup Wizard, youcreated a Friendly Name or devicename for the Media Hub. In theShared section, the Media Hubis listed as its Friendly Name.(Example: MediaHub)Double-click the Media Hub.NOTE: Additional information is available in the User Guide; visitwww.linksysbycisco.com/mediahub/ug to download it.18Media Hub
NTI Shadow is the backup tool you installed during the Setup Wizard. Use it toautomatically copy your documents to the Media Hub for safekeeping.ToolsNTI Shadow (Windows only)(If you chose not to install the backup tool, then NTI Shadow will not beavailable. To install NTI Shadow, refer to the previous section, Setup of AdditionalComputers.)AccessGo to Start All Programs Cisco Media Hub NTI Shadow.After you have accessed NTI Shadowfor the first time, the system tray iconappears. Double-click the icon toaccess NTI Shadow.NTI Shadow System Tray IconMain MenuThe main menu appears.The Setup Wizard creates a defaultbackup job that backs up specific filesin the Documents folder.These files include the following filetypes: document (.doc, .docx, .xls, .xlsx,.pdf, .ppt, .txt, .htm, etc.) and .pptx.The backup files are saved to the \backup\ Computer Name \Documentsfolder on the Media Hub and are organized by date. This default backup job islisted in the Modify Backup Job section.Create Backup JobCreate Backup Job Click this option to create a backup job. Follow theon‑screen instructions of the Job Wizard. (Additional information is available inthe User Guide; visit www.linksysbycisco.com/mediahub/ug to download it.)Modify Backup JobAll backup jobs, including the default backup job, are listed in this section. Youcan change the default backup job created by the Setup Wizard; for example,you can back up additional folders on your computer.For more information about NTI Shadow, click Help.Media Hub19
09051110A-JL20Media Hub
3240-00359
Media Hub Overview 2 Overview The Installation section explains how to install the Media Hub and set up your computer for access to the Media Hub. For a Windows computer, proceed to the Windows Installation section. For a Mac, proceed to the Mac Installation section. The Setup of Additional Computers section explains how to set up additional computers for access to the Media Hub.
![gauVI suKmnI m: 5 ] - SikhNet](/img/61/sukhmani-20-gurmukhi.jpg)
