Transcription
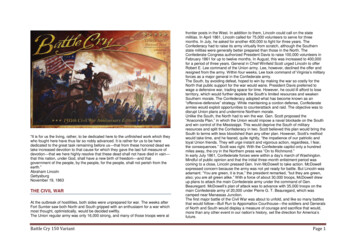
“It is for us the living, rather, to be dedicated here to the unfinished work which theywho fought here have thus far so nobly advanced. It is rather for us to be herededicated to the great task remaining before us—that from these honored dead wetake increased devotion to that cause for which they gave the last full measure ofdevotion—that we here highly resolve that these dead shall not have died in vain—that this nation, under God, shall have a new birth of freedom—and thatgovernment of the people, by the people, for the people, shall not perish from theearth.”Abraham LincolnGettysburgNovember 19, 1863THE CIVIL WARAt the outbreak of hostilities, both sides were unprepared for war. The weeks afterFort Sumter saw both North and South gripped with an enthusiasm for a war whichmost thought, optimistically, would be decided swiftly.The Union regular army was only 16,000 strong, and many of those troops were atBattle Cry 150 Variantfrontier posts in the West. In addition to them, Lincoln could call on the statemilitias. In April 1861, Lincoln called for 75,000 volunteers to serve for threemonths. In July, he asked for another 400,000 to fight for three years. TheConfederacy had to raise its army virtually from scratch, although the Southernstate militias were generally better prepared than those in the North. TheConfederate Congress authorized President Davis to raise 100,000 volunteers inFebruary 1861 for up to twelve months. In August, this was increased to 400,000for a period of three years. General in Chief Winfield Scott urged Lincoln to offerRobert E. Lee command of the Union army. Lee, however, declined the offer andresigned from the army. Within four weeks, Lee took command of Virginia’s militaryforces as a major general in the Confederate army.The South, by avoiding defeat, hoped to win by making the war so costly for theNorth that public support for the war would wane. President Davis preferred towage a defensive war, trading space for time. However, he could ill afford to loseterritory, which would further deplete the South’s limited resources and weakenSouthern morale. The Confederacy adopted what has become known as an“offensive-defensive” strategy. While maintaining a cordon defense, Confederatearmies would exploit opportunities to counterattack and raid. The objective was todisrupt Union plans and undermine Northern morale.Unlike the South, the North had to win the war. Gen. Scott proposed the“Anaconda Plan,” in which the Union would impose a naval blockade on the Southand win control of the Mississippi. This would deprive the South of militaryresources and split the Confederacy in two. Scott believed this plan would bring theSouth to terms with less bloodshed than any other plan. However, Scott’s methodwould take time, and he feared, quite rightly, “the impatience of our patriotic andloyal Union friends. They will urge instant and vigorous action, regardless, I fear,the consequences.” Scott was right. With the Confederate capitol only a hundredmiles away, the cry in the Northern press was “On to Richmond.”In early July 1861, Confederate forces were within a day’s march of Washington.Mindful of public opinion and that the initial three-month enlistment period wascoming to a close, Lincoln pressed Gen. Irvin McDowell to take action. McDowellexpressed concern because the army was not yet ready for battle. But Lincoln wasadamant. “You are green, it is true,” the president remarked, “but they are green,also; you are all green alike.” With a force of about 30,000 troops, McDowell drewup plans to attack the main Confederate army under the command of Gen.Beauregard. McDowell’s plan of attack was to advance with 35,000 troops on themain Confederate army of 20,000 under Pierre G. T. Beauregard, which wascamped near Manassas Junction.The first major battle of the Civil War was about to unfold, and like so many battlesthat would follow—Bull Run to Appomattox Courthouse—the soldiers and Generalsof North and South would display a measure of courage and sacrifice that would,more than any other event in our nation’s history, set the direction for America’sfuture.Page 1
INTRODUCTIONBATTLE SCENARIOSThe Battle Cry game features stylized Civil War battles and skirmishes. Thesescenarios focus on important terrain features from the original battlefields andrepresent the historical deployment of Union and Confederate forces thatparticipated in each battle.Victory will require strategic card play, timely dice rolling, and an aggressive, yetflexible, battle plan. The stage is set, the battle lines are drawn, and you are incommand. The rest is history.Classic Battle Cry ScenariosHOW TO WINBe first to capture a set number of opponent’s flag figures and/or flag tokens, asnoted in the scenario, to win!COMPONENTS1 Game Board60 Command Cards46 Double-sided Terrain Tiles9 Double-sided Entrenchment/Fieldwork Tokens14 Double-sided Flag Tokens8 Battle Dice1 Flag Label SheetConfederate (gray) and Union (blue) armies, each with the following plastic figures:3 Generals with Flags3 Artillery with Flags6 Artillery Crewmembers3 Cavalry with Flags6 Cavalry10 Infantry with Flags30 InfantryBattle Cry 150 VariantFirst Bull Run, Virginia — July 21, 1861Pea Ridge, Arkansas (Elkhorn Tavern) — March 7, 1862Kernstown, Virginia — March 23, 1862Shiloh, Tennessee (first day of battle) — April 6–7, 1862Gaines Mill, Virginia — June 27, 1862Second Bull Run, Virginia (Brawner’s Farm) — August 28, 1862Antietam, Maryland — September 17, 1862Fredericksburg, Virginia — December 13, 1862Murfreesboro, Tennessee (first day of battle) — Dec. 31–Jan. 2, 1863Gettysburg, Pennsylvania (Devil’s Den & Wheat Field, second day of battle) — July1–3, 1863Gettysburg, Pennsylvania (Pickett’s Charge, third day of battle) — July 1–3, 1863Chickamauga, Georgia (second day of battle) — September 19–20, 1863New Market, Virginia — May 15, 1864New Hope Church, Georgia — May 25, 1864Jackson Campaign SupplementMcDowell, Virginia — May 8, 1862Winchester, Virginia — May 25, 1862Cedar Mountain, Virginia — August 9, 1862150th Civil War Anniversary Edition BattlesFalling Waters, West Virginia — July 2, 1861Wilson’s Creek, Missouri (Bloody Hill) — August 10, 1861Greenbrier River, West Virginia — October 3, 1861Belmont, Missouri — November 7, 1861Dranesville, Virginia — December 20, 1861Fort Donelson, Tennessee (Confederate Breakout) — February 15, 1862Little Sugar Creek, Arkansas — February 17, 1862Williamsburg, Virginia (North of Fort Magruder) — May 5, 1862Oak Grove, Virginia — June 25, 1862Richmond, Kentucky (Union Final Position) — August 30, 1862Ox Hill, Virginia — September 1, 1862Perryville, Kentucky — October 8, 1862Prairie Grove, Arkansas — December 7, 1862Page 2
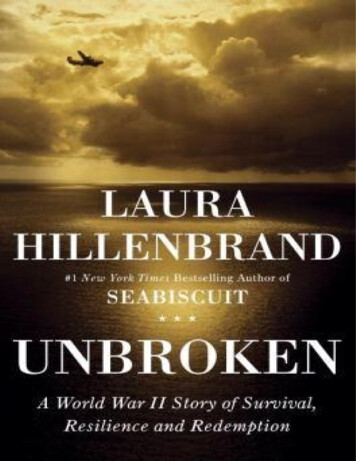
Applying Flag StickersGame BoardApply an appropriate flag sticker to each figure with a flag stand.The game board represents a battlefield and is divided into three sections by twodotted lines—giving each player a left flank section, a center section, and a rightflank section. Where a dotted line cuts through a hex, the hex is part of both theflank section and the center section. The victory stand areas hold captured enemyflags.Battle Cry 150 VariantPage 3
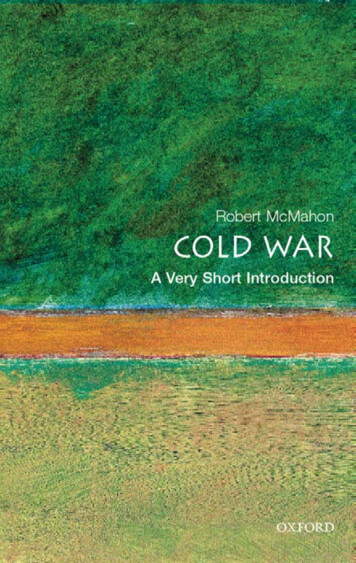
Command CardsTactic CardsUsing command cards, you’ll order your troops to move, attack, and/or dosomething special. There are two types of command cards: section cards andtactic cards.Tactic cards feature special rules that enable units to move and/or battle in uniqueways or that create other effects as noted in the text of the card.Section CardsWhen you play a section card, the card will indicate how many and which type ofunits you may order to move and/or battle. The card will also indicate in whichsection or sections of the battlefield you may issue orders.Battle Cry 150 VariantPage 4
DiceGenerals and UnitsYou’ll roll a variable number of dice to resolve battles. The dice are custom madefor this game and have the following 6 sides:Each silhouette on the map represents either a single general figure or a unitcomprised of multiple troop figures.SETUPChoose a Battle ScenarioSelect one of the 30 battle scenarios from the Scenarios section, starting on page17. Each scenario includes a battlefield map, a brief overview of the battle, andstaffing notes.The 30 scenarios are based on actual Civil War battles. Every attempt has beenmade to ensure accuracy, within the boundaries of the game system. Keep inmind, however, that history is, by definition, interpretive. “Facts” are oftencontradictory. Press and government reports are not always accurate. Historians,sometimes disagree. People are misquoted. Embellishment, mistakes, faultymemories and conflicting records also play a role. In war, nothing is certain.A Note on Scale The number of historical forces represented by a game unit variesby scenario. For example, in some scenarios an infantry unit in the game mayrepresent an entire division, while in other scenarios it might represent a singleregiment.First Game?TerrainIf this is your first game of Battle Cry, start with the First Bull Run scenario.This scenario will help you become familiar with the rules and the basics of fightinga Civil War battle.Set up the Game BoardTerrain has a variety of effects as described in the Terrain section and on thequick-reference sheet.See last pages for further terrain reference.Each scenario has a battlefield map that shows where to deploy armies and placeterrain tiles and tokens on the game board.Set up the game board according to the map.Battle Cry 150 VariantPage 5
Flag TokensWHAT TO DO ON A TURNFlag tokens mark special units or objective hexes. When a special unit or objectivehex is present in a scenario, it will be labelled on the map and explained in thestaffing notes.The player listed in the staffing notes goes first. Players then alternate taking turns.On your turn, follow the sequence shown below:1. Play a command card.2. Announce orders.3. Move.4. Battle.5. Draw a new command card.Special Unit: When you move a special unit, move the corresponding token alongwith it. The token doesn’t count as a piece that can be removed to satisfy losses,and the token is not transferable. Remove the token from the battlefield when thelast piece in the special unit is eliminated.Objective Hex: Place a flag token on the objective hex. Normally when your unitoccupies an objective hex, you capture the flag token and place it on your victorystand.Review the Staffing NotesEach scenario includes staffing notes with information on the following:The generals in command. In some scenarios, the generals aren’t present on thebattlefield; only the field officers whose presence affected the actual outcome ofthe battle are represented. Each player’s hand size of command cards.The player who goes first.The number of captured flags needed to win the game.Any special rules or victory conditions that apply.1. Play a Command CardPlay one command card from your hand. The card will tell you in which section(s)of the battlefield you may issue orders and how many orders you may give. Somecards allow you to take special actions, as explained on the card.2. Announce OrdersAnnounce which of your generals and/or units you will order. Only those orderedfigures may move, battle, or take a special action this turn. You can’t give morethan one order to each general or unit.3. MoveYou may move generals and units you’ve ordered in any sequence you wish.However, you must complete each move before beginning another. All moves mustbe completed on a turn before you may battle. (Battling is step 4 of the turnsequence.)When a battle’s special rules require a unit to occupy an objective hex to earn avictory flag token, a general figure by itself can’t capture that objective hex; only aninfantry, cavalry or artillery unit can capture a victory flag token.Deal Command CardsInfantry — An ordered infantry unit may move 1 hex in anydirection and battle.Shuffle the command cards and deal the number of cards shown in the staffingnotes to each player. Players keep their cards secret. Place the remaining cardsface down in a draw pile, within easy reach of both players.Battle Cry 150 VariantPage 6
Moving GeneralsCavalry — An ordered cavalry unit may move up to 3 hexes inany direction and battle.Artillery — An ordered artillery unit may move 1 hex in anydirection or it may battle. An artillery unit may not move and battle. General — An ordered general may move up to 3 hexes in anydirection. When alone, a general may not battle. Attached GeneralsMoving Units A general may move only once per turn.A general that is ordered doesn’t have to move.A general may move from one section of the battlefield to another.A general may move through a hex occupied by a friendly unit, a friendly unit withan attached general, or a friendly general that is alone in a hex.A general may end its movement in a hex occupied by a friendly unit as long asthere is no other general in the same hex. The general is then attached to the unit.A general may not move onto or through a hex occupied by an enemy unit orgeneral.Some terrain features affect movement and may prevent a general from movingits full distance or battling. (See Terrain.)Aside from special rules, a general may not exit the battlefield.A general in the same hex as a friendly unit is “attached” to the unit.A unit may move only once per turn.A unit that is ordered doesn’t have to move.A unit may move from one section of the battlefield to another.A unit may not move onto or through a hex occupied by a friendly unit, an enemyunit, or an enemy general.You may move a unit onto a hex occupied by a friendly general if the general isalone in the hex. The unit stops there and may move no further that turn. Thegeneral is then attached to the unit.You may not split a unit. The individual figures within a unit must stay together andmove as a group.Units that have been reduced through casualties may not combine with otherunits.Some terrain features affect movement and may prevent a unit from moving its fulldistance or battling. (See Terrain.)Aside from special rules, a unit may not exit the battlefield.Battle Cry 150 Variant Only one general may be attached to a unit.If a unit with an attached general is given an order, the general must move withthe unit to the same hex. The movement of the unit and attached general onlycounts as one order.You may give an order to an attached general to move away from the unit that it’sattached to for a cost of one order. The unit that the general moves away from isnot ordered unless it is also given an order.A general may move away from one unit and attach to another, but the unit itattaches to is not automatically ordered.A general that moves and joins a unit may not move again with a unit it has justjoined.Note: Retreating is a different type of movement with slightly different rules. SeeRetreat.Page 7
4. BattleAfter completing all moves, your ordered units able to battle may battle. However,they must first be close enough to the enemy and be in a position to “see” theenemy. (See Range, and Line of Sight.) Adjacent units can always Battle.A unit may battle only once per turn. You must resolve each battle before startingthe next.Units in Battle A unit may never split its battle dice between several enemy targets.If a unit is adjacent to one or more enemy units, it may not attack a more distantenemy.The number of playing pieces in a unit has an effect on the number of battle dicerolled.Generals in Battle Embolden Troops: Each time a unit with an attached general is attacked, that unitmay ignore one retreat flag rolled against it.Each time a general that is alone in a hex is attacked, that general may ignore oneretreat flag rolled against it.A general alone in a hex may not battle.A general attached to a unit will not normally add any battle dice to a unit when itis battling.To battle, do the following:1.2.3.Determine the range (distance to the enemy target).Determine the line of sight (whether or not you can see the target).Roll the dice (to determine hits, retreats, and misses).RANGED COMBATInfantry — Range of 3 hexes.An ordered infantry unit may battle an enemy target that is 3 or fewer hexes awayin any direction. An infantry unit rolls 1 battle dice per figure. If the unit moved,halve the number of dice (rounding up). For example, to battle an enemy that is 3hexes away in clear terrain, a full strength 4 figure infantry unit would roll 4 battledie. (2 dice if the infantry moved).Artillery — Range of 5 hexesAn ordered artillery unit may battle an enemy target that is 5 or fewer hexes awayin any direction. An artillery unit rolls 5 battle dice when the target is in an adjacenthex (see Melee), and 1 die less for each additional hex away from the enemy. Forexample, to battle an enemy that is 5 hexes away in clear terrain, an artillery unitwould roll 1 battle die.Horse Artillery will battle with 4 dice in adjacent hex (see Melee), 3 dice, 2 diceand 1 die at four hex range (4-3-2-1).Horse Artillery may move 2 hexes and not battle or move 1 hex and battle. Alsonote that a Horse artillery unit ordered to move by a Bombard card may not battle.Artillery and Horse Artillery units with only 1 figure battle with 1 die less.Cavalry - Range 2 hexesOptional An ordered cavalry unit may target an enemy unit two hexes away in anydirection, subject to being in line of sight of the firing unit. The base number ofbattle dice rolled in ranged combat when the cavalry unit does not move is equal tothe number of figures in the cavalry unit. When a cavalry unit moves, the unit maynot range fire.General — No range.See Generals in Battle.Battle Cry 150 VariantPage 8
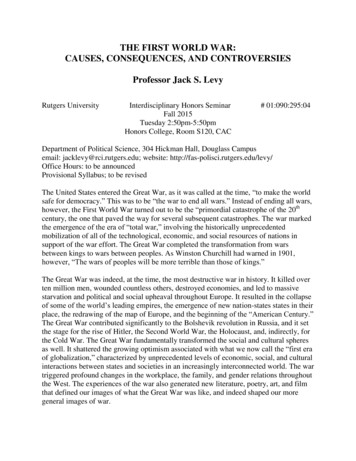
LINE OF SIGHTA unit must be able to see the enemy unit it wants to battle. This is known ashaving line of sight to the enemy.Imagine a line drawn from the center of the hex containing the battling unit to thecenter of the hex containing the enemy target. This line of sight is blocked if a hex(or part of a hex) between the battling unit and the target hex contains anobstruction. Obstructions include a unit or general (regardless if friend or foe) andsome terrain. (See Terrain) The terrain in the target hex does not block line ofsight.If the imaginary line runs along the edge of 1 or more hexes that containobstructions, line of sight is not blocked unless the obstructions are on both sidesof the line.Battle Cry 150 VariantLine of Sight ExampleExample 1: No terrain, units, or generals block line of sight between the unitson the hill hex and clear hex.Example 2: Hill hexes block line of sight on both sides of the line between theunits on the hill and clear hexes.Example 3: The hill does not block line of sight between the two units on thehill hexes. They are part of the same complex of hills to form a plateau. Thehill hex is on only one side of the line of sight to the Zouaves (on the right).Example 4: No terrain, units, or generals block line of sight between the twounits on the hill hexes.Example 5: The Homestead hex only blocks of the line of sight on one side ofline. The hills form a plateau.Example 6: The Homestead hex blocks line of sight between theunit on the hill hex and the clear hex.Example 7: The unit in the clear hex blocks line of sight betweenthe units on the hill hexes.Example 8: Confederate artillery on a hill hex has line of sight overa friendly unit in an adjacent hex at a lower level in a clear hex tothe Union Infantry on the hill hex. The Confederate Infantry uniton the clear hex blocks the Union infantry line of sight to theConfederate artillery on the hill hex.Example 9: The rough terrain hex is blocking the line of sightbetween the two units on the hill hexes.Example 10: Two different pieces of blocking terrain are on bothsides of the line of sight, even though apart.Page 9
Resolving BattlesMELEE COMBATDetermine the total number of battle dice a unit will roll as follows:1.2.3.4.Determine the number of battle dice a unit will roll because of range.Halve for moving Infantry (round up)Reduce the number of dice when targeting a unit on terrain.Add to the number of dice for any command card effects.Example: You play a Leadership tactic card and order a reduced 3 figure infantryunit with an attached general that is targeting an enemy infantry unit 2 hexes awayon a woods hex. First, determine the dice to be rolled based on range, 3 dice, thendeduct the woods protection of –1 die, which equals 2 dice. Then add theLeadership bonus of 1 die for a total of 3 dice.Once you’ve determined how many battle dice to use in a battle, roll the dice. Eachdie rolled will result in a hit, a retreat, or a miss. Hits are resolved first, followed byretreats.Infantry—An ordered infantry unit may stay in position or moveone hex and melee an enemy unit on an adjacent hex. In melee combat, the basenumber of battle dice rolled is equal to the number of figures in the unit, even if theinfantry unit has moved prior to the melee combat.Cavalry—An ordered cavalry unit may stay in position or move3 hexes and melee an enemy unit on an adjacent hex. In melee combat, the basenumber of battle dice rolled is equal to the number of figures in the unit, even if thecavalry unit has moved prior to the melee combat.HitThe attacker scores one hit for each symbol rolled that matches the target unit. (notSabres).Artillery—An ordered artillery unit, which does not move, maytarget an enemy in the adjacent hex in melee. An artillery unit rolls 5 battle dicewhen the target is in an adjacent hex.Horse Artillery will battle with 4 dice in adjacent hexFlagArtillery units with only 1 figure battle with 1 die lessEach flag may cause a retreat (see Retreat rules)MissYou failed to roll any of the symbols needed to hit an enemy target or to force theenemy to retreat.Battle Cry 150 VariantGeneral — No meleeSee Generals in BattlePage 10
HitIn melee combat, the attacker scores 1 hit for each troop symbol rolled thatmatches the target unit and 1 hit for each saber symbol rolled. A saber symbolscores 1 hit regardless of the troop type being targeted. Each flag may cause aretreat (see Retreat rules) Other symbols rolled are a miss.For each hit scored, remove one figure from the target unit. Remove the flagbearer piece last. When the flag bearer (last piece) in the opponent’s unit isremoved, place it on an empty star of the victory stand on your side of thebattlefield.If an attacking player rolls more hits than the number of playing pieces in thedefending unit, the additional hits have no effect.FlagEach flag may cause a retreat (see Retreat rules)MissAttached General: When a General is attached to a unit and the unit loses one ormore figures without being eliminated, there is a chance that the General may alsobe hit. Make a General casualty check by rolling 2 battle dice. To hit the Generaltwo saber symbols must be rolled.A General casualty check must be made when a unit loses a figure from: Ranged CombatMelee CombatFailure to complete a retreat moveOnly one General casualty check is required from a single combat dice roll. Forexample, when a unit with an attached General is attacked and the unit loses oneor more figures from the combat dice rolled, after the combat loss figures areremoved, there is a General casualty check. If the unit is also forced to retreat, butthe unit the General is with cannot complete its entire retreat movement, the unitmust also lose additional figures, another General casualty check is not required,however, because the same combat dice roll caused the retreat figure losses.You failed to roll any of the symbols needed to hit an enemy target or to force theenemy to retreat.Hitting a GeneralA general may only be attacked and hit when alone in a hex.When attacking a general, calculate the number of battle dice to be rolled as usual.The attacking player must then roll at least one sabers symbol. If the roll succeeds,the defending general is eliminated. When you eliminate a defending general,place it on an empty space of the victory stand on your side of the battlefield.GENERAL CASUALTY CHECKYour opponent will always roll for your General Casualty check. When a General ishit, remove the General figure from the battlefield and collect a Victory Banner.Battle Cry 150 VariantAttached General’s Unit Eliminated: When a General is attached to a unit andthe unit loses one or more figures, eliminating the unit and leaving the Generalalone in the hex the General casualty check is made with 1 battle die. To hit theGeneral a saber symbol must be rolled. If the General is not hit, the General mustretreat 1, 2, or 3 hexes. If the General is on a friendly map edge hex, he mustretreat off the map.When a General is attached to a unit that is forced to retreat and the unit has all ofits figures eliminated because it could not complete its retreat movement, theGeneral must retreat from the hex where the last unit figure was removed.When a unit’s retreat is blocked by enemy units and the unit loses its last figure,the General must use “Escape” rules to move through one of the enemy units andreach an open or friendly hex.When a unit loses its last figure at the map edge because it cannot retreat further,the General must retreat off the map edge. A General that retreats off a friendlymap edge hex does not give your opponent a Victory Banner.When a unit loses its last figure because its retreat path is occupied by impassablePage 11
RETREATterrain hexes, the attached General is also eliminated if it too cannot retreat intothe hex. In this instance, the General’s elimination yields a Victory Banner to theopponent.When a unit is eliminated any flags rolled against an eliminated unit have no effecton the General, however the General, after the General casualty check, mustretreat 1, 2, or 3 hexes.When a General’s unit is eliminated in melee combat, the attacking unit may TakeGround into the vacated hex after the General retreats from the hex.Unattached General: A General alone in a hex may not be targeted in rangedcombat but an unattached General may be attacked in melee. When a General isalone in a hex, the attacking enemy unit rolls its normal melee battle dice. One ormore saber symbols rolled will score a hit and eliminate the General, even from aunit that normally does not score a hit on a saber roll in melee combat.If the General is not hit, the General must retreat 1, 2, or 3 hexes.Flags rolled against the General have no effect on the unattached General. Theattacking unit may Take Ground into the vacated hex, after the General retreatsfrom the hex.Bolster MoraleSome situations allow a unit to disregard one or more flags rolled against it.Disregarding a flag result is optional and the owning player may always decide toaccept a flag result. If more than one flag result can be ignored, the owning playercan choose to ignore one (or more) and accept one (or more). A unit may chooseto disregard flags rolled against it each time it is attacked.If more than one of the following situations applies, the effects are cumulative. A unit may disregard one flag when a General is attached to the unit. If the unitloses one or more figures in combat, the General must survive the Generalcasualty check for the unit to ignore the flag.A unit may disregard one flag when supported by two or more friendly units.Support units may be on any hexes that are adjacent to the unit.A General when alone in a hex may act as one adjacent support and can providesupport just as a friendly unit does.Some terrain features will allow a unit defending on the terrain to ignore one flag.See Terrain rule section.After you resolve all hits and remove casualties, then resolve retreats. For eachflag symbol rolled during the battle that cannot be ignored, the defending unit mustretreat 1 hex toward its own edge of the battlefield. Terrain has no effect on retreatmoves; therefore, a retreating unit may move through terrain that normally wouldstop movement. Impassable terrain, however, may not be moved through during aretreat move.The defending player decides to which hex a unit retreats using the following rules: Battle Cry 150 VariantA unit may not retreat onto or through a hex that contains another unit.o Exception 1: A unit, without a general attached, may retreat ontoa hex that contains a friendly unattached general. If a unitretreats onto a hex with a friendly general, the unit must stopand the general attaches to that unit. The unit will ignore anyother retreat flag symbols rolled by the attacker and may notretreat any further.o Exception 2: A general may retreat through a hex with a friendlyunit or general. A general may retreat onto a hex that contains afriendly unit as long as the unit does not already have anPage 12
attached general. After completing all retreat moves required, ifthe general is in a hex with a friendly unit, it is consideredattached to that unit. Any unit on a hex that a general passesthrough during his retreat move is unaffected.A unit with an attached general may not retreat onto a hex that containsanother friendly general.An attached general must retreat with its unit to the same hex. If the unitis eliminated in battle, the general must make any retreat moves required.If a unit can’t retreat because of reaching the edge of the battlefield, or ifother units (friend of foe) or impassable terrain blocks the retreat, theplayer of the retreating unit eliminates one figure in the retreating unit foreach retreat flag move that can’t be completed. Such losses may includean attached general if there are no other figures available to be taken ascasualties.If a general can’t retreat because of reaching the edge of the battlefield,or if enemy units or impassable terrain blocks its retreat, the general iseliminated.General’s RetreatGenerals retreat somewhat differently from units. A General’s retreat movement is1, 2, or 3 hexes back towards its own side of the battlefield, the owning player’sc
The game board represents a battlefield and is divided into three sections by two dotted lines—giving each player a left flank section, a center section, and a right flank section. Where a dotted line cuts through a hex, the hex is part of both the flank section and the center se