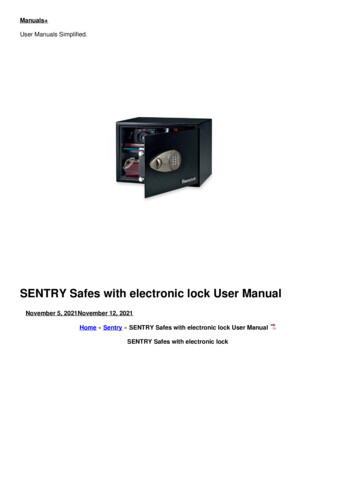
Transcription
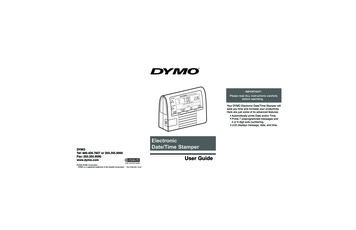
Date/Time StaIMPORTANT!mperPlease read ALL instructions carefullybefore operating.LOCKTIMEDATESHIFTMALARMODERITSECU ECODYSET/EDITPRINTCTSELEElectronicDate/Time StamperDYMOTel: 800.426.7827 or 203.355.9000Fax: 203.355.9090www.dymo.comUser GuideDYMO, AN ESSELTE BRAND 2000 DYMO Corporation.DYMO is a registered trademark of the Esselte Corporation.GEMESSAFILEPart 47000-003 04.00Your DYMO Electronic Date/Time Stamper willsave you time and increase your productivity.Here are just some of its advanced features: Automatically prints Date and/or Time. Prints 7 preprogrammed messages and4 or 6 digit auto-numbering. LCD displays message, date, and time.
Usage TipsTo maintain your stamper at peak operatingperformance, please follow these guidelines:1. Do not touch the printer head or belt whenthe unit is printing. This will cause the printerto malfunction and require servicing.2. Immediately replace LCD display cell-batteryif the BATT indicator lights up on the LCD.3. If printer speed slows down, replace all 4 AAbatteries. Operating the unit with lowbatteries will damage the printer.4. Always cover the battery compartment beforeprinting.5. Keep unit away from moisture6. Avoid placing unit in direct sunlight.16Table of ContentsGetting StartedSetting Date & TimeStamping/Printing OptionsSelecting which fields to printAuto-numberingHow to lock Auto-numberingAlarm FunctionSetting The AlarmDeactivating the AlarmUsing the Security CodeSetting the Security CodeDisabling the Security CodeMaintenance and TroubleshootingHow to refill the ink rollPrinter Error/ResetLow Cell-Battery DetectionUsage Tips6789101111111212121313131415165
Getting Startedshuttle to return tothe startposition.4. The unit is now ready for use.1. Open thebattery compartmentas shown.(figure 2)If the unit does not reset, verify that the print beltshuttle(bottom of unit) is not jammed and slidesfreely across belt (use ball point pen). Repeatsteps 1-4 above.MADECHINAINLow Cell Battery Detectionfigure 2Your DYMO Electronic Date/Time Stamperautomatically checks itself every hour to detect a lowdisplay battery (3-volt Lithium battery). If displaybattery level is low BATT will turn on in the LCD.2. To activate printingfunctions, insert4 AA batteries. (figure 3)INTETRR OPEN PR3. To activate theLCD display, openthe lithium cellbattery door byusing a small coin(see figure 3) anddiscard the red safety ribbon.Make sure the battery’s positive( ) sign is facing up and close thebattery door using a small coin andtwisting it in a clockwise direction. Ifthe LCD is flashing P-RESET, use aballpoint pen to reset the unit (figure 4).ESE3.0 VOLTMADE INCHINA"AA" UM-3 1.5V6figure 3IMPORTANT! If the BATT indicator appears,replace the 3-volt lithium cell batteryimmediately.DO NOT OPERATE UNIT ON LOW BATTERYFOR PROLONGED PERIODS, THIS MAYCAUSE DAMAGE TO YOUR UNIT.15
3. Apply a few dropsof ink-pad ink onto theroll, then carefully insert the roll back intoproper position inside the unit. Or simplyinsert a new Ink Roller (DYMO SKU 47001)4. Replace the ink roll compartment door.Printer Error/Reset (P-RESET)If the AA batteries are weak or there is a printererror the LCD will start flashing P-RESET. Theunit will not print while P-RESET is flashing.RINTE4. Snap the battery door backinto place."AA" UM-3 1.5VESE3.0 VOLT"AA" UM-3 1.5V5. Remove and discard theclear protective cover fromthe bottom of the unit.Setting Date and Time1. To set the current date and time, press andhold down the SET/EDIT button for 2 seconds,let go and the Month (M) and Day (D) indicatorswill start flashing.If no other key is pressed for 10 seconds,the unit will revert back to normal display.2. While the Month(M) and Date (D) indicators areflashing press the LOCK button to cyclethrough the 3 available date formats.1. Open the battery compartment inback of the unit.2. Press the PRINTERRESET button using aball point pen (see Figure figure 77 below).3. Listen for the unit to beepand the printer belt and3. Once you have chosen an appropriate dateformat, press the SHIFT button to switchbetween each of the different DATE, MONTH,YEAR, HOUR and MINUTE fields. The field thatis currently active will start flashing. To changea field’s value press the LOCK button, eachstroke of the Lock button moves one value up.INTE"AA" UM-3 1.5VTRR PRTo reset the printer follow instructions belowOPENESE3.0 VOLT14 PROPENR figure 6figure 4Tor a paper clip torotate the ink rollcounter-clockwise andpull it out of the unit.(see Figure 6)"AA" UM-3 1.5V7
NOTE: If you go past the current year, you willneed to press the LOCK button to cyclethrough the year 2189, and back up tothe current year.4. Once you are finished setting the Date andTime press the SET/EDIT button to return tonormal display.5. The Date/Time Stamper is now ready to print.The stamper will print the current date, time,and message as displayed.The IN message is printed by default. To select adifferent message press the SHIFT button tocycle through the 7 available messages.1. Press and hold the Security Code button for2 seconds.2. Press LOCK to set the first digit of the code,then SHIFT to move on to the next digit.Repeat this step until all digits of the codeare entered.3. Press SECURITY CODE to return to normaldisplay, and if the "key" icon will disappear.NOTE: If the incorrect security code is entered,until will prompt the user to re-entercode. The user has 3 tries to enter code.If you have forgotten the code, removethe batteries to reset.Maintenance and TroubleshootingStamping / Printing OptionsHow to refill the Ink RollIf you want to customize which fields yourstamper prints, follow the instructions below.pere StamDate/TimLOCKDATESHIFTREMINDER: Whenever the unit is in"program mode" and a button is not pressedfor 10 seconds, the unit will revert to ESET/EDITPRINTSELECT1. Remove the ink rollcompartment door.(see Figure 5)2. Use a pair of tweezersfigure 513
pattern press the ALARM MODE button tofinish print programming and return to normaldisplay.Auto-numberingYour Date/Time Stamper allows you to use either4 or 6 digit auto numbering Follow theinstructions below for setup:1. Press and hold the PRINT SELECT button for2 seconds, the DATE field will start flashing.2. Press the PRINT SELECT button until either 4or 6-digit auto-numbering is flashing and usethe SET/EDIT button to turn the rectangle on.3. Press the LOCK button to set the first digit.Once the first digit is set, press the SHIFTbutton and once again press the LOCK buttonto set the second digit. Follow this pattern untilall digits are correct.If you chose 4-digit auto numbering, the counterwill only count up. If you chose 6-digit autonumbering you can have the stamper count up ordown, depending on the arrow that was flashingwhen you selected 6-digit auto numbering.4. Press the ALARM MODE button to return tonormal display.How to lock Auto-numberingTo prevent the counter from automaticallyadvancing to the next sequential number aftereach printing, press the LOCK button. TheCNTLOCK indicator will appear on the LCD. Todeactivate, press the LOCK button again andthe CNTLOCK indicator will disappear.Alarm FunctionSetting the Alarm1. Press the ALARM MODE button. The Alarmindicator will start flashing.2. Press LOCK to activate the alarm icon(bell will appear).3. Press SET/EDIT while the alarm indicator isstill flashing and hour digit will begin to flash.4. Press LOCK to set hour, once the hour is setpress SHIFT and press LOCK to set theminute.5. Press the ALARM MODE button to lock-inthe alarm setting.NOTE: When alarm sounds, the Date/Time1011
Selecting which fields to printStamper will emit a series of shortbeeps. To shut off the alarm, pressALARM MODE.Deactivating the alarm1. Press ALARM MODE, then press LOCK sothe "bell" icon will disappear.2. Press ALARM MODE to return to normaldisplay.Using the Security CodeSetting the Security Code1. Press and hold the Security Code button for 2seconds.2. Press LOCK to set the first digit, then SHIFTto move on to the next digit. Repeat this stepuntil all digits are set.3. Press SECURITY CODE to return to normaldisplay. A "key" icon will appear, locking thecode in.Disabling the Security Code121. Press the PRINT SELECT button for 2seconds, the DATE field will start flashing2. By pressing the SET/EDIT button you canturn the rectangle surrounding the DATE fieldon or off. If you wish to print the date, makesure the rectangle is on.3. To move on to the next field press thePRINT SELECT button, and repeat instruction2 for each subsequent field.4. Your DYMO Electronic Date/Time Stampercan print any combination of the followingitems: Date, Time, Message [IN, OUT, PAID,REF, CFMD, RCVD] To select a differentmessage, press the SHIFT key while innormal display.OR 4-digit counter any of the two fieldsabove(4-digit counter will count up only)OR 6-digit counter one of the fields above(6-digit counter will count up or down)OR 4 or 6-digit counter alone.5. Once you have selected your stamping9
In program mode, allows you to changethe value of all available fields.Date/Time StamperLOCKSHIFTPress to change messageto be printed. In programmode, allows you to navigatebetween the available fields.DATE TIME TPress toselect messageto be printed.Press todisplay timealarm willsound.Allows youto set securitycode.Allows youto enterprogram mode.www.dymo.com
4-digit counter any of the two fields above (4-digit counter will count up only) OR 6-digit counter one of the fields above (6-digit counter will count up or down) OR 4 or 6-digit counter alone. 5. Once you have selected your stamping Stamper will emit a series of short beeps.To shut off the alarm, press ALARM MODE. Deactivating .