Transcription
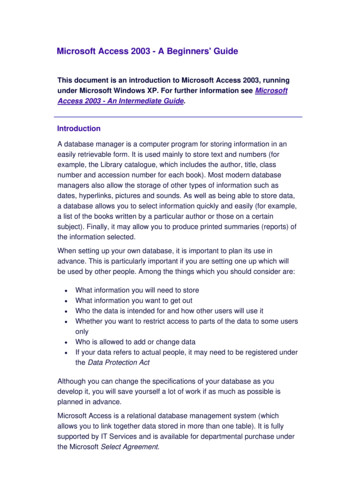
file:///C e/Access%202007/PA M30 Step%201.htmlApplication of Skills:Microsoft Access 2007 TutorialThroughout this module, you will be prompted to enter information into a database. You will continue toadd to this database through a series of steps . You should keep a digital and printed copy of thecompleted database for your own files, then submit the digital document for review in STAR-Online.The use of bullets indicate the exact actions you need to perform tocomplete the module.Red bolded words indicate specific parts of the program you will useto complete the step.Green italicized words indicate exact text or numbers you will type inthe document.Green Underlined, italicized words are prompts for you to typeindividual information in the document.Step 1Open Access. Click on the Start button in the lower left hand corner of screenSelect All Programs Microsoft Office Microsoft Access 2007 or If there is an Access shortcut on thedesktop, double-click the Microsoft Access icon.Create New Blank Database.file:///C e/Access%202007/PA M30 Step%201.html (1 of 4)4/2/2009 3:23:31 PM
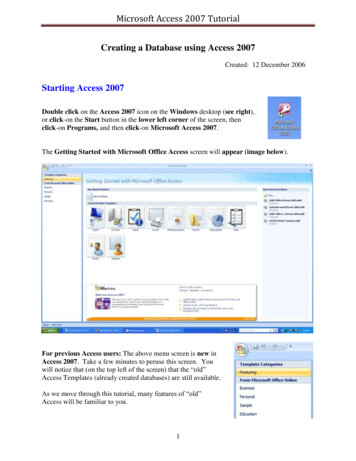
file:///C e/Access%202007/PA M30 Step%201.htmlWhen Access is opened, the Getting Started with Microsoft Office Access window is displayedClick HERE to view the image larger. Click the Blank Database button toward the top of the windowfile:///C e/Access%202007/PA M30 Step%201.html (2 of 4)4/2/2009 3:23:31 PM
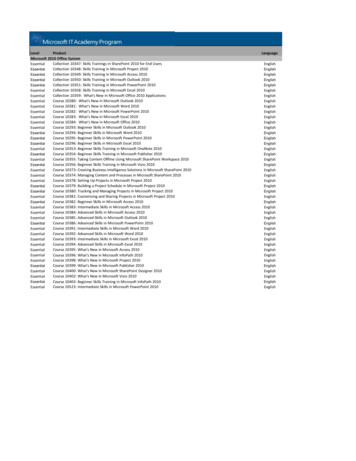
file:///C e/Access%202007/PA M30 Step%201.html A new Blank Database pane will open on the rightside of the window In the File Name: field, type Your last nameDatabaseMaintain the .accdb extension. Click the Open folder icon to be sure you are savingthe database in My Documents Click the Create buttonThe Database Window will now be viewable with a blank Table with ID and New Field available forimmediate use.file:///C e/Access%202007/PA M30 Step%201.html (3 of 4)4/2/2009 3:23:31 PM
file:///C e/Access%202007/PA M30 Step%201.htmlClick HERE to view the larger image.Exit the database. Click the OfficeButtonin thetop left corner of thewindowClick the Exit Accessbutton at the bottomof the menufile:///C e/Access%202007/PA M30 Step%201.html (4 of 4)4/2/2009 3:23:31 PM
file:///C e/Access%202007/PA M30 Step%202.htmlStep 2In Microsoft Access, data is organized in tables to minimize duplication of information. To use Access successfully, you must plan ahead to determine thenecessary tables in the database and the required data (fields) within each table.The best way to decide on the amount of tables needed is to think of the word “about”. You will need a table “about” this subject and another table “about” thissubject, and so on until all your subjects are determined. A table is then created for each subject. Fields are then added to each table based on how you planto use the data.Open Access. Click the Start button in the lower left hand corner of screenSelect All Programs Microsoft Office Microsoft Office Access 2007 or click the Microsoft Access shortcut icon on the desktop if viewableOpen saved database. In the Open Recent Database area, click the database you created in Step 1: Your last name Database.accdbfile:///C e/Access%202007/PA M30 Step%202.html (1 of 6)4/2/2009 3:23:32 PM
file:///C e/Access%202007/PA M30 Step%202.htmlClick HERE for a larger view. If you have a Security Warning appear below the Ribbon, click the x in the top right corner of that area to close it.Create a table. Click the Create tab in the Ribbon at the top of the windowClick the Table buttonfile:///C e/Access%202007/PA M30 Step%202.html (2 of 6)4/2/2009 3:23:32 PM
file:///C e/Access%202007/PA M30 Step%202.htmlTable1 should be viewable with an ID column and an Add New Field column.Add new fields. In Table 1, click on the Add New Field column to select itClick the New Field button in the Datasheet tab of the RibbonScroll down and locate the Contacts area of the Field Templates pane whichis now viewable on the right hand side of the windowfile:///C e/Access%202007/PA M30 Step%202.html (3 of 6)4/2/2009 3:23:32 PM
file:///C e/Access%202007/PA M30 Step%202.html Double click (click twice quickly) on First NameFirst Name column will now be viewable in Table1 in front of the Add New Field column.file:///C e/Access%202007/PA M30 Step%202.html (4 of 6)4/2/2009 3:23:32 PM
file:///C e/Access%202007/PA M30 Step%202.html DoubleDoubleDoubleDoubleDoubleDouble Click the x in the Field Templates pane to close the pane clickclickclickclickclickclickLast Name to add the field name and column to the tableAddressCityState/ProvinceZip/Postal CodeHome PhoneThere should now be 7 new columns with defined field names in the table, resembling the example below.Save and close the table. Click the black x in the top right hand corner of Table1 to close the tableDo not close Access. Click Yes when prompted to save Table1In the Save As window, type Students in the Table Name: field Click the OK button You should be returned to the Database Window and Students is now listed as a table.file:///C e/Access%202007/PA M30 Step%202.html (5 of 6)4/2/2009 3:23:32 PM
file:///C e/Access%202007/PA M30 Step%202.htmlfile:///C e/Access%202007/PA M30 Step%202.html (6 of 6)4/2/2009 3:23:32 PM
file:///C e/Access%202007/PA M30 Step%203.htmlStep 3Open table.In the All Tables area of theDatabase window, double click onStudents: TableInsert new column. Click on the Column Heading forAddressIn the Datasheet TableToolstab in the Ribbon, clickthe Insert button locatedwithin the Fields & ColumnsgroupRename field. Right click on the Field1heading at the top of thecolumn that is now viewablebetween Last Name andAddress in the tableClick Rename Column at thebottom of the menuType Parents Names in thecolumn fieldEnter data in the table in Datasheet View.file:///C e/Access%202007/PA M30 Step%203.html (1 of 3)4/2/2009 3:23:32 PM
file:///C e/Access%202007/PA M30 Step%203.htmlBy choosing to enter data directly into the table in the previous step, the table opens automatically in Datasheet View; that is,the data on the screen is displayed as a table. Click the cursor in the first cell under the First Name columnIn the First Name cell, type your First NameID is defined as AutoNumber so Access will automatically fill in the IDnumbers as you add records to the table. Once you begin typing, the IDshould change to “1”.It is acceptable if Access inserts a 2, 3, or other number in this field.Please make note of this for data input on your next table because theID numbers must match. Press the Enter key to move the cursor to the right one cellIn the Last Name cell, type your Last NamePress the Enter key to move the cursor to the right one cellIn the Parents Names cell, type your Parents NamesPress the Enter keyIn the Address cell, type your Home/Permanent AddressPress the Enter key to move the cursor to the right one cellIn the City cell, type your Home/Permanent CityPress the Enter key to move the cursor to the right one cellIn the State/Province cell, type your Home/Permanent StateUse the two letter state abbreviation. If Illinois, type IL Press the Enter key to move the cursor to the right one cellIn the Zip/Postal Code cell, type your Home/Permanent City’s Zip CodePress the Enter key to move the cursor to the right one cellIn the Phone Number cell, type your Home/Permanent Phone NumberPress the Enter key to move the cursor to the next rowType just the numbers without dashes or (). You will change the data type in a futurelesson.Close the table. Click the black x in the top right hand corner of Students to close the tableDo not close Access.file:///C e/Access%202007/PA M30 Step%203.html (2 of 3)4/2/2009 3:23:32 PM
file:///C e/Access%202007/PA M30 Step%203.html Click Yes if prompted to save StudentsYou should be returned to the Database Window and Students is now listed as a table.file:///C e/Access%202007/PA M30 Step%203.html (3 of 3)4/2/2009 3:23:32 PM
file:///C e/Access%202007/PA M30 Step%204.htmlStep 4Open table Datasheet View. In the All Tables area of the Database window, double click onStudents: TableAdd records to current table.The data is displayed as a table and your record should be viewable in the first row. Click the cursor in the second row, First Name cellType a friend’s first namePress the Enter key to move the cursor to the right one cellType a friend’s last namePress the Enter key to move the cursor to the right one cellfile:///C e/Access%202007/PA M30 Step%204.html (1 of 2)4/2/2009 3:23:33 PM
file:///C e/Access%202007/PA M30 Step%204.html Complete the record by typing in the appropriate information in the cellsClick the cursor in the third row, First Name cellType another friend’s first namePress the Enter key to move the cursor to the right one cellType another friend’s last namePress the Enter key to move the cursor to the right one cellComplete the record by typing in the appropriate information in the cellsType information for 7 more people using the same techniques you performed in the first three records for a total of 10 complete records in the tableUse the ID number as a guide to the number of records in the table or check the record status in the navigationbuttons located at the bottom of the table.file:///C e/Access%202007/PA M30 Step%204.html (2 of 2)4/2/2009 3:23:33 PM
file:///C e/Access%202007/PA M30 Step%205.htmlStep 5Adjust column width. Move the cursor over the right side column divider (straight line) of Parents NamesThe cursor will change to a black line with arrows going leftand right. Click on the line and drag the column to the right until the longest of the Parents Names is displayed in the columnAdd a new record to the table. Click cursor in any cell in the Students tableIn the navigation area at the bottom of the window, click the New (blank) Record button(New) will be highlighted in Row 11 Press the Enter key to move the cursor to the right one cell (First Name for Row 11)Type a sibling’s (or family member) first namePress the Enter key to move the cursor to the right one cellType a sibling’s (or family member) last nameDo not add any more information to this recordCopy selected data in the table.file:///C e/Access%202007/PA M30 Step%205.html (1 of 3)4/2/2009 3:23:33 PM
file:///C e/Access%202007/PA M30 Step%205.html Move cursor to the left edge of the cell where the first row and Parents Names column meet; the cursor needs tobe the blocked white t shapeThis is your record with your parent’s names. Click, hold, and drag mouse to the right to highlight the cells for Parents Names, Address, City, State/Province,ZIP/Postal Code, and Home Phone are highlighted in light grayClick the Copy buttonin the Home tab in the Ribbon at the top of the windowInsert copied data (paste) at insertion point. Move cursor to the left edge of the cell where the 11th row and Parents Names column meet; the cursorneeds to be the blocked white t shapeThis is your sibling’s or family member’s record. Click, hold, and drag mouse to the right to highlight the cells for Address, City, State/Province, Zip/Postal Code,and Home Phone are highlighted in light grayClick the Pastebutton in the Home tab in the Ribbon at the top of the windowfile:///C e/Access%202007/PA M30 Step%205.html (2 of 3)4/2/2009 3:23:33 PM
file:///C e/Access%202007/PA M30 Step%205.htmlEdit information in a record. Move cursor to the left edge of the cell where the first row and Address column meet; the cursor needs to bethe blocked white t shapeThis is your record with your permanent address. Click the cursor on the cell to highlight your permanent addressType your Current School AddressDo not change this record if your permanent address is thesame as your current address. You will not complete thefollowing steps. Press the Enter key to move the cursor to theType your Current School CityPress the Enter key to move the cursor to theType your Current School State/ProvincePress the Enter key to move the cursor to theType your Current School Zip/Postal CodePress the Enter key to move the cursor to theType your Current School Home Phoneright one cellright one cellright one cellright one cellType just the numbers without dashes or () for the homephone number. You will change the data type in a futurelesson.file:///C e/Access%202007/PA M30 Step%205.html (3 of 3)4/2/2009 3:23:33 PM
file:///C e/Access%202007/PA M30 Step%206.htmlStep 6Add a new field (and column) to the table in Design View.In a table, Design View allows you to add, define, and edit the fields in the table. Click the down arrow to the right of the View buttonTable Tools tab)Click Design Viewin the Home tab (it is also located in the DatasheetClick cursor in the empty cell under HomePhoneType Sports? in the cellfile:///C e/Access%202007/PA M30 Step%206.html (1 of 5)4/2/2009 3:23:33 PM
file:///C e/Access%202007/PA M30 Step%206.html Click the down arrow to the right of theView button in the Design Table Toolstab now viewable in the RibbonClick Datasheet ViewClick Yes if prompted to save the tableThe Sports? column has been added after Home Phone to the end of your table.Create a lookup for the Sports? field.A lookup field can be created to limit the data entered into the field to a selection from a fixed set of values. Click the down arrow to the right of the View buttonTable Tools tab)Click Design Viewin the Home tab (it is also located in the Datasheetfile:///C e/Access%202007/PA M30 Step%206.html (2 of 5)4/2/2009 3:23:33 PM
file:///C e/Access%202007/PA M30 Step%206.html Click the cursor in the Sports? and Data Type cellClick the down arrow on the right side of the cell withText in itClick Lookup WizardIn the Lookup Wizard window, click the radio button in front of I will type in the values that I wantClick the Next button at the bottom of the windowfile:///C e/Access%202007/PA M30 Step%206.html (3 of 5)4/2/2009 3:23:33 PM
file:///C e/Access%202007/PA M30 Step%206.html Maintain 1 in the Number ofColumns fieldIn the values area of the window,click the cursor in the first cell underCol1Type yesPress the Tab key to move cursorone cell below yesType noClick the Finish button at thebottom of the windowClick the down arrow to the right of the View button in the Design Table Tools tab now viewable in the RibbonClick Datasheet Viewfile:///C e/Access%202007/PA M30 Step%206.html (4 of 5)4/2/2009 3:23:33 PM
file:///C e/Access%202007/PA M30 Step%206.html Click Yes at the prompt to save the tablefile:///C e/Access%202007/PA M30 Step%206.html (5 of 5)4/2/2009 3:23:33 PM
file:///C e/Access%202007/PA M30 Step%207.htmlStep 7Add lookup values to table in Datasheet View. Click cursor in the cell where the first row and Sports? column meet; the cursor needs to be aflashing IThis is your record with your information. Click the down arrow that appears on the right side of the cellClick yesClick cursor in the cell where the second row and Sports? column meet; the cursor needs to be aflashing IClick noContinue to add either a yes value or no value to each of the remaining recordsProvide a mix of these values in the table; do not assign all records witheither all yes values or all no values.Using Input Mask Wizard, specify that a field will display a telephone format.file:///C e/Access%202007/PA M30 Step%207.html (1 of 4)4/2/2009 3:23:34 PM
file:///C e/Access%202007/PA M30 Step%207.htmlAn input mask is used in fields to format data and provide some control over what values can be entered. Click the down arrow to the right of the View buttonClick Design Viewin the Standard ToolbarClick cursorin the HomePhone andData TypecellIn the FieldPropertiesarea belowthe FieldName andfile:///C e/Access%202007/PA M30 Step%207.html (2 of 4)4/2/2009 3:23:34 PM
file:///C e/Access%202007/PA M30 Step%207.html Data Typecolumns,click thefield next toInput MaskClick theBuild buttonnext tothe InputMask field Click Yes if prompted to save thetable firstIn the Input Mask area of theInput Mask Wizard window, clickPhone NumberClick the Finish button at thebottom of the windowfile:///C e/Access%202007/PA M30 Step%207.html (3 of 4)4/2/2009 3:23:34 PM
file:///C e/Access%202007/PA M30 Step%207.html Click the down arrow to the right ofthe View button in the StandardToolbarClick Datasheet ViewClick Yes at the prompt to save thetablefile:///C e/Access%202007/PA M30 Step%207.html (4 of 4)4/2/2009 3:23:34 PM
file:///C e/Access%202007/PA M30 Step%208.htmlStep 8Format the table. In the Home tab, click the down arrow to the immediate right of the Font: window andselect Times New RomanIn the Size: window, click the down arrow and select 14Save the table. Click the Save buttonin the Quick Access ToolbarChange orientation to landscape.file:///C e/Access%202007/PA M30 Step%208.html (1 of 5)4/2/2009 3:23:34 PM
file:///C e/Access%202007/PA M30 Step%208.html Click the Office Buttonin the top leftcorner of thewindowLocate the Printoption in themenu, and thenclick PrintPreview Click theLandscapebutton in thePrint Previewtabfile:///C e/Access%202007/PA M30 Step%208.html (2 of 5)4/2/2009 3:23:34 PM
file:///C e/Access%202007/PA M30 Step%208.html Click the Close Print Preview buttonPreview tabin the right corner of the PrintPrint a copy of the table. Click the OfficeButtonin the top leftcorner of thewindowLocate the Printoption in themenu, and thenclick Printfile:///C e/Access%202007/PA M30 Step%208.html (3 of 5)4/2/2009 3:23:34 PM
file:///C e/Access%202007/PA M30 Step%208.html In the Printwindow, click theOK buttonTo printmultiplecopies ofthe table,click theup ordownarrow inthe copiesarea of thePrintwindow toplace thedesignatednumber ofcopies inthewindow.Close the data table without closing Access. Click the black x in the top right hand corner of the Students: Table Click the Yes button if prompted to save the tableYou should be returned to themain Database Window.Change the name of data table.file:///C e/Access%202007/PA M30 Step%208.html (4 of 5)4/2/2009 3:23:34 PM
file:///C e/Access%202007/PA M30 Step%208.html In the All Tables Menu ofthe Database window,right click on Students:TablesClick Rename in themenu that appearedWith Studentshighlighted, type StudentInformationClick in the white area todeselect the textfile:///C e/Access%202007/PA M30 Step%208.html (5 of 5)4/2/2009 3:23:34 PM
file:///C e/Access%202007/PA M30 Step%209.htmlStep 9Search a table for a particular word. In the All Tables Menu of the Database window, click theTables buttonDouble click Student Information in the list box to open thetableClick the Find button in the Home tab In the Find and Replace window, type your Last Name in the Find what: fieldIn the Look In: field, click the down arrow and select Student Information: Table In the Match: field, click the down arrow and select Any Part of the Field file:///C e/Access%202007/PA M30 Step%209.html (1 of 3)4/2/2009 3:23:35 PM
file:///C e/Access%202007/PA M30 Step%209.htmlThis allows the search to find the word even if it is not the only word in the field. In the Search: field, maintain AllDo not click the box in front of Match CaseThis allows the search to find the word if it appears in capital or lower case letters. Click the Find Next buttonThe first match will be highlighted in black on the table. Continue to click the Find Next button until Microsoft Office Access indicates has finished search the recordsClick the OK buttonClose the Find and Replace window by clicking the white X in the red box in the top right corner of the windowClose the data table without closing Access.file:///C e/Access%202007/PA M30 Step%209.html (2 of 3)4/2/2009 3:23:35 PM
file:///C e/Access%202007/PA M30 Step%209.html Click the black x in the top right hand corner of the Students: Table Click the Yes button if prompted to save the tableYou should be returned to the Database Window.file:///C e/Access%202007/PA M30 Step%209.html (3 of 3)4/2/2009 3:23:35 PM
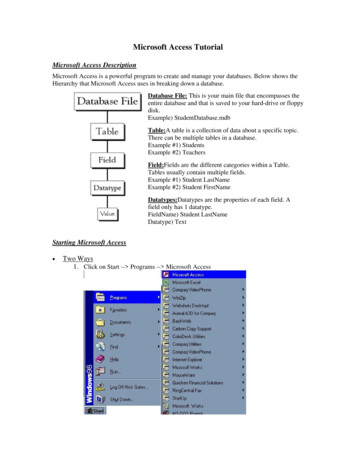
file:///C e/Access%202007/PA M30 Step%2010.htmlStep 10Create a second table for student grades in Design View.You will create another table using the same field names and student names from theStudent Information table.Use your printed Student Information table as a reference for the Field Namesin this section. Click the Create tab in the Ribbonat the top of the windowClick the Table Design buttonA blank Design view window will open.file:///C e/Access%202007/PA M30 Step%2010.html (1 of 4)4/2/2009 3:23:35 PM
file:///C e/Access%202007/PA M30 Step%2010.htmlClick HERE to view the larger image. In the first Field Name cell, type IDYou must type this exactly as it is on your StudentInformation table. Press the Enter key to move the cursor to the Data Type columnPress the down arrow in the Data Type column and select Numberfile:///C e/Access%202007/PA M30 Step%2010.html (2 of 4)4/2/2009 3:23:35 PM
file:///C e/Access%202007/PA M30 Step%2010.html Click the cursor in the second row, Field Name cellType First NameYou must type this exactly as it is on your StudentInformation table. Press the Enter key to move the cursor to the Data Type columnMaintain Text in the Data Type columnPress the Enter key twice to move the cursor to the third row, Field Name cellType Last NameYou must type this exactly as it is on your StudentInformation table. Press the Enter key to move the cursor to the Data Type columnMaintain Text in the Data Type columnPress the Enter key twice to move the cursor to the fourth row, Field Namecellfile:///C e/Access%202007/PA M30 Step%2010.html (3 of 4)4/2/2009 3:23:35 PM
file:///C e/Access%202007/PA M30 Step%2010.html Type GradePress the down arrow in the Data Type column and select NumberClick the cursor in the fifth row, Field Name cellType Calendar DatePress the Enter key to move the cursor to the Data Type columnMaintain Text in the Data Type columnfile:///C e/Access%202007/PA M30 Step%2010.html (4 of 4)4/2/2009 3:23:35 PM
file:///C e/Access%202007/PA M30 Step%2011.htmlStep 11Display field as date rather than text.Click cursor in the Calendar Date (fifth row) and Data Type cellPress the down arrow in the Data Type column and select Date/Time Specify that the date field will display only the date without time. Click cursor back in the Date (fifth row) and Date Type cellThe Data Type should be Date/Time. If it does not state correctly, press the down arrow inthe Data Type column and select Date/Time. In the Field Properties area below the Field Name and Data Type columns, click the cursor in the Format fieldClick the down arrow and select Short Datefile:///C e/Access%202007/PA M30 Step%2011.html (1 of 4)4/2/2009 3:23:35 PM
file:///C e/Access%202007/PA M30 Step%2011.htmlSpecify percentage for number format. Click cursor in the Grade (fourth row) and Date Type cellThe Data Type should be Number. If it does not state correctly, press the down arrow in theData Type column and select Number. In the Field Properties area below the Field Name and Data Type columns, click in the Field Size fieldClick the down arrow and select DoubleClick the cursor in the Format field (field below Field Size)Click the down arrow and select Percentfile:///C e/Access%202007/PA M30 Step%2011.html (2 of 4)4/2/2009 3:23:35 PM
file:///C e/Access%202007/PA M30 Step%2011.htmlAccess will multiply the number by 100 to calculate percent. When entering numbers in thisfield, type the number as a decimal to be multiplied by 100 (i.e. type .98 in the field; Access willchange the number to 98%). Click the cursor in the Decimal Places field (field below the Format field) containing AutoClick the down arrow and select 0Specify the primary key for the table.file:///C e/Access%202007/PA M30 Step%2011.html (3 of 4)4/2/2009 3:23:35 PM
file:///C e/Access%202007/PA M30 Step%2011.htmlIn a table, at least one field must be unique so that one record can be distinguished from another. A primary key is the fieldidentified as the unique value in the table Click cursor in the first row, Field Name cell containing IDClick the Primary Key button in the Standard Toolbar The ID field is now identified as the Primary Key by the placement of the key icon in the row header Close and save the student grades table. Click the black x in the top right corner of the table window In the Table Name: field of the Save As window, type Grades Click the OK buttonfile:///C e/Access%202007/PA M30 Step%2011.html (4 of 4)4/2/2009 3:23:35 PM
file:///C e/Access%202007/PA M30 Step%2012.htmlStep 12Close Design View without closing Access.You should be returned to the Database Window with 2 tables now viewable:Student Information and Grades.Exit Access. Click the Office ButtonClick the Exit Access button in the lower right corner of the menufile:///C e/Access%202007/PA M30 Step%2012.html (1 of 2)4/2/2009 3:23:35 PM
file:///C e/Access%202007/PA M30 Step%2012.htmlfile:///C e/Access%202007/PA M30 Step%2012.html (2 of 2)4/2/2009 3:23:35 PM
file:///C e/Access%202007/PA M30 Step%2013.htmlStep 13Open Access. Click on the Start button in the lower left hand corner of screenSelect All Programs Microsoft Office Microsoft Access 2007 or click the Microsoft Access shortcut icon on the desktop if viewableOpen a saved database. In the Open Recent Database area, click the database you created in Step 1: Your last name Dat
Select All Programs Microsoft Office Microsoft Office Access 2007 or click the Microsoft Access shortcut icon on the desktop if viewable Open saved database. In the Open Recent Database area, click the database you created in Step 1: Your last name Database.accdb