Transcription
Autodesk Architectural DesktopMetric Tutorial2005April 2004
Copyright 2004 Autodesk, Inc.All Rights ReservedThis publication, or parts thereof, may not be reproduced in any form, by any method, for any purpose.AUTODESK, INC., MAKES NO WARRANTY, EITHER EXPRESS OR IMPLIED, INCLUDING BUT NOT LIMITED TO ANY IMPLIEDWARRANTIES OF MERCHANTABILITY OR FITNESS FOR A PARTICULAR PURPOSE REGARDING THESE MATERIALS, ANDMAKES SUCH MATERIALS AVAILABLE SOLELY ON AN "AS-IS" BASIS.IN NO EVENT SHALL AUTODESK, INC., BE LIABLE TO ANYONE FOR SPECIAL, COLLATERAL, INCIDENTAL, ORCONSEQUENTIAL DAMAGES IN CONNECTION WITH OR ARISING OUT OF PURCHASE OR USE OF THESE MATERIALS. THESOLE AND EXCLUSIVE LIABILITY TO AUTODESK, INC., REGARDLESS OF THE FORM OF ACTION, SHALL NOT EXCEED THEPURCHASE PRICE OF THE MATERIALS DESCRIBED HEREIN.Autodesk, Inc., reserves the right to revise and improve its products as it sees fit. This publication describes the state of this product at thetime of its publication, and may not reflect the product at all times in the future.Autodesk TrademarksThe following are registered trademarks of Autodesk, Inc., in the USA and/or other countries: 3D Props, 3D Studio, 3D Studio MAX, 3DStudio VIZ, 3DSurfer, ActiveShapes, ActiveShapes (logo), Actrix, ADI, AEC Authority (logo), AEC-X, Animator Pro, Animator Studio, ATC,AUGI, AutoCAD, AutoCAD LT, AutoCAD Map, Autodesk, Autodesk Inventor, Autodesk (logo), Autodesk MapGuide, Autodesk University(logo), Autodesk View, Autodesk WalkThrough, Autodesk World, AutoLISP, AutoSketch, Biped, bringing information down to earth, CADOverlay, Character Studio, Cinepak, Cinepak (logo), Codec Central, Combustion, Design Your World, Design Your World (logo), Discreet,EditDV, Education by Design, gmax, Heidi, HOOPS, Hyperwire, i-drop, Inside Track, Kinetix, MaterialSpec, Mechanical Desktop, NAAUG,ObjectARX, PeopleTracker, Physique, Planix, Powered with Autodesk Technology (logo), RadioRay, Revit, Softdesk, Texture Universe, TheAEC Authority, The Auto Architect, VISION*, Visual, Visual Construction, Visual Drainage, Visual Hydro, Visual Landscape, Visual Roads,Visual Survey, Visual Toolbox, Visual TugBoat, Visual LISP, Volo, WHIP!, and WHIP! (logo).The following are trademarks of Autodesk, Inc., in the USA and/or other countries: 3ds max, AutoCAD Architectural Desktop, AutoCADLearning Assistance, AutoCAD LT Learning Assistance, AutoCAD Simulator, AutoCAD SQL Extension, AutoCAD SQL Interface, AutodeskMap, Autodesk Streamline, AutoSnap, AutoTrack, Built with ObjectARX (logo), Burn, Buzzsaw, Buzzsaw.com, Cinestream, Cleaner, CleanerCentral, ClearScale, Colour Warper, Content Explorer, Dancing Baby (image), DesignCenter, Design Doctor, Designer's Toolkit,DesignProf, DesignServer, Design Web Format, DWF, DWG Linking, DXF, Extending the Design Team, GDX Driver, gmax (logo), gmaxready (logo),Heads-up Design, IntroDV, jobnet, ObjectDBX, onscreen onair online, Plans & Specs, Plasma, PolarSnap, ProjectPoint,Reactor, Real-time Roto, Render Queue, Visual Bridge, Visual Syllabus, and Where Design Connects.Autodesk Canada Inc. TrademarksThe following are registered trademarks of Autodesk Canada Inc. in the USA and/or Canada, and/or other countries: discreet, fire, flame,flint, flint RT, frost, glass, inferno, MountStone, riot, river, smoke, sparks, stone, stream, vapour, wire.The following are trademarks of Autodesk Canada Inc., in the USA, Canada, and/or other countries: backburner, backdraft, Multi-MasterEditing.Third Party TrademarksAll other brand names, product names or trademarks belong to their respective holders.Third Party Software Program CreditsACIS Copyright 1989-2001 Spatial Corp. Portions Copyright 2002 Autodesk, Inc.Copyright 1997 Microsoft Corporation. All rights reserved.International CorrectSpell Spelling Correction System 1995 by Lernout & Hauspie Speech Products, N.V. All rights reserved.InstallShield 3.0. Copyright 1997 InstallShield Software Corporation. All rights reserved.PANTONE Colors displayed in the software application or in the user documentation may not match PANTONE-identified standards.Consult current PANTONE Color Publications for accurate color.PANTONE and other Pantone, Inc. trademarks are the property of Pantone, Inc. Pantone, Inc., 2002Pantone, Inc. is the copyright owner of color data and/or software which are licensed to Autodesk, Inc., to distribute for use only incombination with certain Autodesk software products. PANTONE Color Data and/or Software shall not be copied onto another disk orinto memory unless as part of the execution of this Autodesk software product.Portions Copyright 1991-1996 Arthur D. Applegate. All rights reserved.Portions of this software are based on the work of the Independent JPEG Group.RAL DESIGN RAL, Sankt Augustin, 2002RAL CLASSIC RAL, Sankt Augustin, 2002Representation of the RAL Colors is done with the approval of RAL Deutsches Institut für Gütesicherung und Kennzeichnung e.V. (RALGerman Institute for Quality Assurance and Certification, re. Assoc.), D-53757 Sankt Augustin."Typefaces from the Bitstream typeface library copyright 1992.Typefaces from Payne Loving Trust 1996. All rights reserved.GOVERNMENT USEUse, duplication, or disclosure by the U.S. Government is subject to restrictions as set forth in FAR 12.212 (Commercial Computer SoftwareRestricted Rights) and DFAR 227.7202 (Rights in Technical Data and Computer Software), as applicable.1 2 3 4 5 6 7 8 9 10
ContentsChapter 1Autodesk Architectural Desktop Tutorials . . . . . . . . . . . . . . . . . . . . . . . . . . . . . . . . . 1Using this Tutorial . . . . . . . . . . . . . . . . . . . . . . . . . . . . . . . . . . . . . . . . . . . . . . . . . . . . . . . . . . . . . . . . . .Prerequisites for the Tutorial . . . . . . . . . . . . . . . . . . . . . . . . . . . . . . . . . . . . . . . . . . . . . . . . . . . . . . .Working with the Sample Project . . . . . . . . . . . . . . . . . . . . . . . . . . . . . . . . . . . . . . . . . . . . . . . . . . .Exercises and Datasets . . . . . . . . . . . . . . . . . . . . . . . . . . . . . . . . . . . . . . . . . . . . . . . . . . . . . . . . . . . .Extracting Datasets. . . . . . . . . . . . . . . . . . . . . . . . . . . . . . . . . . . . . . . . . . . . . . . . . . . . . . . . . . . . . . .Chapter 211122Getting Started with Projects. . . . . . . . . . . . . . . . . . . . . . . . . . . . . . . . . . . . . . . . . . . . 5Lesson 1: Setting up Your Project Environment . . . . . . . . . . . . . . . . . . . . . . . . . . . . . . . . . . . . . . . . . . . 5Exercise 1: Creating a Set of Project Tools . . . . . . . . . . . . . . . . . . . . . . . . . . . . . . . . . . . . . . . . . . . . . 5Exercise 2: Working with Toolbars . . . . . . . . . . . . . . . . . . . . . . . . . . . . . . . . . . . . . . . . . . . . . . . . . . 8Exercise 3: Exploring the Sample Project. . . . . . . . . . . . . . . . . . . . . . . . . . . . . . . . . . . . . . . . . . . . . 10Summary of Project Concepts . . . . . . . . . . . . . . . . . . . . . . . . . . . . . . . . . . . . . . . . . . . . . . . . . . . . . 18Exercise 4: Creating a New Project. . . . . . . . . . . . . . . . . . . . . . . . . . . . . . . . . . . . . . . . . . . . . . . . . . 19Lesson 2: Setting up Your Project . . . . . . . . . . . . . . . . . . . . . . . . . . . . . . . . . . . . . . . . . . . . . . . . . . . . . . 23Exercise 1: Defining Building Levels . . . . . . . . . . . . . . . . . . . . . . . . . . . . . . . . . . . . . . . . . . . . . . . . 23Exercise 2: Categorizing Portions of Your Project . . . . . . . . . . . . . . . . . . . . . . . . . . . . . . . . . . . . . . 24Chapter 3Developing Your Building Model Design . . . . . . . . . . . . . . . . . . . . . . . . . . . . . . . . . . 29Lesson 3: Designing the Building Shell . . . . . . . . . . . . . . . . . . . . . . . . . . . . . . . . . . . . . . . . . . . . . . . . . 29Exercise 1: Adding a Curtain Wall . . . . . . . . . . . . . . . . . . . . . . . . . . . . . . . . . . . . . . . . . . . . . . . . . . 29Exercise 2: Adding an Entrance Using a Tool . . . . . . . . . . . . . . . . . . . . . . . . . . . . . . . . . . . . . . . . . 31Exercise 3: Creating an Entrance from a Sketch . . . . . . . . . . . . . . . . . . . . . . . . . . . . . . . . . . . . . . . 33Exercise 4: Modifying a Curtain Wall . . . . . . . . . . . . . . . . . . . . . . . . . . . . . . . . . . . . . . . . . . . . . . . 36Exercise 5: Assigning Materials to the Building Shell . . . . . . . . . . . . . . . . . . . . . . . . . . . . . . . . . . . 40Lesson 4: Laying out the Building Core . . . . . . . . . . . . . . . . . . . . . . . . . . . . . . . . . . . . . . . . . . . . . . . . . 44Exercise 1: Creating Floor and Roof Slabs . . . . . . . . . . . . . . . . . . . . . . . . . . . . . . . . . . . . . . . . . . . . 44Exercise 2: Modifying the Edge of a Roof Slab. . . . . . . . . . . . . . . . . . . . . . . . . . . . . . . . . . . . . . . . . 48Exercise 3: Adding Interior Partitions . . . . . . . . . . . . . . . . . . . . . . . . . . . . . . . . . . . . . . . . . . . . . . . 50Exercise 4: Creating a Pilaster . . . . . . . . . . . . . . . . . . . . . . . . . . . . . . . . . . . . . . . . . . . . . . . . . . . . . 55Exercise 5: Converting a Wall Segment to a Curved Wall . . . . . . . . . . . . . . . . . . . . . . . . . . . . . . . 60Lesson 5: Refining the Building Core . . . . . . . . . . . . . . . . . . . . . . . . . . . . . . . . . . . . . . . . . . . . . . . . . . . 63Exercise 1: Creating a Niche. . . . . . . . . . . . . . . . . . . . . . . . . . . . . . . . . . . . . . . . . . . . . . . . . . . . . . . 63Exercise 2: Placing Doors . . . . . . . . . . . . . . . . . . . . . . . . . . . . . . . . . . . . . . . . . . . . . . . . . . . . . . . . . 68Exercise 3: Changing a Door Style . . . . . . . . . . . . . . . . . . . . . . . . . . . . . . . . . . . . . . . . . . . . . . . . . . 72Exercise 4: Creating Wall Openings. . . . . . . . . . . . . . . . . . . . . . . . . . . . . . . . . . . . . . . . . . . . . . . . . 77Exercise 5: Adding 3D Endcaps to a Wall Opening . . . . . . . . . . . . . . . . . . . . . . . . . . . . . . . . . . . . . 80Lesson 6: Finishing the Building Core . . . . . . . . . . . . . . . . . . . . . . . . . . . . . . . . . . . . . . . . . . . . . . . . . . 83Exercise 1: Copying Floors to Levels . . . . . . . . . . . . . . . . . . . . . . . . . . . . . . . . . . . . . . . . . . . . . . . . 83Exercise 2: Creating Stairs and Landings . . . . . . . . . . . . . . . . . . . . . . . . . . . . . . . . . . . . . . . . . . . . . 86Exercise 3: Adding Railings . . . . . . . . . . . . . . . . . . . . . . . . . . . . . . . . . . . . . . . . . . . . . . . . . . . . . . . 88Exercise 4: Modifying Stairs and Creating the Stair Tower . . . . . . . . . . . . . . . . . . . . . . . . . . . . . . . 92Exercise 5: Adding Elevators . . . . . . . . . . . . . . . . . . . . . . . . . . . . . . . . . . . . . . . . . . . . . . . . . . . . . . 99 i
Chapter 4Producing Construction Documents . . . . . . . . . . . . . . . . . . . . . . . . . . . . . . . . . . . . 103Lesson 7: Working with Sections and Elevations . . . . . . . . . . . . . . . . . . . . . . . . . . . . . . . . . . . . . . . . 103Exercise 1: Creating a View for a Floor Plan . . . . . . . . . . . . . . . . . . . . . . . . . . . . . . . . . . . . . . . . . 103Exercise 2: Using Callouts to Create a 2D Elevation View . . . . . . . . . . . . . . . . . . . . . . . . . . . . . . 109Exercise 3: Changing Materials Within an Elevation . . . . . . . . . . . . . . . . . . . . . . . . . . . . . . . . . . 112Exercise 4: Modifying and Updating a 2D Section . . . . . . . . . . . . . . . . . . . . . . . . . . . . . . . . . . . . 115Exercise 5: Creating a 3D Section . . . . . . . . . . . . . . . . . . . . . . . . . . . . . . . . . . . . . . . . . . . . . . . . . 118Lesson 8: Working with Details. . . . . . . . . . . . . . . . . . . . . . . . . . . . . . . . . . . . . . . . . . . . . . . . . . . . . . 122Exercise 1: Using the Detailing Tool Palettes. . . . . . . . . . . . . . . . . . . . . . . . . . . . . . . . . . . . . . . . . 122Exercise 2: Using the Detail Component Manager . . . . . . . . . . . . . . . . . . . . . . . . . . . . . . . . . . . . 126Exercise 3: Modifying Details. . . . . . . . . . . . . . . . . . . . . . . . . . . . . . . . . . . . . . . . . . . . . . . . . . . . . 129Exercise 4: Adding a New Detail Component . . . . . . . . . . . . . . . . . . . . . . . . . . . . . . . . . . . . . . . . 133Lesson 9: Scheduling Your Building Model . . . . . . . . . . . . . . . . . . . . . . . . . . . . . . . . . . . . . . . . . . . . 134Exercise 1: Tagging Doors for a Schedule . . . . . . . . . . . . . . . . . . . . . . . . . . . . . . . . . . . . . . . . . . . 135Exercise 2: Adding a Project Schedule . . . . . . . . . . . . . . . . . . . . . . . . . . . . . . . . . . . . . . . . . . . . . . 141Exercise 3: Editing Schedule Data . . . . . . . . . . . . . . . . . . . . . . . . . . . . . . . . . . . . . . . . . . . . . . . . . 143Exercise 4: Changing the Appearance of a Schedule . . . . . . . . . . . . . . . . . . . . . . . . . . . . . . . . . . . 146Lesson 10: Finishing Your Plot Sheets. . . . . . . . . . . . . . . . . . . . . . . . . . . . . . . . . . . . . . . . . . . . . . . . . 150Exercise 1: Working with Sheet Sets in Project Navigator. . . . . . . . . . . . . . . . . . . . . . . . . . . . . . . 150Exercise 2: Creating a Sheet for a Project. . . . . . . . . . . . . . . . . . . . . . . . . . . . . . . . . . . . . . . . . . . . 156Exercise 3: Adding Existing Details to a Project as Views . . . . . . . . . . . . . . . . . . . . . . . . . . . . . . . 161Exercise 4: Adding Completed Drawings to a Project . . . . . . . . . . . . . . . . . . . . . . . . . . . . . . . . . . 163Exercise 5: Manually Adding Model Space Views . . . . . . . . . . . . . . . . . . . . . . . . . . . . . . . . . . . . . 165Lesson 11: Using Callouts . . . . . . . . . . . . . . . . . . . . . . . . . . . . . . . . . . . . . . . . . . . . . . . . . . . . . . . . . . . 170Exercise 1: Creating a Callout for an Existing Detail. . . . . . . . . . . . . . . . . . . . . . . . . . . . . . . . . . . 170Exercise 2: Creating a Callout and a View . . . . . . . . . . . . . . . . . . . . . . . . . . . . . . . . . . . . . . . . . . . 174Exercise 3: Copying Callouts . . . . . . . . . . . . . . . . . . . . . . . . . . . . . . . . . . . . . . . . . . . . . . . . . . . . . 179Lesson 12: Annotating and Keynoting Your Project. . . . . . . . . . . . . . . . . . . . . . . . . . . . . . . . . . . . . . 184Exercise 1: Assigning Sheet Keynotes to Objects . . . . . . . . . . . . . . . . . . . . . . . . . . . . . . . . . . . . . . 185Exercise 2: Working with Keynote Databases and Style-based Keynotes . . . . . . . . . . . . . . . . . . . 188Exercise 3: Adding a Keynote Legend . . . . . . . . . . . . . . . . . . . . . . . . . . . . . . . . . . . . . . . . . . . . . . 190ii Chapter
Autodesk Architectural Desktop TutorialsThe Autodesk Architectural Desktop Tutorials show how to use key features to design a building modeland produce construction documents for a sample commercial building project. The step-by-step procedures show how you can use the tools in Autodesk Architectural Desktop to create designs and produce drawings efficiently and accurately, following a typical workflow.Using this TutorialThis tutorial introduces you to the fundamental features of Autodesk Architectural Desktop software,using an example of a commercial building project. The lessons follow the typical workflow of a building project, from setting up the project to producing construction documents. You can follow the workflow presented in these lessons when getting started with your own projects.Throughout this tutorial, you work in a project environment. When you choose to work in a projectenvironment, drawing files are linked through a project file, and you can establish a project-wide structure to help you work effectively across design teams. To derive the most benefit from the process-basedlessons presented in this tutorial, complete the tutorial from start to finish. Each lesson (and each exercise within a lesson) builds upon the preceding one.The lessons focus on the fundamental information you need to be successful as you begin your workwith Architectural Desktop. For in-depth coverage of topics, use the cross-references provided in thelessons.TIP When you follow a link for a cross-reference, use the Back button in the Help window to return to thetutorial.Topics in this section: Prerequisites for the Tutorial Working with the Sample Project Exercises and Datasets Extracting DatasetsPrerequisites for the TutorialAccess to Tutorial Files By default, the tutorial files are installed in c:\program files\autodesk architecturaldesktop 2005\tutorial\architectural desktop. If you are using Architectural Desktop in a network environment, the tutorial files may be in a different location. Contact your network administrator or CADmanager for the location of the tutorial files.AutoCAD Knowledge The lessons in this tutorial are designed to build upon your knowledge ofAutoCAD . If you are not familiar with basic AutoCAD functions and commands, see the onlineAutoCAD 2005 User’s Guide.Working with the Sample ProjectAutodesk Architectural Desktop and the tutorial datasets feature powerful tools to assist you in thedesign of a five-story office building. The building consists of approximately 2300 square meters perfloor, a three-story atrium area with an angled staircase, a centralized bank of elevators, and two emergency exit stairwells. The interior building space also includes a typical central core of conferencerooms, bathrooms, and storage rooms, in addition to open space intended for future cubicle and officelayouts.Based on a predefined building outline and structural column grid, you create the building’s exteriorshell that consists of custom glazed curtain walls and standard brick exterior walls. You then create theinterior with structural floor slabs and roof slabs for four of the floors. Next, you add a fourth floor toyour building model by creating a copy of the entire third floor, including the slab and core.
After the building’s shell and base structural components are designed, you develop the core of the building.You add architectural components, such as the interior partitions and bathroom layouts, and additionalstructural components, including the stairwells and elevators.When you have completed the building model, views of the model are established and annotation is added,including callouts and keynotes. The views are then arranged on sheets to create construction documents,including floor plans, sections, and elevations.Exercises and DatasetsEach lesson is a group of related exercises focused on a tangible result, such as setting up a new project,designing a building shell, or scheduling your building model. With the exception of lesson 1, every lessonhas a corresponding dataset that contains the project files you need to complete the exercises in the lesson.When you begin a lesson, you are directed to extract a dataset that corresponds to the step-by-step proceduresof the exercises in that lesson. For more information, see “Extracting Datasets” on page 2.Extracting DatasetsFollow this procedure whenever you are directed to extract a dataset before beginning a lesson.Update project files1. Verify that all project drawing files are closed.2. Minimize Autodesk Architectural Desktop.3. In Windows Explorer, browse to c:\program files\autodesk architectural desktop 2005\tutorial\architecturaldesktop\datasets.If you are using Architectural Desktop in a network environment, the tutorial files may be in a differentlocation. Contact your network administrator or CAD manager for the location of the tutorial files.4. Double-click the dataset specified at the beginning of the exercise, for example, m adt5 L04.exe.The datasets are contained in self-extracting files. When you double-click a dataset, the extraction softwareopens.5. In the Self-Extractor dialog box, click Browse and navigate to my documents\autodesk\my projects.NOTE If you extract the files without specifying a location, the project files are extracted to the default tempfolder on your local system.6. Click OK.7. Verify that Overwrite files without prompting is cleared, and click Unzip.A message indicates the number of project files that were unzipped as part of this dataset.8. Click OK in the message box, and click Close to close the extraction software.9. Restore Autodesk Architectural Desktop.10. On the File menu, click Project Browser.NOTE You must have a drawing open to access the Project Browser. If you do not have a drawing open, clickon the Standard toolbar to create a new drawing.11. In the Project Browser, clickclick the lesson folder.if necessary to display the folder for the lesson you are beginning. Double-NOTE If you have been working with non-tutorial projects, you may need to browse to my docu-ments\autodesk\my projects.2 Autodesk Architectural Desktop Tutorials
12. Double-click the project name. For example, Small Office Building 04.13. When prompted to re-path the project, click Yes.14. Click Close to close the Project Browser.15. On the Project Navigator, click the Project tab.16. Under Current Project, verify that Name displays the correct project. For example, Small Office Building04.To change the current project, click, and repeat steps 11 through 16.17. Keep the Project Navigator open, and begin the lesson.Using this Tutorial 3
4 Autodesk Architectural Desktop Tutorials
Getting Started with ProjectsThe Drawing Management feature of Autodesk Architectural Desktop software provides you with toolsfor creating large building projects that are distributed among many drawing files. Drawing Management formalizes and automates the organization and management of external reference files, lettingyou work with the logical pieces of a building, as opposed to managing the file system.In this part of the tutorial, you are introduced to the key concepts of Drawing Management as youbegin the design development phase of a sample commercial building project.Lessons in this part: Lesson 1: Setting up Your Project EnvironmentLesson 2: Setting up Your ProjectLesson 1: Setting up Your Project EnvironmentAs you begin the design development phase of a project, you familiarize yourself with the requirementsof the project as outlined in the design program and conceptual drawings. Often you can begin to identify design objects that will be repeated throughout the building model, such as specific types of walls,doors, and windows. In Architectural Desktop, you can create tools that represent your most frequently-used design objects, allowing you to add objects such as walls, doors, and windows to yourdrawings quickly and easily.You begin this lesson by importing a set of tools that represent some of the design objects used in thebuilding model in the sample project. You also open two additional toolbars in the drawing area to prepare for your work on the project. Next, this lesson introduces you to the key concepts essential toworking with projects that are organized and managed in a project environment. This introductionfocuses on the fundamental information you need to be successful as you begin your work withprojects. For in-depth coverage of project-related topics, use the cross-references provided throughoutthe lesson. Finally, you create a new project, which forms the basis for your work in the remainder ofthis tutorial.Exercises in this lesson: Exercise 1: Creating a Set of Project ToolsExercise 2: Working with ToolbarsExercise 3: Exploring the Sample ProjectExercise 4: Creating a New ProjectExercise 1: Creating a Set of Project ToolsIn Architectural Desktop, you can use tools to add architectural objects, annotation, and documentation to your drawings. The tools are organized on tool palettes, which are groups of tools that supportparticular tasks or processes. For example, the Walls tool palette contains tools for several commonlyused interior and exterior wall styles, while the Documentation tool palette contains tools for workingwith schedules and areas. To use a tool, simply click the tool on the palette and begin drawing in thedrawing area.When you install the software, several tool palettes are provided. You can begin using these defaulttools right away. You can modify the tools on these palettes, or create new tools and palettes to meetyour project-specific needs.You can assemble your tools and tool palettes into catalogs. Your library of catalogs is stored in the Content Browser. You use the Content Browser to store and retrieve your complete inventory of stock andcustom tools, content, and tool palettes.This exercise shows how to open a tool catalog in the Content Browser, and retrieve a tool palette thatcontains architectural object tools. In later exercises, you use these tools to add objects such as slabs,walls, and doors to your drawings.
The objects you add with these tools behave like their real-world counterparts. For example, a wall tool hasall of the parameters of real wall components built into it. When you add a wall to your drawing, you canuse the default parameters or modify them.Like all architectural objects in Architectural Desktop, a wall is a “smart” object that adheres to a set of builtin rules that control its behavior under certain circumstances. For example, if you add a door to a wall, thedoor cuts an opening in the wall, and the endcaps of the wall adjust to accommodate the dimensions of thedoor. If you move the door along the wall, the opening moves with the door. If you remove the door, theopening in the wall is removed as well. In this way, architectural objects interact with other building modelobjects and update dynamically to reflect design changes.In addition to rule-based behavior and dynamic updates, architectural objects have another advantage overtraditional drafting with lines, arcs, and circles: display representations. Architectural objects can be represented two-dimensionally or three-dimensionally, all with a single object. Therefore, you can add the objectonce, and then use different built-in representations of the object to produce different views of the object,such as a plan or model view. When you modify an object, the change is reflected in all views.Tools make it easy to add and modify objects in Architectural Desktop. Using tools effectively and collaboratively in a project environment can increase productivity and reduce drawing errors.Add a tool palette for the sample project1. If you have not already launched Architectural Desktop, double-click the Autodesk Architectural Desktop2005 icon on your desktop.NOTE If you are not using the metric version of the software, but you want to work in metric units in thistutorial, open a metric template before continuing with this exercise.2. Verify that the Tool Palettes are displayed.To display the Tool Palettes, click Window Tool Palettes.3. Open the Content Browser by clickingon the Navigation toolbar.The Content Browser holds your library of tool and content catalogs. You can store and retrieve your owncustomized tools, content, and tool palettes, and you can share tools and palettes with other members ofyour design team through your intranet or the Internet.4. Click Tutorial Palette Catalog.5. Clicknext to the Tutorial (M) palette, and drag it onto the Tool Palettes.When you move the cursor over the i-drop icon, the cursor changes to a dropper image, indicating thatyou are in insertion mode. Use the i-drop insertion method to drag and drop content from catalogs intoyour current drawing.6 Getting Started with Projects
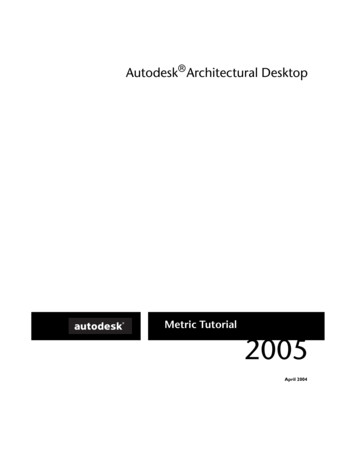
The Tutorial (M) palette is added to your existing tool palettes. It contains the tools for the metric versionof this tutorial. The Tutorial (M) tool palette is shared from a catalog, which allows it to be managed froma single location and refreshed by individual users. Managing tool palettes in this way ensures that allproject team members use the most current tools created or modified for a particular project or function.When a tool palette is shared from a catalog, the Refresh icon ( ) is displayed in the lower right corner ofthe palette to allow updates from the source palette.NOTE This palette is referred to as the Tutorial tool palette throughout the remainder of this tutorial.Working with floating tool palettesYou can work with tool palettes in two ways: floating or docked. Floating tool palettes can be movedwithin the drawing area, resized, and hidden. Docked tool palettes are placed in a specific location in thedrawing area, and they remain in that location unless you turn off the docking option and move the toolpalettes. If your tool palettes are docked and you want to switch to floating tool palettes to complete thisexercise, right-click the top edge of the tool palettes, and then click Allow Docking.6. Resize the Tool Palettes by dragging the bottom edge of the Tool Palettes down until all tabs are visible.7. Click the Doors tab to view the contents of this tool palette.Each tool palette contains a group of related tools. You can modify the tools on a palette, or create newtools and palettes.8. Drag the bottom edge of the Tool Palettes up until the names on some of the tool palette tabs are not visible.9. Click the stacked tabs on the Tool Palettes to display the list of available palettes, and click Windows.Lesson 1: Setting up Your Project Environment 7
The Windows tool palette is displayed. When there are more tool palette tabs than can be displayed withinthe current height of the Tool Palettes, the tabs are “stacked” at the bottom. The list of tool palettes showsall available palettes. The tab names that are displayed below the line on the list are the ones that are hidden.10. Display the Tutorial tool
desktop 2005\tutorial\architectural desktop. If you are using Architectural Desktop in a network environ-ment, the tutorial files may be in a different location. Contact your network administrator or CAD manager for the location of the tutorial files. AutoCAD Knowledge The lessons in this tutorial are designed to build upon your knowledge of