Transcription
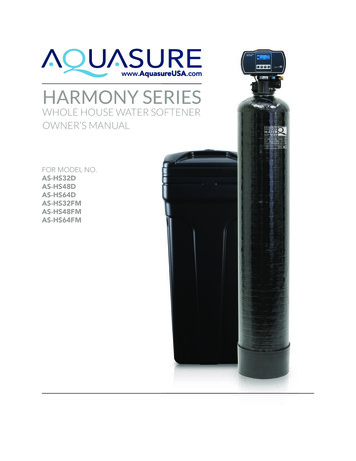
HARMONY SERIESWHOLE HOUSE WATER SOFTENEROWNER’S MANUALFOR MODEL 64FM
TABLE OF CONTENT22234INSPECTION & PREPARATIONUnderstanding How the Water Softener WorksI. Be Familiar with the System Before InstallationII. System Operation Parameter and Installation checklistIII. Installation Safety Guide555678101120INSTALLING THE SYSTEMSTEP 1. Shutting off the main water supply valveSTEP 2. Installing Bypass Valve onto the Control HeadSTEP 3. Brine Tank PreparationSTEP 4. Softener PreparationSTEP 5. Connecting the SystemSTEP 6. System StartupSTEP 7. Programing the SystemTotal Gallon Calculation22FEATURE & DISPLAY25PRODUCT DIMENSION26SYSTEM TROUBLESHOOT28LIMITED PRODUCT WARRANTYVersion 3.4 June 2019AQUASURE HARMONY SERIES 1
WELCOMEThank you for choosing Aquasure. Before you starting installing your Aquasure Harmony SeriesWhole House Water Softener. Please take a few minute to become familiar with the basics.INSPECTION & PREPARATIONUnderstanding How The Water Softener WorksThe principle behind water softening is simple chemistry. A water softener contains resin beadswhich hold electrically charged ions. When hard water passes through the softener, calcium andmagnesium ions are attracted to the charged resin beads. The result is removal of calcium andmagnesium ions which produces soft water.I. Be Familiar with the System Before InstallationIMPORTANT! Please read the entire manual and become familiar with instructions and partsneeded before proceeding with the installation.Inspect the SystemPlease take the system and all the components out of the box. Inspect the system and all theconnection fittings carefully, make sure nothing is damaged during shipping. If any part is crackedor broken, please do not proceed with the installation and contact Aquasure or your distributorfor an exchange or diagnosis.System Components Breakdown Aquatrol Valve Electronic Meter 5’ of 3/8” Brine Line Brine Tank Bypass Valve Drain Line Fitting 14’ of 1/2” Drain Line Top Distributor Resin Media Resin Tank Riser Tube & Bottom Distributor Control Valve Upper Distributor Basket Power TransformerRequired Tool List for System Installation Channel Locks Screwdriver Teflon Tape Razor Knife Two Adjustable Wrenches Plastic inlet and outlet fittings are includedwith the softener. To maintain full valveflow, 1” pipe to and from the softenerfittings are recommended. Use copper , bass, or PEX pipe and fittings.Some codes may also allow PVC plasticpipe. Additional tools may be required ifmodification to home plumbing is required.Required Components not Included with the System Extra Course Grade or Crystal water softener salt is needed to fill the brine tank2 www.AQUASUREUSA.comTel: 1-800-661-0680
II. System Operation Parameter and Installation checklistIMPORTANT! The following condition for feed water supply must be met or warranty will bevoid and manufacturer assumes no responsibility for damage to system or property.1. Water Temperature ParameterSystem must not be installed at an area where it is exposed to direct sunlight and must beprotected against freezing and extreme heat. Maximum: 100º F (37.8º C) Minimum: 32º F (0º C)2. Water Pressure ParameterThe maximum allowable inlet water pressure is 125 psi. If daytime pressure is over 80 psi,night time pressure may exceed the maximum allowed water pressure. Use a pressurereducing valve (PRV) to reduce the pressure if needed. Maximum: 125 PSI (8.78 kg/cm2) Minimum: 25 PSI (1.75 kg/cm2)3. Chlorine & Chloramine ToleranceSoftener resin may degrade in the presence of chlorine or chloramines. If the feed watercontains chlorine or chloramines, reduced life of the resin could occur. In these conditions,a whole house carbon filtration system with chlorine, chloramine reducing media isrecommended. Maximum: 2 ppm4. Pre-install environment checklist Do not use with water that is microbiologically unsafe or of unknown quality withoutadequate disinfection before or after the system. Properly ground to conform with all governing code and ordinances. Use only lead-freesolder and flux for all sweat-solder connections as required by state and federal codes. Place the softener as close as possible to the pressure tank (well system) or water meter(city water). Place the softener as close as possible to a floor drain, or other acceptable drain point(laundry tub, sump, standpipe, etc.). Connect the softener to the main water supply pipe before the water heater. Do not runhot water through the softener. Temperature of water passing through the softener mustbe less than 100º F. Outside faucets and irrigation system should be supplied with pre-softened water. If thisis not possible, be sure to bypass the softener when watering grass or plants. Chronic softwater exposure can be detrimental to plant life. Place softener in a place where water damage is least likely to occur if a leak develops. A 120 volt electric outlet is needed within 6 feet of the softener. The transformer has anattached 8 foot power cable. Be sure the electric outlet and transformer are protect fromwet weather or water. If installing in an outside location, necessary steps must be taken to assure the softener,installation plumbing, wiring, etc. are protected from the elements and contaminationsources. The resin tank should be located close to a drain to prevent air breaks and back flow. The brine tank should be located no more than 15’ from the resin tank.AQUASURE HARMONY SERIES 3
III. Installation Safety Guide Handle with care when moving the water softening system. Do not turn upside down,drop, drag, or set on areas with sharp protrusions.The system works on standard 110v power plug only. Do not use any other transformerexcept the ones that is included with the systemTransformer must be plugged into an indoor 120 volt, grounded outlet only.Use clean water softening salt only with at least 99.5% pure. Extra course grade or crystalsalt are recommended. Do not use rock, block, granulated or ice cream making salts. Theycontain contaminants that could cause problems during maintenanceAlways keep salt lid in place on the softener unless servicing or refilling the unit.All of our resin tanks have level adjusting tank bases. These tanks are designed to workwith a “floating” base. This allows the tank to be leveled on any surface. Some applicationsmay not have level surface to place the tank. The floating base allows the tank to beleveled within the base and ensure proper operation. Sometimes the based can shiftduring shipping. It can be adjusted back by lifting the tank up no higher than 5” - 10”, andletting it drop to help level the base.INCORRECT4 www.AQUASUREUSA.comCORRECTINCORRECTCORRECTTel: 1-800-661-0680
INSTALLING THE SYSTEMIMPORTANT! Locate and test the main water supply valve to the home before installingthe system. If the main water supply valve fails to shut off the water completely during thetest, we recommend contacting your local plumber to fix the valve before begin installing thesystem.WARNING! If the system is installed on a metal (Conductive) plumbing system, i.e. copperor galvanized metal, the plastic components of the system will interrupt the continuity of theplumbing system. As a result, any arrant electricity from improperly grounded appliancesdownstream or potential galvanic activity in the plumbing system can no longer groundthrough contiguous metal plumbing. Some homes may have been built in accordance withbuilding codes, which actually encouraged the grounding of electrical appliances throughplumbing. A grounded “jumper wire” bridging the equipment and reestablishing thecontiguous conductive nature of the plumbing system must be installed prior to your systemuse.STEP 1. Shutting off the Main Water Supply ValveWARNING! If the hot water tank is electric, turn off the power to the hot water tank first toavoid damage to the element in the tank. If the source water is coming from a private well.Power off the well water pump and then shut off the main water supply valve.1. Locate the main water supply valve of the house and turn off completely by turning theshut-off handle clockwise.2. Test to see if the water is completely shut off by turning on the closest faucet in the coldwater position. If the cold water cannot be shut off, please contact your local plumber tofix the valve before begin installing the system.STEP 2. Installing Bypass Valve onto the control head1. Attached the Yoke to theprovided Bypass valve byreattaching the metal plateto the backside of the maleend of the bypass valve. (Skipthis step if the Yoke is alreadypre-installed. )AQUASURE HARMONY SERIES 5
2. Attached the other end of thebypass valve onto the controlhead and secure it with the metalplate. Make sure the o-rings arelubricated before installing.STEP 3. Brine Tank Preparation (Skip this step if the brine tank comes preassembled)1. Attach the four grid plate stand onto eachcorner of the grid plate.2. Place the grid plate inside the bottom ofbrine tank, and brine well cut out on thesame side of the brine well holder mountopening.3. Place the brine well inside the brine tankby sliding it into the grid plate. Make surethe side with the slot cut out is facingdownward.6 www.AQUASUREUSA.comTel: 1-800-661-0680
STEP 4. Softener Preparation1. Remove the resin tank from carton2. Lubricate both O-rings on the bottom of thecontrol valve (center and outer).3. Lubricate the riser tube located onthe opening of the tank.4. Install the upper basket on thebottom of the valve by lining up thetabs, pressing in, then turning thebasket counterclockwise to lock itin place.5. Place the upper basket over thedistributor tube and push the valveon the tank. Thread the valve onthe tank by turning it clockwise.Be sure not to cross-thread thevalve on the tank. The valve shouldthread easily in the tank. If not, itmay be cross-threaded.6. Tighten the valve hand tight, thensnug it further by tapping it withthe palm of the hand. DO NOTuse tools to tighten the valve ordamage could occur.AQUASURE HARMONY SERIES 7
STEP 5. Connecting the SystemIMPORTANT! On copper plumbing systems be sure to install a grounding wire between theinlet and outlet piping to maintain grounding.WARNING! Any solder joints being soldered near the valve must be done before connectingany piping to the valve. Always leave at least 6” (152 mm) between the control valve andjoints being soldered when soldering pipes that are connected to the valve. Failure to do thiscould cause damage to the valve.1. The Aquatrol valve is equipped with 1” maleNPT connections. It is recommended that theseconnections are made using Teflon tape.2. The inlet and outlet can be identified on thebypass valve. There are arrows stamped in thebypass valve showing the flow direction. Thearrow pointing toward the valve is the inlet andthe arrow pointing away from the valve is theoutlet.3. Apply the Teflon tape onto the bypass inlet andoutlet fittings.4. Connect the inlet and outlet of the softener usingappropriate fittings.5. All piping should be secured to prevent stress onthe bypass valve and connectors.6. Connect the drain hose to the valve by removingthe orange lock clip and push the 1/2” blacktubing into the hole. Pull the drain line to see if it issecure. Run the drain hose to the nearest laundrytub or floor drain. This can be ran up overheador down along the floor. Drain hose should be aminimum of 1/2”. If running the drain line morethan 20 ft linear, it is recommended to increasethe hose size to 3/4” and be sure there is no sagsor a “drop” in the hose all the way to the draindestination.Note: A direct connection into a waste drain is notrecommended. A physical air gap of at least 1.5”Should be used to avoid bacteria and wastewatertraveling back through the drain line into the softener.7. Connect the brine line to the control valve byremoving the blue locking clips on the brine lineconnectors.8 www.AQUASUREUSA.comTel: 1-800-661-0680
8. Push the brine line into the brinelineconnector and secure it by pushing inthe locking clips. Pull the brine line tosee if it is secure.9. Secure the flow regulator by installingthe Flow holder with the gasketmounted on the inner brine tank walland align the opening with the holder.10. Push the brine line into the white quickconnector inside the brine well.11. Pull on the brine line to see if it issecure.12. Pour in at least two bags (80 lbs) of salt and 5 gallons of tap water into the brine tank.13. Place the unit in the bypass position. Locate the nearest faucet and remove aerator(faucet screen) if there are any. Turn the cold water position on at the nearest faucet andslowly turn on the main water supply. Let the water run for a few minutes or until thesystem is free of any air or foreign material resulting from the plumbing work.14. Make sure there are no leaks in the plumbing system before proceeding and shut off thenearest faucet when water runs clear.BypassPositionServicePositionNOTE:The system is not ready for service until you complete the system startup section of this owner’s manualAQUASURE HARMONY SERIES 9
STEP 6. System Startup111:302531. Flow Meter Indicator2. Time of Day10004GAl3. Status4. Volume Remaining5. Regeneration ModeTimerMeter ImmediateMeter DelaySetting Button1. Enter into setting menu2. Confirm the current setting, and enter into the next step3. When used simultaneously with up button, it will enter into masterprogrammingUp / Down Buttons1. Adjust current settings2. Go one step forward or backwardCycle Button1. Save the setting and return to service2. Enter into queued regeneration mode3. A long press for 5 - 6 seconds will initiate a immediate regenerate4. Terminate the current regeneration step and goes to the next step1. Plug the power transformer into an approved power source. Connect the power cord tothe valve.2. When power is supplied to the control, the screen will display the time of day, gallonsremaining and the mode. Press and hold the “Cycle” button. The valve will display “GOTOBW” and will continue to move until it reaches the backwash system.3. Once the valve is in the backwash (BW) cycle the display will show a time value (10),open the inlet on the bypass valve slowly and allow water to enter the unit. Air from thetank will begin to push out of the control valve drain. Allow all air to escape from theunit before turning the bypass fully open. If there is a large “knocking” sound, the wateris being fed too quickly and should be slowed. Once there is a steady stream of watercoming from the system drain with no air coming out, allow water to run to drain for 3-4minutes or until all media/ resin fines are washed out of the softener which is indicatedby clear water in the drain hose.10 www.AQUASUREUSA.comTel: 1-800-661-0680
4. When the backwash cycle is complete, the valve will advance to the brine draw (BD)position. Once the valve reaches the BD cycle, push and release the “Cycle” button. Thedisplay will show “GOTO RR” (Rapid Rinse). Once the valve reaches the rinse cycle, allowthe water to run for the entire rinse cycle5. When the rinse cycle is complete, the valve will advance to the “BF” position. Once inthe brine fill position, check that the control valve is pushing water into the brine tank(remove brine well cap to confirm that the water level is rising in the brine tank). Allowthe valve to refill for the full amount of time as displayed on the screen to insure a properbrine solution for the next regeneration.6. When the refill cycle is complete, the valve will automatically advance to the SERVICEposition. Open the outlet valve on the bypass, then open the nearest treated water spigotor faucet (remove faucet screen to prevent clogging) and allow the water to run untilclear, close the tap and replace the faucet screen.STEP 7. Programing Unit1. Setting Time of DayDefault setting 12:00 (24 hours)Press Settings Button and UpButton simultaneously to enterinto Programing ModePress Simultaneously11:30SET- 1TIMEFlashingSet the hourFlashingPress Up or Down buttons tochange hours.11:30Press the Settings Button toaccept and continue.Set the minutesFlashingPress Up or Down buttons tochange minutes.11:30Press the Settings Button toaccept and continue.AQUASURE HARMONY SERIES 11
2. Setting the Regeneration Mode11:30Default setting is "Timer"SET- 2TYPENOTE:See page 22 for feature and display in regards to eachof the three regeneration mode. Choose the modethat best fit your need.FlashingChoose Between Time, Meter Immediate or Meter Delayed (Recommend Setting the system to Meter Delay)TimerThis mode will notshow water capacityoptions.11:30TYPE-TFlashingPress Up or Downbuttons to changemodePress the SettingsButton to acceptand continue.11:30Meter r Delay(Regenerate at2 am night ofreaching capacity.)TYPE-TMFlashing12 www.AQUASUREUSA.comTel: 1-800-661-0680
3. Setting the Unit Capacity (Not shown if Timer Mode was selected in 2nd Step)11:30Default setting is 1000 galSET-3 C-UFlashingSet Unit Measurement - Gallons, Liters or Cubic Meters (Recommend setting to Gallons for US Press Up or Down buttonsto Change Unit between:GAL: GallonL: LiterM3: Cubic Meter11:30Liters01000Press the SettingsButton to acceptand continue.LFlashing11:30Cubic Meters01000M3FlashingAQUASURE HARMONY SERIES 13
01000GALFlashing11:3001000GALFlashingPress Up or Down buttonsto set water capacity.11:30Press the Settings Button toaccept, cursor moves left andthe number flashes.01000GALFlashingIMPORTANT! Enter the number of gallons thatwas determined in the Total Gallons Calculationworksheet in page 20. This worksheet must becompleted to determine the proper IMPORTANT! You may hit thebutton to end you setting after setting up the gallons needed for regeneration. Settings 4 to 8has been pre-set from the factory and are only meant for special application that requires customized settings.14 www.AQUASUREUSA.comTel: 1-800-661-0680
4. Regeneration Time and Hours Override (Recommend keeping at factory default setting)11:30S E T - 4 T-HFlashingTimer ModeMeter Imm & Meter Delay Modes (Recommended)Default: 2:00 a.m. – 072 hoursHours Override range:3, 4, 6, 8, 12 hours, then every 24 hours (24, 48, 76 960)Default: 2:00 a.m. – OFFHours Override range:Every 24 hours (24, 48, 76 960)Use UP and DOWNbuttons to adjust theRegeneration TimeUse UP and DOWNbuttons to adjust theRegeneration Time11:300202H-07 2Press SET to go toHours Override11:301311:3002H-07 2Use UP and DOWNbuttons to adjustHours Override11:3013H-OFFFlashingFlashingUse UP and DOWNbuttons to adjustHours OverrideH-OFFFlashingFlashingPress SET to go toHours Override11:30H-07 2Flashing11:3002H-024Flashing11:3013H-06 0FlashingAQUASURE HARMONY SERIES 15
5. Setting the Back Wash Time (Recommend keeping at factory default setting)11:30SET-5 -BWFlashingSet the TimeDefault setting is 01511:30015Press Up or Down buttonsto change Back Wash time(Minutes)Range: 0 - 999Press the Settings Buttonto accept and continueto next lashing16 www.AQUASUREUSA.comTel: 1-800-661-0680
6. Setting the Brine Time (Recommend keeping at factory default setting)11:30SET-6 -BDFlashingSet the TimeDefault setting is 06011:30060-BD-FlashingPress Up or Down buttonsto change Brine time(Minutes)Range: 0 - 999Press the Settings Buttonto accept and continueto next URE HARMONY SERIES 17
7. Setting the Rapid Rinse Time (Recommend keeping at factory default setting)11:30SET-7 -RRFlashingSet the TimeDefault setting is 01011:30010-RR-FlashingPress Up or Down buttonsto change the Rapid Rinsetime (Minutes)Range: 0 - 999Press the Settings Buttonto accept and continueto next digit11:30010-RR-Flashing11:30010-RR-Flashing18 www.AQUASUREUSA.comTel: 1-800-661-0680
8. Setting the Water Filling Time (Recommend keeping at factory default setting)11:30SET-8 -BFFlashingSet the TimeDefault setting is 01211:30012-BF-FlashingPress Up or Down buttonsto change the Water FillingTime (Minutes)Range: 0 - 99911:30012Press the Settings Buttonto accept and continueto next digit-BF-Flashing11:30NOTE: Use the table below to determine the properBF setting for your unit.012-BF-FlashingParameterMedium Salt Curve Capacity SettingBrine Fill Settings in MinutesAquasure Water 6810AQUASURE HARMONY SERIES 19
TOTAL GALLONS CALCULATIONThe Aquatrol valve uses a meter to count the gallons of water being treated through the system. Once the gallonsprogrammed in the unit has been exhausted, the system will regenerate. The total gallons of treatable water the systemcan produce is based on the system size, family size, and the hardness level of the feed water. A simple calculation is doneto determine the amount of gallons to input during the programming portion of the installation.NOTE: This calculation must be completed to program the unit:Total Gallons System Capacity in Grains (see chart below) / Hardness in (GPG) Grains Per Gallon(determined by water test) - Number of People X 75 GallonsParameterMedium Salt Curve Capacity SettingBrine Fill Settings in MinutesAS-HS32D32,0006Aquasure Water tem Capacity: AS-HS32D System/32,000 Grains (chart above)Feed Water Hardness: 25 GPG (must be tested on-site by the end user or installer)Number of People: 3(32,000 Grains / 25 GPG) - (3 People X 75 Gallons) Total Gallons1,280 Gallons - 225 Gallons 1,055 Total Gallons1,055 Gallons would be inputted for Total Gallons during programming.If the hardness level is given in ppm or mg/L, it can be converted to Grains Per Gallon by dividing the value by 17.1.Input the site values in the equation below to figure out your total gallons value:( Grains / GPG) - ( People X 75 Gallons)Gallons - Gallons Total Gallons20 www.AQUASUREUSA.comTel: 1-800-661-0680
CONGRATULATIONS!You have finished installing your very own water softener. Please document the system installation time and maintain the systemat its recommended interval. Don’t forget to register your system to get full 5 years of limited warranty.(System comes with 2 year limited warranty without registration)Simply scan the QR code using your mobile phone, or go directly to ourwebsite http://www.aquasureusa.com/warranty-registration to begin theonline registration process.AQUASURE HARMONY SERIES 21
FEATURE & DISPLAYS1. Display in ServiceTimed Regeneration ModeThe display will show the current time, remaining time to the nextset regeneration, and the days override.11:3002:18 01-DReg. remaining timeMeter Immediate Regeneration ModeReg. override days11:30The display will show the current time and the remaining treatedwater to the next regeneration.60M3Reg. remaining capacityMeter Delay Regeneration Mode11:30The display will show the current time and the remaining treatedwater alternatively. When the remaining treated water counts downto zero the display changes to the regeneration time set by the user.60M311:3002:18Reg. remaining time2. Backlight ScreenThe backlight on the screen will go off automatically after one minute if no buttons are pressed. To light it up again press any button onthe touch pad.22 www.AQUASUREUSA.comTel: 1-800-661-0680
3. Memory during power failureAll program settings are stored in permanent memory. Current valve position, cycle step elapsed, time of day are stored during thepower failure. Reset the current time is necessity when power up.If the valve stopped at a regeneration stage when power failure, the valve will return to prior position when power up. It takes 4 to 5minutes to reset to the position.11:30The display shows as:The system will show the statuswhen power failure after find theposition.RESET4. Restore factory settings1) Pull out the power2) Press the3) Release the11:30button and plug in the power simultaneouslybuttonRESETThe system is now restored5. Manual regenerationQueued RegenerationWhen the valve is in service position press thebutton to activate the queued regeneration.Queued Regeneration means the system will initiate a regeneration at the time set. If missed, it will initiate on the next day.The display shows the Queued Regenerationin Meter Delay ModeThe display shows the Queued Regenerationin TIMER e display shows the Queued Regeneration in Meter Delay Mode.The system will initiate a regeneration - either the treated water remaining counts down to zero or the remaining time countsdown to zero, whichever is 60M302:18----AQUASURE HARMONY SERIES 23
5. Manual regenerationImmediate RegenerationWhen the valve is in service position, press and hold thebutton for 5 seconds, an immediate regeneration will be initiated.Examples:"BW" Flashing (ready to "Backwash")11:30G O TOBWWhen the time counts down to zero or press thebutton11:30015BW"BD" Flashing (ready to "brine)11:30G O TOBDThe display shows as:Stop RegeneratingWhen regenerating, press thesimultaneously,then stop regenerating the display will return to the serviceposition.24 www.AQUASUREUSA.com11:30GOTOSRTel: 1-800-661-0680
PRODUCT DIMENSIONVALVE DIMENSIONSAquasure Water SoftenersTank ��10”13”15"AB37"CAQUASURE HARMONY SERIES 25
SYSTEM TROUBLESHOOTProblemCauseCorrection1) The control fails toRegenerate automaticallyA) Disconnected meter cableA) Reconnect the meter cableB) Transformer damagedB) Replace the transformerC) Electronic controller or sensor damagedC) Replace or repair2) Regeneration at wrongtimeA) Timer improperly set, due to power failureA) Reset timer3) loss of capacityA) Increase draw water hardnessA) reset unit to the new capacityB) Brine concentration or quantityB) Keep brine tank full of salt at all times. Clean it yearly. Salt may bebridged. If using a salt grid Plate insure refill water is over itC) Rinse foulingC) Consolidate the rinse tank, clean the rinse and prevent futurefoulingD) Poor distribution, channeling (Uneven bedservice)D) Check distributors and backwash flowE) Internal control leakE) Replace the spacer, seal or pistonF) Aging of rinseF) Check for resin oxidation caused by Chlorine. Mushy resinG) Loss of rinseG) Check for correct bed depth. Broken distributors. Air or gas inbed: Well gas Eliminator loose brine lineA) Check items listed in Problem # 3A) Check items listed in Correction # 3B) Bypass is openB) Close the bypassC) ChannelingC) Check for too slow or high service flowA) High salt settingA) adjust salt settingB) Excessive water in brine tankB) refer to problem # 7 tankA) Fouling of inlet pipeA) Clean or replace the pipelineB) Fouled resinB) Clean the resin. Pretreat to preventC) Improper backwashC) Too many resin fines. Reset the flow rate and time of backwashA) Plugged drain lineA) Check drain line and clean flow controlB) Brine valve plugged or damagedB) Clean or replace the brine valveC) Injector pluggedC) Clean injector, replace injector screenD) Low inlet water pressureD) Increase water pressure to allow Injector to perform properly4) Poor water quality5) Excessive salt use6) Loss of water pressure7) Excessive water in brinetank8) Softener fails to brine draw A) Plugged brine lineA) Clean brine line and flow controlB) Plugged injectorB) Clean or replace the injector and screenC) No water in the brine tankC) Check for restriction in B.L.FC. Ensure Safety float is not stuckD) Low water pressureD) Increase water pressureE) Brine line injects air during brine drawE) Check brine line for air leaksF) Internal control leakF) Check seal, spacer and piston for scratches and dents9) Control cyclescontinuouslyA) Faulty timerA) Replace timer10) Continuous flow to drainA) Foreign material in the controlA) Call dealer. Clean valve, rebuild unitB) Internal control leakB) Same as aboveC) Piston jammed in brine or back washpositionC) Same as aboveSEE THE AQUATROL MANUAL FOR ADVANCE INSTALLATION PROCEDURES26 www.AQUASUREUSA.comTel: 1-800-661-0680
AQUASURE HARMONY SERIES 27
LIMITED PRODUCT WARRANTYAquasure warrants that your new water conditioner is built of quality material and workmanship.When properly installed and maintained, it will give years of trouble free service.Five Year Valve, Electronics and Resin GuaranteeAquasure will replace any part on the valve or electronics which fails or the softening resin within (5)five years from date of manufacture, as indicated by the serial number, provided the failure is due to adefect in material or workmanship. The only exception shall be when proof of purchase or installationis provided and then the warranty period shall be from the date thereof. Resin and internal controlvalve parts will not be covered for systems used to remove iron, manganese or with very highchlorine concentrated feed waters.Ten Year Warranty on Resin Tank and Brine TankAquasure will provide a replacement resin tank or brine tank to any original equipment purchaserin possession of the Aquatrol water softener that fails for (10) ten years after the date of purchase,provided that it is at all times operated in accordance with specifications and not subject to freezing.General ProvisionsAquasure assumes no responsibility for consequential damage, labor or expense incurred as a resultof a defect or for failure to meet the terms of these guarantees because of circumstances beyondour control. Installation workmanship failure is not covered under warranty. Damage caused byenvironmental conditions such as, lightening strikes, humidity or heat will not be covered underwarranty.These warranties are in lieu of all other warranties expressed or impl
outlet. 3. Apply the Teflon tape onto the bypass inlet and outlet fittings. 4. Connect the inlet and outlet of the softener using appropriate fittings. 5. All piping should be secured to prevent stress on the bypass valve and connectors. 6. Connect the drain hose to the valve by removing the orange lock clip and push the 1/2" black tubing .