Transcription
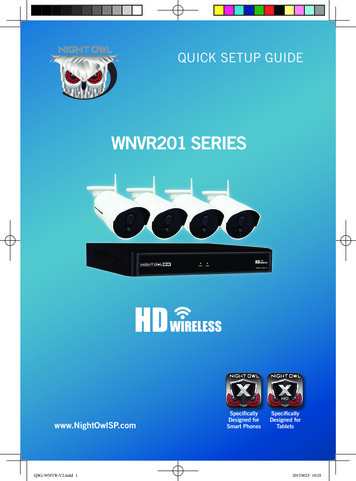
QUICK SETUP GUIDEWNVR201 SERIESwww.NightOwlSP.comQSG-WNVR-V2.indd 1SpecificallyDesigned forSmart PhonesSpecificallyDesigned forTablets2017/8/23 10:25
What’s in the BoxPackage ContentsDisclaimer: Images and Quantities may vary by model.Important: For best results use all of the included Night Owl accessories.Third party accessories may not work properly.Camera Antenna(1 per camera)NVR Antenna (x2)Wireless NVRWireless NVR PowerAdapter (x1)Camera(s)9 ft. CameraPower Adapter(s)9 ft. Wi-Fi Extender Antennaand Mounting Hardware(1 for every 4 cameras)6 ft. HDMI(x1)6 ft. RJ-45 Cable(Ethernet) (x1)Items Not IncludedSafety StickersRESETMonitorMounting HardwareLAN1LAN2LAN3LAN4WANRouterUSB Mouse (x1)1QSG-WNVR-V2.indd 22017/8/23 10:25
Product OverviewWireless NVR Rear NOTE: The maximum number of cameras you can connect to your Wireless NVRwill be determined by the number of channels.AAudio Output – Allows for the connection of an amplified speaker.BVGA Output – Allows for a video connection. If the TV/Monitor does nothave an HDMI input but does have a VGA input, connect the VGA cablefrom the VGA output port on the NVR to the VGA input port on your TV/Monitor. (VGA cable not included)CHDMI Output – Allows for a video connection. If the TV/Monitor has an HDMIinput, connect the HDMI cable from the HDMI output port on the NVR to theHDMI input port on your TV/Monitor.DRJ-45 (Ethernet) Port – Used to connect the Wireless NVR to your modem/router for remote viewing. Please note your Wireless NVR comes with builtin Wi-Fi for the cameras to transmit to the NVR. However, you will needto manually connect the NVR to your modem/router to remotely view on asmart device or PC/Mac .EUSB Ports – Allow for the connection of a USB mouse and/or a USB flashdrive. Connect the included USB mouse to assist in navigating the NVR’smenu interface. Connect a USB flash drive to download video files fromthe NVR for long term storage or sharing.FPower Input – Used to connect the included 12V DC power supply.GNVR Antenna Mount – for installation of two included NVR antennas.2QSG-WNVR-V2.indd 32017/8/23 10:25
POSITIONING YOUR WIRELESS NVRPositioning Your Wireless NVR and CamerasIncorrect PlacementYour wireless IP cameras will reach upto 300 ft. Therefore, proper placementof the wireless NVR in your home willensure you achieve maximum coverage.NVRCorrect PlacementPlacing the wireless NVR centrally inyour home will help make certain thatno matter where you mount your cameras,they will be able to wirelessly connectinside the signal range of the WNVR.NVR3QSG-WNVR-V2.indd 42017/8/23 10:25
How Obstacles Affect Your Signal StrengthWhen your wireless signal is transmitted through various materials, suchas walls and windows, the signal strength is affected. Though the NVRand wireless camera may be very close in proximity, you could still noticehigh signal interference if the signal passes through certain obstacles. Forinstance, if the signal passes through a concrete wall it will be severelyweakened. Please reference the chart below to see which obstacles highlyaffect your signal and which do not.Concrete WallBrick WallWeakSignalGlass withMetalCinderblockDry WallWood DoorGlass WindowStrongSignalMirrorNOTE: If your setup requires the signal to be transmitted through an obstacle thatseverely weakens it, you can use the 9 ft. Wi-Fi Extender Antenna included withyour system. The Extender Antenna can be used to bypass the obstacle weakeningthe signal. Simply replace the white Camera Antenna with the Extender Antennaand then mount the Extenderon theSignalopposing side of the obstacle.Strength Antennaof TransmissionPowering the NVR and Wireless CamerasYour Wireless NVR must be powered onusing the NVR power adapter. Similarly,each wireless camera must be poweredwith a camera power adapter. Thoughthese cameras wirelessly transmit videoto the NVR, they are not battery powered,and must therefore be powered via theincluded adapters. Each camera withinyour system will come equipped with itsown camera power adapter.4QSG-WNVR-V2.indd 52017/8/23 10:25
Connecting Your SystemHDMI1 Connect the two included antennasto your wireless NVR. This willensure you achieve the maximumwireless range for transmissionfrom your wireless cameras.HDMI2 Plug one end of the includedHDMI cable into the HDMI porton the back of the Wireless NVR.ETHERNETYou may also connect using VGA (not included)3 Plug the other end of theHDMI cable into the backof your TV or monitor.4 Plug one end of the includedEthernet cable into the LAN porton the back of the Wireless NVR.NOTE: To view cameras, TV/Monitor must betuned to the same Input the HDMI is plugged into.Router NotIncludedETHERNET5 Plug the other end of theEthernet cable into a porton the back of your router.6 Plug the USB mouse intothe USB port on the backof the NVR.5QSG-WNVR-V2.indd 62017/8/23 10:25
SurgeProtector notincluded7 Connect the Wireless NVR poweradapter to the Power Input onthe rear of the Wireless NVR.NOTE: Power adapters will belabeled as either NVR or Camera.8 Plug the Wireless NVR poweradapter into a surge protector orUninterruptible Power Supply(UPS). (surge protector andUPS not included)NOTE: Make sure NVR is in intendedlocation before testing cameras.9 Connect the included cameraantenna to the antenna mounton the camera.10 To ensure all cameras are workingproperly, please test them locallybefore installing them.11 Each camera comes equippedwith its own camera poweradapter. Connect the femalepower cable coming from thecamera to the male power endof the camera power adapter.Next, plug the camera poweradapter into a wall outlet.NOTE: You should see each camera appear on your TV/Monitor. You maynow proceed to install your Wireless NVR cameras in the desired location.6QSG-WNVR-V2.indd 72017/8/23 10:25
Booting Up for the First TimeStartup Wizard1 When you power on the WirelessNVR you will be prompted withthe following screen. Please followthe instructions to complete theStartup Wizard.Important Please Read2On the Password Creation screen, please note the following:Admin Account CreationBy default, the username will be admin. It mustremain admin upon your initial account configuration.NOTE: Password can be any alphanumeric combinationbetween 6 and 20 characters.Recovery Email AddressPlease ensure you provide a valid email address incase you forget your account information.Remember Your PasswordNight Owl strongly recommends writing down yourpassword within the Quick Setup Guide. You will needit every time you log into your Wireless NVR and toremotely view on a Smart Device.Write yourpassword here:7QSG-WNVR-V2.indd 82017/8/23 10:25
3 When you reach the Camera / Channel Settings screen, you willwant to have installed the cameras in their final position. Pleasemake sure you have mounted cameras at least 7ft. above theground and angled them slightly down.The infrared sensorworks best for‘side to side’movement acrossthe cameras fieldof view as opposedto movementdirectly to or awayfrom the cameraAt this stage of the Startup Wizard, you will be instructed onadjusting the camera sensitivity and setting the Motion DetectionArea. Having your cameras in their final position will be key.So, if you would like to detect motion for the front door to yourhome, place the camera to the side of the entrance.4 This is the last screen you willsee when you have successfullycompleted the Startup Wizard.NOTE: For additional configuration of your Wireless NVR, please refer to theowner’s manual located on our support page at www.NightOwlSP.com.8QSG-WNVR-V2.indd 92017/8/23 10:25
Night Owl X & Night Owl X HD Mobile AppsNight Owl fits right in with your mobile lifestyle by allowing you to remotelymonitor your home or business. Our free and exclusive Night Owl X app foriOS and Android phones and Night Owl X HD for iOS and Android tablets are available in the App Store and Google Play Store.NOTE: To ensure the best customer experience make sure you downloadthe correct app for your device.Night Owl XNight Owl X HDSmart PhonesTabletsFor remote viewing on aniOS or Android phone,make sure you downloadNight Owl X.For remote viewing on aniOS or Android tablet,make sure you downloadNight Owl X HD.9QSG-WNVR-V2.indd 102017/8/23 10:25
Using Night Owl XDownload and Install Application1Download the appropriate app from theApp Store or Google Play Store andinstall the application on your device.NOTE: Use correct appfor compatibility.Smart Phone:Night Owl XNOTE: Account setup is the samefor phone and tablet.Tablet:Night Owl X HD2Create an account using anemail address for the usernameand a password between 6–20characters. This account allowsthe user to login to Night Owl Xand Night Owl X HD. Please note,this is NOT the login info createdfor the NVR, this login is unique tothe Night Owl X and Night Owl XHD apps. The NVR login shouldbe stored on page 7, step #2 ofthis QSG.3To confirm your email address,click the link in the confirmationemail from “Night Owl(No Reply@NightOwlSP.com)”.STOP: You MUST complete Step 3 before continuing! Go toyour email, open the Confirmation email from Night Owl, andclick the “Confirm Email” link. You MUST confirm your emailto use the App!10QSG-WNVR-V2.indd 112017/8/23 10:25
Using Night Owl XConnecting and Adding your DeviceNOTE: When adding a new device, it may take 5–10 minutes before youbegin receiving notifications.A device can be added to the Night Owl X App by using the application’sSmart Auto Detection or through a QR Code Setup. With Smart AutoDetection, your NVR will automatically be detected by the Night Owl Xsoftware, making connecting easy! To use this preferred method, ensure yourSmart Device and NVR are both on the same network.WIFIEthernet Cable4Adding a DeviceTo begin adding a new device, first select theyellow plus sign within the Device menu.4ASmart Auto DetectionIf your Smart Device and NVR are on thesame network, the Smart Auto Detectionwill auto find your NVR. If this methodis not available, please use the QR CodeSetup from step 4B below.4BQR Code SetupTo use the QR Code Setup, select Setupdevice by QR Code and hover your SmartDevice camera lens over the QR Codelocated on the top of your NVR.11QSG-WNVR-V2.indd 122017/8/23 10:26
Login to your App5On the Device Login screen, enter the login information for the NVR(Remember, the NVR login and Night Owl X app login are different). TheNVR username is admin by default. If you are not the admin, login with yourusername credentials.admin is case sensitive(all lowercase).The password will be the same password you created duringthe Startup Wizard and should be stored in your QSG.Please note: this is the password of your Wireless NVR, NOTthe password used to login to the Night Owl X App. You mustkey the Wireless NVR password verbatim to add it to the app.12QSG-WNVR-V2.indd 132017/8/23 10:26
Using Night Owl XApp OverviewLive ViewDisplays real-timefootage of yoursystem.SettingsDisplay connected devices,change view layout, viewfavorites, manage accountsand access the help section.PlaybackView recordings &images and save themto your phone’s album.NotificationsManage customPush Notifications.13QSG-WNVR-V2.indd 142017/8/23 10:26
Using Night Owl X CMS SoftwareAccess your Wireless NVR from any computer, anywhere!Live ViewViewing live video, controllingPTZ functionality and settingimage parameters.PlaybackView system recordingsand images and save themdirectly to your PC or Mac .Device ManagerAdd and configureavailable NVRs andcameras on your network.Night Owl X CMS SoftwareThe Night Owl X Control Management Software (CMS) allows you to view yourNight Owl Security system remotely from a PC or Mac . Additionally, you canplayback recorded video, save video and images directly to your PC or Mac ,configure numerous settings such as channel names and set record preferences.To download the CMS Software:1 Go to www.NightOwlSP.com.2 Click on the Support tab.3 In the search bar, type “X CMS”.4 Download the Night Owl X CMS software.5 Once downloaded, select PC or Mac .14QSG-WNVR-V2.indd 152017/8/23 10:26
Pairing a Replacement Wireless CameraBy default, each camera within your Wireless NVR kit comes pre-paired to theWireless NVR. Additionally, your wireless NVR has its own built-in Wi-Fi forsecure, uninterrupted video transmission and recording. Pairing allows for thewireless transmission coming from the camera to be detected by the WirelessNVR. However, if you have a camera that needs to be replaced while underwarranty, the replacement camera will similarly need to be paired to the NVR.NOTE: When pairing a Night Owl add-on camera, refer to “Add-on camerasQuick Setup Guide”.To pair a replacement camera to your NVR, please use the below steps:1 Power on the replacement camerausing the camera power adapter.NOTE: This should be done locallyat the NVR to avoid interference2 With the NVR connected toa TV/monitor, right click onyour mouse and navigate tothe Main Menu using theoptions bar.3AGo to the Camera Menu andSelect the Add Camera tabon the left side of the menu.BABCThe top portion of the screenwill list cameras that havebeen found but not yet paired.CThe bottom portion of thescreen will show all camerasthat are currently paired tothe NVR.15QSG-WNVR-V2.indd 162017/8/23 10:26
4 Next, you will need to reset thereplacement camera. To do so, pressand hold the reset button until youhear a beep, indicating the camerahas begun the reset process.NOTE: The reset process may takeup to 3 minutes.5ABAfter 3 minutes have passedor after hearing the camerabeep, click on Wireless Addlocated on the Add Camerascreen. Your NVR will nowsearch for new cameras.ABNOTE: The replacementcamera will not appear in thebottom screen with all otherpaired cameras until the NVRfinishes the process of findingand pairing the new camera.6 Within the Wireless Add screen,the “Number of CamerasConnected” signifies thosecameras that are already pairedto the Wireless NVR and willnot immediately reflect thisnew camera.NOTE: You cannot exceed thenumber of Wireless NVR channelsyou have. If you have a 4 channelsystem, the maximum number ofcameras you can have paired is 4.16QSG-WNVR-V2.indd 172017/8/23 10:26
Pairing a Replacement Wireless Camera7 If you have not exceeded the channel limitation, the new camera willappear in a vacant video field once paired.8 WooHoo! Your replacement camera has now been paired to theWireless NVR using the Wireless NVR’s built-in Wi-Fi.17QSG-WNVR-V2.indd 182017/8/23 10:26
Additional SupportFAQs1. Does my wireless NVR have to be connected to the Internet to work?No, your wireless NVR does not have to be connected to the Internet to work. You canview live feed and recordings by connecting it to a TV/Monitor via HDMI or VGA.2. Will I be able to view my system while away from home?In order to view your wireless system remotely, your NVR will need to be manuallyconnected to a modem/router via the included Ethernet cable. You can view your systemvia the FREE Night Owl X or Night Owl X HD App by utilizing the FREE CMS software on aPC/Mac .3. How do the cameras transmit video to the NVR?Our wireless NVRs have built-in Wi-Fi for communicating with the cameras. Each cameracomes paired to the wireless NVR by default, so your initial setup should be hassle free.4. Are my cameras weatherproof?Yes, your cameras are weatherproof and will endure minimal moisture and dirt/debris.However, Night Owl strongly recommends placing all outdoor cameras under an eave orawning to help shield them from overexposure to the elements, which could reduce yourcamera’s lifespan.5. Does my NVR have to be connected to a TV or monitor?For initial setup, you will need to connect your NVR to a TV or monitor. After completing theinitial setup, your NVR does not need to be connected to a TV or monitor to view or capturerecordings. You can view your system using the Night Owl X CMS Software on a PC/Mac or bydownloading the Night Owl X or Night Owl X HD apps on your Smart Device.6. Why is the Night Owl X or Night Owl X HD app not accepting my password?The Night Owl apps will require two passwords to configure: one password will be used to loginto the app itself and the second will be the admin password of your NVR. In order to add adevice to the app, you will need to enter the NVR’s admin password. Please refer to pages 7and 12 of this QSG. Remember, when setting up your Night Owl X or Night Owl X HD app, youmust confirm your email by clicking the “Confirm Email” link sent by Night Owl upon initialapplication configuration.7. Why can’t I connect using the Night Owl X app, Night Owl X HD app orNight Owl X CMS Software?If you are having trouble connecting using our mobile app or client software, A) your NightOwl system may not be connected to a router, B) the latest firmware or client softwaremay not be installed on your computer or mobile device or, C) the password may have beenentered incorrectly or, D) You may need to restart your NVR and try again.18QSG-WNVR-V2.indd 192017/8/23 10:26
For system manuals,troubleshooting guides, FAQs,video tutorials and more:Please visit www.NightOwlSP.com.CONTACT USPHONE (English, Spanish & French)Click the Support tab.Enter your product’s model number in the search bar.Access the support material needed.Sales/ Technical Support1.866.390.1303Live Chat 24/7, 365 days a yearEMAILSales SupportSales@NightOwlSP.comTechnical SupportSupport@NightOwlSP.comWEBSITE24/7 Product Support How-To Videos Manualswww.NightOwlSP.comiPhone, iPad, Mac and Mac OS X are registered trademarks of Apple Inc.Windows, Windows XP, Windows Vista, Windows 7, Windows 8 andWindows 10 are registered trademarks of Microsoft Corporation in theUnited States and/or other countries.FCC RADIATION NORMFCCThis device complies with Part 15 of the FCC Rules. Operation is subject to the following two conditions: (1) this device may not cause harmfulinterference, and (2) this device must accept any interference received, including interference that may cause undesired operation.FCC Compliance StatementThese limits are designed to provide reasonable protection against frequency interference in residential installation. This equipment generates,uses, and can radiate radio frequency energy, and if not installed or used in accordance with the instructions, may cause harmful interference toradio communication. However, there is no guarantee that interference will not occur in television reception, which can be determined by turningthe equipment off and on. The user is encouraged to try and correct the interference by one or more of the following measures: Reorient or relocate the receiving antenna. Increase the separation between the equipment and the receiver. Connect the equipment into an outlet on a circuit different from that to which the receiver is connected. Consult the dealer or an experienced radio/TV technician for help.CAUTION!The Federal Communications Commission warns the user that changes or modifications to the unit not expressly approved by the party responsiblefor compliance could void the user’s authority to operate the equipment.This equipment should be installed and operated with minimum distance 20cm between the radiator & your body.QSG-WNVR-V2.indd 20Rev 1708182017/8/23 10:26
Night Owl X. Smart Phones. For remote viewing on an . iOS or Android tablet, make sure you download . Night Owl X HD. Tablets. QSG-WNVR-V2.indd 10 2017/8/23 10:25. 10. . Detection, your NVR will automatically be detected by the Night Owl X software, making connecting easy! To use this preferred method, ensure your