Transcription
9*Version 1.5.XUnderstanding the concepts and features of On-Time Web.Updated: 03/13/2013
TABLE OF CONTENTSCHAPTER 1OVERVIEW . 4SYSTEM REQUIREMENTS .5CHAPTER 2ACCESSING THE LOGIN SCREEN . 6AFTER SUCCESSFUL LOGIN .7CHAPTER 3FILE MAINTENANCE . 8COMPANY INFO.9Basic Information Tab .9Settings & Defaults Tab .10Punch Defaults Tab.14Miscellaneous Tab .15Welcome/Footer Message Tab .16Clock Setup Tab .16EMPLOYEE INFO .19SUPERVISOR GROUPS .21PUNCH OVERRIDES .22EARNING TYPES.23Earning Type Setup .23Link Premium Codes .24DEPARTMENTS .25DIVISIONS .26WORK SCHEDULES .27Master Work Schedules .27Create New Employee Work Schedules .28Edit Existing Employee Work Schedules .29JOBS/PHASES .30VALIDATION .31CHAPTER 4TIMESHEET ENTRY . 34SHEET STYLE .34PUNCH STYLE.35SUPERVISOR EDITS AND COMMENTS .37SUPERVISOR APPROVALS .38BULK TRANSACTIONS.39REALLOCATE TIME .41CHAPTER 5REPORTS MENU . 45TIMESHEET REPORT .45SIMPLE TIME CARD REPORT.482
WORK SCHEDULES .49SCHEDULE/ACTUAL COMPARISON REPORT .51MISSED PUNCH REPORT .52EXCEPTION TRANSACTION REPORT .54EMPLOYEE MASTER REPORT .55SUPERVISOR GROUPS MASTER REPORT .57EARNING TYPES REPORT .58DEPARTMENTS REPORT .59JOBS/PHASES REPORT .60VALIDATION REPORT .61COMPANY INFO REPORT .62CHAPTER 6SYSTEM MENU . 64DATA OUTPUT .65BACKUP/RESTORE DATA .66IMPORT DATA .68For Employee, Department, or Job/Phase data: .68For Data gathered using Remote Data Collection: .69Using the Templates .69PURGE RECORDS .72SEND MESSAGE.73LABEL MAKER .74IP ADDRESS RULES .76CONTACT PROVIDER.77ON-TIME WEB MANUAL .78CHAPTER 7ON-TIME WEB MOBILE. 79CHAPTER 8OT1000 REMOTE DATA COLLECTION . 81CHAPTER 9TROUBLESHOOTING GUIDE . 823
Chapter1OverviewOn-Time Web is a flexible and scalable time-gathering solution for companies of all sizes. With bothBasic and Pro editions, we can find the right solution for your company.On-Time Web is a robust Software as a Service (SaaS) package. This means there is no software toinstall, which saves you time and money and allows us to provide a flexible and scalable productsolution. We also backup our servers daily and employ multiple levels of security, so you can trust uswith your data.On-Time Web utilizes PHP—Hypertext Preprocessor as its server language and MySQL as its databaseengine, making it a powerful package now and in the future. MySQL will allow us to continue to developnew features that will benefit many organizations.4
System RequirementsTo use On-Time Web you need an active Internet connection, a modern JavaScript-enabled webbrowser (Internet Explorer 7 , Google Chrome, Mozilla Firefox, Apple Safari), and a PDF documentreader for reporting.In order to view On-Time Web Mobile a smart mobile device is required.There is no On-Time Web software to install on any computer.5
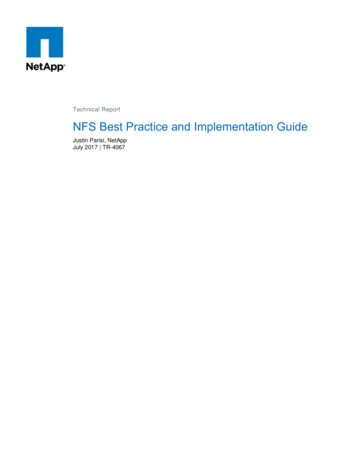
Chapter2Accessing the Login ScreenOur office will create a unique URL (web address) for your company upon signup. This URL will besimilar to http://www.on-timeweb.com/companyid. From this URL you can access the Login screen.The Company Administrator or Provider will create Employee logins.The first time this screen is accessed you may notice the logo in the header is not associated with yourcompany. This is company specific and will be setup later, as will the welcome message and footer.Definitions of the fields on this screen:Employee ID – Identification or username of the employeePassword – Password for the employee6
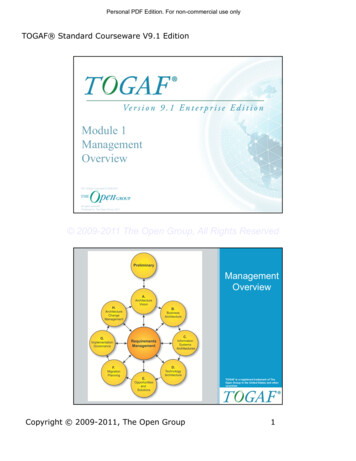
Login – Click to login to your On-Time Web siteAfter Successful LoginThe type of employee logging in determines where you are directed after login. Employees andSupervisors will be directed immediately to their timesheet page. Management logins, such as SuperAdmins, Company Admins and Providers, will be directed to the page below. The welcome pagedisplays the name and login type of the person logged in to the system. Important system messagessuch as the last time a backup was completed and how many active employees/employee countdisplays.7
Chapter3File MaintenanceThe File Maintenance menu contains the forms that are typically used during the initial configuration.The menu items are Company Information, Employee Information, Earning Types, Supervisor Groups,Departments, Divisions, Jobs/Phases and Validation.8
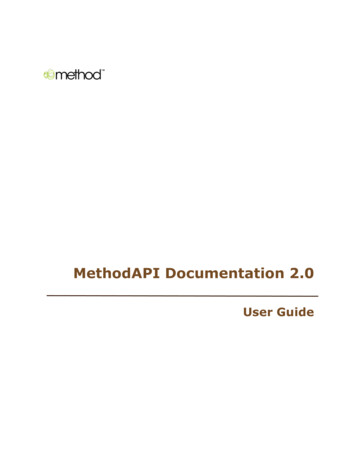
Company InfoThe Company Info screen is for setting basic options and settings for how the company will use On-TimeWeb. Below is an overview of each tab and what the settings are on each.Basic Information TabDefinitions of the fields on this screen:Company Name – The name of your companyAddress – The address of your companyAddress 2 – A secondary address such as suite number, P.O. Box, etc. (optional)City/State/Postal Code – City, state, and postal/zip code of your companyCompany Logo – Browse to upload a new logo to be displayed on the page headers and reports.This must be a JPEG, GIF, or PNG type of file, with a size of less than 3MB.Time Zone Offset – Time zone of your company’s physical location9
Settings & Defaults TabCompany DefaultsDefinitions of the fields on this screen:First Day of Week – Day of the week on which your payroll period beginsUse Jobs – Check this box to use Jobs and Phases in the system.Paid Breaks – Set whether or not employee breaks are paid.New Employee Defaults10
Default Employee Timesheet Type – Defaults in the specified timesheet type when setting up newemployees.Default Employee Cut Off Time – Defaults in the specified shift cut off time when setting up newemployees.Earnings & Overtime SettingsDefault Earning Code – Defaults in the specified earning code when setting up new employeesDefault Overtime Code – Defaults in the specified overtime code when setting up new employeesOvertime Method – Choose the method for overtime calculations: Weekly, Daily, Both, or None.Overtime Weekly Limit – Number of hours each week an employee must work before overtimecalculateOvertime Daily Limit – Number of hours an employee must work each day before overtimecalculates.11
Work Schedule SettingsWork Schedules – Enable or Disable work schedules globally.Allow supervisors to create master work schedules – Allows supervisors to create master daily shiftrecords to assign to employees’ work schedules.Allow supervisors to create and edit their employees' work schedules – Allows supervisors tocreate and edit work schedules for their employees.Allow employees to view and print work schedules – Allows employees to view and print their ownwork schedule.Timesheet Summary Settings12
Previous Week Timesheet Summary Display – Select the number of weeks to display on thetimesheet summary screen: none, 1, 2, 3, 4 or 5.Show Transmitted Transactions – Choose whether to show or hide transmitted transactions that fallin the Previous Week Summary Display setting.Export SettingsRegular/Premium Time Export Format – Choose how to export regular and premium hours to file.Multi-Line places the regular and premium time for a single transaction on separate lines. SingleLine places the regular and premium time for a single transaction all on the same line.Default Export File Format – Choose the default export format: CSV, Excel, or QuickBooks.QuickBooks ID – The unique company ID created by QuickBooks.13
Punch Defaults TabDefinitions of the fields on this screen:Enable Lunch Buttons – Enable/disable the Return Lunch and Go Lunch buttons on the timesheetform.Enable Break Buttons – Enable/disable the Return Break and Go Break buttons on the timesheetform.Punch Rounding – Check this box to enable Punch types to use time rounding.Punch Rounding on Buttons – Enable/disable punch rounding on each button on the timesheetform.Rounding Interval – Select the number of minutes by which an actual punch is to be roundedup/down: 5, 6, 10, or 15 minute intervals.Amount of time required to work before punch rounding – Enter how long an employee must workbefore the next rounding interval.14
Punch Type Display – Show/Hide the Department, Job or Phase combo boxes for Punch type on thetimesheet form.Auto Lunches – Enable/Disable auto lunch option. (Auto lunches are created only for punchemployees who have an IN punch before the employee auto lunch start time and an OUT punchafter the auto lunch end time.)Default Auto Lunch Time – The default start and end time to default into new employees on theemployee info screen.Miscellaneous TabDefinitions of the fields on this screen:Field Size Maximum LimitsEmployee ID’s – Select the character size limit for Employee ID’s.Dept ID’s – Select the character size limit for Department ID’s.Job ID’s – Select the character size limit for Job ID’s (if applicable).Phase ID’s – Select the character size limit for Phase ID’s (if applicable).Style Sheet – Choose from a variety of style sheets that will be used company wide.Site Status – Enable or disable the status of the site. If marked inactive only admins may log in tothe site.15
Global Mobile Access – Choose between employee specific, which allows admin to control whichemployees have mobile access to the site. Deny all disables mobile access completely. Allow all willallow all employees to have mobile access.Welcome/Footer Message TabDefinitions of the fields on this screen:Welcome Message – Enter the welcome message you wish to display on the Login screen.Footer Message – Enter the footer message you wish to display at the bottom of every screen.Clock Setup Tab (required hardware: OT1000)On-Time Web has the ability to communicate with the exclusive OT1000 time clock offered byCustomware, Inc. The OT1000 is ready to hang on the wall out of the box. The information shown onthis tab will not be seen until a clock has been issued to the company.16
Definitions of the fields on this screen:Serial No – The serial number of the physical clock. This cannot be changed.Last Connect – The last time the time clock connected to the server.Status Reported – Basic information that came from the clock such as number of new transactionsand IP information.Clock ID – An ID to identify a specific clock. Especially useful in a multi-clock installation.Description – A unique description to help identify the clock or its location.17
Callback Servers – This is the address that the clock will communicate with.DNS Servers – Enter the welcome message you wish to display on the Login screen.Remote Data Collection – Tells the system that this clock uses the Remote Data Collection feature,which means that data is collected from the clock using a USB thumb drive instead of being sentautomatically via the Internet.Network – Choose between DHCP for a dynamic network and Static for a dedicated IP address.IP Address – If the Network is static enter the IP address here.Subnet Mask – If the Network is static enter the subnet maskGateway – If the Network is static enter the gateway address here.Poll Interval – Tells the system when to poll the clock for new transactions. Options includeminutes, daily and weekly. Each option allows you to specify the days of the week, the time intervalbetween polls, or time of day of each poll.Time zone– Set the time zone of the clock.Reboot Clock – This option will reboot the clock.Default Department – departments can be assigned to individual clocks. When an employee makesan IN type punch the department assigned to the device will be assigned. The employee canoverride this by manually entering a department ID on the clock. If no department is assigned to theclock then the department will come from the employee’s home department.Primary Contact – The primary contact that will receive clock notifications.Other Contact – Secondary contacts that will receive clock notifications.When a clock has not yet been verified, a red icon will be seen on the recordby our servers, the icon will change to a checkmark and say verified.18. Once verified
Employee InfoThe Employee Information screen is used to enter information about your employees. Beforeemployees can login they must be setup here. Either the Provider or Company Admin may add, edit ordelete employees. NOTE: If an employee assigns a supervisor group that he/she is a part of, then thatemployee will be able to approve his own timesheet records on the Timesheet page.Definitions of the fields on this screen:Find Employee – Select an existing Employee from the drop-down list to view or edit.Employee ID – Unique identification of each employee. May be alpha, numeric, or a combination ofboth.First Name – Employee’s first nameM.I. – Employee’s middle initial19
Last Name – Employee’s last nameEmployee Email – Employee’s email addressPassword – The employee’s password to login to On-Time Web. May be alpha, numeric, symbols,or a combination.Password Confirmation – Type the Password a second time in this field for validation. NOTE: If thisfield does not match the Password field, you will receive an error message when you click Save andwill have to re-enter the Password Confirmation before you may Save your entries/changes.Login Type – Select the employee’s login type from the drop-down list.Home Dept. – Select the employee’s default Home Department from the drop-down list.Supervisor Access – If the employee Login Type is set to supervisor then admin may set thesupervisor to have the default access or read-only access. Read-only supervisors may not changeemployee time records.Division – Select the employee’s division from the drop-down list.Auto Lunch Time – The start and end times for the auto lunch option. If these fields are left blank,the employee will not use the auto lunch feature.Timesheet Entry Type – Select either Sheet or Punch for the timesheet mode for selected employee(Punch mode in Pro version only)Allow Web Punches – Allow/Deny timesheet entries to be made on the web if a punch employee isusing the OT1000 time clock. (Required hardware: OT1000 time clock)Default Earning Type – Select the employee’s default earning type from the drop-down list.Supervisor Group – Select the employee’s supervisor group from the drop-down list. NOTE: Inorder to have their timesheet approved, an employee must be assigned a to Supervisor group. Ifthey are allowed to approve their own time, they may be assigned to their own group.Cut-Off Time – The employee’s absolute cut-off time for in punches for grouping on the previousday. For example, an employee’s cut-off time is set to 03:00 (3:00 am) and they clock in at 2:30 am.Instead of the transaction being grouped on the date the transaction was made, it will group on theprevious day. If the employee was to clock in at 3:01 am then the transaction would group on thecurrent date.Badge ID – The employee’s badge identification (not required unless you are using a time clock)Inactive – Check this box if the employee’s status is Inactive (i.e., employee is on leave and a tempemployee is in place, employee has been terminated)Save – Click to Save your entries/changes.New – Click to bring up a blank form to enter a New employee.Delete – Click to Delete this employee’s record.20
Cancel – Click to Cancel your entries/changes.Supervisor GroupsSupervisor Groups allow administrators to organize supervisors into groups for monitoring ofemployees. Supervisors may be in more than one group. Multiple supervisors in a single group shareemployees and those supervisors are allowed to approve employee time on their behalf.Tip: For easy setup, group names can be the same as the supervisor’s employee ID.Definitions of the fields on this screen:Find Group – Select an existing Group from the drop-down list to view or edit.21
Group Name – Unique name of each group. May be alpha, numeric, or a combination of both.Supervisors – A listing of the employee ID’s and names of all supervisors in the system.Use the Filter boxes to filter the list of supervisors containing the characters typed. To cancel thefilter click theicon.To add supervisors click on the name (ctrl click or shift click to select multiple supervisors) andclick thebutton to move them to the selected box. Click thebutton to select allsupervisors. To unselect a supervisor or range of supervisors click the name in the selected box andclick thebutton. To unselect all supervisors click thebutton.Save – Click to Save the new entryUpdate – Click to Update an existing record.Delete – Click to Delete the existing record.Cancel – Click to Cancel your entries/changes.Punch OverridesPunch Overrides are punch rules created to override employee punches on the web and through theOT1000 clock. There are 3 policies that can be configured; global, employee specific, or by supervisorgroup. The policy looks at the time range set and replaces the specific punch type time with the overridetime set. There is no need to delete the record in order to disable the policy. Saved policies can beenabled or disabled by clicking the appropriate radio button.Definitions of the fields on this screen:22
Policy – Global, meaning company wide, employee specific, or supervisor group options. Ifemployee or supervisor group is chosen choose employee or group from bottom drop down list.Punch – The type of punch to set the policy for. The options are In, Out, Return Lunch, and GoLunch.Punch Range – The beginning and end time range for employee punches.Override Time – The set time to replace any employee punch that falls in the punch range.Earning TypesEarning Types, also known as Earning Codes, are the pay codes used for employee timesheets. Thesystem comes standard with Straight, Premium, and Double Pay Type codes.Earning Type SetupThis tab is used for creating, editing, and deleting earning codes. Below are the descriptions of the fieldson this tab.Definitions of the fields on this screen:Find Earning Type – Select an existing Earning Type from the drop-down box to view or edit.23
Earning Type – Identification for this Earning Type (i.e., OVT for Overtime, DBL for Double time)Description – Description of this Earning TypePay Type – Defines what the multiplier should be. Choose from 1-Straight, 2-Premium, or 3-Double.Sort Order – Determines the order in which the earning codes are displayed in the timesheetearning code drop down boxes and timesheet summary.Include for Premium – Check this box to allow Straight Pay Type codes to “roll-over” to Premiumcodes.Inactive – Check this box to disable this Pay Type. NOTE: A Pay Type can only be inactivated if it isnot any employee’s Default Earning Type.Save – Click to Save your entries/changes.New – Click to bring up a blank form to enter a New Earning Type.Delete – Click to Delete this Earning Type record.Cancel – Click to Cancel your entries/changes.Link Premium CodesThis tab is used to link a specific straight time code to a specific premium code if multiple codes of eachexist. This allows employees who use different straight time codes to not have to rely on the employeedefault overtime code when calculating overtime. Below are the descriptions of the fields on this tab.Definitions of the fields on this screen:Regular Earning Code – Shows the regular straight time earning codes that are marked as included inpremium and marked as active.24
Linked Premium Code – The premium code that is linked to the straight time earning code. By defaultstraight time earning codes are set to use the employee default overtime code.DepartmentsThe Departments screen allows management to create the departments used for employees’ timesheetentries.Definitions of the fields on this screen:Find Department – Select from the drop-down box for an existing Department to view or edit.Department ID – Unique identification for this Department. May be alpha, numeric, or acombination.Description – Description of this DepartmentInactive – Check this box to disable the selected Department. NOTE: A Department can only bedisabled if it is not the Default Department for any employee.Save – Click to Save your entries/changes.New – Click to bring up a blank form to enter a New Department.Delete – Click to Delete this Department record.25
Cancel – Click to Cancel your entries/changes.DivisionsThe Divisions screen allows management to setup different divisions in a company. The employee maythen be assigned to a division in the employee file maintenance page.Definitions of the fields on this screen:Division ID – The ID of the created division.Description – The description or name of the created division.26
Work SchedulesThe Work Schedules screen contains all the functions needed to create full work schedules forcompany employees.Master Work SchedulesDefinitions of the fields on this screen:Saved Work Schedules– Select an existing work schedule/shift saved from the drop-down box toview or edit.Schedule Name– The name or ID of the saved work schedule.Schedule Description– The description of the saved work schedule.Shift
Default Employee Timesheet Type - Defaults in the specified timesheet type when setting up new employees. Default Employee Cut Off Time - Defaults in the specified shift cut off time when setting up new employees. Earnings & Overtime Settings Default Earning Code - Defaults in the specified earning code when setting up new employees