Transcription
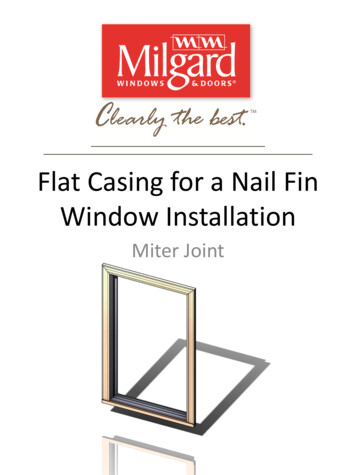
Flat Casing for a Nail FinWindow InstallationMiter Joint
Nail Fin Flat Casing InstructionsFor Milgard Essence Windows and Doors Install window per AAMA 2400-10installation standard. Read instructions from beginning to endbefore assembling or installing Flat Casing. Flat Casing is not compatible with otherMilgard Window or Door offerings. Do not use Flat Casing on othermanufacturers’ products. Window or Door must be properly installedand flashed prior to Flat Casing installation. Milgard Nail Fin Flat Casing does not providestructural support or function as a waterbarrier.2
Nail Fin Flat Casing PartsFlat Casing with Sill NoseFlat Casing All SidesPartDescriptionPart #PartDescriptionPart #1#8 – 5/8” Flat Head SS ScrewFA04421#8 – 5/8” Flat Head SS ScrewFA04422Trim Clip – WindowHA78262Trim Clip – WindowHA78263(Window Frame)Varies3(Window Frame)Varies4Sill NoseEX79194Flat Casing – LegEX78175End Cap – Sill Nose – RightIM79745Flat Casing – Header/SillEX78176End Cap – Sill Nose – LeftIM79756Corner KeyIM79647Secondary Sill KeyIM79718Flat Casing – Leg – LeftEX78179Flat Casing – HeaderEX781710Flat Casing – Leg – RightEX781711Corner KeyIM79643
Nail Fin Flat Casing CornersTop MiterFront / BackBottom MiterBack / FrontBottom Sill Nose FlushBack / FrontBottom Sill Nose HornBack / Front4
Special Instructions for:Shape and Radius Windows Install window per AAMA 2400-10 installationstandard. Milgard provides Shape and Radius Flat Casing clippedto Window Frame. Remove trim through gently pulling on any corner. Skip to Step 15 for Trim Installation.5
Corner Key AssemblySkip to Step 14 if Installing Factory Assembled Flat Casing.1Determine Header, Sill, and Leg Trim Pieces.2Insert Corner Keys into Flat Casing miter ends.Note: There are two Corner Keys per Miter Corner.6
Corner Key Assembly Cont.3Start #8 x 5/8” Flat Head Screw into one hole.Repeat for all Corner Keys. Tighten screw halfway.7
Sill End Cap AssemblySkip to Step 11 for Flat Casing on all sides.45Caulk inside of Sill Nose on Both Ends.Seat End Caps into Sill Nose.Before / After8
Sill Nose Horn ModificationSkip to Step 8 for Sill Nose without Horns.CAUTION!: Only do this step for Sill Nose Horns.6Remove Screw Boss from End Cap.Score both Sides and Snap.Repeat Step 6 forother end of Sill Nose.7Insert first Secondary Sill Key against edge of End cap.Place second Secondary Sill Key 2” apart on center.Go to Step 9.2”9
Sill Nose Horn ModificationCont.8Place Secondary Sill Key two inches from first key.Note: LegTrim willalignSecondarySill Keys incorrectlocations.2”10
Flat Casing Assembly9Lay out Flat Casingoutside face downon a flat surface.10Fit joints together.Note: It is possible to make a Flush or a Horn Jointwith the same parts. Make sure the Sill Nose hasthe correct Joints before moving onto Step 11.11
Install Screws1112Locate all Screw Holes. With Screw halfwaytightened, Rotate Screw Head with tool untilsecond Corner Key Screw Hole appears.Inject Caulk into Corner Keys (half asqueeze into one hole per Corner Key).12
Install Screws Cont.13Install #8 x 5/8” Flat Head Screws.Miter Corners: Start screw into second hole and tighten untilhead is flush with Flat Casing. Finish tightening first Screw.Sill Nose: Tighten screwsuntil flush with Flat Casing.Sill Nose Horn: Make sureSecondary Sill Key is againstEnd Cap. Tighten screwuntil flush with Flat Casing.Note: Sill Joint may have an extra hole on the back ofthe Flat Casing Legs. The open holes allow differentJoint types. There are no missing parts.13
Trim Clip Attachment14Install Trim Clips onto Window Frame.If installing FlatCasing with SillNose, do notplace Trim Clipson Window SillAccessory Groove.Space Trim Clip1.5” away fromCorner. Tap twoTrim Clips intoeach corner.1.5”If length of window side is 47" or longer, tapadditional trim clip midway between two corner clips.14
Trim Installation1516Apply 1/4" diameter 2" long beads of sealant toback of Flat Casing. Space Beads 18" apart.Place clear or color matched sealant into accessorygroove along full length of Window Frame Sill.15
Trim Installation Continued17Push Flat Casing onto WindowFrame until it seats fully.If installing Flat Casing with Sill Nose, slide SillNose Lip into Window Frame Accessory Groove.16
Clean Up Wipe up any excess caulk. TiteBond WeatherMaster Sealantcompatible colors.Milgard ColorBarkBlack BeanCinnamonClassic BrownClearEvening SkyFernFogFrostHarmonyNatural CrèmePea PodPebbleRattanTweedTwilightEssence Accessories SealantMilgardTiteBond 7673BL44031LA7915MMTiteBond yPoplar WhiteGreenGrayBeigeClayBlack17
Install window per AAMA 2400-10 installation standard. Read instructions from beginning to end before assembling or installing Flat Casing. Flat Casing is not compatible with other Milgard Window or Door offerings. Do not use Flat Casing on other manufacturers' products. Window or Door must be properly installed