Transcription
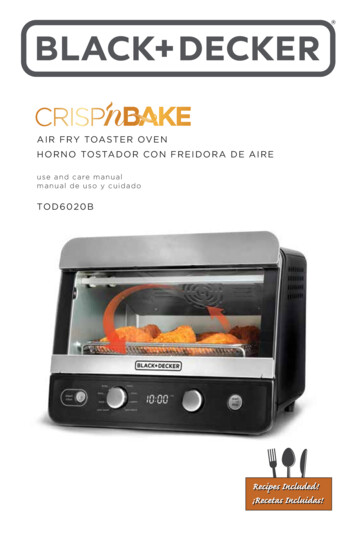
AIR FRY TOASTER OVENHORNO TOSTADOR CON FREIDORA DE AIREuse and care manu alma n ual de uso y cui d ad oTOD6020BRecipes Included!¡Recetas Incluidas!
Please Read and Save this Use and Care Book.IMPORTANT SAFEGUARDS.When using electrical appliances, basic safety precautions should always be followed to reduce the risk of fire, electric shock, and/or injury, including the following: READ ALL INSTRUCTIONSBEFORE USING. Do not touch hot surfaces. Usehandles or knobs. To protect against electricalshock, do not immerse cord,plug, or appliance in water orother liquid. Close supervision is necessarywhen any appliance is used by ornear children. Unplug from outlet when not inuse and before cleaning. Allowtime to cool before putting on ortaking off parts. Do not operate any appliancewith a damaged cord or plug,or if the appliance malfunctionsor has been damaged in anymanner. Contact consumersupport at the toll-free numberlisted in the warranty section. The use of accessoryattachments not recommendedby the appliance manufacturermay cause injuries. Do not use outdoors. Do not let cord hang over edgeof table or counter, or touchhot surfaces. Do not place on or near a hotgas or electric burner, or in aheated oven. Extreme caution mustbe used when moving anappliance containing hot oil orother hot liquids. If the unit is in standby (thestart/stop light is flashing orcompletely off), unplug fromwall outlet. If the unit is poweredon (the start/stop light isilluminated), press the Start/Stopbutton to turn the unit off. Thenunplug from wall outlet.2 Do not use appliance for otherthan intended use. Use caution when removing trayor disposing of hot grease. Do not clean oven with metalscouring pads. Pieces can break offthe pad and touch electrical parts,causing risk of electric shock. Do not attempt to clean theheating elements. Oversized foods or metal utensilsmust not be inserted in a toasteroven, as they may create fire orrisk of electric shock. A fire may occur if the toasteroven is covered or touchingflammable materials includingcurtains, draperies, walls, and thelike, when in operation. Do notstore any item on top of the unitwhile in operation. Extreme caution should beexercised when using containersconstructed of other than metalor glass. Do not store any material,other than manufacturer’srecommended accessories, inthis oven when not in use. Do not place any of thefollowing materials in the oven:paper, cardboard, plastic, andother items not constructed ofoven safe metal and glass pans. This appliance is not intendedfor use by persons (includingchildren) with reduced physical,sensory or mental capabilities,or lack of experience andknowledge, unless they havebeen given supervision orinstructions concerning useof the appliance by a personresponsible for their safety.
Children should be supervised toensure that they do not play withthe appliance. The appliance is not intendedto be operated by means ofan external timer or separateremote-control system. Do not leave unattended whilein operation. Food ignition mayoccur. If this happens, unplug theunit, but DO NOT open door. Toreduce the risk of fire, keep oveninterior completely clean and freeof food residues, oil, grease andother combustible materials.SAVE THESE INSTRUCTIONS.This product is for household use only.GROUNDED PLUGAs a safety feature, this product is equipped with a grounded plug, which will onlyfit into a three-prong outlet. Do not attempt to defeat this safety feature. Improperconnection of the grounding conductor may result in the risk of electric shock. Consulta qualified electrician if you are in doubt as to whether the outlet is properly grounded.TAMPER-RESISTANT SCREWWarning: This appliance is equipped with a tamper-resistant screw to preventremoval of the outer cover. To reduce the risk of fire or electric shock, do not attemptto remove the outer cover. There are no user-serviceable parts inside. Repair shouldbe done only by authorized service personnel.ELECTRICAL CORDa) A short power-supply cord is provided to reduce the risks resulting from becomingentangled in or tripping over a longer cord.b) Extension cords are available and may be used if care is exercised in their use.c) If an extension cord is used:1) T he marked electrical rating of the extension cord should be at least as great asthe electrical rating of the appliance;2) I f the appliance is of the grounded type, the extension cord should be agrounding-type 3-wire cord; and3) The cord should be arranged so that it will not drape over the counter top ortabletop where it can be pulled on by children or tripped over.Note: If the power cord is damaged, please contact the warranty department listedin these instructions.CAUTIONTHIS OVEN GETS HOT.WHEN IN USE, ALWAYS USE OVEN MITTS ORPOT HOLDERS WHEN TOUCHING ANY OUTEROR INNER SURFACE OF THE OVEN.3
GE T TI NG TO KN OW YO URA IR F RY TOASTE R OVE N12345678911101.Door handle2.Steam Clean button3.Function knob4.Digital display5. Time/Temp knob- rotate to change- press to toggle between timeand temperature6. Start/Stop button(Turns unit ON or OFF)7. Baking pan(Part# TOD6020-04)8. Wire rack(Part# TOD6020-01)9. Crumb/steam tray(Part# TOD6020-02)10. M esh cooking basket(Part# TOD6020-03)11. xtra accessories can be tuckedEunder the oven. To do so, lift thefront of the unit up and slide extraracks under.Product may vary slightly from what is illustrated.4
Crumb/steam trayThe crumb/steam tray mustbe installed above the heating elements to protect themfrom crumbs. Place the wirerack or mesh cooking basketon the crumb/steam tray.Note: Do not attempt to cookdirectly on this tray. The foodwill burn. This tray is also used topour soapy water into forthe Steam Clean cycle.Removing FoodTo easily remove food, use autensil or oven mitts to pullthe front edge of the crumb/steam tray outwards. Thisallows the tray to catch anyfood debris or crumbs.Wire rack (up position)Use for most functions.Always use on top of thecrumb/steam tray with bake/broil label facing up.Wire rack (down position)Use for toast function, orfor tall food items such as awhole chicken.Use with toast label showingon top of the crumb/steam tray.Mesh cooking basketUse for air frying anddehydrating functions.Always use on top of thecrumb/steam tray.Baking panUse for bake or broil cookingfunctions. Place on top of wirerack in up position, resting onthe crumb/steam tray.5
G E T T I NG STARTE DThis appliance is intended for household use only. Remove all packing material, any stickers, and the plastic band around thepower plug. Remove and save literature. Please go to www.prodprotect.com/blackanddecker to register your warranty. Wash all removable parts as instructed in Care and Cleaning Section. Select a location where this unit is to be used, allowing enough space fromthe back of the unit and wall (at least 4 inches) to allow heat to flow withoutdamage to cabinets and walls. Ensure that the crumb/steam tray is in place before use. When removing food from the oven you may slide the crumb/steam traytowards you by fitting tongs or other utensils in the pull slot on the front edgeof the crumb/steam tray. Protect your hands with oven mitts or potholders. Unplug appliance when not in use. This oven has unique cleaning capabilities. Please see the Care and Cleaningsection for more details. The crumb/steam tray is non-stick for easy cleaning. Do not cover thecrumb/steam tray or any part of this oven with metal foil. This oven has beendesigned to operate without foil. Using metal foil will negatively impact thecooking performance of your oven.Important information about using your oven1.2.3.4.5.6This oven gets hot. When in use, always use oven mitts or potholders whentouching any outer or inner surface of the oven.When using the oven for the first time, you may notice smoke or a slight odorduring the first few minutes. This is normal. Many factors influence cook times such as altitude, humidity and variations inelectrical grids. For best results, monitor the end of the cook cycle. Cooking Containers: Metal, ovenproof glass or ceramic bakeware up tostandard 9" x 13" size pans (without handles) can be used in your oven.Follow the manufacturer’s instructions. Be sure food or baking pan does not come within 1 ½ inches (3.8 cm)of the top heating elements. If you have tall food items or cookingcontainers, use the wire rack in the down position.
STAN D BY/ P OW E R O N /PAUSESleep Mode: When the oven is not in use, the digital display and start/stop lightare off. If the oven is not in use and the controls are not touched for 5 minutes, itwill go to sleep.Standby Mode: When you press any of the buttons or turn any of the dials, thedigital display illuminates and the start/stop light flashes. This indicates the ovenis ready to be started. If the timer is at 0:00, the start/stop light will remain unlitand you’ll need to put time on the oven before starting the oven.Power On: When you have selected your desired function and cook time andpress the start/stop button, the oven will power on and the start/stop light willilluminate. After 30 seconds, the heating elements will glow. During operation, theheating elements will cycle on and off to maintain the desired temperature.Add Time: To add time while the unit is running, turn the time/temp knob toadd more time.Change Temperature: To change the temperature while the unit is running(in most functions), press the time/temp knob to toggle to the "TEMP" settingthen turn the time/temp knob to change the temperature.Pause: When the start/stop button is pressed before the timer reaches zero, theheating elements turn off. The start/stop light flashes. The display shows thetime left on the cooking cycle. To restart the cooking cycle, press the start/stopbutton and the start/stop light illuminates and the timer starts again.D IGITA L D I S PLAYWhen the digital display is showing temperature, "TEMP" is illuminated.When it is showing time, "TIME" is illuminated. Toggle between showing timeand temperature by pressing in the time/temp knob.Display while setting time: The display shows minutesusing the last two digits.Display while cooking: For all functions, except fordehydrate, the display shows minutes when above 20, up toa maximum of 90 minutes. Below 20 minutes, the displayshows minutes and seconds.7
B AK ENote: For best results, when baking or cooking,preheat the oven for at least 5 minutes at the desiredtemperature setting. While the oven is preheating, thedigital display will flash "PH" every 3 seconds.Note: This oven has been designed to cook rapidly.Please inspect your items earlier than the prescribedcook time for a conventional oven to ensure that theydo not get overcooked.The default temperature for baking is 350 F. The range for the bake functionis 150 F–450 F.1. pen oven door and place rack in the up position on the crumb/steam tray.OWith the rack in this position you should be able to read the “bake/broil”label on the rack.2. Place items to be baked directly on wire rack or place pan on wire rack.3.Use the Time/Temp knob to set desired temperature.4. Pressthe Time/Temp knob to toggle from " TEMP" to "TIME". Turn the Time/Temp knob to adjust cook time on digital display if you want a different timethan the 15-minute default.5. ress the Start/Stop button to begin baking. The Start/Stop light illuminates.PThe digital display counts down while cooking, showing the time remaining.6. here are 2 beeps when the baking cycle is complete. The Start/Stop lightTturns off. The digital display reads “0.00”.B RO ILNote: It is not necessary to preheat the oven forbroiling.The default temperature for broiling is 425 F. Therange for the broil function is 400 F–500 F.81. pen oven door and place rack in the up position onOthe crumb/steam tray. With the rack in this positionyou should be able to read the “bake/broil” label.2. lace items to be broiled directly on wire rack, or in the baking pan on top ofPthe wire rack.3. Set the Function knob to the Broil position.4. Use the Time/Temp knob to set desired temperature.5. ress the Time/Temp knob to toggle from " TEMP" to "TIME". Turn the Time/PTemp knob to adjust cook time on digital display if you want a different timethan the 10-minute default.6. ress the Start/Stop button to begin broiling. The Start/Stop light illuminates.PThe digital display counts down while cooking, showing the time remaining.
Note: For best results when broiling meat, turn over the meat half-waythrough broiling.7. here are 2 beeps when the broiling cycle is complete. The Start/Stop lightTturns off. The digital display reads “0.00”.BAGE LIt is not necessary to preheat the oven for toasting bagels.1. Open oven door and place rack in the up position onthe crumb/steam tray. With the rack in this positionyou should be able to read the “bake/broil” label.2. Place bagels to be toasted directly on rack with the side up that you want tohave toasted. Close the door.3. Set the Function knob to the Bagel position.4. Use the Time/Temp knob to select desired toast shade on digital display, with 1being the lightest and 7 being the darkest. Shade 4 is the default.5. Press the Start/Stop button to begin toasting. The Start/Stop light illuminates. Thedigital display counts down while cooking, showing the time remaining.6. There are 2 beeps when the bagel toasting cycle is complete. The Start/Stoplight turns off.7. Open the oven door. The crumb/steam tray will be hot so use oven mitts or autensil to slide out the crumb/steam tray and remove the bagel(s).TOASTIt is not necessary to preheat the oven for toasting.Note: It is important to use the rack in the downposition for adequate toasting on the bottom sideof your bread. With the rack in this position you should beable to read the “toast” label. The down rack position putsyour bread at the correct distance to the bottom heatingelements. Do not toast in the upper rack position1. Open oven door and place rack in the down position on thecrumb/steam tray. The toaster will hold a maximum of 6slices of bread, placed in a single layer.2. Place items to be toasted directly on rack and close the door.3. Set the Function knob to the Toast position.4. Use the Time/Temp knob to select desired toast shade on digital display, with 1being the lightest and 7 being the darkest. Shade 4 is the default.5. Press the Start/Stop button to begin toasting. The Start/Stop light illuminates. Thedigital display counts down while cooking, showing the time remaining.6. There are 2 beeps when the toasting cycle is complete. The Start/Stop lightturns off.7. Open the oven door. The crumb/steam tray will be hot so use oven mitts or autensil to slide out the crumb/steam tray and remove the toast.9
A IR F RYAir Fry technology uses high intensity hot air tobake, brown, and crisp your favorite fried foodswith little to no oil.The default temperature for airfry is 425 F. The range for the airfry function is350 F–450 F.Use the cook times listed in the recipes in this booklet or follow the foodpackage recommendations for baking. Adjust the cook adjust the cook timeor temperature as needed to achieve your preferred crispiness.Note: It is not necessary to preheat the oven for air frying.Note: Arrange your food in a single layer on the mesh rack for optimal airfrying results.1. Place food on mesh cooking basket.2. Open door and place mesh cooking basket on the crumb/steam tray.3. Set the Function knob to the Air Fry position.4. Turn the Time/Temp knob to adjust for a different temperature than the 425 Fdefault.5.Press the knob to toggle to time and turn to adjust cook time.6. Pressthe Start/Stop button to begin cooking. The Start/Stop light illuminates.The digital display counts down while cooking, showing the time remaining.7. Thereare 2 beeps when the cooking cycle is complete. The Start/Stop lightturns off. The digital display reads “0.00”.8. To turn off the oven during a cooking cycle, press the Start/Stop button.DE H Y D R AT EThe default temperature for dehydrating is 165 F. Therange for the dehydrate function is 120 F–175 F.Note: Cut the food to even size and thickness.Note: Arrange your food in a single layer on the meshrack for optimal dehydrating results.101. Place food on mesh cooking basket.2. pen door and place mesh cooking basket on the crumb/steam tray. For anOadditional dehydrating layer, carefully place the wire rack in the down positionon top of the mesh cooking basket.3. Set the Function knob to the Dehydrate position.4. Use the Time/Temp knob to set desired temperature.5. Pressthe Time/Temp knob to toggle to the "TIME" setting. Turn the Time/Temp knob to adjust dehydration time on the digital display. The display showsthe dehydration time in hours.
6. ress the Start/Stop button to begin cooking. The Start/Stop light illuminates.PThe digital display counts down while cooking, showing the time remaining. Itwill show the time in hours and cycle between showing the time and the text“Hr”. Once the time reaches 60 minutes remaining, the display will count down inminutes instead of hours.7. here are 2 beeps when the dehydrating cycle is complete. The Start/Stop lightTturns off. The digital display reads “0.00”.8. Open the oven door. Using oven mitts or potholders remove mesh cooking basket.9. To turn off the oven during a cooking cycle, press the Start/Stop button.PIZZ AThe pizza function is designed to produce the bestpizza crust and evenness of cooking. Monitor thepizza near the end of the cooking cycle to preventovercooking.The default temperature for pizza is 425 F. The rangefor the pizza function is 350 F–450 F.Note: It is not necessary to preheat the oven for the pizza function.1. Open oven door and place rack in the up position on the crumb/steam tray.2. lace frozen pizza to be cooked directly on wire rack, or fresh pizza in thePbaking pan on top of the wire rack. Follow recipe or package instructions3. Set the Function knob to the Pizza position.4.Use the Time/Temp knob to set desired temperature.5. ress the Time/Temp knob to toggle from " TEMP" to "TIME". Turn the Time/PTemp knob to adjust cook time on digital display if you want a different timethan the 20-minute default.6. ress the Start/Stop button to begin cooking. The Start/Stop light illuminates.PThe digital display counts down while cooking, showing the time remaining.7. Thereare 2 beeps when the cooking cycle is complete. The Start/Stop lightturns off. The digital display reads “0.00”.11
KE E P WA R MNote: This function is only designed to keep warm food that is alreadycooked. Do not use this function for cooking. Do not keep foods on the keepwarm setting for more than 4 hours.The default temperature for keep warm is 150 F. The range for the keep warmfunction is 150 F–250 F.1. Set Temp selector knob to Keep Warm position.2. urn the Time/Temp knob to adjust keep warm time on digital display if youTwant a different time than the 30-minute default. Press the Time/Temp knob totoggle to the "TEMP" setting. Turn the Time/Temp knob to adjust keep warmtime on the digital display.3. Pressthe Start/Stop button to begin the keep warm function. The Start/Stoplight illuminates. The digital display counts down while warming, showing thetime remaining.4. Thereare 2 beeps when the keep warm cycle is complete. The Start/Stop lightturns off. The digital display reads “0.00”.5. To turn off the oven during the keep warm cycle, press the Start/Stop button.C AR E A N D C L EA N IN GThis product contains no user serviceable parts.Refer to qualified service personnel. Wire rack, mesh cooking basket and crumb/steam tray are dishwashersafe. We recommend washing the bake pan by hand in hot water withdish soap. The top surface of the crumb tray has a (PTFE and PFOA free) non-stickceramic coating. Do not use metal scouring pad to clean the tray as itwill damage the coating. Do not use aerosol or spray oven cleaners.ST E AM C L E AN IN G YO UR OVE NUse the Steam Clean function for a quick cleanup ofyour oven.Note: For best results, clean regularly based on yourfrequency of usage. The function works best whenfood residue does not build up.Important: Do not steam clean immediately aftercooking. Let the oven cool down.121. ix one drop of dish soap and 1/2 cup water. Use distilledMwater if possible.2. our the soapy water onto the crumb tray. Spread thePwater around the tray. Make sure the tray is in its normalposition.
3. lose the door and press the steam clean button. This will illuminate the steamCclean icon and change the display to show “SC”.4. ress the start/stop button to begin the steam clean cycle. The display will cyclePbetween showing the time remaining and “SC”.5. he steam clean cycle runs for 5 minutes. This includes time for the oven to coolTdown. Once the cycle is complete, the oven will beep twice and the display willshow “0.00”.6. pen the oven door and use a towel, paper towel, or sponge to wipe down theOinterior surfaces and glass door. For best results wipe down right after the cycleas condensation helps the cleaning. If significant time has passed and watercondensation is no longer visible on glass door or walls, re-run the cycle for bestcleaning results.7. here will be some residual water left on the tray. When wiping the back of theToven or sides, use caution as the oven may be warm.8. fter you have wiped down the oven, use oven mitts or towel to carefully removeAthe crumb/steam tray and bring it to the sink. Empty the residual water fromthe tray and rinse off the crumb tray. The tray may require some additionalscrubbing to remove any stubborn baked-on food. You can also place the crumbtray in the dishwasher if desired.Note: Use steam cleaning setting for cleaning only. This setting is notdesigned to steam cook foods.Note: Make sure soap is added to the water. Using soap ensures the propercondensation of water.Note: For very stubborn baked-on food or grease, see the "Deep CleaningYour Oven" section below.9. ipe the outside of the oven with a damp cloth or sponge. Do not use a sprayWcleaner. Dry thoroughly.10. Do not attempt to clean the heating elements. Any food that comes intocontact with the elements will burn off on its own.D E E P C L EA N I NG YO UR OVE NAfter using your oven for an extended period of time, it may be necessary todeep clean your oven to remove baked-on stains, or grease.1. Ensure the crumb tray is in place but other accessories are removed.2. reate a mixture of 3 parts baking soda and 1 part water. This will create a bakingCsoda cleaning paste, but it should not be too thick3.Apply some of the paste to a paper towel, sponge or nylon pad.4. crub the stained areas with the baking soda paste with medium pressure.SContinue scrubbing until the surfaces are clean.5. sing a moist sponge, wipe away the remaining soda paste. Clean up any bakingUsoda paste that may have fallen onto the crumb tray during the cleaning process.13
AIR FRYING GUIDEFOODTIME* based on 425 F air fry temperatureFrozen Food *Chicken Nuggets13-16 min. or until crisp and golden brownChicken Strips25-28 min. or until crisp and golden brownFish Sticks10-12 min. or until crisp and golden brownBreaded Onion Rings10-12 min. or until breading is crispBreaded Mushrooms16-20 min. or until breading is crispMozzarella Sticks10-12 min. or until breading is crispJalapeño Poppers14-16 min. or until breading is crispCorn Dogs23-25 min. Rotate front to back halfway through cookingPotato Skins13-15 min. or until hot and cheese is meltedStraight or Crinkle Cut Fries18-24 min. or until golden brownThick Steak Fries20-25 min. or until golden brownThin Shoestring Fries14-18 min. or until golden brownSeasoned Potato Nuggets20-25 min. or until golden brownBroccoli (Frozen)18-20 min. Spray florets with a little pan spray. Seasonwith salt and pepperCauliflower (Frozen)18-20 min. Spray florets with a little pan spray. Seasonwith salt and pepperFresh VegetablesPotato Wedge/Fries20-25 min. or until golden brownBroccoli10 min. Toss florets in 1-2 Tbsp. of oil.Season with salt and pepper.Cauliflower15-17 min. Toss florets in 1-2 Tbsp. of oil.Season with salt and pepper.PoultryChicken Wings(Thawed/Fresh)20-25 min. or until internal tempis 165 F / 75 CChicken Drumsticks(Thawed/Fresh)20-30 min. or until internal tempis 165 F / 75 C*Note: F or these and other foods, please review manufacturer suggestedcook times.Note: Do not air fry frozen raw meats (i.e. burgers, steaks)14
T RO U B L ES HO OTIN GPROBLEMSOLUTIONUnit won’t turn on. Make sure the unit is plugged in. Select a cookingfunction or bake temperature and ensure there is timeon the digital display. Press the start/stop button. If thestart/stop light is illuminated, your oven is powered onand heating.Heating elements are notglowing. Check that the start/stop light is illuminated whichindicates unit is powered on. The heating elementsshould glow red after 1 minute of heating up. Duringoperation, they cycle on and off.Fan is not operating during Check that the function knob is set to air fry. Whenair fry mode.oven is in air fry mode, you should hear the fanhumming.Bottom of bread is nottoasting. Make sure wire rack is used in the down position withthe “toast” label facing up. The cross wires should beclose to the steam/crumb tray. Clean the crumb/steam tray to remove food residue. Do not use foil on the crumb/steam traySmoke is coming out ofthe unit. The oven may create smoke when high-fat or greasyfoods drip on the crumb/steam tray. Cook these kindsof food in the bake pan or other bakeware placed ontop of the wire rack. Run steam clean cycle and thoroughly wipe downinterior and clean the crumb/steam tray. Ensure there is no food debris in the bottom of theoven underneath the crumb/steam tray. If smoke issue persists, use the bake function at alower temperature.Unit may smoke upon theinitial start-up.Food was burned. Make sure you are not cooking directly on the crumb/steam tray. See page 5 for the best cooking support for your food. In air fry mode, gently shake the food half-way throughthe cycle to get more even cooking. Next time lower the temperature or shorten thecooking time.Food is not crispy in air frymode. Use the mesh basket and ensure the food is arrangedin a single layer without any overlap. If using a bake pan instead of a mesh basket for highfat or greasy foods, the food will not be as crispy. Clean the crumb/steam tray to remove any residue. Do not use foil on the crumb/steam trayCooking too slowly. Increase the cooking temperature. Clean the crumb/steam tray to remove any residue.15
T RO U B L ES HO OTIN G CO N TIN UE DPROBLEMSOLUTIONSteam is coming from theunit during cooking ortoasting. This is normal for foods with high moisture content,including some bread types during toasting. Ensure there is no residual water on crumb/steam tray.During steam cleaning:steam is not building upon the glass door or wallsinside the oven. Allow the unit to cool before running steam clean. Use 1/2 cup of soapy water spread out on the crumb/steam tray. Press the Steam Clean button. Then press Start/Stop. Make sure the start/stop light is illuminated duringsteam clean cycle. Ensure the door is closed during the steam clean cycleSteam Clean function didnot completely clean theoven. Refer to “Deep Cleaning Your Oven” to take care ofmore stubborn baked-on foods. Use the steam clean function regularly and immediatelyafter cooking messy food items to prevent build up.Water is dripping onto thecontrol panel. Note: If this occurs it will not damage your oven sincethe control panel is designed to prevent water ingress. Do not cook with water in the crumb/steam tray. Do not run the steam clean cycle two times in a row.Water accidentally spilledonto bottom of the oven. Note: If water is spilled onto the bottom of the oven itwill not damage the oven, as the oven will contain thewater and drain it out the back of the oven. Ensure the unit is not powered on by checking that thestart/stop light is either off or flashing. Unplug oven.Use a towel to dry the bottom of your oven and becareful not to damage the heating elements. Move youroven from its position on the countertop and dry anywater on the counter. Wait 24 hours for any moisture toevaporate and then you can use your oven again.There is food debris stuckon the crumb/steam tray. Run the steam clean cycle. Use a nylon pad to scrub the crumb/steam tray. Donot use a metal scouring pad as this will damage thecoating. Run tray through a dishwasher cycle. Refer to steps in Deep Cleaning Your Oven and use thebaking soda paste to clean your tray. If stain still persists, it will not affect the cookingperformance of your oven.If additional assistance is needed,please contact our consumer service team at1-800-465-6070.16
RecipesBreakfast Egg RollsPrep Time: 10 minutesServings: 5 egg rollsCook Time: 10 minutesTotal Time: 20 minutesServing Size: 1 egg rollIngredients:1414tsp. unsalted buttereggstsp. minced garlicSalt and pepper to tasteslices of bacon (or meat of yourchoice) cooked, and crumbled½5cup cheddar cheese, shreddedegg roll wrappersSmall bowl of waterPan sprayDirections:1. Add the butter to a medium frying pan, over medium heat. Crack the eggsinto a small bowl and scramble. Stir in garlic, salt and pepper. Pour into thefrying pan.2. Sprinkle the bacon and cheese on top of the eggs and stir to incorporateuntil the eggs are cooked through.3. Lay an egg roll wrapper on a flat surface so that one point is facing you(think diamond). Brush the edges with water. Place 3 tablespoons of the eggmixture onto the center of the wrapper. Fold the sides in to the center andthen fold the point closest to you over the egg mixture. Roll tightly awayfrom you and seal the top point with more water to help seal the egg roll.4. Over a sink spray the mesh cooking basket with pan spray and then pla
AIR FRY TOASTER OVEN 1. Door handle 2. Steam Clean button 3. Function knob 4. Digital display 5. mTi eTme/ p knob - rotate to change - press to toggle between time and temperature 6. oponSt /t btSutat r (Turns unit ON or OFF) 7. ngpaBi akn (Part# TOD6020-04) 8. We kacr r i (Part# TOD6020-01) 9. Cruymaeamrt sbt / (Part# TOD6020-02) 10. Mesh .