Transcription
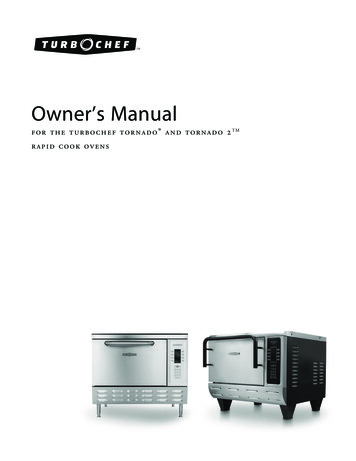
TMOwner’s Manualfor the turbochef tornado and tornado 2 TMrapid cook ovens
m od e lse r i a l n u m b e ri n sta l l e d b yi n sta l l a ti on c h e c k e d b ys er v i c e c e n te r n a m e / n u m b e rFor service or information:wi thin no r th a me r ica ca l lCustomer Service at 800.90turbo orSales & Marketing at 866.90turbooutsi d e no r th a me r ica ca l l 1 214-379-6000 or Your Authorized DistributorTM
IMPORTANT SAFETY INFORMATION - PLEASE READ FIRSTWARNING: Improper installation, adjustment, alteration, service or maintenance can causeproperty damage, injury or death. Read the installation, operating and maintenance instructionsthoroughly before installing or servicing this equipment.This product employs an exposed radiant heating element on the bottom of the cavity. This element isHOT during operation and will remain at dangerous temperatures after the unit is switched off. NEVERattempt to touch the element during operation or while the oven is warm.ox DO NOT store or use gasoline or any other flammable vapors or liquids in the vicinity of this or anyother appliance.The information contained in this manual is important for the proper installation, use and maintenanceof this oven. Adherence to these procedures and instructions will result in satisfactory cooking results andlong, trouble-free service. Please read this manual carefully and retain it for future reference.Errors— descriptive, typographic, or pictorial— are subject to correction. Specifications are subject tochange without notice.
Table of ContentsImportant Safety InstructionsiTo Reduce the Risk of Fire in the Oven CavityiiPrecautions to Avoid Possible Exposureto Excessive Microwave EnergyiiGrounding InstructionsiiPower Supply Cord ReplacementiiiRF Interference ConsiderationsiiiProtective Earth (Ground) Symbol iiiEquipotential Bonding Symbol iiiOverview of the TornadoSpecs and DimensionsDimensionsConstructionStandard al SpecificationsTMHow the Technology WorksThe Technology Behind the TornadoAssembly and InstallationInstallation InstructionsDelivery and Initial InspectionLifting the OvenOven Location and PlacementSecuring Oven to CartDouble Stacking OvensBuilt-In InstallationInstallation Near Open Heat SourceVentilation RequirementsOven AssemblyOptional Installation ItemsOven Restraint KitOven CartsLoading a Menu from a Smart CardSaving a Menu to a Smart CardCommon Operating TermsOven Operating ComponentsModes and StatesCommon Cooking TermsFaults and Errors123477789911111112
Operating the TornadoThe Control PadPowering Up the OvenInitial Power-UpPower-UpVoltage SensingCooking InstructionsTurning the Oven OffEditing a Food ItemChanging the Edit Pin NumberEditing a Food ItemChanging the Idle IR Set TemperatureEnabling/Disabling the Edit ModeCooking Options - Time, Done, and SnoozeThe “Enter Cook Time” ScreenThe “Done” ScreenThe “Snooze” ModeRecipe Development and Cooking TipsDeveloping RecipesDevelopment MethodologyThe Importance of ConsistencyOvenablesDual-Ovenable Paper BoardBaking Papers/SheetsCeramics, Earthenware, CorningwareToughened GlassPlasticsNordicWareWhat Not To UseMaintenance and TroubleshootingDaily Maintenance for the TornadoTips for Prolonging Oven LifeTroubleshootingCatalytic ConverterLimited WarrantyNorth America Limited WarrantyInternational Limited Warranty1314141516171818182123252626293033
INTRODUCTIONiIMPORTANT SAFETY INSTRUCTIONSWARNING: When operating this oven, strictly adhere to the following safety precautions toreduce the risk of burns, electric shock, fire, injury, damage to oven or property near oven, orpossible exposure to excessive microwave energy.General Safety Informationa Read all instructions before using this appliance.a Read and follow the specific “Precautions to be Observed to Avoid Possible Exposure to ExcessiveMicrowave Energy” found on page ii.a This appliance must be grounded. Connect only to a properly grounded outlet. See “GroundingInstructions” on page ii.a Install or locate this appliance only in accordance with the provided installation instructions.a This appliance should be serviced by qualified service personnel only. Contact the nearest authorizedservice facility for examination, repair, or adjustment.a Keep the cord away from heated surfaces.a Liquids, such as water, coffee, or tea are able to be overheated beyond the boiling point withoutappearing to be boiling. Visible bubbling or boiling when the container is removed from the microwaveoven is not always present. this could result in very hot liquid suddenly boiling over whenthe container is disturbed or a utensil is inserted into the liquid.a warning: The contents of feeding bottles and baby food jars must be stirred or shaken and thetemperature checked before consumption, in order to avoid burns (IEC 60335-2-90).a Use this appliance only for its intended uses as described in this manual.a Only use utensils that are suitable for use in microwave ovens (IEC 60335-2-90).Xdo not use corrosive chemicals or vapors in this appliance; it is not designed for industrial/laboratory use.Xwarning: Failure to maintain the oven in a clean condition could lead to deterioration of the surfacethat could adversely affect the life of the appliance and possibly result in a hazardous situation.Xwarning: do not heat liquids or other foods in sealed containers (e.g., jars, whole eggs, etc.) sincethey are liable to explode.Xdo not allow children to use this appliance.Xdo not operate this appliance if it has a damaged cord or plug, is not working properly, or has beendamaged or dropped. See “Power Cord Replacement” found on page ii.Xdo not cover or block any openings on this appliance.Xdo not store this appliance outdoors.Xdo not use this product near water (e.g., near a kitchen sink, in a wet basement, near a swimming pool).Xdo not immerse the cord or plug in water.Xdo not let the cord hang over the edge of a table or counter.Xdo not use a water jet for cleaning. See pages 5-6 in this manual for proper cleaning procedures.XThis appliance is not to be used by children or persons with reduced physical, sensory or mentalcapabilities, or lack of experience and knowledge, unless they have been given supervision or instruction.Reducing Fire Riska Remove wire twist-ties from paper or plastic bags used to facilitate cooking in the oven.a If materials inside the oven ignite, keep the oven door closed, turn the oven off, and disconnect thepower cord or shut off power at the fuse or circuit breaker panel.a If smoke is observed, switch off or unplug the oven. Keep the door closed to stifle any flames.XXXdo not use the cook cavity for storage purposes.do not overcook food. Carefully attend to the oven if paper, plastic, or other combustible materials areplaced inside the oven to facilitate cooking.do not leave paper products, cooking utensils, or food in the cavity when the oven is not in use.SAVE THESE INSTRUCTIONS
iiINTRODUCTIONGrounding InstructionsThis appliance must be grounded. In the event of an electrical short circuit, grounding reduces the riskof electric shock by providing an escape wire for the electric current. This oven is equipped with a cordthat has a grounding wire with a grounding plug, which must be plugged into an outlet that is properlyinstalled and grounded. Consult a qualified electrician or serviceman if uncertain about the ability tofollow grounding instructions or if doubt exists as to whether the appliance is properly grounded.Xdo not use an extension cord. If the power cord is too short, have a qualified electrician orserviceman install an outlet near the appliance.WARNING: Improper grounding can result in risk of electric shock.Power Cord ReplacementIf the power cord is damaged, it must be replaced by the manufacturer, its service agent, or a similarlyqualified person.Precautions to Avoid Possible Exposure to Excessive Microwave Energy(a) Do not attempt to operate this oven with the door open since open-door operation can result inharmful exposure to microwave energy. It is important not to defeat or tamper with the safetyinterlocks.(b) Do not place any object between the oven front face and the door or allow soil or cleaner residue toaccumulate on sealing surfaces.(c) Do not operate the oven if it is damaged. It is particularly important that the oven door closeproperly and that there is no damage to the: (1) Door (bent), (2) hinges and latches (broken orloosened), (3) door seals and sealing surfaces.(d) The oven should not be adjusted or repaired by anyone except properly qualified service personnel.RF Interference ConsiderationsThe Tornado oven generates radio frequency signals. This device has been tested and was determined tobe in compliance with applicable portions of FCC part 18 requirements and to the protection requirements of Council Directive 89/336/EEC on the approximation of the laws of the Member States relatingto electromagnetic compatibility at the time of manufacture. However, some equipment with sensitivity tosignals below these limits may experience interference.If your equipment experiences interference:a Increase the physical separation between this oven and the sensitive equipment.a If the sensitive device can be grounded, do so following accepted grounding practices.a If battery-powered microphones are being affected, ensure that the batteries are fully charged.a Keep sensitive equipment on separate electrical circuits if possible.a Route intercom wires, microphone wires, speaker cables, etc. away from the oven.Protective Earth (Ground) SymbolThis symbol identifies the terminal which is intended for connecting an external conductor for protection against electric shock in case of a fault, or the terminal of a protective earth (ground) electrode.Equipotential Bonding SymbolThis symbol identifies the terminals which, when connected together, bring the various parts of anequipment or of a system to the same potential, not necesarily being the earth (ground) potential,e.g. for local bonding.SAVE THESE INSTRUCTIONS
OVERVIEW OF THE TORNADO OVENOverview of the Tornado Ovenf i g ur e 1 : Dimensions of the Tornado OvenSPECS AND DIMENSIONSDimensionse xt e riorHeight19”with legs*23”Width26”Depth25.7”with handle (Tornado)28.2”with handle (Tornado 2) 28.45”Weight190 lb.(482 mm)(584 mm)(660 mm)(653 mm)(716 mm)(723 mm)(86 kg)c o ok c avityHeight8”Width15.5”Depth14.7”(203 mm)(393 mm)(373 mm)w al l c l e ar a nceBack0”Sides2”Top4”(0 mm)(51 mm)(102 mm)e nt ry c l e arance (minimum)Crated30”Uncrated 24”* Legs are 4” (102 mm).Constructione x te r io ro 430 stainless steel front, top and sideso 4” (102 mm) adjustable legso Stainless steel handleo Cool to the touch pull down doorinte r io ro 304 stainless steel lineo Fully insulated cook cavityo Lower cooking (IR) elementStandard Featuresooooooo(787 mm)(673 mm)ooooIntegral recirculating catalytic converter for ULlisted ventless operation (UL KNLZ)Variable-speed High h recirculating impingementairflow systemVariable cooking surfaces (racks, stones, platters)Independently-controlled bottom browning elementSmart Voltage Sensor Technology* (U.S. only)Smart menu system capable of storing 128 recipesBuilt-in self-diagnostics for monitoring ovencomponents and performanceStackable design (requires stacking kit)Manual snooze modeIncludes plug and cord (5 ft.)Warranty – 1 year parts and labor**North American models (NGC) only.1
2OVERVIEW OF THE TORNADO OVENAccessories (Additional Charge)o 24” (610 mm) stainless steel oven stand withlocking casterso 18” (457 mm) stainless steel oven stand withlocking castersCertificationsPackagingAll ovens are packaged in a double-wall corrugatedbox with integrated corrugated skids.ELECTRICAL SPECIFICATIONSNGC (1 Phase, 60 Hz )Operating VoltageCurrent DrawPhaseFrequencyPlugMax InputMicrowave Input Power208/240 VAC*30 Amps1 Phase60 HzNEMA 6-305990/6675 watts3500 watts* Smart Voltage Sensor Technology automaticallysenses the supply voltage and allows the user toconfigure the oven to the correct setting (208 or240) with the touch of a button.NOTE: The Smart Voltage Sensor Technologydoes not compensate for lack of, or over voltagesituations. It is the responsibility of the owner tosupply voltage to the unit according to the abovespecifications.NGCEW (3 Phase, WYE, 50 Hz)Operating Voltage400 VACCurrent Draw16 AmpsPhase/Frequency3 Phase/50 HzPlugIEC 309, 5 PIN (32 A)Heaters Input Power6300 wattsMicrowave Input Power 3500 wattsNGCED (3 Phase, Delta, 50 Hz)Operating Voltage230 VACCurrent Draw30 AmpsPhase/Frequency3 Phase/50 HzPlugIEC 309, 4 PIN (32 A)Heaters Input Power6300 wattsMicrowave Input Power 3500 wattsNGCUK (1 Phase, 50 Hz)Operating VoltageCurrent DrawPhase/FrequencyPlugHeaters Input PowerMicrowave Input Power230 VAC30 Amps1 Phase/50 HzIEC 309, 3 PIN (32 A)6300 watts3500 wattsNGCBK (1 Phase, 60 Hz)Operating VoltageCurrent DrawPhase/FrequencyPlugHeaters Input PowerMicrowave Input Power220 VAC30 Amps1 Phase/60 HzIEC 309, 3 PIN (32 A)6300 watts3500 wattsNGCJD (3 Phase, 50/60 Hz)Operating Voltage200 VACCurrent Draw30 AmpsPhase/Frequency3 Phase/50 or 60 HzPlugPSE, 4-blade (30 A)Heaters Input Power6300 wattsMicrowave Input Power 3500 wattsNGCJK (1 Phase, 50/60 Hz)Operating Voltage200 VACCurrent Draw30 AmpsPhase/Frequency1 Phase/50 or 60 HzPlugPSE, 3-blade (30 A)Heaters Input Power6300 wattsMicrowave Input Power 3500 wattsNOTE: Model NGC is typically the oven modelused in North America. NGCEW, NGCED,NGCUK, NGCBK, NGCJD, and NGCJK areprimarily used in international markets andlocations.
HOW THE TECHNOLOGY WORKSHow the Technology Worksf ig u r e 2 : How the Technology WorksTHE TECHNOLOGY BEHIND THE TORNADOThe Tornado uses a patented combination of highspeed forced air convection, heating, and microwave energy to cook food up to 12 times fasterthan conventional methods.At a very high speed of circulation, a controlled,smoothly flowing field of hot air forms a shroudaround the food. This takes place in conjunctionwith measured, precise bursts of microwave energy,creating a unique set of temperature and moisturecontrol conditions within the food that preservesand enhances flavor.Figure 2 illustrates the five steps of the technologyused by the Tornado Oven. These steps, describedbelow, are all computer controlled.1. The internal heaters transfer energy to therecirculating airflow.2. The recirculating airflow circulates at speeds upto 60 mph (100 km/h) down and around thefood item.3. Simultaneously, a bottom radiant heater providesheat transfer to the bottom of the food product.4. The recirculating air passes through a CatalyticConverter where excess grease and odors arecombusted and removed.5. Working in parallel with the recirculating airflowand bottom IR element, the microwave systemcouples microwave energy from the bottom ofthe cavity evenly into the food items.NOTE: An easy way to understand our cooking isto think of the microwave cooking from the insideout and the airflow cooking from the outside in.The two energy gradients meet and greatly reducethe cook time.3
4ASSEMBLY AND INSTALLATIONAssembly and InstallationINSTALLATION INSTRUCTIONSThe TurboChef Tornado is manufactured tocomply with applicable CE, NSF, UL, cUL, TÜV,PSE, GOST R, FDA, and FCC requirements. Allequipment is designed and certified for safe operation when installed in accordance with local and/or national codes. It is the owner and/or installer’sresponsibility to comply with any codes that mayexist.Install the oven only in accordance with the procedures detailed in this manual.WARNING: Death, injury and equipmentdamage can result from improper installationof the oven or installation of a unit damagedduring shipment or storage. DO NOT install an oven suspected of damage.TurboChef does not assume responsibility for anyloss or damage suffered in transit. The carrier assumesfull responsibility for delivery in good order whenthe shipment is accepted. However, when necessary, TurboChef can assist in filing a claim.Lifting the OvenWARNING: Oven weighs approximately190 lbs. (90 kg). Two or more people arerequired to lift it.Position at least one person on either side of theoven. Lift from the bottom. Never lift the oven fromthe front and rear. The countertop surface on whichthe oven is placed must be at least 30” (762 mm)deep and capable of supporting 200 lbs. (90 kg).Once properly positioned on the counter, plug theoven into a wall-mounted electrical receptacle. SeeElectrical Specifications on page 2.oxOven Location and PlacementNOTE: Improper installation or the installationof a unit damaged during shipment or storage mayresult in the voiding of the Limited Warranty.Delivery and Initial InspectionAll TurboChef speed cook ovens are shipped soas to prevent damage.WARNING: Death, injury and equipmentdamage may result from improper positioning.It is the operator’s responsibility to ensure theoven is properly positioned on countertop.TurboChef will not warrant any damage orinjury to ovens that fall off countertops due toimproper placement.Upon delivery, inspect the shipping container forexternal damage. Any evidence of damage should benoted on the delivery receipt which must be signedby the driver.Proper placement of the oven will enhance long-termoperator convenience and satisfactory performance.Be sure to place the oven in an area accessible forproper operation and servicing.Upon removing the oven from its shipping carton,check for any possible damage. Make note of anydamage and contact the shipping company to filea claim. Carriers will accept claims for concealeddamage if notified within fifteen (15) days of thedelivery and if the shipping container is retainedfor inspection.The surface on which the oven is placed must be atleast 30” (762 mm) deep and capable of supporting200 lbs. (90 kg). The manufacturer shall not assumeliability for damage or injury resulting from theimproper installation of this equipment, includingtemporary or unstable work stations or countertops.
ASSEMBLY AND INSTALLATIONfigure 3: Oven Secured to CartThere must be at least 4” (102 mm) between thetop of the unit and any shelf or surface.The oven must be installed level front to back andside to side. For additional stability, the oven legsmay be bolted to the countertop if desired. Anoptional Oven Restraint Kit (P/N TC3-0242) is alsoavailable and can provide additional stability forthe oven. See page 7 for further information.Securing Oven to Cart (Figure 3)1. Lock the wheels of the oven cart.2. Place the oven on the oven cart.WARNING: Do not attempt to lift the ovenwith fewer than 2 people.WARNING: When lifting the oven, positionat least one person on each side.WARNING: Do not lift the oven from thefront and back.WARNING: Do not transport ovens on cartwhen stacked.3. Remove the oven legs. There will be holes in theoven where the legs used to be.f i gu r e 4 : Double Stacking Ovens4. Align holes in oven with holes on oven cart.(Different sets of holes are provided on cart toaccommodate either the Tornado or C3.)5. Install bolts with washers by running them upthrough the cart surface and into the holes inthe oven (where the legs were). See Figure 3.Double Stacking Ovens (Figure 4)1. Ensure the surface that will hold the stackedovens can support the weight (500 lbs/227 kg).2. Allow each oven time to cool and then unplug.3. If you are stacking the ovens on a TurboChefoven cart, make sure that the bottom oven isbolted to the cart and wheels are locked (seeprevious section).4. Attach the Stacking Bracket (P/N TC3-0323) tothe back of the bottom oven:a. Remove the screws marked with gray arrowsin Figure 4.b. Align the holes on the Stacking Bracket withthe holes on the oven and reinstall the screws.NOTE: Orient the bracket as shown in Figure 4.5
6ASSEMBLY AND INSTALLATION5. Remove the legs of the oven that will be placedon top. This requires two or more persons—atleast one person to lift and one person tounscrew the legs.6. Remove the screws from the oven that will beplaced on top, as marked with black arrows inFigure 4.7. Place the oven on top of the oven that has thestacking bracket attached.WARNING: Do not attempt to lift the ovenwith fewer than 2 people.WARNING: When lifting the oven, positionat least one person on each side. Do not liftthe oven from the front and back, and do notuse the handle to lift the oven.8. Align the holes on the Stacking Bracket with theholes on the top oven and reinstall the screws.Installation Near Open Heat Source (Figure 6)When placing a TurboChef oven near an openheat source, strictly adhere to the following:Verify oven location has a minimum 4” (102mm) clearance on top and minimum 2” (51mm) of clearance on each side.o If the oven is being placed near a grill or stove,there must be a divider between the oven andthe open heat source, with a minimum of 6”(152 mm) between the oven and the divider.o If the oven is being placed near a fryer, theremust be a divider between the oven and fryer,with a minimum of 12” (305 mm) between theoven and the divider.o The height of the divider must be greater thanor equal to the height of the oven (23”/584mm).o Built-In Installation (Figure 5)TurboChef ovens are designed to be installed ona countertop or table. They are not intended forbuilt-in or enclosed installation.Ventilation RequirementsThe TurboChef Tornado oven has been approvedby Underwriter’s Laboratory for ventless operation(UL KNLZ listing) for all food items except forfoods classified as “fatty raw proteins.” Such foodsinclude bone-in, skin-on chicken, raw ham burgermeat, raw bacon, raw sausage, steaks, etc. If cooking these types of foods, consult local HVAC codesand authorities to ensure compliance with ventilation requirements.“Built-in or enclosed installation” is defined asinstalling an oven in any structure that surroundsthe oven by five sides (i.e., top/rear/side panels andbase).To ensure continued compliance with all health,building, and fire codes, you are required tomaintain clean and sanitary conditions aroundyour oven at all times.If installation must be “built in,” the operatormust ensure the following:NOTE: In no event shall the manufacturer assumeany liability for damages or injuries resulting frominstallations which are not in compliance with theinstructions and codes previously listed. Failure tocomply with these instructions could result in theissuance of a temporary cease and desist order fromthe local health department until the environmentconcerns are addressed.WARNING: Do not stack ovens over two-high.Minimum of 300 cfm (8.5 cmm) of supplementflow within the cabinet.o Minimum clearances of 2” (51 mm) to everysurface.o In addition, the operator will be responsible forcompensating any extra time required to servicethe product due to removing the product forserviceability.
ASSEMBLY AND INSTALLATION2.0" (51mm)2.0" (51mm)UnobstructedAirflowFan300 CFM (8.5 CMM)Dischargeto Ambient4.0"(102mm)UnobstructedAirflow2.0" (51mm)2.0" (51mm)Notes:1: Must be included by contractorfigure 5: Built-in Installationfigure 6: Installation Near Open Heat SourceOVEN ASSEMBLYOven Assembly1. Carefully remove packing materials from thewire rack.2. Open the cook cavity door.3. Remove packing materials from inside the oven.4. Place wire rack in oven.OPTIONAL INSTALLATION ITEMSOven Restraint Kit (P/N TC3-0242)The Oven Restraint Kit is an optional systemintended to hinder the oven from moving forwardduring use and/or cleaning. It will not prevent theoven from falling off a countertop if the legs areallowed to slide off the edge or if the oven is intentionally or forcefully pulled off.Proper installation instructions are included withthe Oven Restraint Kit. If additional help is needed,call Customer Service at 800.90TURBO ( 1 214379-6000) or your Authorized Distributor.7
8ASSEMBLY AND INSTALLATIONfigure 7: 24” (610mm) Cart with a Single Ovenf i gu r e 8 : 24” (610mm) Cart with a Single OvenOven Carts (P/N TC3-0143-1 & P/N TC3-0143-2)There are two carts – 18” (457 mm) (TC3-0143-2)and 24” (610 mm) (TC3-0143-1) – available foruse with the Tornado oven. See Figures 7 and8 (above). Both carts can be used with single orstacked ovens.24” (610 mm) Cart:Heightwith single ovenwith stacked ovensWidthwith single ovenwith stacked ovensDepth*with single ovenwith stacked ovensDimensions for the two carts are listed below.18” (457 mm) Cart:Heightwith single ovenwith stacked ovensWidthwith single ovenwith stacked ovensDepth*with single ovenwith stacked 37.6”37.6”(457 mm)(940 mm)(1422 mm)(706 mm)(706 mm)(706 mm)(676 mm)(955 mm)(955 .6”37.6”(610 mm)(1092 mm)(1575 mm)(706 mm)(706 mm)(706 mm)(676 mm)(955 mm)(955 mm)* Depth with the oven door(s) open. With thedoor(s) closed, the depth is 26.625” (676 mm)or the depth of the cart.Assembly instructions are included with the carts.If additional help is needed, call Customer Serviceat 800.90TURBO ( 1 214-379-6000) or yourAuthorized Distributor.
ASSEMBLY AND INSTALLATIONSAVING A MENU TO A SMART CARDAt some point you may be required to save yourexisting menu settings to a smart card (for example,if the control board needs to be replaced). Pleasenote that once the procedure below is completed,any existing menu settings on the smart card will bepermanently lost.1. Ensure the oven is in the oven off/coolingdown mode.figure 9: Insert Smart CardLOADING A MENU FROM A SMART CARDAt some point you may be required to overwrite theexisting menu settings with new ones via a smartcard. Please note that once the procedure below iscompleted, the old menu settings will be permanently lost.2. Enable the save menu function:a. Simultaneously press the up and down keys.b. Enter the code 6-3-6-8 (M-E-N-U) and pressenter.c. Press 9 to enable load menu. The oven willreturn to oven off/cooling down.d. Simultaneously press the up and down keys.e. Enter the code 7-2-8-3 (S-A-V-E) and pressenter. The oven will return to the oven off/cooling down screen.3. Remove the lower access panel (Figure 9).4. Insert smart card into oven (Figure 9).5. Press the bottom-left soft key.1. Ensure the oven is in the oven off/coolingdown mode.6. Select save menu to card. The menu on theoven will load to the smart card.2. Enable the load menu function:a. Simultaneously press the up and down keys.b. Enter the code 6-3-6-8 (M-E-N-U) and pressenter.c. Press 9 to enable load menu.7. When this process completes, the oven willbeep. Remove the smart card and reattach thelower access panel.3. Remove the lower access panel (Figure 9).4. Insert smart card into oven (Figure 9).5. Press the bottom-left soft key.6. Select load menu from card. The menu onthe smart card will load to the oven.7. When this process completes, the oven willbeep. Remove the smart card and reattach thelower access panel.9
10ASSEMBLY AND INSTALLATIONT hi s p a ge l e ft i n te n ti o n a l l y b l a n k .
COMMON OPERATING TERMSCommon Operating TermsOVEN OPERATING COMPONENTSDisplayThe display is the primary interface to relay messages to the operator.KeypadThe keypad is the primary interface for the operator to enter commands to the oven.Cook CavityCavity in which the food products are cooked.MODES AND STATESModeA mode is a software environment that allows certainoperations to occur. These modes consist of off,warm-up, idle, cook, cool down, edit, and test.Off ModeWhen in the off mode, the cook cavity temperature is below 150ºF (65ºC), and power is not beingsupplied to the oven’s main components – the convection blower, heaters, magnetron circuits, andradiant element. However, there is power to theoven controls (keypad and display).Warm-Up ModeThe mode in which the oven is warming itself tothe pre-defined cook cavity (CC) and radiant element (IR) set temperatures.Idle Mode Mode in which an oven has successfully warmedto the pre-defined set temperatures, and the oven isready to receive cook commands via the keypad.When in the idle mode, the first 8 food groupswill appear on the display.Until the oven receives cook commands, it willcycle the blower motor/heaters in order to maintain the set temperature.Cook ModeMode during which the oven is cooking (executing a food item). Note that a food item, or recipe,is a sub-component of a food group (see commoncooking terms, below).Cool Down Mode During cool down, the oven’s main convectionblower circulates until the cook cavity temperatureis below 150ºF (65ºC). All major oven componentsare turned off except for the cooling fan, convection motor, and oven controls.Edit ModeThe edit mode enables the user to change existingmenu settings.Test ModeThe test mode is a special diagnostic mode thatenables service technicians to turn the oven’ssystems on and off independently for the pusposeof testing them.COMMON COOKING TERMSCook CycleA set of operations as defined by a food item, or“recipe.”Food Item/Recipe A set of cooking parameters including total cooktime, IR set temperature, and events.A recipe must have at least one (1) event and cannot have more than six (6).Total Cook TimeThe total duration (time) of a recipe.11
12COMMON OPERATING TERMSIR Set TemperatureThe operating temperature of the IR heating element during a given recipe.Cook Cavity Actual TemperatureThe actual temperature of the cook cavity as registered by the cook cavity thermocouple.The IR heating element is the electrical heating element located beneath the cooking rack which supplies the heat used primarily to toast and/or brownthe underside of a product.Cook Cavity Set TemperatureA pre-defined temperature to which the cook cavitywill warm and at which the oven will cook.EventA portion of a recipe with unique air and microwavesettings. A recipe must contain at least one event,and cannot contain more than six.Within an event, the user can determine percentagetime, percentage air, and percentage microwave.See page 17 for more detail.Percentage (%) TimeEach event is a percen
a If materials inside the oven ignite, keep the oven door closed, turn the oven off, and disconnect the power cord or shut off power at the fuse or circuit breaker panel. a If smoke is observed, switch off or unplug the oven. Keep the door closed to stifle any flames. X do not use the coo