Transcription
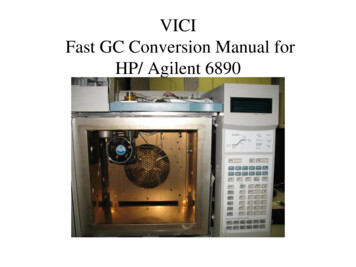
VICIFast GC Conversion Manual forHP/ Agilent 6890
VICI Fast GC Conversion Kit This manual describes how to convert a HP/Agilent 6890to a “Fast GC” using the VICI Fast GC Conversion Kit.There are many advantages to converting the HP orAgilent GC to a “Fast GC”. An increase in productivityand efficiency is easily attained when using a VICI CladColumn and Fast Column Controller. Installation of an adapter plate is required to relocate thedetector next to the injector. The conversion can becompleted within one hour. This kit includes all necessarytools except an electric drill.2
Conversion Kit Parts List12345678910111213141516T15 Screw DriverT20 Screw Driver(4) 6/32” x ¾” Screws(4) M4 ScrewsKnifeFID Guide Block3/8” Brad Drill BitCutting PliersHole SawMetal WrenchRulerInjector Adapter Fitting Assy.Detector Adapter Fitting Assy.Detector Insulation CupFan Bracket12V Cooling Fan171819202122232425262728293031Fan Extension HarnessGround HarnessFID Igniter HarnessFID Electrometer HarnessFID Heater HarnessColumn HarnessPower Supply HarnessPower Supply AC CordUSB CordAdapter PlateColumn ControllerPower SupplyConversion ManualController ManualColumn Manual3
Once the FID has been relocated, theGC can accept a small diameternickel clad column.4
Remove Panels From GC 1) Unplug GCs AC powercord. 2) Loosen the two screwson the side panel. 3) Slide panel to rear andremove panel.5
Remove FID Cover There are two tabs(forward and back)holding the FID coveronto the GC. 1) Reach under the coverand push the tabs inwardto unlatch both ends. 2) Lift cover up andremove.6
Remove FID Hood 1) Pull metal lock tabforward to unlock hinge. 2) Slide lid to the right,then up to remove.7
Remove Deck Plate 1) Use the cutters and cutthe (7) tabs holding thecover plate to the GC. 2) Remove the plate fromthe GC to expose the oveninsulation.8
Disconnect FID Connectors 1) Disconnect the threeFID connectors from theelectrical panel of the GC. Extension cords will beconnected to the FID onceit has been repositioned.9
Remove FID from GC Before removing the FID,disconnect and remove oldcolumn. 1) Unscrew the fourscrews holding the FID tothe GC. 2) Carefully lift the FIDfrom the GC.10
Remove FID Insulation 1) Remove the screwholding the heater cover tothe FID. 2) Remove the cup andinsulation from the FIDand set the FID aside. 3) Keep the insulationintact for later use.11
Remove the FID Fasteners It is necessary to removethe four pallet mountingscrews from the FIDpallet. 1) Take a 6/32” x ¾”screw and push up on thebottom of the palletscrews. Unscrew the fourM4 screws from the pallet. 2) Save the old screws toreplace the FID to itsoriginal position.12
Install Adapter Plate 1) Install the adapter plateonto the GC. 2) Install four M4 screwsto hold the plate to theGC, but do not tighten thescrews down tightly at thistime. The plate will be removedafter the next step.13
Cut Insulation for FID 1) Use the knife to cut asquare hole down throughthe insulation using theperimeter of the plate as aguide. Make a smooth cutdown to the top of themetal oven. The insulation has twolayers. Do not destroy thelower 1cm dense layer ofinsulation. All insulationwill be reused later.14
Clean FID Hole 1) Remove the insulationfrom the new hole. 2) Clean any looseinsulation from the bottomof the hole. It is important for the holeto be clear of any debris.15
Insert FID Block 1) Insert the guide blockwith the hole toward theinjector. Make sure the block isresting flat and firm on themetal below.16
Drill the FID Hole 1) Use the electric drillwith the 3/8” Brad drill bitto drill a hole in the top ofthe GC oven. 2) Remove the block whenfinished.17
Wire Harness Hole 1) Use the 3/8” Brad DrillBit to hand drill a holethrough the insulation forthe fan and column wires.The hole may be enlargedlater if needed. 2) Remove the adapterplate screws and theadapter plate.18
FID Insulation Replacement 1) Cut half of the lightweight insulation that wasremoved from the newsquare hole and place itinto the original FID hole. 2) Keep the other half ofthe insulation for the newFID hole.19
Insulation 1) Place the 1cm thickdense insulation, removedfrom the bottom of thenew FID hole, back intothe bottom of the hole. The dense insulation has ahigher temperature ratingand a hole must be drilledthrough it for the FIDfitting.20
Insulation Hole 1) Reinstall the adapterplate using the four M4screws. Firmly tighten thescrews. 2) Reinsert the guideblock. 3) Use the 3/8” drill bit tohand drill a hole in thedense insulation. 4) Remove the block fromthe plate.21
Install FID 1) Add the remaining insulationto the right side of the new FIDhole. 2) Lower the FID onto theadapter plate. 3) Install and tighten the four6/32” x ¾” screws to secure theFID to the plate. Do not overtighten the screws to thealuminum plate.22
FID Wiring Harness 1) Connect the three FIDextension harnesses to theFID. 2) Connect the threeharnesses to theirrespective connections onGC electrical panel.23
Adapter Fittings The injector and detectorfitting assemblies areshown in order ofassembly. The taper of the seals mustface UP when installingthe fittings into the GC.24
Adapter Fitting Installation 1) Install the injector fitting andseal into the injector. The taperof the seal must face up. 2) Insert the detector fitting intothe insulation cup. Keep thehole clear. 3) Install the detector fitting,cup and seal into the detector. 4) Firmly tighten fittings withmetal wrench.25
Connect Ground Harness 1) Install the ground harnessonto the adapter fittings. 2) Install the washers and nutsonto the adapter fittings. 3) Tighten nuts firmly withmetal wrench. The ground harness should siton top of the fan housing toallow clearance for the auxiliarycooling fan.26
Fan Installation 1) Install the fan assembly tothe top of the oven via originalattachment points for thecolumn rack. The fan label mustface FORWARD as shown. 2) Push the ground and fanharnesses up through the hole inthe top of the oven. Adjustments to the groundharness may be necessary toclear the auxiliary fan.27
Column and Fan Harness 1) Tie a loop in the columnharness to preventdisconnections and wrap theloop around the hinge bracket. 2) Push the fan and columnharnesses down between thetwo walls of the GC. 3) Connect the black wires tothe ground harness. 4) Connect the fan harness.28
FID Cover Vent Hole It is necessary to drill anew vent hole for therepositioned FID. 1) Measure 35 mm fromthe side of the FID hoodand make a mark. 2) Measure 108 mm fromthe front of the FID hoodand make another mark. The two marks should beat the same point. Markthis spot for drilling.29
Drill FID Vent Hole 1) Use the hole saw todrill a vent hole in thecover. 2) Use the knife to trimany rough edges from thehole.30
Reinstall FID Cover 1) Slide the FID cover intothe socket. 2) Slide hinge pin to theright and into the lid hole. 3) Push the locking tabtoward the back to securethe hinge. 4) Close the lid whenfinished.31
Install GC Panels 1) Snap FID cover ontothe GC. 2) Insert the side panelinto the lower track (2cmback from screw holes)and slide it forward intoplace. 3) Tighten the two screws. 4) Plug the GC powercord into the AC outlet.32
Connect the Fast ColumnController 1) Connect the fan harness tothe controller. 2) Connect the power supplyharness to the controller. 3) Connect the column harnessto the controller. 4) Connect the power output tothe 48VDC power supply. 5) Connect the AC power cordto the 48VDC power supply. Verify the polarities are correct.33
Verify Harness Connections 1)Verify all electricalconnections areconnected and secure. 2) Close GC hood.34
Installation CompleteIt is necessary to leave the door of the GC open 5cm to allow the heat from the injector anddetector to escape from the oven. Otherwise, the heat will build up in the oven making thecooling of the column difficult. This also prevents strong drafts from effecting the columntemperature.35
VICI Fast GC Conversion Kit This manual describes how to convert a HP/Agilent 6890 to a "Fast GC" using the VICI Fast GC Conversion Kit. There are many advantages to converting the HP or Agilent GC to a "Fast GC". An increase in productivity and efficiency is easily attained when using a VICI Clad Column and Fast Column Controller.