Transcription
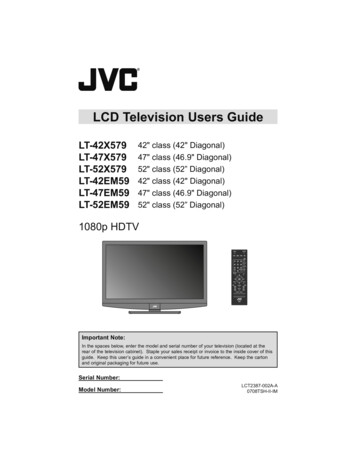
LCD Television Users LT-52EM5942" class (42" Diagonal)47" class (46.9" Diagonal)52" class (52” Diagonal)42" class (42" Diagonal)47" class (46.9" Diagonal)52" class (52” Diagonal)1080p HDTVImportant Note:In the spaces below, enter the model and serial number of your television (located at therear of the television cabinet). Staple your sales receipt or invoice to the inside cover of thisguide. Keep this user’s guide in a convenient place for future reference. Keep the cartonand original packaging for future use.Serial Number:Model Number:LCT2387-002A-A0708TSH-II-IM
Table of ContentsWarnings . . . . . . . . . . . . . . . . . . 3Precautions . . . . . . . . . . . . . . . . 6Remote Control . . . . . . . . . . . . . 10TV Basic Controls . . . . . . . . . . . 12Setup . . . . . . . . . . . . . . . . . . . 16Initial Setup . . . . . . . . . . . . . . . . . . . 16Key Features . . . . . . . . . . . . . . . 18Remote Control Functions . . . . . 19Sleep . . . . . . . . . . . . . . . . . . . . .Return TV . . . . . . . . . . . . . . . .Favorite . . . . . . . . . . . . . . . . . . .Aspect . . . . . . . . . . . . . . . .Sound . . . . . . . . . . . . . . . .Video . . . . . . . . . . . . . . . .Guide . . . . . . . . . . . . . . . .SUB CH . . . . . . . . . . . . . . . .ML/MTS . . . . . . . . . . . . . . . .191919202020212121Customizing your TV . . . . . . . 22Picture . . . . . . . . . . . . . . . . . 23Video Status . . . . . . . . . . . . . . . .Color Temp . . . . . . . . . . . . . . . .Color Management . . . . . . . . . . . . .Dynamic Gamma . . . . . . . . . . . . . .Smart Picture . . . . . . . . . . . . . . . .Digital VNR . . . . . . . . . . . . . . . . .MPEG NR . . . . . . . . . . . . . . . . .Natural Cinema . . . . . . . . . . . . . . . . .Video Reset . . . . . . . . . . . . . . . . .232424242525252525Display . . . . . . . . . . . . . . . . 26Video Input Label . . . . . . . . . . . . . . 26Photo Viewer . . . . . . . . . . . . . . . . 26Aspect . . . . . . . . . . . . . . . . . . . 28TV . . . . . . . . . . . . . . . . . 29Closed Caption . . . . . . . . . . . . . . . .C.C. Setting . . . . . . . . . . . . . . . . . . .Tuner Mode . . . . . . . . . . . . . . . .Auto Scan . . . . . . . . . . . . . . . .229293030Add Channel . . . . . . . . . . . . . . .Edit Channel . . . . . . . . . . . . . . .V-Chip . . . . . . . . . . . . . . .Guide . . . . . . . . . . . . . . .TV (V-Chip) . . . . . . . . . . . . . . .Password . . . . . . . . . . . . . . .MPAA . . . . . . . . . . . . . . .Can. Eng. . . . . . . . . . . . . . . .Can. Fre. . . . . . . . . . . . . . . .TVPG . . . . . . . . . . . . . . . .31313131323333343536Sound . . . . . . . . . . . . . . . . . 37MTS . . . . . . . . . . . . . . . .Digital Audio (ML) . . . . . . . . . . . .Surround . . . . . . . . . . . . . . . .Sound Status . . . . . . . . . . . . . . . .Audio Reset . . . . . . . . . . . . . . . .3737373838Power . . . . . . . . . . . . . . . . . 39Sleep Timer . . . . . . . . . . . . . . . . 39Power Indicator . . . . . . . . . . . . 39Setting . . . . . . . . . . . . . . . . . 40Plug-In Menu . . . . . . . . . . . . . . . .Time Zone . . . . . . . . . . . .D.S.T. . . . . . . . . . . . . . . . .Language . . . . . . . . . . . . . . . .Noise Mute . . . . . . . . . . . .Front Panel Lock . . . . . . . . . . . .Transparency . . . . . . . . . . . .Auto Shut Off . . . . . . . . . . . . . . . .System Info . . . . . . . . . . . . . . . .Auto Demo . . . . . . . . . . . .Optical Out . . . . . . . . . . . .4040404040414141414141Connecting Your Devices . . . . .Troubleshooting . . . . . . . . . . . .Specifications . . . . . . . . . . . .Warranty . . . . . . . . . . . .42474950
WarningsCAUTIONRISK OF ELECTRIC SHOCKDO NOT OPENCAUTION: To reduce the risk of electric shock. Do notremove cover (or back). No user serviceableparts inside. Refer servicing to qualified servicepersonnel.The lightning flash with arrowhead symbol, within anequilateral triangle is intended to alert the user to thepresence of uninsulated “dangerous voltage” withinthe product’s enclosure that may be of sufficientmagnitude to constitute a risk of electric shock topersons.The exclamation point within an equilateral triangle isintended to alert the user to the presence of importantoperating and maintenance (servicing) instructions inthe literature accompanying the appliance.WARNING:TO PREVENT FIRE OR SHOCK HAZARDS, DO NOT EXPOSE THISAPPARATUS TO RAIN OR MOISTURE.CAUTION:TO INSURE PERSONAL SAFETY, OBSERVE THE FOLLOWING RULESREGARDING THE USE OF THIS UNIT.1. Operate only from the power source specified on the unit.2. Avoid damaging the AC plug and power cord.3. Avoid improper installation and never position the unit where good ventilation is unattainable.4. Do not allow objects or liquid into the cabinet openings.5. In the event of trouble, unplug the unit and call a service technician. Do not attempt to repairit yourself or remove the rear cover.Changes or modifications not approved by JVC could void the warranty.* When you don’t use this TV set for a long period of time, be sure to disconnect both thepower plug from the AC outlet and antenna for your safety.* To prevent electric shock do not use this polarized plug with an extension cord, receptacle orother outlet unless the blades can be fully inserted to prevent blade exposure. As an “ENERGY STAR ” partner,JVC has determined that thisproduct or product model meets the“ENERGY STAR ” guidelines for energyefficiency.3
WarningsIMPORTANT RECYCLING INFORMATIONThis product has a fluorescent lamp that contains mercury. Disposalof these materials may be regulated in your community due toenvironmental considerations. For disposal or recycling information,please contact your local authorities or for USA, the Electronic IndustriesAlliance: http://www.eiae.orgIMPORTANT SAFETY INSTRUCTIONS1)2)3)4)5)6)7)Read these instructions.Keep these instructions.Heed all warnings.Follow all instructions.Do not use this apparatus near water.Clean only with dry cloth.Do not block any ventilation openings. Install in accordance with the manufacturer'sinstructions.8) Do not install near any heat sources such as radiators, heat registers, stoves, or otherapparatus (including amplifiers) that produce heat.9) Do not defeat the safety purpose of the polarized or grounding-type plug. A polarized plughas two blades with one wider than the other. A grounding type plug has two blades anda third grounding prong. The wide blade or the third prong are provided for your safety. Ifthe provided plug does not fit into your outlet, consult an electrician for replacement of theobsolete outlet.10) Protect the power cord from being walked on or pinched particularly at plugs, conveniencereceptacles, and the point where they exit from the apparatus.11) Only use attachments/accessories specified by the manufacturer.12) Use only with a cart, stand, tripod, bracket, or table specified by themanufacturer, or sold with the apparatus. When a cart is used, usecaution when moving the cart/apparatus combination to avoid injuryfrom tip-over.13) Unplug this apparatus during lightning storms or when unused for long periods of time.14) Refer all servicing to qualified service personnel. Servicing is required when theapparatus has been damaged in any way, such as power-supply cord or plug is damaged,liquid has been spilled or objects have fallen into the apparatus, the apparatus has beenexposed to rain or moisture, does not operate normally, or has been dropped.15) Apparatus shall not be exposed to dripping or splashing and no objects filled with liquids,such as vases, shall be placed on the apparatus.4
Warnings16) Place the television on a stable, flat surface. Failure to do so can result in the televisionfalling, causing injury.17) DO NOT allow young children to play around or on the television. Do not hang from theTV. Failure to do so can result in the television falling, causing injury.18) DO NOT allow young children to play with the plastic bag that came with the televisionwhen you unpacked it. Failure to do so can result in suffocation, causing injury.19) Avoid improper installation and never position the unit where good ventilation is impossible.When installing this TV, distance recommendations must be maintained between the setand the wall, as well as inside a tightly enclosed area or piece of furniture. Keep to theminimum distance guidelines shown for safe operation.200 mm7 7/8 in150 mm5 7/8 in200 mm7 7/8 in150 mm5 7/8 in50 mm2 in20) Cautions for installation— Do not tilt the TV towards the left or right, or towards the back.— Install the TV in a corner on the floor so as to keep cords out of the way.— The TV will generate a slight amount of heat during operation. Ensure thatsufficient space is available around the TV to allow satisfactory cooling.— Have two people remove the TV from the box with the screen facing awayfrom you. It's possible your clothing, (such as a belt buckle or button) mayscratch the front of the TV. Do the same when moving the TV to anotherlocation.21) When attaching to a wall, use the optional JVC wall mounting unit.For LT-42X579 / LT-42EM59: JVC-XUF-2637 LCD FLAT WALL MOUNTFor LT-47X579 / LT-47EM59: JVCPCM-MS2 TILT/FLAT WALL MOUNTFor LT-52X579 / LT-52EM59: JVCPCM-MS2 TILT/FLAT WALL MOUNTCaution— Consult qualified installers.— See the included manual on mounting procedures.— JVC is not responsible for damages or injuries due to improper mounting.— Use with other wall mounting unit is capable of resulting in instability or causing possibleinjury.22) Make enough room for inserting and removing the power plug. Place the TV as closeto the outlet as possible. The main power supply for this TV is controlled by inserting orremoving the power plug.23) Batteries shall not be exposed to excessive heat such as sunshine, fire or the like.24) When this TV is connected to the wall outlet, it is always on standby even when all the LEDlamps are not lit. To shut down the TV, unplug the TV from the wall outlet.5
WarningsFCC Notice:Caution: Changes or modifications not expressly approved by party responsible forcompliance could void the user's authority to operate the equipment.We have an important note for customers who subscribe to basic cable services (do not havea separate cable box) and plan to use their JVC TV remote control to select channels.Once you run the Auto Tuner Setup (which detects and programs all the channels your TV isreceiving through the RF input), every channel number available from your cable companywill appear in your television’s Channel Summary and they will all be marked as available forscanning. Even though every channel is detected and appears as available, you will only beable to view those that you specifically subscribe to from your cable company. This will likelymean there are blank channels between those channels you wish to scan or “surf”.We apologize for any inconvenience this may cause but it is important to note that this isnot a malfunction of your television. If you want to sequentially scan those channels yousubscribe to without blank ones in between, you can contact your cable company for theircable box and remote, or manually deselect them using the edit / skip feature on page 30.PrecautionsAvoiding Temporary Burn-inDisplaying fixed images for extended periods of time can leave a subtle but temporary burn-inimage on your screen. To avoid this, mix your viewing pattern.Examples include, but are not limited to the following: Stock-market report bars Shopping channel logos and pricingdisplays Video game patterns or scoreboards Bright station logos Internet web sites or other computer-styleimages DVD discs, video tapes, laser discs Broadcast, cable, satellite channels ordigital television tuners/converters6For example.TV onTV offXYZXYZ
PrecautionsCaring for the CabinetNormally, light dusting with a soft, non-scratching duster will keep your TV clean.If you wish to wipe down the television, first unplug it. Then wipe gently with a soft cloth, slightlymoistened with water. You can add a few drops of mild liquid detergent to the water to helpremove spots of oily dirt. DO NOT allow liquid to enter the TV through the ventilation slots.DO NOT use strong or abrasive cleaners on the TV.DO NOT spray liquids or cleaners directly on the TV’s surface.DO NOT rub or scrub the TV harshly. Wipe the set gently with a soft cloth.Caring for the ScreenThe screen is treated with an electrostatic-proof coating. When it gets dirty, wipe it gently with asoft cloth. If the screen is very dirty, wipe it down with a cloth dipped in a diluted kitchen cleanerand thoroughly wrung-out. Then wipe immediately after with a clean, dry cloth.Do not apply alcohol, organic solvents (like acetone), acidic or alkaline cleansers to the screen.These will remove the coating layer and cause discolorations.Do not push or hit the screen. This could cause scratches on the screen surface and imagedistortions.Tidying the cablesA cable holder which keeps your connection cables tidy is attached to the back of the stand.7
PrecautionsDisconnecting the stand1) Place the TV face down on a soft cloth on a table.2) Remove the screws from the back of the TV.3) Pull out the stand from the TV.Notes: To re-install the stand, reverse the procedure from 3) to 1). If you find it difficult to remove the screws from inset screw wells, use a magnetizedscrewdriver.* In the case of placing the 52” TV on the wall, please follow the next steps.1) Remove the TV base from the upper bodyof the stand.82) Attach the upper stand body to the TV.
PrecautionsPackage ContentsMake sure you have the following.Television x 1Remote Control x 1AAA Batteries x 2 AAA AlkalineAAA Alkaline––Insert the batteriesUse two “AAA” batteries (included).Place the "–" end in the unit first, making sure the " " and"–" markings are correct. Place the "–" end in the unitfirst.If this symbol is shown, it is only validin the European Union9
Remote ControlThe following pages gives you a brief description of each button’s function. For more detailedinformation on the remote control buttons, see pages 19 - 21.Change the aspect ratio of the image on yourTV screen. See page 20.Turns the TV on or off.Switch between devicesconnected to Video-1, 2, 3,4 and 5.For V4 (Video-4) and V5 (Video-5) you must select the signalinput type first (ie. composite, S-Video, or component). To doso, you need to press the V4 or V5 button until the correcttype is highlighted. Select “Composite 1” for composite videosignal input, “S-Video” for S-video signal input, or “Component1” for component video signal input. Select “Composite 2” forcomposite video signal input or “Component 2” for componentvideo signal input.Change channels.Choose how long the TV will stay on beforeturning off. See page 19.Used to select sub channels.(Digital channels only). See page 21.Listen to a program in stereo, mono oranother language (SAP). (Depending onavailability in the program). See page 21.Lets you decide the input channel and selectit. After pressing the remote 0 - 9 buttons,press TUNE.Lets you go back to the previously selectedchannel. See page 19.Programming information. (Digital channelsonly). See page 21.10
Remote ControlUsed to navigate through the TV’sonscreen menus.View current channel information.Used to select the mode of closed captionUsed to access the TV’s onscreen menus.See page 22.Go back to a previous onscreen menu or tocorrect a mistake.Move sequentially through the channels.Save your favorite channels. See page 19.Turns the TV volume to 0. Press again torestore the volume.Raise or lower the volume.Choose different display settings according topersonal preferences. See page 20.Choose several types of sound frequencies.See page 20.11
TV Basic ControlsBefore you connect your television to another device, please refer to the proper diagrams foryour specific TV and remote. These will help assist you in understanding how to connect yourtelevision to another device, as well as use the remote to set up your television. Some of theconnection terminals are color coded for easy connection with the proper cables.Front PanelPower LampRemote Control SensorSide PanelInputChange the inputINPUTMENUUsed to access the TV’s onscreen menus.MENU CH–Move sequentially through the channels.CHANNELOKVOLUMEBACK VOL–Raises or lowers the volume.POWERTurn the TV on or off.POWERPHOTO VIEWER12Photo Viewer Connector Do not use Photo Viewer connector toconnect the iPod
TV Basic ControlsAUDIO OUTLRLRINPUT 1HDMI ANALOGAUDIOINPUT 1AUDIOVIDEOLCOMPONENTYRPBINPUT 5PR75 Ω(VHF/UHF)AUDIOS-VIDEODIGITAL AUDIO OPTICAL OUTVIDEOLCOMPONENTYPBRINPUT 4PRLC34324-001A75 Ω(VHF/UHF)INPUT 1INPUT 2INPUT 2INPUT 3INPUT 3FAntenna / Cable* For more detailed information, seepages 42 - 46.A/BAAAUDIO OUTLRLRINPUT 1HDMI ANALOGAUDIODVD PlayerAUDIOVIDEOLCOMPONENTYPBRINPUT 5PRAUDIOS-VIDEODIGITAL AUDIO OPTICAL OUTVIDEOLCOMPONENTYPBRINPUT 4PRSTB (Digital Cable,satellite) Tuner BoxLC34324-001A* This is usedwhen you areusing HDMIanalog audioC/EVideo CameraC/EDGame ConsoleGHAudio System13
TV Basic ControlsWith CablesTV SideHDMIHDMI CableINPUT 1, 2 or 3DVI AudioDVI – HDMI Cable,Audio CableInput 1 HDMI ANALOG AUDIOComponentVideo AudioComponentVideo AudioINPUT 4 or 5S-Video AudioS-Video Cable,Audio CableINPUT 4 AUDIO InputCompositeVideo AudioCompositeVideo AudioINPUT 4 or 5Antenna / Cable(VHF / UHF)RF Cable75Ω(VHF / UHF)OPTICAL INPUTOPTICAL AUDIOCableDIGITAL AUDIOOPTICAL OUTAUDIO INPUT(L / R)Audio CableAUDIO OUT(L / R)BestDevice SideAVIDEO and AUDIOBCDGoodEBestFGoodAUDIOG14H
TV Basic ControlsCompatible SignalNotesInput HDMI (Digital)SD: 480i, 480pHD: 1080i, 1080p/60Hz, 720pAudio L/RSee page 46.Input DVI (Digital)SD: 480i, 480pHD: 1080i, 1080p/60Hz, 720p Audio L/R (Analog)See page 45.Input Component (Analog)SD: 480i, 480pHD: 1080i, 720p Audio L/R (Analog)See page 43.Input S-Video (Analog) Audio L/R (Analog)Input Composite (Analog) Audio L/R (Analog)See page 43.ATSC (Digital)NTSC (Analog)Clear QAM (Digital)See page 42.Output Audio L/R (Digital)(PCM or Dolby Digital)See page 44.Output Audio L/R (Analog)(Fixed)See page 44.15
SetupInitial setupWhen you turn on your TV for the first time, the Initial Setup menu appears automatically.These menus will help you setup your TV with basic information for Language, Time andTuner Setup. You can also set this setting in the “Plug in Menu”.1) Turn on the TV2) Set the language1 Select a languageSet Language/Langue/IdiomaEnglishNext2 Select “Next”3 Move to next menu3) Set time attribute1 Change settingsSet Time AttributeTime ZoneD.S.T.AtlanticONNext2 Select an item3 Select “Next”4 Move to next menu16Time ZoneChoose the time zone you live in.D.S.T.Changes the clock automatically for daylightsaving time. On / Off
SetupInitial setup (Continued)4) Set TV attribute1 Change settingsSet TV AttributeTuner ModeAirStart ScanExit2 Select an item3 Select “Start Scan”4 Start scanningchannelsTuner ModeChoose Air (antenna) or Cable* If you use a set top box (satellite or cable box), press “Exit” toskip this step.Cable Users: After your auto tuner setup is complete, you may,(depending on the type of hookup), have only 1 channel, usually2, 3 or 4 in the auto tuner memory. This is normal.“Thank you! Setup is now complete”Note: If you want to turn off the Auto Demo, press the MENU button.17
Key FeaturesYour JVC TV is equipped with many features. Here is some key featureshighlighted in detail.1Stunning picture quality via 1920x1080 Full HD panel.Dynamic Gamma and Color Management give furtherfine tuned picture reproduction. Smart Picture adjusts thebest possible picture quality automatically scene by scenebased on the incoming signal from any source!2JVC exclusive oblique cone speakers provide excellentTV sound quality. OmniSurround sound provides you 4different settings based on the program you are watching.The equalizer will fine tune your listening preferences.3Full connectivity with 3 HDMI, 2 Component, 1 S-video and others. The variety ofconnections are explained in pages. 42 to 46.x34x2Aspect mode will show every pixel you are getting in High Definition. The Native mode willshow 100% of 1080p. Full – with slight overscan. Panarama, Cinema will fill the screenwith various aspect settings.Full or Widescreen Mode18x1
Remote Control FunctionsSleepAllows you to choose how long the TV will stay on before turning off.Notes: When you press the SLEEP button several times, you can set the interval at Off, 15, 30, 45,60, 90, 120, 150 and 180 minutes. 60 seconds before the TV turns off, a message will appear and it will count the remainingtime. If you want to extend the time, press the SLEEP button and you can change theinterval. If you don’t press the SLEEP button, within 60 seconds the TV will turn off.Return TVHas three functions.Return – Returns to the channel viewed just before the channel currently onscreen.Return – Lets you program a specific channel to return to while scanning through thechannels using the – CH button as you memorize the channel.TV – Returns to the TV mode as you are watching a video, DVD, etc.Note: Press TUNE and RETURN TV buttons. This will memorize the current channel to returnto while you scan through the other channels. To cancel, press TUNE and RETURN TVbuttons again.FavoriteAllows you to save channels you like so you can view them easily. First you must register thechannels you like.Notes: Go to the channel you want to register and press the FAVORITE. A list will appear. Pressthe FAVORITE button again to register your channel. To view your favorite channels, press FAVORITE. Move to select your channel andpress OK. To erase your favorite channels, press FAVORITE. Move to select your channel andpress . Both analog and digital channels can be registered. The channels you registered will appear in numerical order at the top of the list.19
Remote Control FunctionsAspectAllows you to adjust the way the image appears on your TV based on the format that is beingreceived.Panorama / Cinema / Full / Panorama Zoom / Cinema Zoom / Full Native / Regular / SlimSee page 28.Notes: You can select the aspect mode by pressing the ASPECT button. You can also access the aspect modes using the buttons on the side of the TV, by using theMENU button, then the – CH button.SoundYou can choose several types of sound modes. Speech / Jazz / Classic / Rock / UserNotes: You can choose the different sound modes by pressing the SOUND button. If you select User, you can customize the various sound frequencies.VideoAllows you to choose different picture settings according to personal preferences. You canaccess this feature for each input (TV, V1, V2, V3, V4, V5).Standard / Dynamic / Theater / GameSee page 23.20
Remote Control FunctionsGuideYou can view program information for Digital Channels.Note: When the program information is not being broadcast, the correct information will not bedisplayed. The GUIDE will not show the correct time and date depending on the Time Zone and D.S.T.settings. See page 40.SUB CHDigital broadcast sometimes offers sub channels. By using the SUB CH button, you can selecta sub channel easily.For example, to move to sub channel 123-45:1) Press 1, 2 and 3 in order2) Press the SUB CH button3) Press 4 and 5 in order4) Press the TUNE buttonML/MTSAllows you to listen to a program in stereo, mono sound or another language (SAP) if available.First you must set the MODE to TV on your remote.Notes: When you are receiving a digital broadcast, if there are other languages, you can change thelanguage by pressing the ML/MTS button. Keep the TV in stereo mode to get the best sound quality. The sound will work in stereomode even if a certain broadcast is in mono sound only. Choose the mono setting to reduce excessive noise on a certain channel or broadcast. MTS is unavailable if your television’s Input source is (V1, V2, V3, V4, V5). ML/MTS will not work when you are using HDMI.21
Customizing your TV1) Display the menu bar2) Display the desired menuPictureDisplayTVSoundPowerSettingGameVideo StatusTint0–50– 100Color0–25– 100Picture0–50– 100Bright0–43– 100Detail0–94– 100Backlight0–50– 100SelectCoolColor TempColor ManagementOffDynamic GammaOnOnSmart PictureDigital VNRHighMPEG NROnNatural CinemaOnVideo Reset:SelectOK :OperateBACK :BackMENU :ExitEnter3) Change or adjust the settingPictureTint0–50– 100Color0–25– 100Picture0–50– 100Bright0–43– 100Detail0–94– 100Backlight0–50– 100Color TempCoolColor ManagementOffDynamic GammaOnSmart PictureSelectDGameVideo StatusChange / Adjust To enter an item’s sub menuSelectOnDigital VNRHighMPEG NROnNatural CinemaOnEnterPlease insert scannumber or rangetoStartVideo Reset(Example: Add Channel)Note: Depending on the situation(analog channels, digitalchannels, video signalformat, external inputs,etc.), some items will bedisplayed in gray and cannot be selected.22 To the previous screen4) Close the menu
Customizing your TVPicturePictureDisplayVideo StatusTint0–50– 100Color0–25– 100Picture0–50– 100Bright0–43– 100Detail0–94– 100Backlight0–50– 100Color TempTVSoundPowerSettingGameCoolColor ManagementOffDynamic GammaOnSmart PictureOnDigital VNRHighMPEG NROnNatural CinemaOnVideo Reset:SelectOK :OperateBACK :BackMENU :ExitVideo StatusChoose different display settings according to personal preferences. You can use this featurewith TV, V1, V2, V3, V4 and V5.StandardResets the picture display to the factory settings.DynamicGives a vivid picture with better contrast when viewing in a brightly lit room.TheaterGives a rich, film-like look to video when viewing in a dimly lit room.GameUsed for when you are playing video games connected to your TV.Notes: Each mode is memorized for each input (TV, V1, V2, V3, V4, V5) connected to the TV. Each video status setting has a separate memory for HD (1080i/1080p/720p) and SD(480p/480i) video signal. Each video status can be chosen along with your favorite picturesettings (Tint, Color, Picture, Bright, Detail and Backlight).– When an HD or SD signal is displayed, your HD or SD settings are recalled for the videostatus you are using.23
Customizing your TVPicture (Continued) Allows you to change and adjust the way the picture appears on your television.TintAllows you to adjust the levels of red and green on your TV.ColorAllows you to make all the colors on your TV appear more vivid or subtle.PictureAllows you to adjust the level of black and white on your TV giving you a darker or brighterpicture overall.BrightAllows you to adjust the overall brightness of the TV.DetailAllows you to adjust the level of fine detail on your TV.BacklightAllows you to adjust the brightness of the internal lamp which effects the overall brightness ofthe TV.Color TempAllows you to adjust colors to look as accurate as possible. Cool / Natural / WarmColor ManagementAllows you to compensate for dull colors to ensure dull colors are reproduced with natural hues.On / OffDynamic GammaAllows you see more detail in very dark or bright areas so these areas don’t appear “muddied”.Normally, this feature should be left On for optimum picture quality. On / Off24
Customizing your TVPicture (Continued)Smart PictureAllows the TV to adjust the brightness level automatically to a level suitable for what you arewatching. On / OffDigital VNRThis function can be selected to change the effect of Digital VNR (Video Noise Reduction).High – Adjusts the effect maximallyLow – Adjusts the effect minimallyOff – Function is turned off.MPEG NRThis function effects the block noise removal and mosquito NR (Noise Reduction)simultaneously.Note: When you are receiving digital channels, block noise removal will have no effect.Natural CinemaAllows you to compensate for image blurring when the original video you are watching was shotat 24 frames/sec, and is broadcast at 30 frames/sec. This conversion process is known as“TELECINE”. On / OffNotes: When you are receiving a 480p, 720p or 1080p signal, Natural Cinema cannot be selected. Natural Cinema is only applied for SD 480i and HD 1080i signals.Video ResetResets all picture adjustments at once to the default settings, except for Natural Cinema.25
Customizing your TVDisplayPictureDisplayTVVideo Input LabelSoundPowerSettingAIR TVPhoto ViewerAspect Ratio:SelectCinema ZoomOK :OperateBACK :BackMENU :ExitVideo Input LabelAllows you to label all the devices you have connected to the TV that use the VIDEO-1, 2, 3, 4and 5 inputs.VCR1 SelectDVDPVRD-VHSSTBSATAMPGAMECAMDISC2 SetBlu-ray DVDDefaultPhoto ViewerConnect your USB Mass Storage Class device to the Photo Viewer terminal on the TV.Photo Viewer allows you to enjoy your digital pictures stored on your USB Mass Storage Classdevices. You can view them on the TV in high quality.1) Choose Slide Show Interval of 5, 10 or 20 seconds by pressing the buttons.1 SelectThumbnail ViewInterval2610
Customizing your TVDisplay (continued)2) Choose Thumbnail View by pressing the button, and a folder list will be displayed. Selectyour folder by using the or buttons. The screen will show the first 10 images.* If there is more than 10 images, those images will be shown in the next page. To go to thenext page, select the last image on the page and press the or buttons. To go back tothe previous page, press the or buttons.3) Choose a picture and press the OK button. It will now be shown on the screen. To move tothe next picture, press the or buttons. To move to the previous picture, press the or buttons.1 Select2 Display290º Rotation4180º Rotation8270º Rotation6360º RotationTUNEStart Slideshow4) To go back to main menu, press the MENU button.Notes: Please pull out your USB device from the Photo Viewer terminal after finishing the “PhotoViewer” menu. Use the supplied USB cable that came with your device. Do not use HUB or USB extensioncab
The main power supply for this TV is controlled by inserting or removing the power plug. 23) Batteries shall not be exposed to excessive heat such as sunshine, fire or the like. 24) When this TV is connected to the wall outlet, it is always on standby even when all the LED lamps are not lit. To shut down the TV