Transcription
HP ALM SynchronizerSoftware Version: 1.40User GuideDocument Release Date: August 2011Software Release Date: October 2010
Legal NoticesWarrantyThe only warranties for HP products and services are set forth in the express warrantystatements accompanying such products and services. Nothing herein should be construedas constituting an additional warranty. HP shall not be liable for technical or editorial errorsor omissions contained herein.The information contained herein is subject to change without notice.Restricted Rights LegendConfidential computer software. Valid license from HP required for possession, use orcopying. Consistent with FAR 12.211 and 12.212, Commercial Computer Software,Computer Software Documentation, and Technical Data for Commercial Items are licensedto the U.S. Government under vendor's standard commercial license.Copyright Notices Copyright 1992 - 2011 Hewlett-Packard Development Company, L.P.Trademark NoticesMicrosoft , Windows , and Windows XP are U.S registered trademarks of MicrosoftCorporation.2
Documentation UpdatesThis guide’s title page contains the following identifying information: Software Version number, which indicates the software version. Document Release Date, which changes each time the document is updated. Software Release Date, which indicates the release date of this version of the software.To check for recent updates, or to verify that you are using the most recent edition, visit theHP Application Lifecycle Management Add-ins site:From the main ALM window, select Help Add-ins Page.Additional HP ALM documentation is also available by visiting the following s site requires that you register for an HP Passport and sign-in. To register for an HPPassport ID, go .htmlOr click the New users - please register link on the HP Passport login page.You will also receive updated or new editions if you subscribe to the appropriate productsupport service. Contact your HP sales representative for details.3
SupportVisit the HP Software Support web site at:http://www.hp.com/go/hpsoftwaresupportThis web site provides contact information and details about the products, services, andsupport that HP Software offers.HP Software online support provides customer self-solve capabilities. It provides a fast andefficient way to access interactive technical support tools needed to manage your business.As a valued support customer, you can benefit by using the support web site to: Search for knowledge documents of interest Submit and track support cases and enhancement requests Download software patches Manage support contracts Look up HP support contacts Review information about available services Enter into discussions with other software customers Research and register for software trainingMost of the support areas require that you register as an HP Passport user and sign in.Many also require a support contract. To register for an HP Passport ID, go .htmlTo find more information about access levels, go to:http://h20230.www2.hp.com/new access levels.jsp4
Table of ContentsWelcome to This Guide .7How This Guide is Organized.7Documentation Set.8Chapter 1: Getting Started .11Starting and Stopping the Synchronizer Service.11Starting the Synchronizer Client.13The Synchronizer Client Window .16Managing Users .17Chapter 2: Synchronizing at a Glance .19About Synchronizing at a Glance .19Synchronization Links .20Integrity Checks .22Incremental Synchronizations .27Full Synchronizations.28Working with ALM Version Control .29Chapter 3: Creating Synchronization Links .31About Creating Synchronization Links.32Creating Links .33Setting Link Properties .40Setting Scheduling Options.44Setting Filter Options .46Creating Requirement Type Mappings .49Configuring Synchronization Rules.51Creating Field Mappings .56Setting Mail Notifications .73Setting Adapter Parameters .755
Table of ContentsChapter 4: Working with HP ALM Synchronizer .77Viewing Link Details .78Running Link Tasks .84Viewing Task Run History .88Viewing Task Run Reports.90Editing Synchronization Link Settings .94Resetting a Link .95Enabling and Disabling Synchronization Links .97Deleting Synchronization Links.98Automatic Backup of the Synchronizer Database.99Restoring the Synchronizer Database .99Exporting and Importing Link Definitions.100Exporting and Importing Link Data .101Configuring the Synchronizer Options .103Changing Your Password .107Appendix A: Working with Rational ClearQuest .109Guidelines for Working with Rational ClearQuest.109Synchronizer Settings for ClearQuest .115Appendix B: Working with Rational RequisitePro .117Guidelines for Working with Rational RequisitePro.117RequisitePro Connection Properties .118Appendix C: Working with Team Foundation Server.119Guidelines for Working with TFS.119TFS Connection Properties.120Requirement Synchronization with TFS .120Field Type Mapping.1266
Welcome to This GuideWelcome to HP ALM Synchronizer. Synchronizer enables you tosynchronize HP Application Lifecycle Management (ALM) data with data inanother application. You can: Synchronize defect data between ALM and Rational ClearQuest orMicrosoft Team Foundation Server. Synchronize requirement data between ALM and Rational RequisitePro orMicrosoft Team Foundation Server. Synchronize defect data between two ALM projects.This guide describes how to create and manage synchronization links, andhow to run tasks on these links.Note: The usage of HP ALM Synchronizer or HP ALM Synchronizer AdapterSPI to develop an adapter for HP ALM is not supported.How This Guide is OrganizedThis guide contains the following chapters:Chapter 1Getting StartedDescribes how to start Synchronizer and introduces the Synchronizerwindow.7
Welcome to This GuideChapter 2Synchronizing at a GlanceProvides an overview of working with Synchronizer.Chapter 3Creating Synchronization LinksDescribes how to create synchronization links for synchronizing databetween ALM and other applications, or between two ALM projects.Chapter 4Working with HP ALM SynchronizerDescribes how to run tasks on synchronization links, managesynchronization links, and configure Synchronizer.Appendix A Working with Rational ClearQuestDescribes notes and limitations specific to synchronizing defects betweenALM and Rational ClearQuest.Appendix BWorking with Rational RequisiteProDescribes notes and limitations specific to synchronizing requirementsbetween ALM and Rational RequisitePro.Appendix C Working with Team Foundation ServerDescribes notes and limitations specific to synchronizing requirementsbetween ALM and Microsoft Team Foundation Server.Documentation SetThe Synchronizer documentation set includes the following guides andreferences:HP ALM Synchronizer User Guide explains how to create and managesynchronization links to synchronize data between ALM and otherapplications.HP ALM Synchronizer Installation Guide explains how to install andconfigure Synchronizer.8
Welcome to This GuideReadme provides last-minute news and information about Synchronizer.To access the documentation set: To access the HP ALM Synchronizer User Guide, from the Synchronizerclient, select Help User Guide. Alternatively, select Start Programs HP ALM Synchronizer Client User Guide. For the most up-to-date versions of these documents, see theHP Application Lifecycle Management Add-ins page. From the main ALMwindow, select Help Add-ins Page. All documents are available on the ALM installation DVD in theALMSynchronizer folder.9
Welcome to This Guide10
1Getting StartedThis chapter explains how to start HP ALM Synchronizer and introduces theSynchronizer window.This chapter includes: Starting and Stopping the Synchronizer Service on page 11 Starting the Synchronizer Client on page 13 The Synchronizer Client Window on page 16 Managing Users on page 17Starting and Stopping the Synchronizer ServiceThis section describes how to start and stop the Synchronizer service.Starting the Synchronizer ServiceYou start the Synchronizer service from the Synchronizer server machine.The Synchronizer service must be running to work with the Synchronizerclient.If you encounter problems starting the Synchronizer service, refer to theHP ALM Synchronizer Installation Guide for troubleshooting suggestions.To start the Synchronizer service:On the Synchronizer server machine, choose Start Programs HP ALMSynchronizer Start Synchronizer.11
Chapter 1 Getting StartedNote: The Synchronizer service is started in the background. It may take afew minutes before the Synchronizer client can connect to the server.Stopping the Synchronizer ServiceYou stop the Synchronizer service from the Synchronizer server machine.To stop the Synchronizer service:1 Make sure that no tasks are running for any link. You can check whetherlink tasks are currently running from the Running field in the Links Grid.For more information on the Links Grid, see "Viewing Link Details" onpage 78.Tip: To ensure that no tasks can run on any link, disable all links beforeyou stop the Synchronizer service. For more information on disablinglinks, see "Enabling and Disabling Synchronization Links" on page 97.2 On the Synchronizer server machine, choose Start Programs HP ALMSynchronizer Stop Synchronizer.12
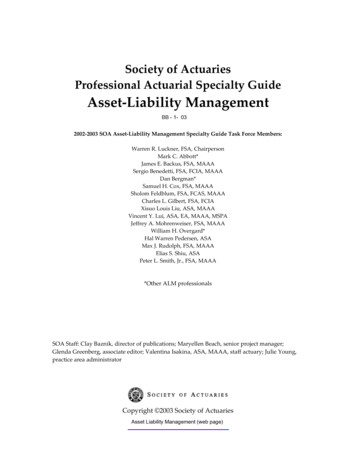
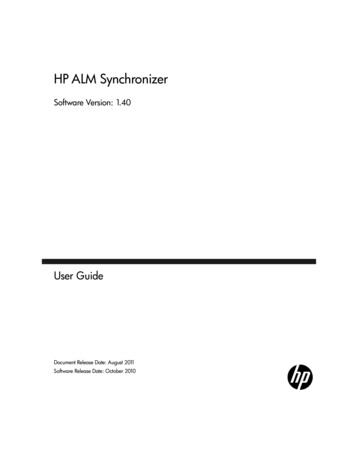
Chapter 1 Getting StartedStarting the Synchronizer ClientAfter you have installed the Synchronizer server and client, and started theserver, you can start the Synchronizer client and connect to the server.Notes: You can work with more than one client connected to the server at thesame time. To avoid unexpected results, if you work with more than oneclient, you must make sure that no link is worked on by more than oneclient at the same time. The Synchronizer client is automatically disconnected from theSynchronizer server after an extended period of inactivity. Forinformation on reconnecting, see "Disconnecting from andReconnecting to the Synchronizer Server" on page 14.To start the Synchronizer client:1 On the Synchronizer client machine, choose Start Programs HP ALMSynchronizer Client HP ALM Synchronizer Client. The Connect toSynchronizer Server dialog box opens.2 In the Server name box, type the machine name of the Synchronizerserver to which you want to connect. To connect to a Synchronizer serverinstalled on your local machine, type localhost.13
Chapter 1 Getting Started3 In the User Name box, type your user name.The first time you connect to a Synchronizer server, you must log in asthe Synchronizer administrator, with the user name admin. After youconnect, you can create additional users. For more information, see"Managing Users" on page 17.4 In the Password box, type your password. The initial password is blank.Note: To increase the security of your Synchronizer data, change thepassword from the default blank password as soon as possible. For moreinformation on changing the server password, see "Changing YourPassword" on page 107.5 Click Connect. The Synchronizer connects to the server you specified andthe Synchronizer client opens.Tip: To close the Synchronizer client, choose Connection Exit.Disconnecting from and Reconnecting to theSynchronizer ServerYou can disconnect from the Synchronizer server manually when needed.For example, you may want to connect to a different server. Additionally, ifyou receive a warning that the Synchronizer client is not connected to theserver, you need to manually disconnect from the Synchronizer server. Thiscan occur, for example, after an extended period of inactivity.After you disconnect from a server, you must connect to another server orreconnect to the same server to continue working with the Synchronizer.14
Chapter 1 Getting StartedTo disconnect from and reconnect to a Synchronizer server:1 Select Connection Disconnect, or click the Disconnect button. TheConnect to Synchronizer Server dialog box opens.2 Click the Disconnect button. The Server name, User Name, and Passwordboxes become editable.3 Enter the logon credentials as described in step 2 in "Starting theSynchronizer Client" on page 13.4 Click the Connect button. The Synchronizer connects to the server youspecified and the Synchronizer client opens.15
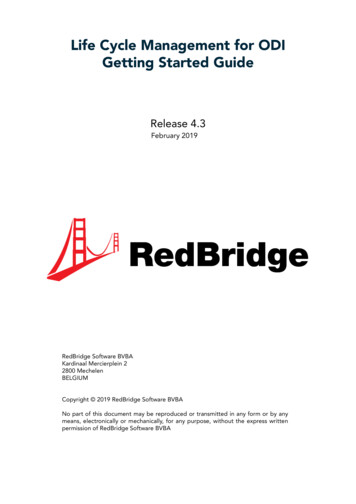
Chapter 1 Getting StartedThe Synchronizer Client WindowThe Synchronizer client enables you to manage the synchronization linksstored in the Synchronizer database. For more information on starting theSynchronizer client, see "Starting the Synchronizer Client" on page 13.The Synchronizer client window contains the following key elements:16 Synchronizer menu bar. Contains drop-down menus of the Synchronizercommands. Synchronizer toolbar. Contains buttons of commands commonly usedwhen managing synchronization links. Links list. Contains a list of the synchronization links available on theSynchronizer server. Located on the left of the Synchronizer clientwindow. Link Details pane. Contains information about your synchronizationlinks. Located on the upper right of the Synchronizer client window. Execution pane. Contains information about link task execution. Locatedon the bottom right of the Synchronizer client window.
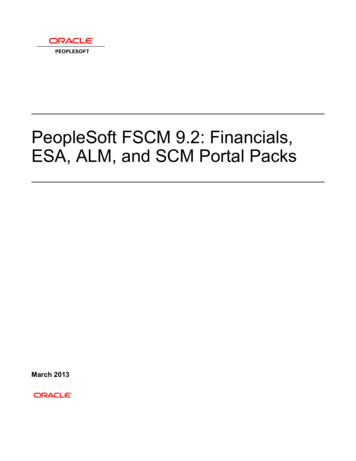
Chapter 1 Getting StartedManaging UsersThe Synchronizer administrator can manage other users. As Synchronizeradministrator, you can add and delete users, reset a user password, andspecify which links are displayed to each user.When you define visible links for users, consider the following: If a link is visible to a user, the user has full privileges and can run, edit,and delete the link. By default, all links are visible to the admin user. When you create a new user, no links are visible to the user by default.You can assign existing links to the user. When a user creates a new link, the link is visible to the user and to theadmin user by default.To manage users:1 Connect to the Synchronizer server using the admin user.2 Select Tools User Management. The User Management dialog boxopens.17
Chapter 1 Getting Started3 To add a new user, click the Add User button.In the User Name box, type a name for the user, with a maximum lengthof 60 characters. The user name cannot include the following characters: () @ \ / : * ? " ; , %. It is also recommended to create user namesaccording to ALM user names.Click OK. The user name is added to the Users list.4 To specify which links are visible to a user, select the user in the Users list.Select one or more links and click the arrow buttons ( and ) to movethe links between the Available Links and Visible Links. Available Linkslists all links that exist on the Synchronizer server. Visible Links list thelinks that are displayed when the selected user is logged in.5 To reset a user’s password, select the user in the Users list and click ResetPassword. Click Yes to confirm. The selected user’s password is reset tothe default blank password. The user should change the default blankpassword on the next login.6 To delete a user, select a user in the Users list and click the Delete Userbutton.Click OK to confirm. The user is deleted from the Users list.18
2Synchronizing at a GlanceThis chapter provides an overview of synchronizing data and describes theHP ALM Synchronizer infrastructure.This chapter includes: About Synchronizing at a Glance on page 19 Synchronization Links on page 20 Integrity Checks on page 22 Incremental Synchronizations on page 27 Full Synchronizations on page 28 Working with ALM Version Control on page 29About Synchronizing at a GlanceSynchronizer enables you to synchronize data between HP ApplicationLifecycle Management (ALM) and other applications, or between two ALMprojects.To manage synchronization between applications, you createsynchronization links. Synchronization links define which data issynchronized and how it is synchronized. For more information onsynchronization links, see "Synchronization Links" on page 20.After you create a synchronization link, you run an integrity check tovalidate the link and to highlight problems that may occur duringsynchronization. For more information on integrity checks, see "IntegrityChecks" on page 22.19
Chapter 2 Synchronizing at a GlanceYou can run two types of synchronization: incremental synchronizationsand full synchronizations. For more information on these synchronizationtypes, see "Incremental Synchronizations" on page 27 and "FullSynchronizations" on page 28.The following ALM data is not synchronized: history, test coverage,requirements traceability, and defect linkage.Synchronization LinksYou create synchronization links between two endpoints. An endpoint is anapplication containing data that is synchronized by Synchronizer. The firstendpoint is always an instance of ALM, while the second endpoint isanother application such as Rational ClearQuest or Rational RequisitePro.A synchronization link or link defines which entities are included in thesynchronization, and how the synchronization is performed. For example,you can define whether Synchronizer synchronizes only new records thatwere added since the last synchronization, or also synchronizes existingrecords that were updated. You also define which fields and field values inone endpoint are mapped to corresponding fields and field values in theother endpoint.For a mapping between fields or field values, the source endpoint refers tothe endpoint from which data is synchronized. Data in the source endpointfor the mapping remains unchanged. The destination endpoint refers to theendpoint to which data is synchronized. Data in the destination endpoint isupdated according to the data in the source endpoint and the mapping’ssettings.Each link contains information to determine which data to synchronize andhow to perform the synchronization. For more details on the informationcontained in links, see "Time Stamp, Identity Mappings, and RecordVersions" on page 21 and "Cycle Redundancy Checks" on page 21.20
Chapter 2 Synchronizing at a GlanceTime Stamp, Identity Mappings, and Record VersionsSynchronizer stores various data during the synchronization process. Duringsubsequent synchronization runs, Synchronizer uses this data to determineif a record needs to be synchronized. The stored data includes: Time stamp. Indicates when the last synchronization task started runningon a specific link. Identity mappings. For each link, Synchronizer stores a table of identitymappings between records in each endpoint. Each record in eachendpoint is identified by a unique ID, and this table records thecorrespondence between each pair of records. Record versions. Indicates the version of each synchronized record ineach endpoint. During synchronization, each synchronized recordreceives a unique version.Cycle Redundancy ChecksAfter Synchronizer has determined that a mapping is a candidate forsynchronization, a cycle redundancy check (CRC) is performed to determinewhether to synchronize the records in the mapping. A cycle redundancycheck is a mathematical operation used to indicate whether data in anendpoint has changed.Synchronizer performs a cycle redundancy check for each endpoint on themapped fields only. This enables Synchronizer to determine whether themodifications made to the records in the mapping necessitatesynchronizing the records.For example, suppose you are mapping defects in ALM with defects inClearQuest, and the only field mapping for the link is between the Statusfield in ALM and the State field in ClearQuest. Suppose the Priority field isupdated for a defect in ALM. As the defect was modified, the mapping thatincludes the defect is a candidate for synchronization, based on the linktime stamp. However, as the mapped fields were not modified, the recordsshould not be synchronized, even though there were other modifications tothe records. During synchronization, Synchronizer performs a cycleredundancy check on the mapping. The check indicates that the mappedfields were not modified, and therefore the records are not synchronized.21
Chapter 2 Synchronizing at a GlanceIntegrity ChecksAn integrity check identifies possible problems that can occur during thesynchronization process. You must run an integrity check on a link beforeyou can run a synchronization task on that link. When an integrity checkpasses successfully, you can enable the link and run synchronization taskson it.You run an integrity check to validate a link when you: Create a new link Modify an existing link Modify the schema for one of the link’s endpointsAn integrity check verifies both general settings for the link, and the fieldmappings defined for the link. Each individual check within the integritycheck can pass or fail. The integrity check passes only if none of theindividual checks within it fail.If you do not run an integrity check, or if the integrity check does not pass,the link remains unvalidated and cannot be enabled for synchronization.Synchronizer generates a report for each run, which you can open byclicking the View Report button in Execution pane (in the lower part of theSynchronizer window). After an unsuccessful integrity check run, you canreview this report to identify which individual checks failed and todetermine how to fix the link. After the link is fixed, run the integrity checkagain.This section includes the following topics:22 "Checks Performed on General Link Settings" on page 23 "Checks Performed on Link Field Mappings" on page 25
Chapter 2 Synchronizing at a GlanceChecks Performed on General Link SettingsThe following table displays which checks Synchronizer performs for eachendpoint when you run an integrity check. Depending on the entity typesynchronized in the link, not all of these checks are performed for everylink.Check NameCheck DescriptionEndpointConnectionChecks that Synchronizer can successfully connect to theendpoint using the settings defined.User permissioncheckChecks that the user used to connect to the endpoint hassufficient permissions to perform the required tasks.License checkQuality Center 10.00: For a link between twoQuality Center endpoints, checks that the endpoint isQuality Center Premier Edition.ALM 11.00: For a link between two ALM endpoints, checkthat the endpoint is not HP Quality Center StarterEdition, HP Quality Center Enterprise Edition, orHP ALM Performance Center Edition.Endpointparameters checkChecks and validates additional parameters that may bedefined for the endpoint.For example, if an alternate root folder is defined forrequirements synchronization, checks that the folderexists in ALM.Fetching endpointschemaChecks that Synchronizer can obtain the database schemafor the endpoint. requirementtype Subtype:Mapped fieldscheckPerforms checks on fields that are mapped for theendpoint.Specified filterexistsIf a filter is defined for the endpoint in the link, checksthat the filter exists in the endpoint.Subtype existscheckChecks that the mapped requirement type exists in theendpoint.23
Chapter 2 Synchronizing at a GlanceCheck NameCheck DescriptionEndpoint eventscheckChecks the following: If the endpoint is set to handle record creation in theother endpoint, it is also set to update the otherendpoint. If the endpoint is set to recreate records, the otherendpoint is set to handle record creation. One endpoint only is set to handle record creation forthe mapped requirement type.24Fields mappingdefinedChecks that a field mapping is defined between theendpoints and that it can be obtained by theSynchronizer.Consistency ofmapping andendpoint eventsChecks that if a field mapping is defined from theendpoint, the link is set to handle record creation orupdates in the other endpoint. Also checks that if the linkis set to handle record creation or updates in theendpoint, a field mapping is defined to the endpoint.
Chapter 2 Synchronizing at a GlanceChecks Performed on Link Field MappingsAn integrity check performs the following checks on the field mappings youdefine for the link. Synchronizer also performs these checks when you checkthe field mappings when you create or configure a link. Depending on thetype of field mapped, not all of these checks are performed for every identitymapping.Check NameCheck DescriptionRequired fieldscheckChecks that required fields in the destination endpointare mapped to a field in the source endpoint, or areassigned a constant value. If this is not the case, the checkfails.In addition, checks that recommended fields in thedestination endpoint are mapped to a field in the sourceendpoint, or are assigned a constant value. If this is notthe case, the check passes with a warning.Field existencecheckChecks that the field exists in the endpoint.Field types matchcheckChecks that if a mapping exists between fields of differenttypes, the values can be converted between the types.Fields length matchcheckFor string type fields (String, Multi value list, Single valuelist, User list), checks that the maximum length for valuesfor each of the fields in a mapping is the same. If themaximum length is different, the check passes with awarning that some values may be truncated.Fixed list mappingcheckChecks whether the source field of a mapping is not averified list field, whereas the destination field is a verifiedlist field. In such a case, the check passes with a warningas it is possible that values will be mapped to thedestination that are not in its list.User list checkChecks whether the source field of a mapping is not a userlist field, whereas the destination field is a user list field.In such a case, the check passes with a warning as it ispossible that values will be mapped to the destinationthat are not in its user list.25
Chapter 2 Synchronizing at a Glance26Check NameCheck DescriptionValue mappingtypes checkChecks that it is possible to convert between the type ofthe value mapped to a field and the type of the field.Values length matchcheckFor string type fields (String, Multi value list, Single valuelist, User list), checks that the length of values mapped tothe field in a field value mapping is not greater that themaximum length for the field. If a value is mapped that islonger that the maximum length, the check passes with awarning that the value will be truncated.Values mapping inmandatory fieldcheckChecks that no field value mapping maps an empty stringto a mandatory field.Fixed list valuesmapping checkChecks that no field value mapping exists that mapsvalues to a verified list field that are not in the listassociated with the destination field.Read only checkChecks that there is no mapping to read-only fields.
Chapter 2 Synchronizing at a GlanceIncremental SynchronizationsYou run an incremental synchronization on a link to determine whichrecords in the endpoints were created or modified since the previoussynchronization task, and then synchronize data between the twoendpoints according to the mapping and settings you defined for the link. In an incremental synchronization, Synchronizer first sends a request toeach endpoint to supply
† Software Release Date, which indicates the release date of this version of the software. To check for recent updates, or to verify that you are using the most recent edition, visit the HP Application Lifecycle Management Add-ins site: From the main ALM window, select Help Add-ins Page.