Transcription
Personal Online andMobile Banking User GuideTable of Contents1. Online Enrollment. 12. Login Process & Device Registration. 93. Accounts . 154. Account Details & Transaction History . 165. Activity Center . 206. Secure Messages .247. Funds Transfers. 268. External Account Setup & Transfer . 309. Online Banking Alerts.3310. Mobile Banking. 46Member FDIC
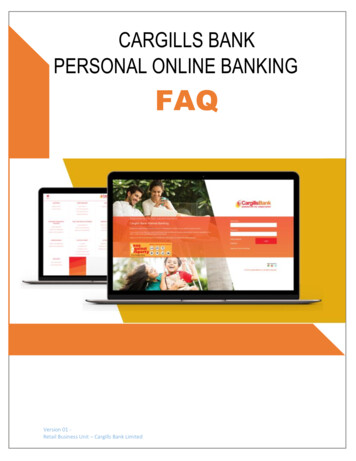
Online EnrollmentRetail Enrollment1. Go to https://www.RocklandTrust.com2. Click the ‘Enroll Now’ button in the top right hand corner of the screen.3. Click on the ‘Enroll Now’ Personal Online Banking box.1 Page
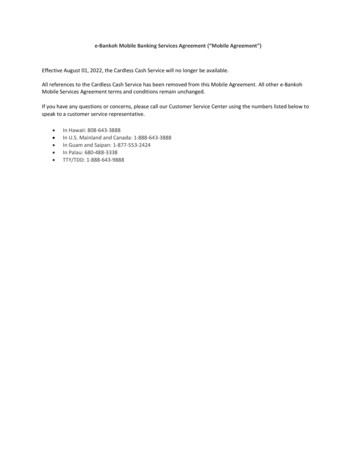
Online Enrollment4. Enter the required fields: Customer Last Name, Social Security Number, and Date of Birth.5. Click the ‘Continue’ button.6. Click the ‘Go to Login’ button.2 Page
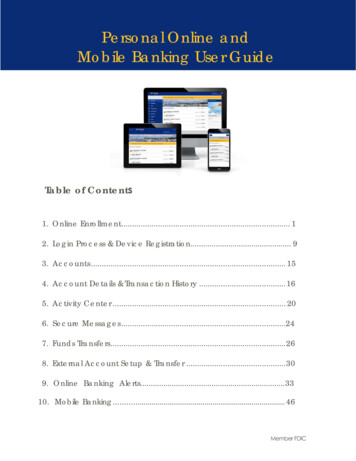
Online Enrollment7. Select the location where you would like to have a Secure Access Code delivered.8. Enter the Secure Access Code in the box once it has been received. Note: Secure AccessCodes are only valid for 15 minutes. Click the ‘Submit’ button.3 Page
Online Enrollment9. Establish your new password following the requirements listed and click the ‘Submit’button at the bottom of the page.4 Page
Online Enrollment10. Validate the information in the user profile.11. Make the necessary changes (if applicable).12. Click the ‘Submit Profile’ button at the bottom of the screen.5 Page
Online Enrollment13. Read the Online Banking Agreement and scroll down to the bottom to accept.14. Click on the ‘I Accept’ button to formally accept the Online Banking Agreement.6 Page
Online EnrollmentEnrollment1. Go to https://www.RocklandTrust.com2. Click the ‘Enroll Now’ button in the top right hand corner of the screen.3. Click on the ‘Enroll Now’ Personal Online Banking box.7 Page
Online Enrollment4. Enter the required fields.5. Click the ‘Submit Enrollment’ button.8 Page
Login Process & Device RegistrationLogin Process1. Enter your User ID in the box that is located in the top right hand corner of the screenand click on the ‘Log In’ button.2. Enter your existing password in the box.3. Click on the ‘Log In’ button.9 Page
Login Process & Device Registration4. Select the location where you would like to have a Secure Access Code delivered.5. Enter the Secure Access Code in the box once it has been received. Note:Secure Access Codes are only valid for 15 minutes.6. Click the ‘Submit’ button.10 Page
Login Process & Device Registration7. Select the appropriate registration option.NOTE: Are you at a private computer that you will use regularly to access online banking? If so,you can register your browser for future access. If you are at a public computer, select 'Do NotRegister Device' and this computer will not be registered. Note: To register your computer wewill place a cookie in your browser. Your PC must be configured to accept 'cookies' from thissite. The next time you log on, you will only need to enter your User ID and password.Forgot your password?1. Click the ‘Forgot your password?’ link on the password screen.11 Page
Login Process & Device Registration2. Enter your Username in the box.3. Click the ‘Submit’ button.4. Select the location where you would like to have a secure access code delivered.12 Page
Login Process & Device Registration5. Enter the Secure Access Code in the box once it has been received. Note:Secure Access Codes are only valid for 15 minutes.6. Click the ‘Submit’ button.7. Select a new password using the requirements listed.8. Click the ‘Submit’ button.13 Page
Login Process & Device RegistrationNote: You must be on a registered computer and browser to perform this action. If you arenot on a registered computer and browser, please call 508.732.7072.14 Page
AccountsAccounts1. A listing of accounts the user has access to appears in the middle of the screen.2. The ‘Transfer Money Now’ option on the top right corner of the screen is a direct shortcut tothe ‘Transfer Funds’ option within the ‘Transactions’ menu.3. The ‘Approvals Required’ displays a listing of commercial or retail payments which arecurrently awaiting approval. Click the ‘View in Activity Center’ button to review thetransactions awaiting approval.4. Click the ‘Edit’ optionshown above the account listing towards the right side of thescreen to go to assign ‘Account Nicknames’ and the 'order' you would like your account toappear.5. Click the ‘print’ optionshown above the account listing towards the right side of thescreen to print a listing of accounts.6. Click on any account to go to the ‘Account Details’ page to view account details andtransaction history associated with the account.15 Page
Account Details & Transaction HistoryAccount Details & Transaction History1. A listing of the details associated with the account are listed in the grey box below theaccount name.2. A listing of historical transactions associated with the account appears below the graybox. The newest transaction will appear on top by default.NOTE: Transactions performed the same day which are waiting to post to the account willappear as ‘Pending’ in red type. All historical transactions will display the date the transactionposted to the account.3. Transactions displaying an iconto the left of the dollar amount have an associatedimage. Click on the transaction to view the front and back of the image.16 Page
Account Details and Transaction History4. Click on the ‘Export’ button on the right side of the screen to display a listing of availableformats. The export will include all transactions specified in the filter by the user.Account Inquiry1. Click on the ‘Ask about account’ link in the top right hand corner of the page to initiate asecure message.2. All account details will be automatically filled in. Type the inquiry in the ‘Message’ box andclick the ‘Send’ button.17 Page
Activity CenterNOTE: Click on the ‘Supported Attachments’ link to view a listing of supported file types. Clickon the paper clipicon to attach a file to the Account Inquiry.Transaction Inquiry1. To inquire on a specific transaction, click on the transaction in question to see the details.Next, click on the ‘Ask about transaction’ link on the right side of the screen.2. All account details will be automatically filled in. Type the inquiry in the ‘Message’ box andclick the ‘Send’ button.18 Page
Activity CenterNOTE: Click on the ‘Supported Attachments’ link to view a listing of supported file types. Clickon the paper clipicon to attach a file to the Transaction Inquiry.19 Page
Activity Center‘Activity Center’ lists all user activity initiated from within Online Banking. This page canbe accessed by selecting the ‘Activity Center’ option under the ‘Transactions’ menu.Single Transactions1. Click the ‘Single Transactions’ tab on the screen to view one-time online transactions.2. Click the ‘Show Filters’ option to reveal searchable fields.3. Search by the available fields to isolate the desired online transactions.a. Transaction Type20 Page
Activity Centerb. Statusi.ii.iii.iv.v.vi.vii.Authorized – All approvals have been satisfied. Ready to be processed.Cancelled – User has cancelled the online transaction.Drafted – Additional approval outstanding. Transaction will not be processed.Failed – Transaction has been denied.On Hold – Transaction is under review and may not be processed.Pending – Transaction processing has been interrupted.Processed – Transaction has been completed and can no longer becancelled.4. Click on the transaction to view the details in an expanded view.21 Page
Activity Center5. Click on ‘Actions’ to display a listing of available options corresponding with thetransaction.Recurring Transactions1. Click on the ‘Recurring Transactions’ tab within the ‘Activity Center’ to view onlinetransactions which are setup to occur in a series.22 Page
Activity CenterMobile Deposit History1. Click on the ‘Mobile Deposit History’ tab within the ‘Activity Center’ to view historicalchecks that have been deposited using the Mobile Deposit functionality.23 Page
Secure MessagesSecure Messages1. Click on the ‘Messages’ menu on the left side of the screen.2. Click on the ‘New Conversation’ button on the right side of the screen.NOTE: The ‘Messages’ feature is a secure messaging function which allows for two-waycommunication between the online banking user and Rockland Trust. Since the messageis delivered securely within Online Banking, sensitive material (i.e. SSN, account number(s))may be safely included in the body of the message.3. Select the appropriate topic from the drop-down menu.24 Page
Secure Messages4. Click the ‘Supported Attachments’ link on the right side of the screen to show what filetypes are supported.5. Click the paper clip icon to attach a file or document if desired.6. Click ‘Send’ at the bottom of the screen to submit the message to Rockland Trust.7. Both incoming and outgoing messages will appear in the column directly to the right ofthe menus in descending date order (newest on top).8. Click on the arrow icon beneath ‘New Conversation’ to reply to a secure message.9. A numeric indicator will appear in red next to the ‘Messages’ menu indicating howmany unread messages are currently listed in the online mailbox.25 Page
Transfer FundsOne Time Transfers1. Select the ‘Transfer Funds’ option under the ‘Transactions’ menu.2. Select a ‘From’ account from the drop down menu.3. Select a ‘To’ account from the drop down menu.NOTE: You can control the order and name of your accounts in Account Nicknames.4. Enter a dollar amount for the transfer.5. Select a ‘Date’ for the transfer.NOTE: The date for the transaction may be the current day or a future date. Same daytransfers occur in real-time. Internal transfers submitted after 9:00 pm EST may be credited toyour account on the next business day. External transfers submitted after 4:30 pm EST may becredited to your account on the next business day but may take two business days tocomplete.6. Enter a ‘Memo’ (This is an optional step and will only display in Activity Center).7. Click the ‘Transfer Funds’ button on the bottom right side of the screen.26 Page
Transfer FundsRecurring Transfers1. Select the ‘Transfer Funds’ option under the ‘Transactions’ menu.2. Select a ‘From’ account from the drop down menu.3. Select a ‘To’ account from the drop down menu.4. Enter a dollar amount for the transfer.5. Click the check box next to ‘Make this a recurring transaction’.6. Select the ‘Transaction Frequency’ from the drop down menu.27 Page
Transfer Funds7. Select a ‘Start Date’ and an ‘End Date’ for the recurrence.NOTE: Click the check box next to ‘Repeat Forever’ if the recurrence will be for anindefinite period of time.8. Enter a ‘Memo’ (This is an optional step).9. Click the ‘Transfer Funds’ button on the bottom right side of the screen.Friends and Family1. Select the ‘Friends and Family’ option under the ‘Transactions’ menu.28 Page
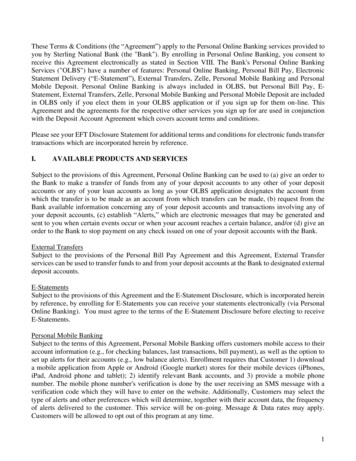
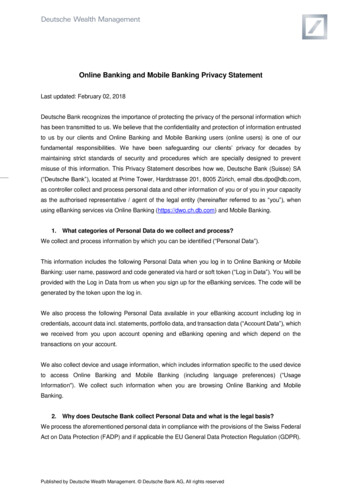
Transfer Funds2. Select ‘Single Transfer’ option to make a one-time transfer to another Rockland Trustcustomer’s account. The customer must be enrolled in Rockland Trust Electronic Banking.a. Enter the information in the required fields designated with an asterisk (*).b. Click the ‘Submit’ button on the bottom right corner of the screen.3. Select ‘Link Account’ to link another Rockland Trust customer's account (deposit only) toyour online login. The customer must be enrolled in Rockland Trust Electronic Banking.a. Enter the Recipient Customer's Account Information. This data is to link a targetaccount to be used in Funds Transfer under the Transaction tab.b. Click the ‘Submit’ button on the bottom right corner of the screen.29 Page
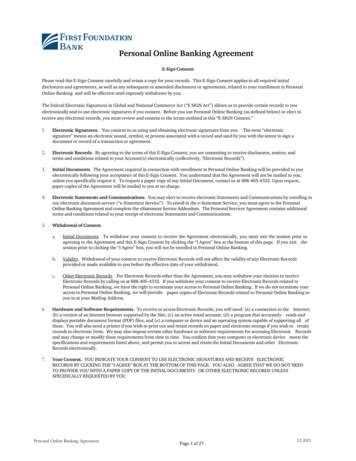
External Account Setup & TransferExternal Account Setup1. Select the ‘Link External Accounts’ option under the ‘Transactions’ menu.2. Enter the external Account Number.3. Select the Account Type.4. Enter the Routing Number of the external account.5. Click the ‘Continue’ button at the bottom of the screen to submit the request.30 Page
External Account Setup & TransferExternal Account VerificationNOTE: Once you have received the two micro deposits in the designated external account,perform the following steps.1. Click the ‘please click here to enter the amounts and activate your external account’ link.2. Click the radio button to select the external account for verification.3. Enter the two micro deposit amounts received in your external account.4. Click the ‘Continue’ button at the bottom of the page.External Transfer1. Select the ‘Transfer Funds’ option under the ‘Transactions’ menu.2. If the external account for the transfer will be the ‘From Account’, select the accountdesignated as ‘EXTERNAL’.31 Page
External Account Setup & Transfer3. If the external account for the transfer will be the ‘To Account’, select the accountdesignated as ‘EXTERNAL’.4. Enter the ‘Date’ for the external transfer.5. Enter a ‘Memo’ (this step is optional).6. Click the ‘Transfer Funds’ button at the bottom of the screen. External transfers submittedafter 4:30 pm EST may be credited to your account on the next business day but may taketwo business days to complete.32 Page
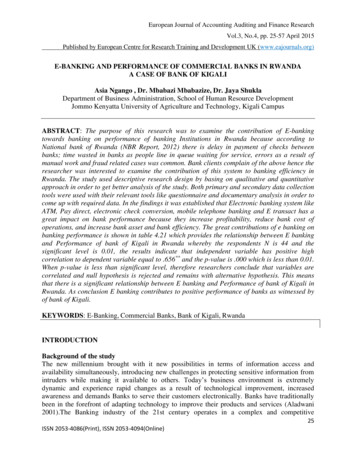
Online Banking AlertsOnline Banking Alerts1. Select the ‘Alerts’ option under the ‘Settings’ menu.2. Select the desired type of alert from the drop-down menu in the top right corner of thescreen.33 Page
Online Banking AlertsDate Alerts1. Select the type of date alert.2. Select the date of the alert. Uncheck the ‘Recurs Every Year’ box if the alert is for one dateonly.3. Enter a message for the date alert.34 Page
Online Banking Alerts4. Select a delivery method for the date alert. ‘Secure Message Only’ will send the alert to theMessages menu within Electronic Banking.Account Alerts1. Select an account.2. Select a field from which the alert should reference.35 Page
Online Banking Alerts3. Select a comparison.4. Enter an amount and select 'Save' in the lower right corner.36 Page
Online Banking Alerts5. Select the delivery method and frequency for the alert.History Alerts1. Select the account.37 Page
Online Banking Alerts2. Select a transaction type.3. Select a comparison.38 Page
Online Banking Alerts4. Enter an amount and select 'Save' in the lower right corner.5. Select a delivery method and frequency.39 Page
Online Banking Alerts6. Selecting ‘Phone’ for delivery method will give you the option to 'Call Immediately' orselect a specific time to call.Transaction Alerts1. Select an online transaction type.NOTE: You will only see options that are applicable to your user rights.40 Page
Online Banking Alerts2. Select an account.41 Page
Online Banking Alerts3. Select the status of the online transaction type to trigger the alert.4. Select a delivery method and frequency.42 Page
Online Banking Alerts5. Selecting ‘Text Message’ for a delivery method will give you the option to 'Send Immediately'or select a specific time to receive the message. You must check the box and Agree to Termsbefore you can save the alert by Text Message.43 Page
Online Banking AlertsSecurity AlertsNOTE: Security alerts are listed at the bottom of the screen. Click the carroticon toexpand the listing of available alerts. Some alerts are clickable and may be turned on or off.The most critical alerts are mandatory and cannot be turned off. These alerts are greyed out.1. Click ‘Edit Delivery Preferences’ to modify how and where to receive security alerts.44 Page
Online Banking AlertsEdit Alerts1. Enable/Disable and edit saved alerts from the Alerts menu.45 Page
Mobile Banking1. Download the Rockland Trust Mobile Banking app from the App or Google Playstore. If you are an existing customer, login using your online banking Login ID andPassword. If you are a new user without a password, select ‘I am a new user’ tologin to Mobile Banking.2. The homepage displays a listing of accounts accessible to the user. Click on the‘Menu’ button and ‘More’ button to reveal user options.46 Page
Mobile Banking3. The left side navigation menus are revealed when clicking on the ‘Menu’ button onthe top left side of the screen.4. Quick Actions are revealed when clicking on the ‘More’ button on the top rightside of the screen.NOTE: ‘Approvals Required’ summarizes how many online transactions are currently awaitingapproval. Click ‘View in Activity Center’ to be brought to the ‘Activity Center’ page.47 Page
Mobile Banking5. All transaction options are located in the ‘Transactions’ menu.6. Click on ‘Pay Bills’ to use the bill pay feature. In Bill Pay you can easily viewpayments and add payees.48 Page
Mobile Banking7. Click ‘Visit Bill Pay Site’ within the ‘Advanced’ link for all Bill Pay options.49 Page
Mobile Banking9. View a listing of Pending and Processed commercial transactions in the right sidepane while working with online transactions.NOTE: Pending transactions are those awaiting approval or processing. Processedtransactions have either passed their processing date or have already been approved andprocessed by Rockland Trust.10. The ‘Services’ menu options are shown expanded below.59 Page
Mobile Banking11. The ‘Settings’ menu options are shown expanded below.12. Click ‘Log Off’ to exit the app on your mobile device.51 Page
3. Select 'Link Account' to link another Rockland Trust customer's account (deposit only) to your online login. The customer must be enrolled in Rockland Trust Electronic Banking. a. Enter the Recipient Customer's Account Information. This data is to link a targe t account to be used in Funds Transfer under the Transaction tab.