Transcription
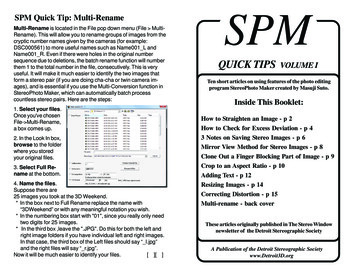
SPM Quick Tip: Multi-RenameMulti-Rename is located in the File pop down menu (File MultiRename). This will allow you to rename groups of images from thecryptic number names given by the cameras (for example:DSC000561) to more useful names such as Name001 L andName001 R. Even if there were holes in the original numbersequence due to deletions, the batch rename function will numberthem 1 to the total number in the file, consecutively. This is veryuseful. It will make it much easier to identify the two images thatform a stereo pair (if you are doing cha-cha or twin camera images), and is essential if you use the Multi-Conversion function inStereoPhoto Maker, which can automatically batch processcountless stereo pairs. Here are the steps:1. Select your files.Once you've chosenFile- Multi-Rename,a box comes up.2. In the Look In box,browse to the folderwhere you storedyour original files.3. Select Full Rename at the bottom.4. Name the files.Suppose there are25 images you took at the 3D Weekend.* In the box next to Full Rename replace the name with“3DWeekend” or with any meaningful notation you wish.* In the numbering box start with "01", since you really only needtwo digits for 25 images.* In the third box ,leave the ".JPG". Do this for both the left andright image folders if you have individual left and right images.In that case, the third box of the Left files should say “ l.jpg”and the right files will say “ r.jpg”.Now it will be much easier to identify your files.[ ][ ] SPM Quick Tips 2016SPMQUICK TIPSVOLUME ITen short articles on using features of the photo editingprogram StereoPhoto Maker created by Masuji Suto.Inside This Booklet:How to Straighten an Image - p 2How to Check for Excess Deviation - p 43 Notes on Saving Stereo Images - p 6Mirror View Method for Stereo Images - p 8Clone Out a Finger Blocking Part of Image - p 9Crop to an Aspect Ratio - p 10Adding Text - p 12Resizing Images - p 14Correcting Distortion - p 15Multi-rename - back coverThese articles originally published in The Stereo Windownewsletter of the Detroit Stereographic SocietyA Publication of the Detroit Stereographic Societywww.Detroit3D.orgSPM Quick Tips2016
SPM Quick Tips - How ToStraighten an ImageKnowing that SPM can fix many problems and improve yourstereo images is fine, but unless you have worked with it a lot, youmay not know how to do a particular fix. This season, we will havea series of “Quick Tips” to demonstrate some image fixes.SPM Quick Tip: Correcting Distortionby Dennis GreenImages taken with a wide-angle lens can suffer from distortion,especially when the camera is pointed up, as in this image of abuilding interior. This can be easily corrected using SPM’s “EasyAdjustment” and clicking on the “H Pers.” tab.For the first one, it is common to take a nice image in the heat ofphotographing an event or scene, only to realize later that theimage is crooked. Here is an example:Apply a grid so you can see somevertical lines, then move thesliders until both images appearto be straight. In this case, it tookabout a 16.7 degree rotation.This image can be made more pleasing by rotating it. To do that,just open the image in SPM and go to the “Easy Adjustment” itemunder the Adjust menu (or press the “K” key) and you will see this:In the middle of the panel on theleft are these sliders:2 SPM Quick Tips 2016Save the image under a newname, so you do not overwriteyour original, in case you want tore-do the change later. Voila!SPM Quick Tips2016 15
SPM Quick Tip - Resizing ImagesOpen StereoPhoto Maker (SPM) and go to File.MultiConversion.Here are the settings you need. Find the images you want toformat using the "Look in:" dropdown box. Select the images youwant and check the following options:1. Input file type - MPO files (from a Fuji camera) are Side-by-side.Stereo pairs (from twin cameras or cha-cha shots) are "Independent (L/R)".Those rotation sliders are used most often to be able to align thetwo images in a pair that have been taken with a single camera orusing the advanced 3D setting on a Fuji W3. They allow you toremove any unintentional rotation between the two chips. Butif you enter the same value inboth the L and R side, theimage is rotated as a whole:Now just click the OKbutton at the bottom ofthe adjustment screen,and the image pair isautomatically rotatedand cropped to get ridof the black trianglescreated when theimage was rotated and it does it to bothsides at the sametime!2. Output file type - should be Side-by-side in JPG format.3. Check the "Auto alignment", "Auto Crop after adjustment" and"Resize" boxes. The resize width should be for one chip (e.g.1400 Wide and 1050 High for our current competitions).4. Do not check the “keep designated size” box. SPM will ensurethat neither dimension exceeds the maximum you input.5. Output Folder - click the Browse button to find the folder whereyou want to save your formatted images. Do not save in the samefolder, as you may overwrite your original!6. Click on the "Convert Selected Files" button. SPM will do therest.Here is the new straightened image:Always save your corrections with a new name so you can goback and readjust the image if you decide that it needs more orless rotation. If you have any questions on this, send me an emailor see me at a club meeting.Dennis14 SPM Quick Tips 2016SPM Quick Tips2016 3
SPM Quick Tips - How ToCheck for Excess DeviationOne thing to be aware of is the relationship between the size of yourtext zone and the size of the font. If the text zone is too small, youmay find the bottoms of your descending characters are beingclipped off, which you may not notice at first. Having to redo awhole set of titles due to this effect is not ideal.What is “excess deviation” and why would you want to check for itusing StereoPhoto Maker?The good thing is that once you find a font and text zone that works,SPM will remember that, even if you close the program or use it forother actions in between sessions of adding text.As you may know, stereo images are made up of two nearlyidentical pictures. The difference between the two is that objectsthat are farther away in the image are also farther apart thanobjects in the front of the image. Thisdifference is known as the stereoscopicdeviation. In this anaglyph image the leafis the near point and the castle turret is inthe distance.Clicking the “Enlarge this dialog for next time” box will make thepreview image larger and will also make the dialog box fill yourscreen to make it easy to see the final effect.If your image has too much depth, thedeviation will be too large and it will beuncomfortable to view. The maximumdeviation should be around 3% or 1/30of the width of the image.Excess deviation occurs most often when taking close-ups ormacro shots. If you are using a Fuji W3 or a pair of cameras withthe lenses about 75mm apart (same as the W3), you will probablyhave too much depth if your nearest object is less than 7 feet fromthe camera (assuming you have other objects in the image thatare more than 25 feet away).It is natural to want to fill the frame with your subject, so if you havetaken a picture of a flower or other small item, you should check tosee if the deviation will be too great to view in projection. Even if itlooks OK on a monitor, when it is projected (for our competitions),it is being magnified and may have too much depth.SPM has a couple of easy ways to check the deviation when youare deciding which images to enter into a competition or haveprojected for the members in our Open Projector slot.Try adding some text to your next project!4 SPM Quick Tips 2016SPM Quick Tips2016 13
SPM Quick Tip - Adding TextThere are many reasons why one might want to add text to a stereoimage. The most common is to add a caption to be able to identifythe content - a location or people, or the significance of what theviewer is seeing. Before StereoPhoto Maker, captions in stereotook a lot more effort using programs like Photoshop or Elements,but now with a few mouse clicks, you can add text to your images.To do so, open your image in SPMand select “Add Text” from the Editmenu (or use the shortcut [Ctrl - T].You will get a dialog box that includesthese controls on the left side:The top section determines where thetext will be placed, first setting one ofsix general locations, then moving thespot on any axis (positive values inthe “Depth” box bring the text forwardin front of the image).The second section allows you tocreate a text zone with colored background, either above or below theimage or overlaying it (which can bedone with or without the text zone. Ifplaced at the top or bottom, this zonewill be added to your image height, so if you need a specific height(as with many exhibitions), you will need to reduce your imageheight by that amount or resize after adding the text zone.The last section allows you to specify a font, including the size andstyle, and add a shadow if you like. It also has the box where youinput the text you want. You will be able to see the text in a previewpane to the right of this box, which will give you an idea of what itwill look like when you click the OK button. You can try out differentfonts and sizes, as well as seeing whether the amount of text in yourcaption is too much to fit the image width. Only one line of text canbe added - extra characters do not wrap to a second line.12 SPM Quick Tips 2016First, open your image with SPM and view it in anaglyph (orinterlaced) mode. Go to the “View” menu and at the bottom youwill see a selection for“Grid Settings.”. Selectthat and click on “ShowGrid” with 29 as thenumber of vertical lines.This will divide yourimage into 30 sections.The distance betweenany two adjacent lines is1/30 of the total width,which is what your maximum deviation should be. You can see inthis image of a tide pool that the triangular object (circled) is morethat twice the desired distance apart. This deviation will causeeye strain, especially when projected.If you want to know what your percentage value is, just tap the leftarrow key until the left and right far point objects coincide. Thenread the “X” value at thebottom of the screen. Inthis case it is “99”. Divide that by the totalimage width, which isalso shown at the bottom- in this case “1491”.This picture’s percentageis about 6.6%, againslightly more that twicethe recommended value.Use this quick tip tocheck your images before showing them to others or submittingthem to a competition. If the image can’t be fixed (possibly byrealigning and cropping), it might be better to choose anotherimage to share. At least you will be aware of a possible problem.SPM Quick Tips2016 5
SPM Quick Tips - 3 Notes onSaving Stereo Imagesby Dennis GreenCheck the “Two-stage cropping” and “Resize to above after cropping” boxes, click OK and when you press a number key, SPM willbe in crop mode for that size. Just drag across the image to get thedesired height, then you can reposition the crop box to keep theimage area you want.1. Shortcut: When editing images in StereoPhoto Maker,whether to align or crop an image, or just to set the stereo window,you need to save the adjusted image. While most Windowsprograms use the keyboard shortcut “Ctrl S” to save, that shortcut in SPM is to “Save Left/Right Images.” which will give you twoindividual images instead of the combined image. A simple saveis done by just pressing the “S” key.2. Format: If you have a 3D monitor, laptop or TV that you use toview images while you are editing, or if you edit in anaglyph modeon a 2D monitor, you may forget to go back and change to theside-by-side view before saving and find you end up with anotherformat, like interlaced or anaglyph. At the bottom of the “Save”dialog box there is a checkbox that allows you to save in SBSformat even when you are viewing in interlaced or anaglyph. Thiscan save a lot of frustration when working on images.Example of a 4:3 crop box on a 1:1 imageIf you do not crop the image to your display aspect ratio, the imagewill be shown with black bars on the sides or on the top and bottom(depending on which type of mis-match you have).4:3 image on a 16:9 screen16:9 image on a 4:3 screen6 SPM Quick Tips 2016Your images always look better when the subject fills the frame, andin a similar way, your images should ideally fill the display for thegreatest effect. Try cropping some images to fit your display andsee if you prefer the results![ ][ ]SPM Quick Tips 2016 11
SPM Quick Tip: Crop to an Aspect Ratioby Dennis GreenThe aspect ratio of an image indicates the relationship between itswidth and height given in a proportion, such as 4:3. The three mostcommon aspect ratios for stereo photography are 4:3, 16:9 and1:1, although you can crop an image to any ratio you prefer.The historical “standard” of 4:3 was established by William Dicksonand Thomas Edison in 1892 when they settled on their movie filmheight of 4 perforations, which resulted in the 4:3 ratio when appliedto the available film area of a 35mm strip. 16:9 is the standard forHD TVs and monitors, as well as for widescreen video supportedby the DVD standard. 1:1 ratio was the standard for mediumformat cameras. It is the format of choice for mobile apps likeInstagram, and is supported by Facebook and Twitter. It is also thebest for displaying Left/Right stereo pairs on a phone display forviewing in a stereo viewer like View-Vaster or Google Cardboardor for creating standard Holmes-style stereo cards.Most digital cameras, including the Fuji W3, allow the user tochoose a default aspect ratio of either 4:3 or 16:9, a choice that willprobably be made based on how you want to display your images.If you have a 3D TV or monitor, the 16:9 ratio may be a goodchoice, although it does not take advantage of the full area of thecamera sensor.3. Image Quality: This setting can be adjusted to reduce the sizeof the new image file. But how much can you reduce it before youwould see visible deterioration of the image?Jay Horowitz of the Ohio club sent a link to a website that showsthe effects on actual images of different compression eg-qualityHe gave these tips with the link:“I strongly suggest everyone take a look at it. It shows a variety ofgood test images and how the 'quality’ setting affects them. Foreach image, there is a close up of the most-affected area andtabs below for different quality settings. You move your mouseover the tabs and see (or not see) the difference, and also checkthe red bar on the left which shows the resulting file size. Justmoving between the first two tabs (loss-less versus Quality 10out of 100) shows how decent the compression looks eventhough the file size is less than 1 tenth the original!“But one word of caution. Repeated editing of jpegs and savingat lower quality will quickly degrade your image. So save youroriginal at the highest resolution and quality, and only re-sizeand save at lower quality for e-mailing or uploading to websites.”Here are the file sizes as shown in SPM for settings at the highestsetting (99) and at a moderate (80) setting:If you have 4:3 images that you would like to reformat to fill thescreen of a TV, or if you have 16:9 images that you would like toproject with 4:3 projectors (as the DSS has done to date), you canuse the crop tool in StereoPhoto Maker to do so.The SPM Crop Tool has several fixedcrop options that can be set by goingto Edit - Preferences and selectingthe Crop tab. If you put in your mostused sizes (like 1400 x 1050 for ourclub competitions), you can just hit thenumber (2 in this example) to get thecrop tool for that size (or 3 for 16:9).10 SPM Quick Tips 2016Note that the image size (right) stays the same, but the file sizedrops from 7.2 MB to 2.5 MB - almost 1/3 the size! Check outthat website and experiment with your own images![ ][ ]SPM Quick Tips2016 7
SPM Quick Tips - Mirror ViewMethod for Stereo ImagesSPM Quick Tips - Clone Out aby Dennis GreenDue to the way the Fuji W1 and W3 were designed, one of the mostcommon issues with images is having a finger blocking part of oneimage like this:One way to view your stereo images if you cannot freeview anddo not have a 3D monitor is to view them with a regular (2D)monitor using a mirror and this arrangement:Finger Blocking Part of an ImageSince most of the blocked portion of the image is in the background, the SPM Clone Tool can be used to repair this quickly.Display your image in SPMusing side-by-side mode andpress the 'E' key to set theimage spacing to wide. Thekey toggles through narrow,medium and wide spacing.1. Put image to be changed on the right and hit “K” to go into EasyAdjustment. Enlarge to 100% and superimpose the area aroundwhere the cloning will happen (to clone at the same depth).This example has the leftimage mirrored.To do this, press Shift F9.Place a mirror about 5"x5"square against your noseand view the right imagewith your right eye. Focusyour left eye on the right image but carefully adjust the angle of themirror until the reflected left-image merges with the right one.4. Save the image - that’s it! For more details, go to stereo.jpn.org/eng/stphmkr/SPM Clone Tool Instructions PDF Starkman.pdfYou may wish to share your stereo images with others using thismethod by batch-converting them to SBS (mirror-left) format.8 SPM Quick Tips 20162. Return to side-by-side view, place cursor where you want to startcloning, hold SHIFT and LEFT CLICK and hold.3. Drag the clone cursor over the area to be clonedImages from www.lhup.edu/ dsimanek/3d/stereo/tricks.htmSPM Quick Tips2016 9
2 SPM Quick Tips 2016 SPM Quick Tips 2016 SPM Quick Tips - How To Straighten an Image Knowing that SPM can fix many problems and improve your stereo images is fine, but unless you have worked with it a lot, you may not know how to do a particular fix. This season, we will have a series of "Quick Tips" to demonstrate some image fixes.

