Transcription
PlanGrid Project Startup GuideA comprehensive guide for setting up & managing your projects on PlanGrid
Table of ContentsPart 1: Creating the project in PlanGridCreating a new projectSetting up project tagsWorkspacesUploading documentsAdding team membersCustom LayersPart 2: Collaborating with team membersMarking up drawingsPhotosTask trackingField ReportsPart 3: Training & educationPlanGrid support optionsPlanGrid consulting/training options
Part 1: Creating a project in PlanGridCreating a new project As soon you are ready to begin a new project, the Nike team will go to www.plangrid.com and find thetemplate project titled Project Template in order to create a new project.When you click into the template project, go to the settings page, and click “Clone Project” in the lowerright hand corner under “PROJ ECT ACTIONS.”On the next page, change the name of the project to the appropriate job title. The format of the projecttitle should be: Dimension – Concept – Locationo Example: NSO – Live – Flatiron, NYThen, select all of the checkboxes (Team, Sheets, Documents, Field Report Templates, Customizations)and click the blue button in the lower right hand corner that says “Clone Project”.
PlanGrid will email you when your project is finished cloning. Then you can go into your newly createdproject and start uploading drawings, as PDFs.Click here for a step-by-step guide for uploading new drawings. Drawing sets can be renamed, if needed.Setting up project tags Why should project tags be added to the project? Project tags allow you to easily group sheets according to location, trade, plan type, or anyother parameters that work for your specific project. Project tags are available to all users onthe project team to quickly pull up specific sets of sheets.Click here for a step-by-step guide for setting project tagsAdditional notes: Some tags will be created automatically by PlanGrid depending on how the sheets are named. For example: All “A” sheets will be tagged “architectural”, etc. Once sheets are uploaded and published, assign project tags immediately (by discipline) ifPlanGrid didn’t tag them automatically.Workspaces Once the Master Project is cloned and has the drawings uploaded, you will need to create three initialWorkspaces. This will prevent the Master project from getting too cluttered with markups. Design Pre-Construction – to be used for Plan Review Construction – to be used during the construction phase of the project Nike Internal – to be used for Nike internal conversation When creating these workspaces, remember to only bring in the appropriate members down into theWorkspace and always choose to bring down all sheets and documents.Each time a store location gets renovated or has additional work done, a new Workspace will be createdwhere all the documents and markups for that work will be done in.Click here for a step-by-step guide on creating Workspaces.
Uploading documents Nike has a folder structure setup in the template project that will come with the cloning process. Alldocuments must be uploaded in the appropriate folder.What type of documents can be uploaded? Any documents that are not drawings can be uploaded to the Documents tab. Multiple filetypes can be uploaded to the Documents tab, such as PDF, Excel, Word, videos, images, CAD &Google Earth files.Click here for a step-by-step guide for uploading documents. (Because you cloned your project, you willnot need to create the entire folder structure, since it was brought over automatically.)Adding team members What are the different permission levels for team members in PlanGrid? Collaborators Can view all project drawings & documents Can create personal markups Note: Collaborators are not able to publish personal markups to the team Power Collaborators All functions of a Collaborator Can publish markups to the team Admins All functions of a Collaborator & Power Collaborator Can upload sheets and documents Can add team members Permission levels will vary based on the Workspace. Here are the appropriate permissions levelsfor each the Master project and workspaces: Master Project Admin: Construction Team & AOR Power Collaborators: None Collaborators: Everyone else Design Pre-Construction Admin: Everyone invited Do not invite the GC to this Workspaces Construction Admin: Everyone in the Master projectNike Internal Admin: Everyone invited to the workspace Do not invite anyone external to Nike to this workspace
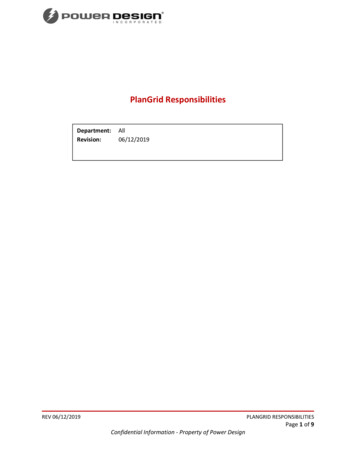
Click here for a step-by-step guide for adding team members and more detailed information onpermission levelsCustom Layers The last step to project set up is to add the custom layers into the Master project and the Workspaces.Here is a list of the Custom Layers to be added: Click here for a step-by-step guide for creating and using custom layers.Part 2: Collaborating with team membersMarking up drawings All team members can create markups on the drawings, however, only Power Collaborators and Adminscan publish markups to the project teamRED markups GREEN markups BLUE markups PURPLE markups BLACK markups Click here for a step-by-step guide for marking up drawingsAdditional notes: All markups will pull through to the most current drawing, when a new version is published. Markups can be turned off or on at any time. Markups cannot be transferred from the Master project to the Workspaces or vice versa.Photos Any photo can be linked directly to a drawing (including 360 degree photos)General steps: Find location on drawing, select the camera icon in the toolbar Tap finger on the plans where you would like to place the photo Take a new photo or select from your photo library. (Don’t forget to title your photo.) If you’re taking a new photo you also have the option of marking up the photo.Click here for a step-by-step guide for taking photos
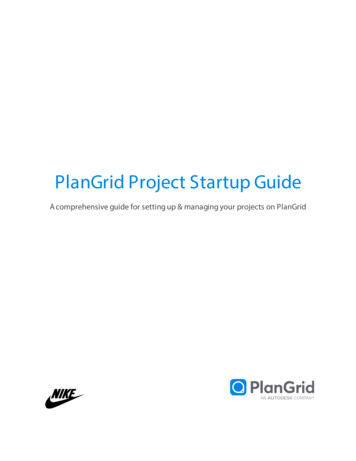
Task tracking Task tracking can be used for a wide range of tasks throughout the project. Nike has a custom list oftask stamps that will be brought over from the template project, once it is cloned. See custom listbelow:
General steps: Open drawing sheet in the project where you would like to track that specific task Select the paper with the check icon in the toolbar, and choose the task type. Fill out all the appropriate information.Click here for a step-by-step guide for Task trackingField Reports Field Reports will be brought over to your project through the cloning process. Nike currently has the Daily Report for the GC to fill out but will be adding more Field Reportsovertime.You can upload a customized editable PDF or use the Form Builder to create one right in PlanGridClick here for a step-by-step guide for managing field reportsPart 3: PlanGrid supportPlanGrid support optionsLive chat box on www.plangrid.comMonday-Thursday: 2AM - 1AM ESTFriday: 2AM - 10PM ESTEmail support@ plangrid.comHelp Site - help.plangrid.comPlanGrid consulting/training options Remote Webinars 500/sessionOnsite Trainings 3000/dayOne pager can be found here.Refer to www.plangrid.com/training and help.plangrid.com for more detailed information on all PlanGrid features.
PlanGrid will email you when your project is finished cloning. Then you can go into your newly created project and start uploading drawin gs, as PDFs. Click here for a step-by-step guide for uploading new drawings . Drawing sets can be renamed , if needed. .