Transcription
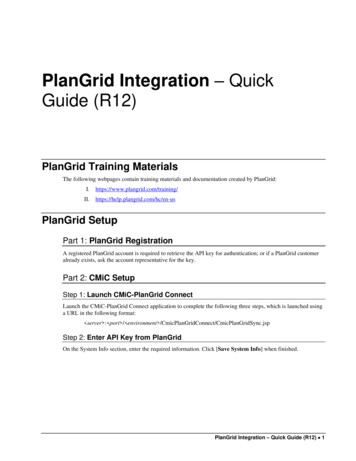
PlanGrid Integration – QuickGuide (R12)PlanGrid Training MaterialsThe following webpages contain training materials and documentation created by tps://help.plangrid.com/hc/en-usPlanGrid SetupPart 1: PlanGrid RegistrationA registered PlanGrid account is required to retrieve the API key for authentication; or if a PlanGrid customeralready exists, ask the account representative for the key.Part 2: CMiC SetupStep 1: Launch CMiC-PlanGrid ConnectLaunch the CMiC-PlanGrid Connect application to complete the following three steps, which is launched usinga URL in the following format: server : port / environment /CmicPlanGridConnect/CmicPlanGridSync.jspStep 2: Enter API Key from PlanGridOn the System Info section, enter the required information. Click [Save System Info] when finished.PlanGrid Integration – Quick Guide (R12) 1
NOTE: Before using the [Check Key] button, please ensure that PlanGrid certificates have been installed onthe application server. The key validation procedure uses the information from the certificates.2 PlanGrid Integration – Quick Guide (R12)
Step 3: Create System DefaultsUnder the Default Values section, shown above, enter the following: The project role names to be created and assigned to project contacts to work with PlanGrid. The issue default values to be used when the sync process creates issues in CMiC. A value for the Attachment Status field for attachments that are coming over from PlanGrid.Click [Save Default Values] when finished.Under the Approved Submittal Status section, enter the statuses for submittals to be synced by selecting a statusfrom the drop-down menu and clicking [Add Status]. Statuses can be deleted by clicking on the Delete ( )icon.Step 4: Create PM Roles for PlanGridCreate CMiC project roles with the same names entered in step 3 (see screenshot above) and assign them to therelevant users who will work with PlanGrid.PlanGrid Integration – Quick Guide (R12) 3
Comparative PlanGrid roles:Mapping CMiC Project to PlanGrid1. Create a project to be mapped to the CMiC system on the PlanGrid site.4 PlanGrid Integration – Quick Guide (R12)
2. On the Mapping section of the CMiC-PlanGrid Connect application, click the [Add New Mapping] button,then select the company code and the project code for the project to be mapped to PlanGrid from the drop-downlist (note that the search functionality is available):3. In the PlanGrid Project field, select the project created in PlanGrid, and the corresponding PlanGrid UID willappear.4. Upon clicking [Save Mapping], the new record appears in the list of projects, showing mapped CMiC andPlanGrid projects:5. The mapped project can be removed from the list using the Delete () icon.PlanGrid Integration – Quick Guide (R12) 5
CMiC – PlanGrid SynchronizationThe created and updated contacts, RFIs, and issues are auto-synchronized based on the frequency set in theScheduler section of the CMiC-PlanGrid Connect application:Contacts SynchronizationThe contacts assigned to a project will be synchronized with PlanGrid if their PM role is one of those set in theSystem Defaults tab of the CMiC-PlanGrid Connect application.When a contact appears in the PlanGrid project team list, the invitation email to collaborate on the project willbe sent.NOTE: If the project contact email is changed, the synchronization process will consider it to be for a newcontact, and a new record will be created in PlanGrid.RFI SynchronizationSynchronization works both ways – RFIs created/updated in the CMiC system will be created/updated inPlanGrid, and RFIs from PlanGrid will be created/updated in the CMiC system.RFI subject lines in PlanGrid are created as concatenations of CMiC RFI IDs and subject lines. Subject lines forRFIs in CMiC are created as concatenations of PlanGrid RFI IDs and RFI subject lines.Comments added to RFIs in PlanGrid are displayed in the CMiC system as notes.Below are the mapping rules for the RFI statuses:PlanGrid StatusCMiC Status CodeCMiC Record EDVOIDVOIDVOIDNOTE: Due to limitations of the PlanGrid API, notes added to RFIs in the CMiC system will not appear inPlanGrid.6 PlanGrid Integration – Quick Guide (R12)
The documents attached to RFIs in the CMiC system will appear in the References section in PlanGrid:For the documents added in PlanGrid, the synchronization process will create the attachments using the defaultdocument type set in Project System Option, and they will appear on the Attachment tab of the RFI.Issues SynchronizationUnlike for RFIs, the synchronization process for issues works from PlanGrid to CMiC only: the issuescreated/updated in PlanGrid will be created/updated in CMiC.The issue title in CMiC will be the same as the one in PlanGrid.The issue ID in CMiC will be created as concatenation of CMiC ID and PlanGrid ID.Comments added in PlanGrid will be displayed as notes in the issue.The documents attached to the issue during the creation process in PlanGrid will appear on the Attachment tabof the created issue in CMiC.NOTE: PlanGrid allows only JPG, PNG, and JPEG files to be added to the issue. When adding the picture –please edit its title. If it stays “Untitled”, the name of the attachment appears in CMiC as a random numbergenerated by PlanGrid.PlanGrid Integration – Quick Guide (R12) 7
Submittals SynchronizationThe submittal attachments are synchronized if the submittal header status is one of the approved submittal statusthat is set in the Approved Submittal Status section of the CMiC-PlanGrid Connect screen and the status of theattachment(s) is approved, by checking the ‘Approved’ flag for the attachment, in CMiC.The sync process will use the document attached to the submittal and create the same in PlanGrid in theDocuments/Submittals folder.Attachments SynchronizationFor references/attachments, CMiC supports any file format, while PlanGrid references may not support all fileformats. Known formats supported by PlanGrid are: PDF, JPG, GIF, DOCX, DOC, and PNG file types.Therefore, CMiC attachments with these file type formats are supported by the integration.8 PlanGrid Integration – Quick Guide (R12)
Scheduling Automatic SynchronizationsThe scheduler allows the user to set up the CMiC-PlanGrid synchronization process for automatic syncing.Once set up, the synchronization process runs automatically based on the configured settings, and the sync logwill be updated at the end of each run.[Start Scheduler] / [Stop Scheduler] – ButtonIf the Status field is “Stopped”, the [Start Scheduler] button will be enabled to start the scheduler. If theStatus field is “Started”, the [Stop Scheduler] button will be enabled to stop the scheduler.FrequencyThis is the time in minutes after which the next sync automatically starts. The default frequency is 15.The Frequency field is disabled and cannot be edited when the scheduler is stopped. It can only be editedwhen the scheduler is running.StatusThis field indicates the current status of the scheduler.PlanGrid Integration – Quick Guide (R12) 9
Synchronization ControlsThis section provides users control over what gets synchronized.By default, the listed synchronization processes under this section are enabled, so that all the expected PMobjects (e.g. RFIs, issues, submittals) are synchronized between CMiC and PlanGrid when the auto-sync is run.To turn off a synchronization process, in order to speed up the overall synchronization process, uncheck the boxnext to the unwanted synchronization process to disable it. Click the [Save Sync Controls] button to save anychanges.10 PlanGrid Integration – Quick Guide (R12)
In the PlanGrid Project field, select the project created in PlanGrid, and the corresponding PlanGrid UID will appear. 4. Upon clicking [Save Mapping], the new record appears in the list of projects, showing mapped CMiC and PlanGrid projects: 5. The mapped project can be removed from the list using the Delete ( ) icon.