Transcription
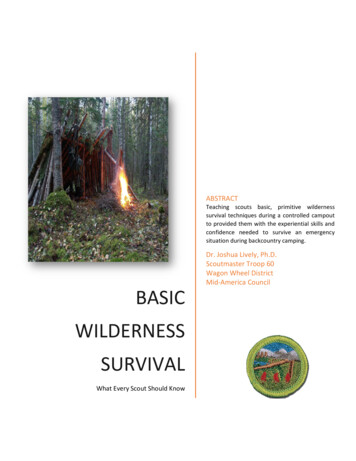
ABSTRACTTeaching scouts basic, primitive wildernesssurvival techniques during a controlled campoutto provided them with the experiential skills andconfidence needed to survive an emergencysituation during backcountry camping.Dr. Joshua Lively, Ph.D.Scoutmaster Troop 60Wagon Wheel DistrictMid‐America CouncilBASICWILDERNESSSURVIVALWhat Every Scout Should Know
Table of ContentsWILDERNESS SURVIVAL MERIT BADGE . 1REQUIREMENTS FOR THE WILDERNESS SURVIVAL MERIT BADGE: . 1WILDERNESS SURVIVAL TRAINING. 2SKILLS LESSON 1 (ACADEMIC): INTRODUCTION TO WILDERNESS SURVIVAL . 21.1 ‐ Overview, Objectives, Goals and Methods . 21.2 ‐ Safety Briefing . 21.3 ‐ A Brief Discussion of The Need for Quality Survival Training . 31.4 ‐ Training Philosophy. 31.5 ‐ The Importance of Planning and Prevention Of Survival Scenarios . 31.6 ‐ Seven (7) Survival Principles . 4LESSON 2 (ACADEMIC): THE PSYCHOLOGY OF SURVIVAL ‐ THE ‘WILL‐TO‐LIVE’. 142.1 ‐ How Fear Affects Your Survival . 142.2 ‐ Developing a Survival Mindset. 15LESSON 3 (ACADEMIC): INTRODUCTION TO BASIC WILDERNESS SURVIVAL PLANNING . 153.1 ‐ Pre‐trip Planning . 163.2 ‐ Crisis Planning . 16LESSON 4 (PERFORMANCE): SURVIVAL KITS . 174.1 ‐ The Ten (10) Essentials for Outdoor Activities . 174.2 ‐ Personal Wilderness Survival Kit . 184.3 ‐ Essential for a Wilderness Survival Kit . 19LESSON 5 (PERFORMANCE): APPLYING CRITICAL SKILLS – SURVIVAL CAMPOUT . 205.1 ‐ Performance Task: Assessing a bad situation . 215.2 ‐ Performance Task: Field Triage & Emergency First Aid . 22RECAP OF TRAINING COURSE OBJECTIVES . 23Troop 60, WW‐MACWilderness Survival Merit Badge Training & CampoutP a g e i
WILDERNESS SURVIVAL MERIT BADGEREQUIREMENTS FOR THE WILDERNESS SURVIVAL MERIT BADGE:1. Do the following:a. Explain to your counselor the hazards you are most likely to encounter while participating inwilderness survival activities, and what you should do to anticipate, help prevent, mitigate, orlessen these hazards.b. Show that you know first aid for and how to prevent injuries or illnesses likely to occur inbackcountry settings, including hypothermia, heat reactions, frostbite, dehydration, blisters,insect stings, tick bites, and snakebites.2. From memory, list the seven priorities for survival in a backcountry or wilderness location. Explain theimportance of each one with your counselor.3. Describe ways to avoid panic and maintain a high level of morale when lost, and explain why this isimportant.4. Describe the steps you would take to survive in the following exposure conditions:a. Cold and snowyb. Wetc. Hot and dryd. Windye. At or on the water5. Put together a personal survival kit and be able to explain how each item in it could be useful.6. Using three different methods (other than matches), build and light three fires.7. Do the following:a. Show five different ways to attract attention when lost.b. Demonstrate how to use a signal mirror.c. Describe from memory five ground‐to‐air signals and tell what they mean.8. Improvise a natural shelter. For the purpose of this demonstration, use techniques that have littlenegative impact on the environment. Spend a night in your shelter.9. Explain how to protect yourself from insects, reptiles, bears, and other animals of the local region.10. Demonstrate three ways to treat water found in the outdoors to prepare it for drinking.11. Show that you know the proper clothing to wear while in the outdoors during extremely hot and coldweather and during wet conditions.12. Explain why it usually is not wise to eat edible wild plants or wildlife in a wilderness survival situation.Troop 60, WW‐MACWilderness Survival Merit Badge Training & CampoutP a g e 1
WILDERNESS SURVIVAL TRAININGSKILLS LESSON 1 (ACADEMIC): INTRODUCTION TO WILDERNESS SURVIVALThe Wilderness Survival Weekend provides scouts with the skills and knowledge to confidently deal withemergencies in remote and austere environments, when emergency services are not a simple call away,thereby improving their ability to explore their world, help others, and be more effective youth leaders.1.1 ‐ Overview, Objectives, Goals and MethodsThis 2‐day campout is designed to be an introduction to the fundamentals of survival in the wild. It is agreat way for scouts, especially young scouts who are not yet comfortable with the idea of camping ingeneral, to begin learning about backcountry camping and how to deal with wilderness emergencies. It’salso a great way for older, experienced scouts to learn or refresh important fundamental skills.The focus of this program places emphasis on basic skills, equipment, and preparedness with theexpectation of rescue within 72 hours. The scouts will learn about the Seven Priorities of Survival (survivalpsychology, wilderness first aid, shelter, fire, signal, water, and food) with particular emphasis on shelterconstruction and fire building. This campout is a great way for the scouts to learn basic skills, buildconfidence, and become more comfortable in the outdoors.This campout is geared towards scouts of varying skill, experience levels, and backgrounds so noprerequisites are required; however, there will be minimum gear requirements for cold/inclementweather. We only require that scouts bring a sense of adventure and plenty of Positive Mental Attitude.This campout involves a mix of “academic” skills discussions during 1‐2 Troop meetings and then ascenario‐based “field training” weekend at an actual campsite.Overall, the campout is meant to be physically and mentally challenging but also fun!1.2 ‐ Safety BriefingWhat do nuclear power plants, construction sites, aircraft carriers, and many hospitals have in commonwith Scouting? All constantly look for ways to eliminate hazards that could be life altering or fatal. Onetool used by many safety‐conscious groups is the safety moment or safety briefing that starts eachmeeting or activity with a pause to discuss a hazard or risk that can be prevented. The safety momentfocuses the attention of the group on safety and how to achieve it. In short, Safety Moments are exactlywhat the name implies: opportunities to prepare for an activity, review safety measures before executingthe activity, and speaking up if something doesn’t seem right. That’s the “why” of the safety moment.Let’s address the who, what, when, where, and how next.Who can deliver a safety moment? Anyone who is willing to be prepared and to step up. Ideally, eachScout or Scouter (with some preparation) could step up and make a difference within his or her unit orgroup. While the leaders/instructors will be briefing safety measures prior to the start of each activity,scouts will need to pay attention to their surroundings and speak up if they feel something is posing asafety concern.When and where a safety briefing be delivered? During the course of this campout, scouts will be exposedto adverse weather conditions, sleep deprivation, and activities that take them well outside their normallevels of comfort. Prior to the start of each activity, leaders/instructors will brief scouts on proper safetyTroop 60, WW‐MACWilderness Survival Merit Badge Training & CampoutP a g e 2
procedures and emphasize the need for situational awareness to ensure no unsafe actions are takingplace.How are safety messages delivered? All messages will be delivered using facts and simple language andwill be appropriate to the audience. Most safety messages will be delivered and things the scouts shouldbe aware of, but, during the course of the training, leaders/instructors will constantly monitor the scouts’performance and action and will redirect as needed.1.3 ‐ A Brief Discussion of The Need for Quality Survival TrainingWhen it comes to survival, there’s no “average” emergency. Each crisis is unique. Specifics like the setting,the weather, the people, and the events combine to create an occurrence that has never happened beforeand will never happen again. Yet in the face of all these variables, there are a few constants. The cold cankill you faster than dehydration. A lack of water can kill you faster than starvation. And a panicked decisioncan get you killed immediately. There’s a lot to consider, but luckily for us, we can learn from the successesand failures of others, and we can use that wisdom to predict the most likely hazards for any givensituation.In an emergency survival situation, there is one particular constant that can turn a bad situation into acatastrophe: the inability to make a plan to survive and the lack of confidence to execute that plan! Thistraining teaches scouts how to stay alive during a catastrophic situation.1.4 ‐ Training PhilosophyBy simulating a survival situation, leaders/instructors are able to step‐in and offer guidance to ensuresuccess. This training weekend will allow scouts to fail in a controlled allow participants the ability to failso that they can learn from their mistakes – which will significantly increase their survivability chances ina real‐life situation. Ultimately, scouts will gain experiential know‐how that will give them the confidencethey need to overcome an emergency wherein the difference between success and failure is notmeasured by a passing grade but rather survival and preservation of life!1.5 ‐ The Importance of Planning and Prevention of Survival ScenariosA normal situation can take a turn forthe worst very fast, and someonewho is not prepared to meet thechallenges of an emergency situationhas a much less chance of survivalthan someone who is mentallypreparedtoovercomeanunexpected event (or series ofevents) that leaves little time, if any,to prepare. That is why it is soimportant to put time into planningand preparation long before anemergency survival situation occurs.Wilderness survival preparedness refers to the pre‐planning and preventive measures taken to reduce theseverity of a survival situation, which has the potential save the maximum number of lives. Specifically,when planning a camping trip or outdoor activity, a scout not only needs to consider all of the possiblesafety needs and potential hazards, but also consider a large number of possible scenarios wherein therewould be a need to implement their survival skills.Troop 60, WW‐MACWilderness Survival Merit Badge Training & CampoutP a g e 3
1.6 ‐ Seven (7) Survival PrinciplesWhile they might not keep you alive in the same ways as shelter and water, an upbeat positive attitudeand a generous streak of mental toughness can be literal lifesavers under the dire circumstances of asurvival situation. Maintaining a positive attitude is like a light in the darkness. You’re more likely to havea better frame of mind and you’re more likely to think clearly. By mustering your mental toughness, youcan tolerate hard conditions better and do what needs to be done. It also helps if you understand the“Rule of Threes” and how that rule can help you prioritize your needs. Generally speaking, you can onlylive 3 minutes without air or if you have massive bleeding. You can only live 3 hours without shelter in acold, wet, and windy setting. Finally, you’ll only have 3 days without water and 3 weeks without food. Ofcourse, these numbers can vary wildly, but it’s still a good framework to help us organize your work andour needs. Remember, stay positive, be tough, avoid panic, work hard and take care of the worst problemfirst.Follow these seven steps—in order—and you greatly increase your chances to surviving in the wildernessor the backcountry if things go wrong (if you get lost, or someone gets injured, or the weather takes anasty turn).The two biggest killers in the great outdoors are poor planning and panic. Most people don't die in thewilderness because of the wilderness itself (the wild elements, injuries, rogue grizzly bears, etc.).Most people die because of the mistakes they made when confronted with just such a survival situation.Here is how to avoid making mistakes, the seven rules for survival courtesy of the U.S. Air Force (thoughwe substitute the more comprehensive "STOP" for "Positive Mental Attitude"):# 1 ‐ STOP (Stop; Think; Observe; Plan)The STOP principal is the first priority in any wilderness survival situationS.T.O.P. is actually an acronym for how you should react when something goes wrong in the wilderness—which usually means someone gets hurt, or you realize you are lost, or you see a bad storm coming. Stop Think Observe PlanStopThe instant something goes wrong, stop immediately.The worst thing you can do is panic, and start running around or attempt to "retrace your steps." That'sthe best way to get even more lost or to waste valuable time that would be better spent dealing with theactual problem (first aid, approaching storm, etc.).Simply stop moving, take a deep breath, and think about what to do next.(Caveat: If you are above the tree line and suddenly see a storm coming—storms can sneak up on youquickly in the mountains—get down below the nearest tree line as fast as is safely possibly, then stop anddo the rest of this assessment.)Troop 60, WW‐MACWilderness Survival Merit Badge Training & CampoutP a g e 4
ThinkYou head is your most useful tool you have in the wilderness. (I know: shocking.) Determine your problem,then determine how to deal with it.First up: See if you can figure out where you are.Get out the map and compass and try to orient yourself using the local landscape (mountains, ridges,streams, etc.).Have everyone go over the last place they remember where knew where they were (trail marker orunmistakable landmark).Don't go anywhere yet. Just try to figure out the plan.ObserveObserve not only your surroundings but also your group. Does anyone need first aid?Is anyone freaking out and needs to be reassured (keep an eye especially on the younger kids).Take inventory: What gear do you have?Think about the next few steps on this list. Where is the best place nearby to seek shelter should you need it? Using the map and your eyes, determine where you could best signal for help (hilltop or nearbyclearing)? Where is the nearest water source?PlanOnce you know everything above, you can continue to plan. If someone is grievously injured, apply first aid then get them to safety.If seriously bad weather is coming, seek shelter.If you are lost, stay put.How to get un‐lostNotice I wrote up above that you need to "continue" to plan. That is because the first part of any "get un‐lost" plan happened well before you leave on the trip when you file a written trip plan with someone backhome, and also let the local ranger know your plans.The best way to get un‐lost is to have others back in civilization who will:Realize that you are lost (which will happen as soon as you are overdue coming off the trail), andKnow where it was you were supposed to be so a rescue party has a reasonable chance of finding you.That last bit is important.You are never closer to where you are supposed to be than the moment you realize you are lost.Troop 60, WW‐MACWilderness Survival Merit Badge Training & CampoutP a g e 5
If you are really and truly lost, the worst thing you can do is to keep on moving.Unless you have a distinct trail or road to follow back (or footprints in the snow), chances are you will onlyget more lost.Also, trails can be deceiving. They twist and turn; other trails constantly branch off—some marked trails,others unmarked bushwhacks, still others game trails left by animals. That means many of thesewilderness paths (bushwhacks and animal tracks) won't even show up on your map. If you are lost it isusually because, through inattention, you accidentally started following a trail other than the one youwere meant to be on. If you are already on the wrong trail, following it "back" will not get you any lesslost.If you are reasonably sure that you merely overshot a turn or took the wrong fork a short ways back, senda scouting party back to check on it. (But remember the triple buddy system: never fewer than 3 peoplein any group; that way if one person gets injured, one can stay to provide first aid while the third goes forhelp.)Look at it this way: a compass has 365 degrees, right? If you just set off randomly from the point whereyou are lost without a clear sense of where you need to go, you have one chance you're now headed inthe right direction—and 364 chances you're going the wrong way.So stay put. Most people lost in the wilderness are found with 24 hours. Focus on surviving until then.# 2 ‐ Provide First AidProviding first aid is the second priority in any wilderness survival situationAlways be sure everybody is in their best form before doing anything else. You need your team in tip‐topshape to tackle a survival situation.Provide any First Aid that is necessary—and not just on the obvious stuff, like blisters and cuts and brokenbones.Make sure everybody is staying hydrated.Watch for signs of hypothermia or heat exhaustion or heat stroke.Mental health is important, too. Try to keep everyone up with a positive mental attitude. Most peoplewho have survived in truly hazardous wilderness situations did so mainly because they believed that theywould survive and that they could survive.# 3 ‐ Seek shelterSeeking shelter is the third priority in any wilderness survival situationHypothermia, heat exhaustion, and heat stroke. All of these affects not only your health but also yourability to think clearly—and therefore your ability to survive.The best way to avoid these medical problems is to be someplace safe and protected from the elements,which means staying warm and dry and out of the wind and rain.That means you need shelter.Troop 60, WW‐MACWilderness Survival Merit Badge Training & CampoutP a g e 6
The clothes on your backShelter is all about insulation.That means "shelter" includes what you are wearing.Be sure to wear layers for warmth, dry clothes, nothing cotton, and some protection from wind and rain(rain jacket and pants or, at worse, a trash bag).Rigging a shelter The whole point of a shelter is insulation, and the two big enemies of you keeping warm are thewind and the ground—both of which will suck the heat right from your body—so remember, nomatter what form of shelter you use: Keep it out of the wind. Use natural wind‐blocks, like the leeward side of hills, large boulders, orat least a tree (a live one; not a dead one, which can tip over in a storm). Insulate the floor. Use sleeping pads if you have them but put them on top of a bed of evergreenbranches, pine needles, or dry leaves (all of which can substitute for a pad). The more insulationbetween you and the ground, the better off you'll be. Keep your shelter as small as possible. Freeze‐out veterans know all about this one. The smalleryour shelter, the warmer it will be, since you will waste less collective body heat warming the airinside. If you have a tent, you already have your shelter. Congratulations. Set it up somewhere out of thewind.No tent? Use your emergency shelter—a ground cloth, poncho, or emergency blanket—along with ropeand sticks for support (and stones as anchors to weigh down corners and edges) to make a simple A‐frameor lean‐to.(You should have some form of emergency shelter, as it is on the 10 Essentials list, but if you do not, uselayers of evergreen or leafy branches to make an old‐school lean‐to. Drafty, but better than nothing.)Keep it close to the ground—and, again, somewhere out of the wind.A gently sloping site with good drainage is important so you won't get as wet.Near a water source is good for getting water—but be high enough above it that you won't get caught ina flash flood.Mark the shelter with bright, unnatural colors (hopefully, Stew packed one of his loud Hawaiian shirts) sorescuers can more easily see it—from the air or the ground.In winter, the best insulator around is the snow itself. Build a snow cave (essentially a lean‐to packed allaround with snow with a tiny opening and some air vents). If you don't know how, come on the annualfreeze‐out trip (in Jan or Feb) and you will learn.# 4 ‐ Build a fireBuilding a fire is the fourth priority in any wilderness survival situationTroop 60, WW‐MACWilderness Survival Merit Badge Training & CampoutP a g e 7
Fires are hugely important. They keep can you warm, dry out wet clothes, melt snow for water (or purifyspring water), signal rescuers, heat food or drinks (which helps keep you warm), and just as importantlythey can make you feel better. Remember: keeping up your spirits is a survival technique.Fire buildings rulesMake a fire circle of stones and build a fire.Dry, dead wood burns much better than wet or living wood. (If it is wet out, you'll find relatively dryerstuff near the base of trees.) Tag‐team healthy members of the group to collect wood so that no one staystoo long away from the warmth. Try to collect enough wood to last all night before it gets dark.Keep the fire modestly‐sized—large enough to work as a warming/drying/signaling device, but no so hugeyou use up all your wood.You will need three things to burn: Tinder (small, easily burnable material to start the fire). Kindling (twigs and sticks no thicker than a pencil to get the fire going). Fuel (larger pieces of wood to keep the fire going and provide coals—useful for cooking andrestarting a fire that has flamed out).Teepee‐style fires tend to be easiest, both to build and to light in the wind. Simply put a small pile of tinderdown, surround it with a teepee of small kindling, then a layer of larger kindling, then layers ofprogressively larger sticks. Leave a gap through which to light the tinder. Presto: fire.Starting a fireYour 10 essentials kit should have three fire‐starting methods in it (lighter in a plastic baggies, waterproofmatches, flint‐and‐steel), plus some tinder (dryer lint or a short length of frayable twine).Good sources of natural tinder: Tree bark (especially birch, or the inner bark of cedar, elm, or cottonwood). Dry grass. Wood shavings. (For the record: Leaves make terrible tinder.)The three important fire‐starting methods to bring Lighter Waterproof matches Flint and steelOK, macho wilderness skills aside, the single best way to start a fire in the woods is with a plain old lighter.It is not cheating to use a Bic.Still, always carry at least three methods of starting a fire—just in case the lighter fails (you could lose it,or lose the flint out of it, or it could simply run out of lighter fluid).The best back‐up method is waterproof matches (you can buy fancy ones from camping stores—or justmelt some candle wax and dip the heads of regular kitchen matches in the wax to waterproof them). Carrythem in a waterproof container—and don't forget to bring along a striking surface! (Lighting matches onbeard scruff only works in old westerns).Troop 60, WW‐MACWilderness Survival Merit Badge Training & CampoutP a g e 8
The third best back‐up is the good old flint‐and‐steel. You don't even have to keep it dry. These days,strike‐starter fire kits are not always made of actual flint and steel but of any two elements that make aspark when banged together. Camping stores like REI sell a bunch of options; pick your poison. Still, it's apain starting a fire with sparks rather than the open flame of a lighter or match; you'll need good, drytinder and plenty of practice. (So bring it and try it on the next trip.)The three famous‐but‐pointless fire‐starting methods "Rubbing two sticks together" is a pain in the butt. It takes a long time to build a proper firewooden fire drill, and an even longer time to master making one work. Remember, in a survivalsituation, you do not want to expend energy on useless activities that will not only drain yourenergy level but could also cause injury!(For the record: you don't actually "rub two sticks." You make a kind of bow using one stick; wrapthe "bowstring" around a second stick called the spindle—sharpened at one end and made of adry hardwood; put the spindle, point first, into a hollowed‐out depression in a fireboard—a largerstick or flat log made of dry softwood; also put into that depression a bit of the finest tinder youcan muster; hold the top of the spindle with a block so you don't bore a hold through your hand;then use your other hand to saw the bow back and forth for, like, an hour, causing the spindle torotate back and forth like a drill. As it does, it's end will slowly get hot enough to turn into a tinyglowing ember of a coal. Hold that ember against the tinder and gently blow on it to catch thetinder on fire. Then move the tinder quickly into the prepared fire. That's the theory, anyway.) While a large magnifying glass can, indeed, start a fire on a bright sunny day, it's useless at night,and it has to be a big glass, one worthy of Sherlock Holmes; that tiny magnifying glass on thepocket knife is nowhere near powerful enough. Finally: Yes, putting a 9‐volt battery against steel wool will cause the filaments of the steel woolto burn. It looks cool, and if you act fast, you can actually use the burning filaments to start sometinder on fire. We've done it before for fun, but it's really more of a camping parlor trick. I mean,honestly: who packs steel wool or a 9‐volt battery to go camping? You're much better off simplybringing a lighter and some matches.# 5 ‐ Signal for helpSignaling for help is the fifth priority in any wilderness survival situationIf you are lost, the best way to become un‐lost is to be found. Remember: You are only likely to get yourselfmore lost; let someone rescue you.The best way to help rescuers find you is to signal themUse your electronicsNo points for being old‐school about this. Whip out that cellphone and call the ranger or 911, whicheveris more appropriate. No signal? Try a clearing or a hilltop.This is a good reason to keep your cellphone off while out in the woods. You need to conserve batterystrength so you can use it when you really need it. (Also, updating Facebook from the trail is déclassé, asis playing Angry Birds in your tent. Both will get your mobile phone confiscated by an adult leader.)Troop 60, WW‐MACWilderness Survival Merit Badge Training & CampoutP a g e 9
If you will be in serious back‐country for longer periods of time, consider renting a satellite phone (as wedid for the Alaska trip). You can get them from Telestial.com, Mobal.com, or Cellularabroad.com.Make noiseThe international signal for "help!" in the wilderness is three repeated loud sound blasts. That meansthree blasts on an emergency whistle, three shouts ("Help!" works nicely), three blasts on a boat horn,three shots from a gun (not that we carry them, but good to know), or whatever.Wait a few minutes, then repeat the sound.Bright colorsClash with your surroundings. Spread brightly colored camping gear or clothing some place rescuers cansee it—both from the ground of from the air.Movement helps too—think: flapping, brightly colored flag.Signaling mirrorsThere is an art to signaling with a mirror—small ones come with emergency kits from camping supplystores. You can also bring an old CD or blank DVD and use it. In a pinch, steal someone's glasses and usethose.If the sun is shining, use the mirror to reflect a flash of sunlight toward potential rescuers, epicycle SARplanes and helicopters or other hikers you can see in the distance.Signaling mirrors have a hole in them (as do CDs and DVDs). Peer through that hole, hold your other armfully extended in front of you with two fingers raised in a V, and use that V as a sight to draw a bead on arescuer, making sure the light from the mirrors is reflected on your finger‐V. Tilt the mirror a tiny bit backand forth to create flashes.Fire & smokeA smoky fire can help rescuers pinpoint you by day or night.Wet wood, wet leaves, moss, ferns, pitchy wood, and other fuel normally best avoided are your friendswhen lost, as they will create much more smoke.Ground signalsLay out logs, brightly colored camping gear, or anything else you can find in a clearing to form oversizedsignals to anyone scanning the ground from the air.
skills lesson 1 (academic): introduction to wilderness survival The Wilderness Survival Weekend provides scouts with the skills and knowledge to confidently deal with emergencies in remote and austere environm