Transcription
DAQ Assistant HelpJanuary 2008, 370467L-01This help file describes how to use the DAQ Assistant to interactivelyconfigure common measurement tasks, global virtual channels, or scales.In NI LabVIEW 7.x and later, NI LabWindows /CVI 7.x and later, or NIMeasurement Studio 7.x and later, you also can use the DAQ Assistantto generate NI-DAQmx code from your tasks and global virtual channels.You can also use the DAQ Assistant with NI LabVIEW SignalExpress 2.xand later.To navigate this help file, use the Contents, Index, and Search tabs tothe left of this window.For more information about this help file, refer to the following topics:Conventions—formatting and typographical conventions used in this helpfileRelated DocumentationGlossaryImportant InformationTechnical Support and Professional ServicesTo comment on National Instruments documentation, refer to the NationalInstruments Web site. Copyright 2003–2008 National Instruments Corporation. All rightsreserved.
Related DocumentationThe following documents contain information that you might find helpfulas you use this help file:DAQ Getting Started Guide—This guide describes how to installthe NI-DAQmx driver software, your data acquisition (DAQ) device,and how to confirm that your device is operating properly.LabVIEW Help—This help file contains information about LabVIEWpalettes, menus, tools, VIs, and functions. This help file alsoincludes step-by-step instructions for using LabVIEW features. InLabVIEW, select Help.LabWindows/CVI Help—The LabWindows/CVI Help includes thefollowing sections:Using LabWindows/CVI—Information about windows,menus, commands, dialog boxes, and options forcustomizing configuration defaults.Library Reference—Reference information for allLabWindows/CVI library functions.Programmer Reference—Information about developingprograms in LabWindows/CVI.Example Programs—Descriptions of each of the exampleprograms included with LabWindows/CVI.Tools Library—Descriptions of the additional instrumentdrivers included with LabWindows/CVI.In LabWindows/CVI, select Help»Contents.Measurement & Automation Explorer Help for NI-DAQmx—Thishelp file contains information on configuring and testing DAQdevices, SCXI devices, PXI systems, SCC devices, serial andparallel ports, and RTSI cables using Measurement & AutomationExplorer (MAX) for NI-DAQmx, and information on specialconsiderations for operating systems. In MAX, select Help»HelpTopics»NI-DAQmx.NI Measurement Studio Help—This help file contains informationabout using Measurement Studio for Microsoft Visual C , Visual
Basic, and the .NET platform. In Visual Studio .NET, selectHelp»Contents.NI-DAQmx Help—This help file describes how to use NI-DAQmx toprogram your National Instruments device. NI-DAQmx is thesoftware you use to communicate with and control your NI device.Select Start»All Programs»National Instruments»NI-DAQ.Taking an NI-DAQmx Measurement in LabVIEW—This tutorialteaches you how to take an NI-DAQmx measurement in LabVIEW7.x or later using the DAQ Assistant. The DAQ Assistant is agraphical interface for configuring measurement tasks, globalvirtual channels, and scales. You also can use the DAQ Assistantto generate NI-DAQmx code from the task. Refer to Taking an NIDAQmx Measurement in LabVIEW in the LabVIEW Help.
Using HelpConventionsNavigating HelpSearching HelpPrinting This Help File
ConventionsThis help file uses the following conventions: Angle brackets that contain numbers separated by an ellipsis represent a range of valuesassociated with a bit or signal name—for example, DIO 3.0 .»The » symbol leads you through nested menu items and dialog box options to a finalaction. The sequence File»Page Setup»Options directs you to pull down the File menu,select the Page Setup item, and select Options from the last dialog box.This icon denotes a note, which alerts you to important information.This icon denotes a caution, which advises you of precautions to take to avoid injury, dataloss, or a system crash.boldBold text denotes items that you must select or click on in the software, such as menuitems and dialog box options. Bold text also denotes parameter names, emphasis, or anintroduction to a key concept.dark redText in this color denotes a caution.greenUnderlined text in this color denotes a link to a help topic, help file, or Web address.italicItalic text denotes variables, emphasis, cross references, or an introduction to a keyconcept. Italic text also denotes text that is a placeholder for a word or value that you mustsupply.monospace Text in this font denotes text or characters that you should enter from the keyboard,sections of code, programming examples, and syntax examples. This font is also used forthe proper names of disk drives, paths, directories, programs, subprograms, subroutines,device names, functions, operations, variables, filenames, and extensions.
Navigating Help (Windows Only)To navigate this help file, use the Contents, Index, and Search tabs tothe left of this window or use the following toolbar buttons located abovethe tabs:Hide—Hides the navigation pane from view.Locate—Locates the currently displayed topic in the Contents tab,allowing you to view related topics.Back—Displays the previously viewed topic.Forward—Displays the topic you viewed before clicking the Backbutton.Options—Displays a list of commands and viewing options for thehelp file.
Searching Help (Windows Only)Use the Search tab to the left of this window to locate content in this helpfile. If you want to search for words in a certain order, such as "relateddocumentation," add quotation marks around the search words as shownin the example. Searching for terms on the Search tab allows you toquickly locate specific information and information in topics that are notincluded on the Contents tab.
WildcardsYou also can search using asterisk (*) or question mark (?) wildcards.Use the asterisk wildcard to return topics that contain a certain string. Forexample, a search for "prog*" lists topics that contain the words"program," "programmatically," "progress," and so on.Use the question mark wildcard as a substitute for a single character in asearch term. For example, "?ext" lists topics that contain the words"next," "text," and so on.
Nested ExpressionsUse nested expressions to combine searches to further refine a search.You can use Boolean expressions and wildcards in a nested expression.For example, "example AND (program OR VI)" lists topics that contain"example program" or "example VI." You cannot nest expressions morethan five levels.
Boolean ExpressionsClick the button to add Boolean expressions to a search. The followingBoolean operators are available:AND (default)—Returns topics that contain bothsearch terms. You do not need to specify thisoperator unless you are using nestedexpressions.OR—Returns topics that contain either the firstor second term.NOT—Returns topics that contain the first termwithout the second term.NEAR—Returns topics that contain both termswithin eight words of each other.
Search OptionsUse the following checkboxes on the Search tab to customize a search:Search previous results—Narrows the results from a search thatreturned too many topics. You must remove the checkmark fromthis checkbox to search all topics.Match similar words—Broadens a search to return topics thatcontain words similar to the search terms. For example, a searchfor "program" lists topics that include the words "programs,""programming," and so on.Search titles only—Searches only in the titles of topics.
Printing Help File Topics (Windows Only)Complete the following steps to print an entire book from the Contentstab:1. Right-click the book.2. Select Print from the shortcut menu to display the Print Topicsdialog box.3. Select the Print the selected heading and all subtopics option.Note Select Print the selected topic if you want to printthe single topic you have selected in the Contents tab.4. Click the OK button.
Printing PDF DocumentsThis help file may contain links to PDF documents. To print PDFdocuments, click the print button located on the Adobe Acrobat Viewertoolbar.
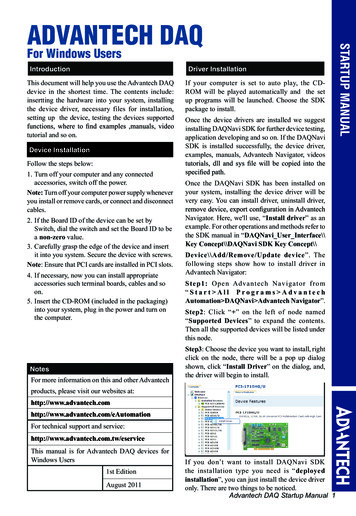
Getting StartedThe DAQ Assistant helps you configure tasks, virtual channels, andscales using a graphical interface. You can launch the DAQ Assistantfrom your National Instruments application software such as LabVIEW,LabVIEW SignalExpress, LabWindows/CVI, or Measurement Studio. Youalso can launch the DAQ Assistant from MAX.Using the DAQ Assistant, you can do the following things:Create and edit tasks and virtual channelsAdd virtual channels to tasksCreate and edit scalesTest your configurationSave your configurationGenerate code in your NI application software for use in yourapplicationView connection diagrams for your sensorsNote You must use version 7.x or later of LabVIEW, LabWindows/CVI, or Measurement Studioor version 2.x or later of LabVIEW SignalExpress to use the DAQ Assistant.
Channels and TasksPhysical Channels and Virtual ChannelsA physical channel is a terminal or pin at which you can measure orgenerate an analog or digital signal. A virtual channel is a collection ofsettings such as a name, a physical channel, input terminal connections,the type of measurement or generation, and can include scalinginformation. In NI-DAQmx, virtual channels are integral to everymeasurement. In NI-DAQmx, use the DAQ Assistant, accessible fromMAX or NI application software to configure channels and measurementtasks. Refer to the DAQ Assistant Help and Measurement & AutomationExplorer Help for NI-DAQmx. You can also configure virtual channelswith the NI-DAQmx API in your application program. In TraditionalNI-DAQ (Legacy) and earlier versions, you can use MAX to configurevirtual channels, an optional way to record which channels are beingused for different measurements.
TasksA task, an important concept for NI-DAQmx, is a collection of one or morevirtual channels with timing, triggering, and other properties.Conceptually, a task represents a measurement or generation you wantto perform. You can set up and save all of the configuration information ina task and use the task in an application.
Global Virtual Channels and Local Virtual ChannelsIn NI-DAQmx, you can configure virtual channels as part of a task orseparate from a task. Virtual channels created inside a task are localvirtual channels. Virtual channels defined outside a task are global virtualchannels. You can create global virtual channels in MAX or in yourapplication software and save them in MAX. You can use global virtualchannels in any application or add them to a number of different tasks. Ifyou modify a global virtual channel, the change affects all tasks in whichyou reference that global virtual channel. In most cases, it is simpler touse local virtual channels.Note If you are using LabVIEW 8.0 and later, you can also create tasks and channels local to aLabVIEW Project.
Using the DAQ Assistant in Your ApplicationUsing the DAQ Assistant, you can create, configure, and save virtualchannels or tasks for use in your applications. If you are using NIapplication software, you also can generate code based on a task orvirtual channel.Refer to LabVIEW Help, LabWindows/CVI Help, Measurement StudioHelp, or NI-DAQmx Key Concepts for more information aboutprogramming with your task or global channel.
Opening the DAQ AssistantYou can open the DAQ Assistant from your NI application software orfrom MAX. When you open the DAQ Assistant, a wizard prompts you forthe information needed to create your new task. When the wizard isdone, the DAQ Assistant opens, and you can configure timing, triggering,measurement-specific settings, and scaling.You can also use the DAQ Assistant to create a global virtual channel.You can open the DAQ Assistant to create a task in:LabVIEWLabWindows/CVIMeasurement StudioMAXYou can also use the DAQ Assistant in LabVIEW SignalExpress to createDAQ steps or to use global virtual channels in your project.
Opening the DAQ Assistant in LabVIEWYou can open the DAQ Assistant to create a task in one of the followingways:Place the DAQmx Task Name control on the front panel. Rightclick the control, and select New DAQmx Task.If you are using LabVIEW 8.0 and later, you can create a task localto the Project, or you can create a task in MAX. To create a task ina Project, right-click My Computer in the Project Explorer window.Then, select New»Task.In LabVIEW 7.x, click the Configure pull-down menu on the mainLabVIEW launch screen and select Create New Task (DAQAssistant).Place the DAQ Assistant Express VI on the block diagram. This VIcreates tasks that are fully contained in a single VI.Note If you configure a task using the DAQ AssistantExpress VI, the task is local to the application and cannot besaved to MAX for use in other applications. You mustconvert the DAQ Assistant Express VI to an NI-DAQmx Taskto use the task in other applications. You can also generatecode from the DAQ Assistant Express VI. Right-click theDAQ Assistant Express VI on the front panel in LabVIEWand select Generate NI-DAQmx Code.In LabVIEW 7.x or later, select File»New and browse the FromTemplates folder to Data Acquisition with NI-DAQmx.Refer to Taking an NI-DAQmx Measurement in LabVIEW in the LabVIEWHelp for step-by-step instructions for creating a task in LabVIEW andgenerating code based on the task.For more information about creating tasks and channels with Project inLabVIEW, refer to the LabVIEW Help.After opening the DAQ Assistant, create the new task.
Opening the DAQ Assistant in LabWindows/CVITo open the DAQ Assistant, select Tools»Create/Edit DAQmx Tasks.In the Create/Edit DAQmx Tasks dialog box, you can choose to create atask in MAX or in the LabWindows/CVI project. You must use MAX tocreate global virtual channels for use in LabWindows/CVI. Forinformation about the differences between creating a task in the projector in MAX, refer to the LabWindows/CVI Help.You also can create a MAX-based task in LabWindows/CVI when youselect New Task from the Task Name control in the DAQmxLoadTaskfunction panel.After opening the DAQ Assistant, create the new task.
Opening the DAQ Assistant in MAXTo open the DAQ Assistant, complete the following steps:1. Right-click Data Neighborhood, and select Create New from theshortcut menu.If you are using a remote system running LabVIEW Real-Time,expand Remote Systems, find and expand your target, thenright-click Data Neighborhood and select Create New.2.3.4.5.Select NI-DAQmx Task in the Create New window.Click Next. The DAQ Assistant opens.Create your task.Click Save Task to save the task to MAX.Tip You can also right-click your device under Devices and Interfaces and select Create Newto launch the DAQ Assistant from MAX.
Opening the DAQ Assistant in Measurement StudioTo use a DAQmx task class in a Measurement Studio application, youmust first create the DAQmx task class within the application. You mustuse MAX to create global virtual channels for use in MeasurementStudio. Complete the following steps to create a DAQmx task class:1. Open the project in which you want to create a DAQmx task class.2. Select Project»Add New Item to open the Add New Item dialogbox.3. In the Categories pane, select Measurement Studio»Assistants.4. In the Templates pane, select DAQmx Task.5. Specify a name for the DAQmx task file and click Open. Thename you choose for the file becomes the class name.6. In the New DAQmx Task dialog box, specify whether to create anew task or to make a project copy of a global task that youcreate in MAX.Note If you choose a global task and make changes to thetask, those changes are not saved to the global task storedin MAX.7. Click Finish. The DAQ Assistant opens for you to create the newtask.After you complete these steps, the DAQ Assistant adds a .mxb file tothe project. The .mxb file stores the DAQmx task class configurationinformation. The DAQ Assistant adds references to appropriate NI classlibraries to the project.
Global Virtual ChannelsTo open the DAQ Assistant to create global virtual channels, completethe following steps:Note If you are using LabWindows/CVI or Measurement Studio, you must create your globalvirtual channels in MAX.1. In MAX, right-click Data Neighborhood and select Create New.If you are using a remote system running LabVIEW Real-Time,expand Remote Systems, find and expand your target, thenright-click Data Neighborhood and select Create New.2. In the Create New window, select NI-DAQmx Global VirtualChannel and click Next. The DAQ Assistant opens.You also can open the DAQ Assistant directly within LabVIEW,LabWindows/CVI, or Measurement Studio version 7.x or later:3.4.5.6.In LabVIEW and LabVIEW Real-Time, use the DAQmxGlobal Channel control to open the DAQ Assistant. Rightclick the control and select New Channel (DAQ Assistant).If you are using LabVIEW 8.0 or later, you can createchannels local to a LabVIEW Project, or you can createchannels in MAX. To create channels in a Project, right-clickMy Computer in the Project Explorer window. Then, selectNew»Channel.In LabVIEW 7.x, click the Configure pull-down menu and selectCreate DAQmx Channel (DAQ Assistant).In LabWindows/CVI or Measurement Studio, first you must createa task as previously described. In the DAQ Assistant, click AddExisting DAQmx Global Channels to add global virtual channelsto your task. You must use MAX to create global virtual channels.Configure the global virtual channel.Save your configuration.If you opened the DAQ Assistant from LabVIEW orLabWindows/CVI, click OK.If you opened the DAQ Assistant from MeasurementStudio, select File»Save.
If you opened the DAQ Assistant from MAX, click SaveChannel.You now can use the global virtual channel in an application or add theglobal virtual channel to a task. Refer to the application softwaredocumentation for more information about using a global virtual channelor generating code.
Using the DAQ Assistant in LabVIEW SignalExpressYou can use the DAQ Assistant with LabVIEW SignalExpress to createDAQ steps. To open the DAQ Assistant in LabVIEW SignalExpress,complete the following steps:1. Click Add Step.2. Select either Acquire Signals»DAQmx Acquire or GenerateSignals»DAQmx Generate.3. Select the I/O type, such as analog input, for your measurement.4. Select the measurement type, such as voltage.5. The DAQ Assistant opens, beginning with the Configuration tab.You can configure settings and test your step.
Creating a Task or Global Virtual ChannelAfter the DAQ Assistant opens, complete the following steps to create anew task or global virtual channel:1. Select an I/O type, such as analog input.2. Select the measurement or generation to perform. You can lateradd multiple measurement types to a task, but you must firstcreate the task with one measurement type.3. Select the sensor to use, if applicable for that measurement.4. A dialog box for the task you specified prompts you to select thephysical channels from which to create local virtual channels inthe task. Alternatively, you can add global virtual channels to thetask, or copy information from an existing global virtual channel tolocal virtual channels.If your system is configured with a TEDS sensor, click the TEDStab. Select the physical channel(s). The DAQ Assistant importsthe setting from the sensor, and uses the information to create thetask. Click Next.Note For hardware that supports multiple channels in atask, you can select multiple channels to add to your task atthe same time.5. Type the new task or global virtual channel name. Click Finish.6. Configure measurement-specific settings, timing, triggering, andscaling, if necessary. If one or more channels are configured forTEDS sensors, some settings loaded from TEDS are not editable.7. Save your configuration.Note In a task, you can add channels of the same or different measurement types.
Adding Multiple Channels to TasksFor hardware that supports multiple physical channels in a task, you canselect multiple channels to add to the task at the same time. To selectparticular physical channels, hold the Ctrl key while selecting thechannels. To select a range of physical channels, click the first physicalchannel, then press and hold the Shift key, and select the last physicalchannel in the range. All physical channels between the two selectionsare highlighted.You can also select multiple global virtual channels and any TEDSchannels you have configured.When you click the Add Channels button, a list of all channels of thesame I/O type as your task appears. This list includes channels from alldevices in your system. Unless your hardware supports multidevicetasks, you can add only channels from the same device to the task.You can also create a task with multiple channels of differentmeasurement types.
Duplicating NI-DAQmx Global Virtual ChannelsTo copy a global virtual channel, complete the following steps:1.2.3.4.5.Expand Data Neighborhood.Expand NI-DAQmx Global Virtual Channels.Right-click the global virtual channel you want to copy.Select Duplicate.A dialog box prompts you to select physical channels from a list ofvalid channels for the measurement type. Select the physicalchannels to use in the new global virtual channels. The DAQAssistant generates an ID for each new global channel, consistingof the original ID with an incremented number appended to theend.6. Click OK.
Creating a Task with Multiple Measurement TypesTo create a task with multiple measurement types, first create a task withan initial measurement type. Then, click the Add Channels button to addthe next channel(s).Note You can have multiple measurement types, such as voltage, temperature, and pressure,in the same task. However, your task must contain only one measurement class, such asanalog input or analog output.When you click the Add Channels button, a list of all channels of thesame I/O type as your task appears. This list includes channels from alldevices in your system. Unless your hardware supports multidevicetasks, you can add only channels from the same device to the task.
Naming Channels, Tasks, and ScalesUse the following guidelines to name your channels, tasks, and scales:Use any alphanumeric characters.Do not use non-alphanumeric characters with the followingexceptions:In NI-DAQmx 7.4 or later, dashes are allowed in channel,task, and scale names.Spaces are allowed.You can use underscores within the channel, task, or scalename, but you cannot use leading underscores, such asDev1.You must use no more than 256 characters.
Special Considerations with LabVIEW ProjectIn the DAQ Assistant, you receive a warning dialog if you attempt toname a LabVIEW Project channel the same name as an existing MAXglobal virtual channel. The DAQ Assistant forces you to choose a uniquename. However, in LabVIEW Project, you can right-click a channel andrename it to the same name as a MAX global virtual channel. If you dorename the channel to the same name as a MAX channel, the next timeyou use the DAQ Assistant, or an I/O Control, the MAX channel will begrayed out and you cannot select it.
Editing a Task or Global Virtual ChannelYou can use tasks and global virtual channels in your NI applicationsoftware or in MAX.
LabVIEWComplete the following steps to edit a task or global virtual channel savedin MAX:1. Place either a DAQmx Task Name control or a DAQmx GlobalChannel control on the front panel.2. Select the task or global virtual channel from the pull-down list.3. Right-click the control and select Edit DAQmx Task or EditDAQmx Channel. Then, select the destination.4. Modify the task or global virtual channel when the DAQ Assistantlaunches.5. Click OK to save the changes.
LabVIEW SignalExpressWith LabVIEW SignalExpress 2.5 and later, you can import tasks fromMAX and copy global virtual channels from MAX into DAQ steps. If youimport a task from MAX, the task becomes local to that LabVIEWSignalExpress project, and you cannot save it back to MAX. Also, anyglobal virtual channels contained in the task become local virtualchannels. Then, you can use the channels in your LabVIEWSignalExpress application.
LabWindows/CVIYou must use MAX to edit global virtual channels.To edit a task, select Tools»Create/Edit DAQmx Tasks and choose thetask you want to edit. You also can edit MAX-based tasks within MAX byselecting Data Neighborhood»NI-DAQmx Tasks and choosing the taskyou want to edit.
Measurement StudioYou must use MAX to edit global virtual channels or MAX-based tasks.To edit a project-based task, go to the project and double-click the .mxbfile to launch the DAQ Assistant.
MAXTo edit a task or global virtual channel using the DAQ Assistant fromwithin MAX, complete the following steps:1. Expand Data Neighborhood.2. Expand NI-DAQmx Tasks or NI-DAQmx Global VirtualChannels.3. Click the task or global virtual channel you want to edit.4. Modify the task or global virtual channel in the DAQ Assistant.5. Click Save when you are finished.Note If an asterisk appears next to a global virtual channel, the channel has unsaved changes.
Adding Virtual Channels to TasksYou can add virtual channels to your task. Additional virtual channelsmust be of the same class, such as analog input or analog output, as thetask. To add virtual channels to your task, complete the following steps:1. Click the Add button.2. From the drop-down list, select the measurement type to add.3. A dialog box prompts you to select a physical channel from a listof valid physical channel(s) for that measurement type. Select thephysical channels to add to your task. Alternatively, you can addexisting global virtual channels or copy information from anexisting global virtual channel to a local virtual channel.4. Click OK.5. Repeat these steps to add more virtual channels.
Creating and Editing ScalesYou can use the DAQ Assistant to create and edit scales for your tasksand global virtual channels. You can use an NI-DAQmx Scale to specify aconversion from the prescaled units measured by a physical channel tothe scaled units associated with your transducer or actuator. You canthen associate this scale with one or more virtual channels.Often, you do not need to create an NI-DAQmx Scale, becauseNI-DAQmx has explicit support for the most common transducers andactuators. For example, when creating an analog input temperaturevirtual channel, you can specify which type of transducer (such as athermistor, RTD, or thermocouple) is used to make the measurement.However, if NI-DAQmx does not explicitly support your transducer oractuator, you can create an NI-DAQmx Scale that specifies how toconvert from the prescaled units to the scaled units. Notice that the sameNI-DAQmx Scale can be associated with multiple virtual channels. Youdo not need to create an NI-DAQmx Scale for each virtual channel if thescale is the same.
Creating ScalesFollow these steps to create new scales:1. You can create a new scale in the following ways:DAQ Assistant—Click the Scale icon and select CreateNew.MAX—Right-click Scales in the configuration tree, andselect New Scale. In the Create New window, selectNI-DAQmx Scale.LabVIEW—Place the DAQmx Scale Name control on thefront panel. Right-click the control and select New Scale(DAQ Assistant).2. When the Create Scale wizard launches, select the scale typeand click Next.3. Enter a name for your scale.4. Click Finish to continue configuring your scale in the DAQAssistant.5. Click OK or Save Scale to save your scale to MAX.
Editing ScalesLabVIEW—Complete the following steps to edit a previously savedcustom scale:1.2.3.4.5.Place a DAQmx Scale Name control on the block diagram.Select a custom scale you previously created and saved.Right-click the control and choose Edit Scale (DAQ Assistant).Modify the scale in the DAQ Assistant.Click OK to save the changes.MAX—Complete the following steps to edit a previously saved customscale:1.2.3.4.Expand Scales.Click the scale you want to edit.Modify the scale in the DAQ Assistant.Click Save Scale when you are finished.
Testing Your ConfigurationClick Run to test your configuration and make sure your sensors andsignals are connected properly. Data acquired appears in the previewview. Verify that you are acquiring the expected data and that youconnected the signal properly. If necessary, modify any settings and clickRun to test your configuration again.
Saving Your ConfigurationYou can save your task or global virtual channel configuration to MAX inseveral ways, depending on how you launched the DAQ Assistant. Tosave your configuration, do the following:MAX—Click Save on the toolbar. You also can check for errors inyour task by clicking Save. If your task has an error, a dialog boxappears. Click No in the dialog box to cancel the save and showthe error(s).LabVIEW—Click OK.Note If you configure a task using the DAQ AssistantExpress VI, the task is local to the application and cannot besaved to MAX for use in other applications. You mustconvert the DAQ Assistant Express VI to an NI-DAQmx Taskto save the task to MAX for use in other applications or togenerate code.LabWindows/CVI—Click OK.Measurement Studio—Select File»Save.You can access saved global virtual channels and tasks in DataNeighborhood in MAX or in your NI application software.Note You cannot save a global virtual channel or a task to MAX with LabVIEW SignalExpress.
Using Your Task or Global Virtual Channel in YourApplication SoftwareYou can use tasks or global virtual channels saved in MAX whenprogramming your applications.If you are using LabVIEW 7.x or later, LabWindows/CVI 7.x or later, orMeasurement Studio 7.x or later, you can generate code from your taskor global virtual channel for use in your application.Refer to LabVIEW Help, LabWindows/CVI Help, Measurement StudioHelp, or NI-DAQmx Help for more information about programming withyour task or global virtua
Select Start»All Programs»National Instruments»NI-DAQ. Taking an NI-DAQmx Measurement in LabVIEW—This tutorial teaches you how to take an NI-DAQmx measurement in LabVIEW 7.x or later using the DAQ Assistant. The DAQ Assistant is a graphical interface for configuring measurement tasks, global virtual channels, and scales.


