Transcription
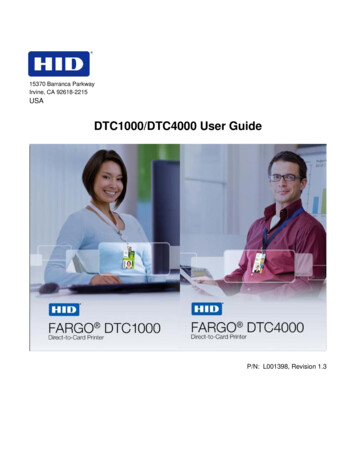
15370 Barranca ParkwayIrvine, CA 92618-2215USAETHERNET USER GUIDEDTC1000-DTC4000-DTC4500 2010 HID Global Corporation. All rights reserved.DTC1000/4000/4500 Ethernet User Guide – Installation GuideL001411 (Rev.1.0)1
DTC1000, DTC4000, DTC4500 Ethernet User Guide (Rev 1.0), 2010 property of HID GlobalCorporation. All rights reserved.Exclusive permission is granted to authorized resellers of HID Global products to reproduce anddistribute this copyrighted document to authorized HID Global customers, who have signed a “nodisclosure agreement” regarding the restricted, proprietary use of said document.The revision number for this document will be updated to reflect changes, corrections, updatesand enhancements to this document.Revision ControlNumberDateDocument TitleRevision 1.0February 2010DTC1000, DTC4000, DTC4500 Ethernet UserGuideTrademarks and DisclaimersHID, HID Global, andare the trademarks or registered trademarks of HID Global Corporation inthe U.S. and other countries.The information contained in this document is provided “AS IS” without any warranty.HID Global hereby disclaims all warranties and conditions with regard to the informationcontained herein, including all implied warranties of merchantability, fitness for a particularpurpose, title and non-infringement.In no event shall HID Global be liable, whether in contract, tort or otherwise for any indirect,special or consequential damages arising from the use of the information contained in thisdocument.Any questions regarding changes, corrections, updates or enhancements to this documentshould be forwarded to:HID GLOBALSupport Services6533 Flying Cloud DriveEden Prairie, MN 55344 (USA)(866)607-7339 Ext #6FAX: (952) 946-8492www.hidglobal.comDTC1000/4000/4500 Ethernet User Guide – Installation GuideL001411 (Rev.1.0)2
Safety Messages (review carefully) 5Ethernet Option 6Introduction 6Technical Specification - Ethernet Option 6Functional Specification - Ethernet Option 7Network Services - Overview 8Reviewing the Print Server 8Reviewing the Web Page Server 8Reviewing the Network Management Interface 8Network Management Interface 8Reviewing the Telnet Server 9Installing the Telnet Client for Windows operating systems. 9Telnet Command Line Interface 12Initiating a Telnet Session 12Accessing the IP address of your Printer 12Reviewing the Telnet Command Table 13Ethernet Web Pages – Standard Procedures 18Reviewing Web page security 18Logging In 18Accessing the Home page 19Reviewing the Home Page 20Reviewing the Home Page Categories and Fields (table) 20Configuring the Network Settings 22Accessing the Network Settings page 22Reviewing the Interface 22Reviewing the Current Settings 22Switching to the automatic IP address mode 23Changing to the static IP address mode 23Entering the TCP Window Size 24Using the Clear Changes button 25Using the Print Path page 26Using the Media Information page 28Using the TCP/IP Status Web Page 29Using the Printer page 30Using the System Log page 31Changing the Log Name 31Selecting the Log Type 32Selecting the Log Destination 33Setting up Email Event logging 34Specifying UDP Event logging 35Specifying TCP Event logging 36Using the Administration pages 39Using the System Information page 39Changing the Root Password 39Upgrading the Print Server 40Using the Reboot pages 41Rebooting the Ethernet Server 41Resetting to Default Settings 43Using the Help page 44Reviewing LED Tables 44Reviewing the LED Table 44Upgrading the Printer Firmware using the Workbench Printer Utility 45DTC1000/4000/4500 Ethernet User Guide – Installation GuideL001411 (Rev.1.0)3
Requirements 45Upgrade the Printer Firmware 45Ethernet Printer Troubleshooting Procedures 47Verifying the Printer Connection 48Verifying the Printer IP address 48Verifying that your PC can access the Printer using the ping command 49Printing a test page 50Reviewing Frequently-asked Questions 51Glossary of Terms 57DTC1000/4000/4500 Ethernet User Guide – Installation GuideL001411 (Rev.1.0)4
Safety Messages (review carefully)SymbolCritical Instructions for Safety purposesDanger:Failure to follow these installation guidelines can result in death orserious injury.Information that raises potential safety issues is indicated by a warningsymbol (as shown to the left).Caution: To prevent personal injury, refer to the following safety messagesbefore performing an operation preceded by this symbol. To prevent personal injury, always remove the power cord prior toperforming repair procedures, unless otherwise specified. To prevent personal injury, make sure only qualified personnelperform these procedures.This device is electrostatically sensitive. It may be damaged ifexposed to static electricity discharges.Information that raises potential electrostatic safety issues is indicated by awarning symbol (as shown to the left). To prevent equipment or media damage, refer to the following safetymessages before performing an operation preceded by this symbol. To prevent equipment or media damage, observe all establishedElectrostatic Discharge (ESD) procedures while handling cables in ornear the Circuit Board and Printhead Assemblies. To preventequipment or media damage, always wear an appropriate personalgrounding device (e.g., a high quality wrist strap grounded to avoidpotential damage). To prevent equipment or media damage, always remove the Ribbonand Cards from the Printer before making any repairs, unless otherwisespecified. To prevent equipment or media damage, take jewelry off of fingersand hands, as well as thoroughly clean hands to remove oil and debrisbefore working on the Printer.DTC1000/4000/4500 Ethernet User Guide – Installation GuideL001411 (Rev.1.0)5
Ethernet OptionIntroductionThe Ethernet option includes the Ethernet port and the internal Printer Server. Printer Management: The Printer Driver provides bi-directional status informationso you can monitor and manage the Printer just as you would any other networkedPrinter. Compatibility: The Ethernet option provides compatibility with TCP/IP and 802.3Ethernet protocols with an IEEE 802.3 10/100Base-T Ethernet female RJ45connector. Application: With the Ethernet Option properly installed and configured, theseprinters are able to print in the same manner as a printer directly connected to thePC via a USB interface.Technical Specification - Ethernet OptionHere are the system requirements for Ethernet.Caution: For safety purposes, Ethernet is not intended for a direct connectionoutside of the building.FunctionRequirementNetworkAn IEEE 802.3 10/100 Base-T Ethernet network is required.PrinterA Printer with the Ethernet option installed is required.PrinterConfigurationSince TCP/IP is used for the network communication, the Printermust be configured with an IP address and a subnet mask (before itcan be seen on the network).An additional network setting for the Default Gateway can also beconfigured, which allows communication across the subnets.Host ComputerA PC running Windows 2000, Windows XP or Windows Server 2003,connected to the network is required.Host PrinterDriverThe host PC must have installed the correct Printer Driver withEthernet support. (Note: This Driver must be configured for printingto the IP address of the Printer.)DTC1000/4000/4500 Ethernet User Guide – Installation GuideL001411 (Rev.1.0)6
Functional Specification - Ethernet OptionThe Ethernet option includes these vides the ability to simultaneously print from multiple PCs tothe network printer.Printer FeedbackProvides status information from the network Printer to the PC.Web PagesProvides easy Printer configuration with any web browser.Log MessagesProvides logging of usage and error events via e-mail, UDP orTCP/IP.Password SecurityProvides security with passwords and configurable Userpermission levels.TelnetProvides a Telnet command line interpreter for Printerconfiguration.SNMPProvides an SNMP agent that supports MIB-II.UpgradesProvides support for Firmware upgrades over the network.TroubleshootingProvides a Ping client for network troubleshooting.IP TracerProvides a utility (IP Tracer) used to find Printers with Ethernetconnection on a local network. (Note: This utility is included onthe CD-ROM and online at www.hidglobal.com.)DTC1000/4000/4500 Ethernet User Guide – Installation GuideL001411 (Rev.1.0)7
Network Services - OverviewThe Ethernet option provides the services described in this section. (Note: Otheradditional services include a Ping client, address assignment and Printer discoveryfunctions.)Reviewing the Print ServerThe Print Server provides printing services in the same manner as a printer connecteddirectly to a USB interface except that the Printer is connected through the local areanetwork to the client PC. The Print Server must be properly configured in order toprovide this printing capability. The Print Server is capable of queuing up to eight (8) client PCs while printing.Communications between each PC and the Ethernet-enabled Printer areimplemented over a bi-directional TCP/IP interface. All clients are able to send print jobs to the Printer and monitor Printer jobs anderrors with the standard Windows printing system using the Printer Driver installedon their local PC.In this way, the User knows whether or not a print job has been successful. Also, theUser knows what problems have been encountered while processing the print job.Printing using Ethernet works in a manner similar to the USB-connected PC/printer.Reviewing the Web Page ServerAn HTTP service serves web pages that provide an interface through which to configureand monitor the Printer. (Note: Users may also monitor all print jobs that have beensent to the Printer from any client PC.)Reviewing the Network Management InterfaceThe Ethernet-enabled Printer operates as an SNMP agent to allow central administratorsto monitor and configure the network interface and the Printer. (Note: A standard hostMIB-II is implemented to maximize the utility of the Printer on the network.)Network Management InterfaceThe SNMP interface is described below.InterfaceDescriptionSNMP The Ethernet interface is a fully-manageable SNMP agent thatsupports MIB-II. The Ethernet interface is MIB II compliant, allowing SNMP managersto monitor protocol, network and routing statistics.DTC1000/4000/4500 Ethernet User Guide – Installation GuideL001411 (Rev.1.0)8
Reviewing the Telnet ServerThe Ethernet interface has a command line interpreter. (Note: The User can connect tothe Printer using a Telnet session on their PC, issue commands to the Printer andreceive response from the Printer.)The Telnet commands are primarily used for network administration, and they will not beused by most Users. (Note: These commands will query the state of the Printer andconfigure various settings for the Printer. These include network settings, logging setting,User names and User passwords.)Installing the Telnet Client for Windows operatingsystems.Windows Vista 32 bit SP2 used as the example below.Similar procedure can be followed for operating systems other than Windows Vista thatdo not have the Telnet Client installed.Step Description1Open the operating systems Control Panel.DTC1000/4000/4500 Ethernet User Guide – Installation GuideL001411 (Rev.1.0)9
23Click on the Programs option within the Control Panel.Click the option for “Turn Windows Features on or off.”If prompted, click on ContinueDTC1000/4000/4500 Ethernet User Guide – Installation GuideL001411 (Rev.1.0)10
4Scroll down the list and check the box for “Telnet Client”Click on the OK button. After a few minutes the Telnet Client will be installed.DTC1000/4000/4500 Ethernet User Guide – Installation GuideL001411 (Rev.1.0)11
Telnet Command Line InterfaceInitiating a Telnet SessionThis procedure shows how to initiate a Telnet session from a PC in order to access theTelnet services provided by the Printer. Follow these instructions to issue Telnetcommands.StepDescription1Identify the IP address of your Printer. (Note: See the Accessing the IPaddress of your Printer procedure below.)2Initiate a Telnet session from a DOS window on your PC. At the DOS prompt,enter telnet [IP Address]Example: C:\ telnet 192.168.11.123 All Telnet responses from the Printer will then be displayed in theTelnet session on the PC. All commands entered will be sent to the Telnet client in the Printer.Enter help or ? to get an on-window list of supported Telnet commands.Accessing the IP address of your PrinterThe additional LCD menus for Ethernet-enabled Printers are provided to view the IPaddress of the Printer. Follow these procedures to access the IP Address of your Printermodel.NOTE: If your model does not have a display, then press and hold the PAUSE button for4 seconds to print a settings card. The printer must be ready and idle for the card toprint.DTC1000/4000/4500 Ethernet User Guide – Installation GuideL001411 (Rev.1.0)12
StepProcedure1Apply power to the Printer.2Ensure that the Printer is connected to your network.3Wait up to one (1) minute to allow the Printer to configure the IP address.4Scroll through the informational messages on the LCD by selecting the INFObutton (the button on the right of the front panel).5View the IP address displayed as a dotted quad number.Example: 168.192.1.1Reviewing the Telnet Command TableThe following table describes available Telnet commands. (Note: You can enter partialfull-word commands: the Printer will respond with additional help. For example, you canenter list, and the Printer will respond with all subcommands to the list command.)Telnet CommandCommand PurposeCommand Format?Display help for Telnetcommands.?helpresetReset the Ethernet interface forthe Printer/Encoder.Send a ping command to anotherIP address as a test of theEthernet interface.ping IPADDR pingallDisplay all information about thisPrinter.list alldiffDisplay all differences betweencurrent and stored networksettings.list diffuptimeDisplay how long since theinterface was last reset.list uptimesysinfoDisplay information about thePrinter (i.e., model, label, contact,location, Firmware version anddate, and serial number).list sysinfolistDTC1000/4000/4500 Ethernet User Guide – Installation GuideresetL001411 (Rev.1.0)13
Telnet CommandsetCommand PurposeCommand FormatmediaDisplay information about theinstalled media in the Printer.list medianetDisplay information about thecurrent network settings of theEthernet interface.list netstorednetDisplay information about thestored network settings of theEthernet interface.list stored netdefaultnetDisplay information about thedefault network settings of theEthernet interface.list default netuserDisplay information about thedefined User names and their type(root or guest privileges).list userlpqDisplay information about printjobs and their settings.list lpqprinterDisplay information about thePrinter (i.e., model number,Firmware version and serialnumber).list printerDisplay information about thesecure mark settings of thePrinter.list printer smprintersmsysinfocontactSet the contact string.set sysinfo contact [ STRING ]locationSet the location string.set sysinfo location [ STRING ]labelSet the label string.set sysinfo label [ STRING ]fromSet all strings fromdefault or currentsettings.set sysinfo from default currentnameChange the name of asystem log pathset logpath LOG NAME name NEW NAME typeChange the type of asystem log path. Thisstarts or stops loggingon start of jobs or onset logpath LOG NAME type[[-]job] [[-]pfault]logpathDTC1000/4000/4500 Ethernet User Guide – Installation GuideL001411 (Rev.1.0)14
Telnet CommandCommand PurposeCommand Formatfaults.setuserdestChange the destinationof a system log path.This may be set tonone, e-mail, udp ortcp.set logpath LOG NAME destnone email udp tcpemailChange the e-mailaddress for e-mailnotification for asystem log path. Itmust specify a valid email address.set logpath LOG NAME email EMAIL udpSpecify the IP addressof the UDP systemlogging program.set logpath LOG NAME udp IPADDRESS fromRestore system logpath settings from thedefault or currentsettings.set syslog from default storedaddAdd a new Userdefinition.set user add NAME Up to four (4) Usersmay be defined.delDelete a Userdefinition.set user del NAME passwdDefine a new passwordfor a User.set user passwd NAME [ PASSWORD ]typeSpecify a User as rootor guest.set user type NAME root guestOnly root Users haveadministrative rights tochange networkinterface settings.storenetfromRestore User settingfrom default or storedsettings.set user from default storedaddrStore a new IPstore net addr ADDRESS DTC1000/4000/4500 Ethernet User Guide – Installation GuideL001411 (Rev.1.0)15
Telnet CommandCommand PurposeCommand Formataddress.maskStore a new addressmask.store net mask MASK gatewayStore a new defaultgateway.store net gateway ADDRESS dnsStore a new DNSserver address.store net dns ADDRESS domainStore a new DNSdomain suffix.store net domain STRING optsEnable or disableautomatic addressassignment usingDHCP. Static (nonautomatic) addresseswill come from thestored or defaultsettings, depending onthe other settings.To enable automatic addressassignment:fromRestore the networksettings from either thedefault settings or thecurrent settings.store net from default currentmodeSpecify the Ethernetinterface mode as:automatic, full or halfduplex; 10 or 100 mHz.store ifc modeauto 10half 10full 100half 100fullfromSet the Ethernet modesettings from thedefault or currentsettings.store ifc from default currentsaveSave all currentsettings as the storedsettings in thepermanent memory.saveloadTake the settings fromthe stored memory andmake them the currentsettings.loadifcDTC1000/4000/4500 Ethernet User Guide – Installation Guidestore net opts dhcpTo disable automatic addressassignment:store net opts -dhcpL001411 (Rev.1.0)16
Telnet CommandlpstatCommand PurposeDisplay informationabout the Printerstatus.Command FormatlpstatThis includes the statusand device response.See the Printer webpage description.cancelCancel a specific printjob from the printqueue.cancel 10quitStop the current Telnetsession.quitDTC1000/4000/4500 Ethernet User Guide – Installation GuideL001411 (Rev.1.0)17
Ethernet Web Pages – Standard ProceduresReviewing Web page securityYou can use the web pages from your Ethernet-connected Printer to view severalattributes about the Printer. Users must have administrative rights, and they must enterthe correct password to alter settings of the Printer.Logging InWhen a User attempts to change any setting, they are asked for a User name andpassword. (Note: The Guest Users can only view settings.)Step12ProcedureEnter the correct User name: The default administrative User name is root. The default non-administrative User name is guest. Non-administrative Users can only view settings.Enter the correct password: The default password is an empty string. If the password has not beenchanged, leave the field blank. See Password page procedure for changing passwords.3Press Enter or click on the OK button.4If the name and password is not accepted, another login prompt will appearon screen.Repeat this procedure with the correct User name and password.DTC1000/4000/4500 Ethernet User Guide – Installation GuideL001411 (Rev.1.0)18
Accessing the Home pageStepProcedure1Open a window for your network browser application on your local PC.2Find the IP address of the Printer. (Note: See Accessing the IP address ofyour Printer as needed to get this from the LCD of the Printer.)3Enter the IP address of the Printer you want to access into the address barof the browser. (Note: The IP address will change for your printerinstallation.)4Press Enter or click on GO.5View the Home page. The Home Page displays general information aboutthe Printer. See the next page.Display – See Procedural Steps 2 and 3 (above)DTC1000/4000/4500 Ethernet User Guide – Installation GuideL001411 (Rev.1.0)19
Reviewing the Home PageThis section displays the DTC1000, DTC4000, and DTC4500 Home Page. The windowtitle bar will vary according to the serial number assigned to your Printer.Reviewing the Home Page Categories and Fields (table)You can view these categories and fields in the following table.CategoryFieldPurposeSerial Number(Printer)Displays the unique fixed serial number of thePrinter.Hardware AddressDisplays the unique fixed hardware address(MAC) of the Printer, which is the uniqueEthernet device identifier.Fixed forPrinterOn the network pageDTC1000/4000/4500 Ethernet User Guide – Installation GuideL001411 (Rev.1.0)20
Set by UserHostname(May beconfigured viaTelnet or fromtheAdministrationweb page.)Indicates the label that the User assigns tothe Printer. This label is reported to theDHCP server as the Host Name (that may beused by the DNS server to resolve the IPaddress of the Printer).If left blank, the Printer will use a unique labelbased on the MAC address of the Printer.LocationIndicates the location string that the Userassigns to the Printer.ContactIndicates the contact person string that theUser assigns to the Printer.Firmware Version(Printer)Displays the current Firmware version of thePrinter.Set byFirmwareDTC1000/4000/4500 Ethernet User Guide – Installation GuideL001411 (Rev.1.0)21
Configuring the Network SettingsThe procedures needed to configure the network settings are presented in this section.Accessing the Network Settings pageThe Network page displays the current network settings and allows the User to changethe settings.Step1ProcedureSelect the Network link from any web page of the Printer.Reviewing the InterfaceThe Interface display indicates the network speed supported by the Printer.Reviewing the Current SettingsThe Current Settings page section displays the current active network settings for thePrinter. These are also labeled as Dynamic if they were provided by DHCP or Static if theycame from the Stored Settings.DTC1000/4000/4500 Ethernet User Guide – Installation GuideL001411 (Rev.1.0)22
The current settings will be Dynamic only if Obtain an IP address automaticallywas selected when the Printer was restarted last.Switching to the automatic IP address modeStepProcedure1Select the Network link from any web page of the Printer.2Select the Obtain an IP address automatically radio button to enable theDHCP/BOOTP, which automatically assigns the network settings.Even with this button selected, the User can enter Stored Settings, and theStored Settings will remain in memory. See below. (Note: This is thedefault method.)3Click on the Submit button to save this setting.4Log in as a root User if you are so prompted. (Note: Any change of asetting will only be accepted after you have successfully logged in.)5Reboot the Printer for this change to take effect.Changing to the static IP address modeStepProcedure1Select the Network link from any web page of the Printer.2Select the Use the following IP address radio button, which prepares thePrinter to use network settings that the User has manually set.These manual settings will then be used the next time the Printer isrebooted.3Enter the network settings which are required for Ethernet communicationsfrom within the same subnet.With only these entries the User will be unable to print from a subnet otherthan the subnet on which the Printer is connected. These required settingsare the following: IP Address Subnet MaskDTC1000/4000/4500 Ethernet User Guide – Installation GuideL001411 (Rev.1.0)23
4Enter the optional network settings for Ethernet communications across arouter from other subnets. The option setting is Default Gateway.5Enter the optional network settings for DNS. These are the following: DNS Server Address DNS Domain Suffix6Select the Submit button to save these changes to stored settings in thememory of the Printer. (Note: These settings will not be lost if the power isremoved from the Printer.)7Log in as a root User if you are so prompted. (Note: Any change of settingwill only be accepted after you have successfully logged in.)8Reboot the Printer for this change to take effectEntering the TCP Window SizeStepProcedure1Select the Network link from any web page of the Printer.2Select the TCP window size from the drop-down menu, as shown below. This entry provides for entry of the TCP Window Size. It adjusts howmuch data can be sent to the Printer at any one time. It is recommended that the default value of 2 MSS Packets be used toensure good compatibility with all client applications.3Click on the Submit button to save this setting.4Login as a root User if you are so prompted. (Note: Any change of a settingwill only be accepted after you have successfully logged in.)5Reboot the Printer to effect this change.DTC1000/4000/4500 Ethernet User Guide – Installation GuideL001411 (Rev.1.0)24
Using the Clear Changes buttonStep1ProcedureClick on the Clear Changes button to delete the information in the textboxesin the Stored Settings area. See the lower left corner of this display.DTC1000/4000/4500 Ethernet User Guide – Installation GuideL001411 (Rev.1.0)25
Using the Print Path pageThe purpose of the Print Path page is to allow the User to view or change the TCP portnumbers used to communicate to the printer. If these settings are left to the defaultentry of 0 then the default ports of 9100, 5400 and 5402 will be used for the RawSocketTCP Port, the CPS Data TCP Port and the CPS Command TCP Port respectively.The CPS Command TCP Port is dependent on the setting of the CPS Data TCP Portand always two units higher.StepProcedure1Select the Print Path link.2View the active configuration of the printer in the Current Settings area onthis page.3New port numbers may be entered into the Stored Settings area in thetext boxes provided on this page.Step4ProcedureSelect the Submit button to save these changes to stored settings in thememory of the Printer. (Note: These settings will not be lost if the powerDTC1000/4000/4500 Ethernet User Guide – Installation GuideL001411 (Rev.1.0)26
is removed from the Printer.)5Select the Clear Changes button to delete these changes from thispage.DTC1000/4000/4500 Ethernet User Guide – Installation GuideL001411 (Rev.1.0)27
Using the Media Information pageThe Media page displays Ribbon information about the Ribbon (currently installed in thePrinter).StepProcedure1Select the Status link from any web page of the Printer.2Select the Media page link.3View currently-installed Ribbon information pertaining to the following: Part Number Percent Remaining Ribbon TypeDTC1000/4000/4500 Ethernet User Guide – Installation GuideL001411 (Rev.1.0)28
Using the TCP/IP pageThe TCP/IP page displays the TCP/IP Status of each Printer connection, which are notconfigurable. See the next two pages for displays.StepProcedure1Select the Status link from any web page of the Printer.2Select the TC
In no event shall HID Global be liable, whether in contract, tort or otherwise for any indirect, special or consequential damages arising from the use of the information contained in this document. Any questions regarding changes, corrections, updates or enhancements to this document should be forwarded to: HID GLOBAL . Support Services