Transcription
Oracle Retail Trade ManagementCustoms Entry User GuideRelease 22.1.301.0F60419-01July 2022
Oracle Retail Trade Management Customs Entry User Guide, Release 22.1.301.0F60419-01Copyright 2022, Oracle and/or its affiliates.Primary Author:Contributing Authors:Contributors:This software and related documentation are provided under a license agreement containing restrictions onuse and disclosure and are protected by intellectual property laws. Except as expressly permitted in yourlicense agreement or allowed by law, you may not use, copy, reproduce, translate, broadcast, modify, license,transmit, distribute, exhibit, perform, publish, or display any part, in any form, or by any means. Reverseengineering, disassembly, or decompilation of this software, unless required by law for interoperability, isprohibited.The information contained herein is subject to change without notice and is not warranted to be error-free. Ifyou find any errors, please report them to us in writing.If this is software or related documentation that is delivered to the U.S. Government or anyone licensing it onbehalf of the U.S. Government, then the following notice is applicable:U.S. GOVERNMENT END USERS: Oracle programs (including any operating system, integrated software,any programs embedded, installed or activated on delivered hardware, and modifications of such programs)and Oracle computer documentation or other Oracle data delivered to or accessed by U.S. Government endusers are "commercial computer software" or "commercial computer software documentation" pursuant to theapplicable Federal Acquisition Regulation and agency-specific supplemental regulations. As such, the use,reproduction, duplication, release, display, disclosure, modification, preparation of derivative works, and/oradaptation of i) Oracle programs (including any operating system, integrated software, any programsembedded, installed or activated on delivered hardware, and modifications of such programs), ii) Oraclecomputer documentation and/or iii) other Oracle data, is subject to the rights and limitations specified in thelicense contained in the applicable contract. The terms governing the U.S. Government’s use of Oracle cloudservices are defined by the applicable contract for such services. No other rights are granted to the U.S.Government.This software or hardware is developed for general use in a variety of information management applications.It is not developed or intended for use in any inherently dangerous applications, including applications thatmay create a risk of personal injury. If you use this software or hardware in dangerous applications, then youshall be responsible to take all appropriate fail-safe, backup, redundancy, and other measures to ensure itssafe use. Oracle Corporation and its affiliates disclaim any liability for any damages caused by use of thissoftware or hardware in dangerous applications.Oracle, Java, and MySQL are registered trademarks of Oracle and/or its affiliates. Other names may betrademarks of their respective owners.Intel and Intel Inside are trademarks or registered trademarks of Intel Corporation. All SPARC trademarks areused under license and are trademarks or registered trademarks of SPARC International, Inc. AMD, Epyc,and the AMD logo are trademarks or registered trademarks of Advanced Micro Devices. UNIX is a registeredtrademark of The Open Group.This software or hardware and documentation may provide access to or information about content, products,and services from third parties. Oracle Corporation and its affiliates are not responsible for and expresslydisclaim all warranties of any kind with respect to third-party content, products, and services unless otherwiseset forth in an applicable agreement between you and Oracle. Oracle Corporation and its affiliates will not beresponsible for any loss, costs, or damages incurred due to your access to or use of third-party content,products, or services, except as set forth in an applicable agreement between you and Oracle.
ContentsSend Us Your CommentsPrefaceAudienceviiDocumentation AccessibilityviiCustomer SupportviiImproved Process for Oracle Retail Documentation CorrectionsviiOracle Help Center (docs.oracle.com)viiiConventionsviii1Customs Entry Overview2Create a Customs EntryDefine/Enter a Customs Entry2-1Customs Entry Header2-2Details2-3Comments2-4Customs Entry Toolbar2-4Customs Entry - More Actions MenuForms and Protests2-52-6CE Forms and Protests Header2-6Forms Table2-6Forms Table - Actions Menu and Icons2-7Forms Table - View Menu and Icons2-7Protests Table2-7Protests Table - Actions Menu and Icons2-8Protests Table - View Menu and Icons2-8CE Forms and Protests Toolbar2-8Add Forms2-9Edit Forms2-10iii
Add Protests2-11Edit Protests2-12Timelines2-12Timelines2-13Timelines Table - Actions Menu and Icons2-13Timelines Table - View Menu and Icons2-13Timeline Details2-13Timeline Details Table - Actions Menu and Icons2-14Timeline Details Table - View Menu and Icons2-14Customs Entry Timelines Toolbar2-14Add a Timeline to a Customs Entry2-15Delete Timelines from a Customs Entry2-16Edit Timeline Details of a Customs Entry2-16Delete Timeline Details from a Customs Entry2-17Custom Entry Details2-17Custom Entry Details Header2-18Custom Entry Details Toolbar2-18Shipments2-19Shipments - Actions Menu and Icons2-19Shipments - View Menu and Icons2-20Add Shipments to a Customs Entry2-20Order/Items2-22Order/Items - Actions Menu, Icons and Buttons2-22Order/Items - View Menu and Icons2-23Add Order/Item to Customs Entry2-24Customs Entry Charges2-26Charges - Actions Menu, Icons and Button2-27Charges - View Menu and Icons2-27Add Charges to Order/Items2-28Licence/Visa2-30CE Licence/Visa Header2-30CE Licence/Visa Table2-30CE Licence/Visa Table - Actions Menu and Icons2-30CE Licence/Visa Table - View Menu and Icons2-31CE Licence/Visa Toolbar2-31Add a Licence or a Visa to a Customs Entry2-32Edit a Licence or Visa for a Customs Entry2-34Delete a Licence/Visa from a Customs Entry2-36Missing Documents2-36Missing Documents Header2-37Missing Documents Table2-37iv
3Missing Documents Table - Actions Menu and Icons2-38Missing Documents Table - View Menu and Icons2-38Missing Documents Toolbar2-38Add a Missing Document2-39Delete a Missing Document2-40Manage Customs EntriesSearch for a Customs Entry3-1Search for a Customs Entry Through the Basic Search Criteria3-2Search for a Customs Entry Through Advanced Search Criteria3-2Results3-3Edit a Customs Entry3-3Download a Customs Entry to a Broker3-4Allocate Customs Entry Charges to Actual Landed Cost3-4Confirm a Customs Entry3-5Manage Shipments3-5Edit Shipments of a Customs Entry3-5Delete Shipments from a Customs Entry3-7Mange Order/ItemsEdit Order/Item of a Customs Entry3-73-8Delete Order/Item from a Customs Entry3-10Edit Charges of Order/Items3-10Delete Charges from Order/Items3-11View BOLs/Containers3-12v
Send Us Your CommentsSend Us Your CommentsOracle Retail Trade Management Customs Entry User Guide, Release 22.1.301.0Oracle welcomes customers' comments and suggestions on the quality andusefulness of this document.Your feedback is important, and helps us to best meet your needs as a user of ourproducts. For example: Are the implementation steps correct and complete? Did you understand the context of the procedures? Did you find any errors in the information? Does the structure of the information help you with your tasks? Do you need different information or graphics? If so, where, and in what format? Are the examples correct? Do you need more examples?If you find any errors or have any other suggestions for improvement, then please tellus your name, the name of the company who has licensed our products, the title andpart number of the documentation and the chapter, section, and page number (ifavailable).Note:Before sending us your comments, you might like to check that you have thelatest version of the document and if any concerns are already addressed. Todo this, access the Online Documentation available on the OracleTechnology Network Web site. It contains the most current DocumentationLibrary plus all documents revised or released recently.Send your comments to us using the electronic mail address: retaildoc us@oracle.comPlease give your name, address, electronic mail address, and telephone number(optional).If you need assistance with Oracle software, then please contact your supportrepresentative or Oracle Support Services.If you require training or instruction in using Oracle software, then please contact yourOracle local office and inquire about our Oracle University offerings. A list of Oracleoffices is available on our Web site at http://www.oracle.com.vi
PrefaceThis document describes the Oracle Retail Trade Management user interface. It providesstep-by-step instructions to complete most tasks that can be performed through the userinterface.AudienceThis document is for users and administrators of Oracle Retail Trade Management. Thisincludes merchandisers, buyers, business analysts, and administrative personnel.Documentation AccessibilityFor information about Oracle's commitment to accessibility, visit the Oracle AccessibilityProgram website at http://www.oracle.com/pls/topic/lookup?ctx acc&id docacc.Access to Oracle SupportOracle customers that have purchased support have access to electronic support through MyOracle Support. For information, visit http://www.oracle.com/pls/topic/lookup?ctx acc&id info or visit http://www.oracle.com/pls/topic/lookup?ctx acc&id trs if youare hearing impaired.Customer SupportTo contact Oracle Customer Support, access My Oracle Support at the following URL:https://support.oracle.comWhen contacting Customer Support, please provide the following: Product version and program/module name Functional and technical description of the problem (include business impact) Detailed step-by-step instructions to re-create Exact error message received Screen shots of each step you takeImproved Process for Oracle Retail Documentation CorrectionsTo more quickly address critical corrections to Oracle Retail documentation content, OracleRetail documentation may be republished whenever a critical correction is needed. Forcritical corrections, the republication of an Oracle Retail document may at times not beattached to a numbered software release; instead, the Oracle Retail document will simply bevii
Prefacereplaced on the Oracle Technology Network Web site, or, in the case of Data Models,to the applicable My Oracle Support Documentation container where they reside.Oracle Retail product documentation is available on the following web index.htmlAn updated version of the applicable Oracle Retail document is indicated by Oraclepart number, as well as print date (month and year). An updated version uses thesame part number, with a higher-numbered suffix. For example, part numberE123456-02 is an updated version of a document with part number E123456-01.If a more recent version of a document is available, that version supersedes allprevious versions.Oracle Help Center (docs.oracle.com)Oracle Retail product documentation is available on the following web index.html(Data Model documents can be obtained through My Oracle Support.)ConventionsThe following text conventions are used in this document:ConventionMeaningboldfaceBoldface type indicates graphical user interface elements associatedwith an action, or terms defined in text or the glossary.italicItalic type indicates book titles, emphasis, or placeholder variables forwhich you supply particular values.monospaceMonospace type indicates commands within a paragraph, URLs, codein examples, text that appears on the screen, or text that you enter.viii
1Customs Entry OverviewThe movement of goods through customs in the import country can be tracked through thecustoms entry module.You can track the following information in the customs entry module: Forms Protests Timelines Shipments, orders, and items Departure, arrival, export, and import dates Missing documents Bills of lading and containers Charges and assessments Licenses and visasA customs entry batch program transmits data to brokers so they can prepare the necessarydocumentation. When you finalize transportation records in the transportation module, thecustoms entries are created automatically. As additional information is acquired, it can beentered manually.When the charges and assessments are complete, you can choose to allocate the costs tothe actual landed cost module. When the customs entry is complete, you can confirm therecord. If you have access to the Oracle Retail Invoice Matching product, non-merchandiseinvoices are created automatically from confirmed customs entries.1-1
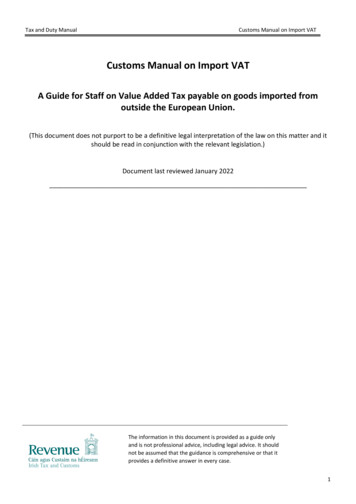
2Create a Customs EntryTo create a customs entry, follow the steps listed below.1.From the Tasks menu, select Trade Management Import Financials CreateCustoms Entry. The Customs Entry window appears.2.In the Customs Entry header, the customs entry number is auto-generated, if you createa customs entry. The ALC status as well as the status of the customs entry are displayedin the top right corner of the window. If you create a customs entry the ALC statusdefaults to Pending and the status of the customs entry to Worksheet.3.Enter, select or search for customs entry data, in the individual sections. For moreinformation about the individual sections of the Customs Entry window, see the Define/Enter a Customs Entry section.4.Then select one of the following options. Click Save and Close to save you entries and close the Customs Entry window. Click the arrow on the right side of the button to display the additional save options. –Click Save to save your entries.–Click Save and Create Another to create additional entries.Click Cancel to reject all entries and close the Customs Entry window.Define/Enter a Customs EntryYou can track the movement of goods through customs in the import country through theCustoms Entry (CE) module.The Create Customs Entry option opens the Customs Entry window. This window allows youto view and maintain customs entries. You can also calculate assessments and allocate themto actual landed cost (ALC).The Customs Entry window contains the following sections. Customs Entry Header Details Comments Customs Entry Toolbar2-1
Chapter 2Define/Enter a Customs EntryFigure 2-1Customs Entry WindowCustoms Entry HeaderThe Customs Entry header displays the Customs Entry ID. In the top right corner ofthe section the ALC status as well as the status of the customs entry are displayed.Additionally, the section contains the following entry fields.Table 2-1Customs Entry Header - Fields and DescriptionFieldDescriptionEntry No.Enter the entry number.Entry DateEnter the entry date or use the Calendar icon to select an entrydate.Import CountryEnter the country into which the merchandise is being imported.Defaults to the corporate headquarters country as defined insystem options.CurrencyEnter the currency in which the customs entry charges will bepaid. Defaults to the primary currency as defined in systemoptions.Exchange RateEnter the exchange rate used to convert from the currency onthe customs entry to the currency of the import locations that theshipment is intended for. This target currency is displayed as asuffix to the exchange rate field.If you need to edit the current Exchange Rate, see “Editing theExchange Rate" in the Oracle Retail Trade Management Lettersof Credit User Guide.Entry StatusEnter, select or search for the status of the customs entry.Entry PortEnter, select or search for the entry port.Entry TypeEnter, select or search for the entry type.Summary DateEnter the summary date or use the Calendar icon to select thedate.2-2
Chapter 2Define/Enter a Customs EntryTable 2-1(Cont.) Customs Entry Header - Fields and DescriptionFieldDescriptionRelease DateEnter the release date or use the Calendar icon to select thedate.Furthermore, the Customs Entry Header contains the Totals section. You can view thefollowing totals in this section.Table 2-2Totals - Fields an DescriptionFieldDescriptionTotal Actual AssessmentsThe Actual Assessments column lists the following values: DutyTaxesOtherValue for DutyDisplays the dutiable value of the merchandise on the customs entry.Estimated AssessmentsDisplays the estimated value of the assessments on the customsentry.DetailsThe Details section contains the following fields.Table 2-3Details - Fields and DescriptionFieldDescriptionImporterEnter, select or search for the importer.ConsigneeEnter, select or search for the consignee.BrokerEnter, select or search for the broker.Broker Ref. No.Enter the broker reference number.File No.Enter the file number.Bond TypeSelect the bond type from the list.Bond No.This field is only enabled, if you selected a bond type.Enter the bond number.Payee TypeSelect the payee type from the field.PayeeThis field is only enabled, if you selected a payee type.Enter, select or search for the payee.Liquidation AmountEnter the liquidation amount.Liquidation DateEnter the liquidation date or use the Calendar icon to select the date.Re-liquidation AmountEnter the re-liquidation amount.Re-liquidation DateEnter the re-liquidation date or use the Calendar icon to select a date.Surety CodeSelect a surety code from the list.Entry TeamEnter the entry team.2-3
Chapter 2Define/Enter a Customs EntryTable 2-3(Cont.) Details - Fields and DescriptionFieldDescriptionLive CargoSelect the Live Cargo checkbox, to indicate the entry is live inaccordance to the U.S. 7501 form.Merchandise LocationEnter the merchandise location.Location CodeEnter the location code.CommentsThe Comments section holds the Comments field. You can enter any comments forthe customs entry.Customs Entry ToolbarThe Customs Entry Toolbar displays the icons and buttons for actions that can beperformed for the customs entry such as changing the status of the customs entry ornavigating to the CE Details window to edit and view shipments, orders, items orcharges information related to the customs entry. The Customs Entry Toolbar containsthe following icons and buttons.Table 2-4Customs Entry Toolbar - Icons/Buttons and DescriptionAction Icons/ButtonsDescriptionHelp iconYou can access the online help for a particular page by clickingthe Help icon.Delete iconDeletes the current customs entry.Only possible, if the Customs Entry is still in the statusWorksheet.Recalculate iconUse this icon to recalculate the totals in the Customs Entrywindow, after you have changed CE Details such as order/itemsor charges.StatusIf you click the Status button, the status of the customs entrychanges to the status specified on the button. When there ismore than one status to which the customs entry can bechanged to, click the arrow on the right side of the button todisplay the additional status options.Possible customs entry statuses are: DetailsWorksheetSendDownloadedConfirmedClick Details to view the details of the customs entry. The CEDetails window appears.For more information about CE details, see the Custom EntryDetails section.Allocate ALCClick Allocate ALC to allocate the costs to the actual landedcosts module.2-4
Chapter 2Define/Enter a Customs EntryTable 2-4(Cont.) Customs Entry Toolbar - Icons/Buttons and DescriptionAction Icons/ButtonsDescriptionMore ActionsClick More Actions to see a list of additional actions that can beperformed in the Customs Entry window.For more information about the More Action Menu for customsentries, see the Customs Entry - More Actions Menu section.Save and CloseClick Save and Close to save your changes and close thewindow.Click the arrow on the right side of the button to display theadditional save options. Click Save to save your entries.Click Save and Create Another to create additional entries.CancelClick Cancel to reject all entries and close the window.DoneOnly displayed in view mode.Click Done to close the window.Note:If you enter the Customs Entry window in view mode, only the following icons andbuttons are available: Help icon Details button More Actions menu Done buttonAll other icons and buttons are disabled in view mode.Customs Entry - More Actions MenuUse the More Actions menu to navigate to the following windows. The More Actions menucontains the following options.Table 2-5More Actions Menu - Buttons and DescriptionAction ButtonsDescriptionForms and ProtestsOpens the CE Forms and Protests window.For more information about this function, see the Forms and Protestssection.TimelinesOpens the Customs Entry Timelines window.For more information about this function, see the Timelines section.2-5
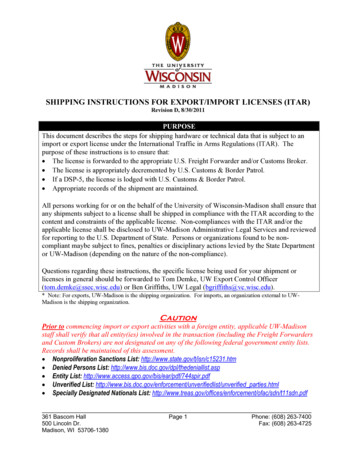
Chapter 2Forms and ProtestsForms and ProtestsIn the CE Forms and Protests window you can create, edit and view forms and protestinformation related to the selected customs entry.The CE Forms and Protests window contains the following sections. CE Forms and Protests Header Forms Table Protests Table CE Forms and Protests ToolbarFigure 2-2CE Forms and Protests WindowCE Forms and Protests HeaderThe CE Forms and Protests header displays the customs entry, the entry number andthe import country.Forms TableIn the Forms table you can maintain forms records. The table displays the followingcolumns by default. Form Type OGA Code and Description Issues2-6
Chapter 2Forms and Protests Dates such as Notice, Due and Response Date CommentsForms Table - Actions Menu and IconsUse the Actions Menu and Icons to apply actions to the table. You can perform the actionslisted below.Table 2-6Forms Table - Actions Menu/Icons and DescriptionActions Menu/IconsDescriptionAdd and Add iconYou can add forms to a customs entry by selecting Actions Add orby using the Add icon.For more information about how to add forms, see the Add Formssection.Delete and Delete iconYou can delete a form from a customs entry: Export to Excel and Export toExcel iconSelect a record in the table.Select Actions Delete or use the Delete icon.You are prompted if you want to delete the record. Select Yes toconfirm the prompt.The record is deleted from the table.You can export the records in the table to a Microsoft Excelspreadsheet by selecting Actions Export to Excel or by using theExport to Excel icon.Forms Table - View Menu and IconsYou can customize the view of the table. Use the View Menu to customize the view as listedbelow.Table 2-7Forms Table - View Menu and DescriptionView Menu/IconsDescriptionColumnsYou can manage which of the columns will be shown in the table byclicking the Show All and Manage Columns options.Detach and Detach iconYou can view the tables in the application in a separate window byclicking Detach or by using the Detach icon.Reorder ColumnsYou can reorder columns by clicking the Reorder Columns option.Query by Example and Queryby Example iconYou can filter the items by one or multiple column values by clickingthe Query by Example option or by using the Query by Example icon.Protests TableIn the Protests table you can maintain protest records. The table displays the followingcolumns by default. Protest Number Protest Code Description2-7
Chapter 2Forms and Protests Protest Date CommentsProtests Table - Actions Menu and IconsUse the Actions Menu and Icons to apply actions to the table. You can perform theactions listed below.Table 2-8Protests Table - Actions Menu/Icons and DescriptionActions Menu/IconsDescriptionAdd and Add iconYou can add protests to a customs entry by selecting Actions Add or by using the Add icon.For more information about how to add protests, see the AddProtests section.Delete and Delete iconYou can delete a protest from a customs entry: Export to Excel and Exportto Excel iconSelect a record in the table.Select Actions Delete or use the Delete icon.You are prompted if you want to delete the record. SelectYes to confirm the prompt.The record is deleted from the table.You can export the records in the table to a Microsoft Excelspreadsheet by selecting Actions Export to Excel or by usingthe Export to Excel icon.Protests Table - View Menu and IconsYou can customize the view of the table. Use the View Menu and icons to customizethe view as listed below.Table 2-9Protests Table - View Menu/Icons and DescriptionView Menu/IconsDescriptionColumnsYou can manage which of the columns will be shown in the tableby clicking the Show All and Manage Columns options.Detach and Detach iconYou can view the tables in the application in a separate windowby clicking Detach or by using the Detach icon.Reorder ColumnsYou can reorder columns by clicking the Reorder Columnsoption.Query by Example andQuery by Example iconYou can filter the items by one or multiple column values byclicking the Query by Example option or by using the Query byExample icon.CE Forms and Protests ToolbarThe Toolbar displays the icons and buttons for actions that can be performed in the CEForms and Protest window. The Toolbar contains the following icons and buttons.2-8
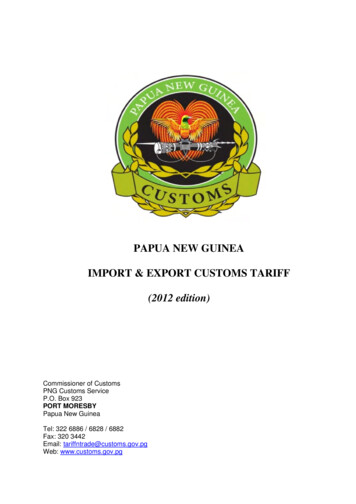
Chapter 2Forms and ProtestsTable 2-10CE Forms and Protests Toolbar - Icons/Buttons and DescriptionAction Icons/ButtonsDescriptionHelp iconYou can access the online help for a particular page by clicking theHelp icon.SaveClick Save to save your changes.Save and CloseClick Save and Close to save your changes and close the window.CancelClick Cancel to reject all entries and close the window.Add FormsTo add a form to a customs entry, follow the steps listed below.1.From the Tasks menu, select Trade Management Import Financials ManageCustoms Entry. The Customs Entry Search window appears.2.Enter or select search criteria as desired to make the search more restrictive.3.Click Search. The Customs Entries that match the search criteria are displayed in theResults section.4.Select a record in the Results section.5.In the Customs Entry column, click on the customs entry link, or mark a record and selectActions Edit or use the Edit icon. The Customs Entry window appears.6.In the More Actions menu select Forms and Protests. The CE Forms and Protestswindow appears.7.In the Forms table, select Actions Add or use the Add icon. The Add Form windowappears.Figure 2-3Add Form Window2-9
Chapter 2Forms and Protests8.a.In the Form Type field, select the form from the list. This field is a requiredfield.b.In the OGA field, enter, select or search for the ID of the other governmentagency. This field is a required field.c.In the Issues field, enter the issue raised be the government agency. This fieldis a required field.d.In the Notice Date field, enter or select the appropriate date or use theCalendar icon to select the date. This field is a required field.e.In the Due Date field, enter or select the appropriate date or use the Calendaricon to select the date.f.In the Response Date field, enter or select the appropriate date or use theCalendar icon to select the date.g.In the Comments field, enter your comments, if necessary.h.Then choose one of the following options. Click OK to add your changes and close the Add Form window. Thesystem returns to the CE Forms and Protests window. The new form isadded to the Form table. Click OK and Add Another to add additional forms. Click Cancel to reject all entries and close the Add Form window. Thesystem returns to the CE Forms and Protests window.After have added all necessary forms, choose one of the following options. Click Save to save your changes. Click Save and Close to save your changes and close the CE Forms andProtests window. Click Cancel to reject all changes and close the CE Forms and Protestswindow.Edit FormsAfter you have added a form to a customs entry, you can edit the form as shownbelow.1.In the Forms table, select a record and edit the following columns, if necessary. IssuesAdd, change or delete the shown entry. Notice, Due and/or Response DateEnter or use the Calendar icon to select the notice, due and/or response date. CommentsAdd, change or delete the shown entry.2.After you have changed all necessary data, choose one of the following options. Click Save to save your changes. Click Save and Close to save your changes and close the CE Forms andProtests window.2-10
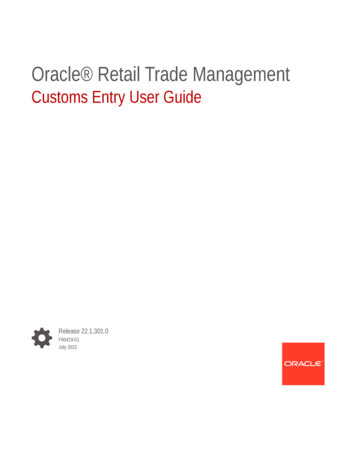
Chapter 2Forms and Protests Click Cancel to reject all entries and close the CE Forms and Protests window.Add ProtestsTo add protests to a customs entry, follow the steps listed below.1.From the Tasks menu, select Trade Management Import Financials ManageCustoms Entry. The Customs Entry Search window appears.2.Enter or select search criteria as desired to make the search more restrictive.3.Click Search. The Customs Entries that match the search criteria are displayed in theResults section.4.Select a record in the Results section.5.In the Customs Entry column, click on the customs entry link, or mark a record and selectActions Edit or use the Edit icon. The Customs Entry window appears.6.In the More Actions menu select Forms and Protests. The CE Forms and Protestswindow appears.7.In the Protest table, select Actions Add or use the Add icon. The Add Protest windowappears.Figure 2-4Add Protest Windowa.In the Protest No. field, enter the number of the protest. This field is a required field.b.In the Protest Code field, enter, select or search for appropriate protest code.c.In the Protest Date field, enter or use the Calendar icon to select the date of theprotest. This field is a required field.d.In the Comments field, enter your comments, if necessary.e.Then choose one of the following options.2-11
Chapter 2Timelines8. Click OK to add the protest and close the Add Form window. The systemreturns to the CE Forms and Protests window. The new protest is addedto the Protests table. Click OK and Add Another to add additional protests. Click Cancel to reject all entries and exit the Add Protest window. Thesystem returns to the CE Forms and Protests window.After have added all necessary protests, choose one of the following options. Clic
Download a Customs Entry to a Broker. To download a customs entry, follow the steps below: 1. From the Tasks menu, select Trade Management Import Financials Manage Customs Entries. The Customs Entry Search page appears. 2. Enter criteria to find the entry you wish to confirm. Click Search.