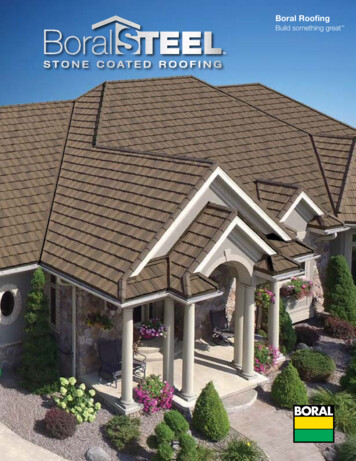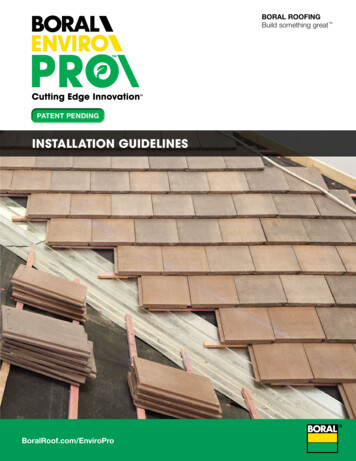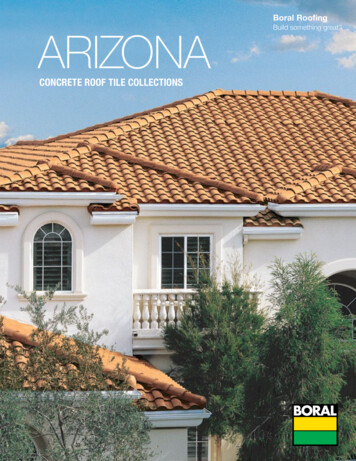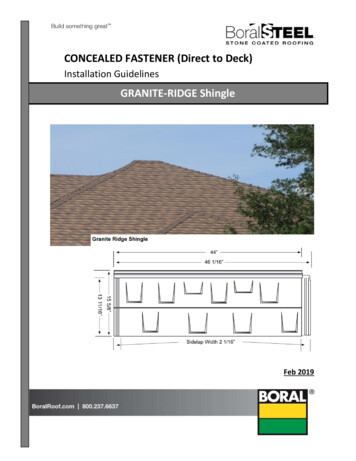
Transcription
Classic SlateAPPLICATION GUIDELINESONLY BASIC ROOFING TOOLS REQUIRED Hand fastened or fastened with a pneumatic nail gun Utility knife or a standard circular saw Tape measure, pry bar, tin snips Chalk line with blue chalk (do not use red chalk)PRODUCT SPECIFICATIONSClassic SlateStarter PieceHip and RidgeCenter Line6"6.5"7"7.5"Exposure Lines18" heightHeight: 18"Width: 12"13 1/2"12" widthHeight: 13 ½"Width: 12"Length: 18"Height: 6"Exposure: 6"- 7.5"Pre-formed Pitch:3/12 les/SquareSquares/Pallet7 1/2" exposure251602406.46.257" exposure251722586.885.86 1/2" exposure251852787.45.46" exposure2520030085Accessory ItemsOriginal Snow Guard100 per boxProduct Ratings and CertificationsHail Rating – UL2218 Class IVFire Rating – Class A or Class CTAS – 100 (110 mph wind driven rain)CCRR-0217Classic Hip & RidgeClass A / Class CClassic Starter1½" Stainless Steel Ring Shank7,200 pcs. per boxCoil NailsLbs. per piece1.5Lbs. per bundle381½" Stainless Steel Ring Shank3,475 pcs. per 25 lb boxHand NailsPieces per bundle25Tiles per lineal foot2Boral Ply 40 (2 squarecoverage roll) Roofing UnderlaymentLineal feet per bundle12.5Lbs. per piece1Lbs. per bundle25Pieces per bundle25Tiles per lineal foot1Lineal feet per bundle25Exposure RequirementsRoof SlopeClassic Slate Exposure5:12 and above6", 6 1/2", 7, 7 1/2"3:12-5:126"1
Classic Slate Application GuidelinesGETTING STARTEDPreparation: Under all circumstances, existing roofing materials must be removed down to the substrate, prior to installation. The surface area must be uniformly flat, smooth, sound, clean and free of irregularities. Examine roof sheathing to verify that sheathing joints are supported by framing and blocking and/or metal clips. Verify that substrate is sloped for drainage and completely anchored to sound framing. Any foreign particles shall be cleanedfrom interlocking areas to ensure proper seating and to prevent moisture intrusion and ice damming. Proper provisions mustbe made for flashings and roof penetrations. Even though metal flashing and other specialty flashings may not be the responsibility of the roofing contractor, these itemsmust be in place prior to slate installation. Work by other trades which penetrate the roof plane must be completed.Storing the Product: For proper installation, the slates need to be stored on the original pallet, on a flat surface. Properstorage of the product at the jobsite is important. Classic Slate should not be stored on roof decks in such a manner as toover-stress and/or damage the deck and supporting structure. The slates are cambered to ensure that maximum pressure istransferred to the leading edge of the slate during installation. Do not double stack pallets.Work Conditions: Perform work when existing and forecasted weather permits. Work should be performed in a safe,professional manner and ambient weather conditions are within the limits listed below. Be sure to follow the manufacturer’sinstallation requirements for all underlayment and any other applications. Comply with any and all local building coderequirements. Note of Caution: The slates can be slippery under certain conditions and jobsite safety procedures should beenforced.Cold Weather Installation: Slates should be stored in original packaging in a storage facility where the temperaturemeets or exceeds 45 F. Use protective coverage over all pallets while being temporarily stored on-site. Roof slates mustbe conditioned at a temperature no lower than 45 F for twenty-four (24) hours prior to use. Slates may be installed attemperatures as low as 32 F hand fastened, or with a pneumatic gun.Recommended Materials: The choice of metals and fasteners should be consistent in material. Building materials must last the lifetime of the roofing tiles. Inspire by Boral Roofing Products does not warranty components of the roof system not manufactured by Inspire by Boral. RING SHANK NAIL FASTENERS (Note: Stainless steel ring shank nails are required in coastal regions.)Head ØLengthMaterialTile3/8"1 ½"Stainless steel, hot dipped galvanized or copperVented Ridge3/8”3"Stainless steel, hot dipped galvanized or copperACCEPTABLE SHEATHINGMETAL RECOMMENDATIONSRoofing Decking MaterialsThicknessMaterialMinimum RequirementPlywoodMinimum of 15/32"Copper16 ozSolid WoodMinimum of 15/16"Aluminum.030Oriented Strand Board (OSB)Minimum of 7/16"Steel26 gauge2
Classic Slate Application GuidelinesINSTALLATIONUnderlayment: Underlayment is an extra layer of protection on your roof, required by most building codes. Self-Adhering Ice and Water Barrier – In areas where the average winter temperature drops below 25 F a self-adheringice and water barrier should be installed. At eaves the barrier should extend 2' beyond the interior wall and 3' for all sidewalls,headwalls, valleys, rakes and roof penetrations. Be sure to follow underlayment manufacturer installation recommendationsand observe your local building codes. Install the recommended underlayment on all parts of the roof deck not covered by the self-adhearing ice and water barrier.Lap edges of underlayment over self-adhering ice and water barrier no less than 2" in direction to shed water. Lap ends of feltno less than 6" over self-adhering ice and water barrier. Underlayment should not be placed under the self-adhering ice andwater barrier and should overlap a minimum of 2". Side laps should be no less than 6". Class C Fire Rating – Single-layer Boral Ply40, Single-layer ASTM D-226 #30 Felt Underlayment, or equivalent to or better:Underlayment should be preserved unbroken, tight and whole. Install perpendicular to roof slope in parallel courses. Install tomanufacturer specifications with design minimum of; lap sides of successive courses a minimum of 2" over each underlyingcourse. Lap ends a minimum of 6". Class A Fire Rating – Underlayment as per Inspire by Boral Evaluation Reports. INSPIREROOFING TILESINGLE-LAYERUNDERLAYMENTSELF-ADHERINGMOISTURE BARRIERINSPIRE STARTERCOURSE''T'' TYPE EDGEMETAL FLASHING''T'' TYPEEDGE METAL3
Classic Slate Application GuidelinesFasteners: Caution should always be used to prevent over/under penetration of the fastener. Two fasteners must be placed in the proper nail target areas on each tile. Improper fastening can compromise the roofsystem and voids the manufacturer warranty. Fastener must penetrate roof decking at least 3/4".Starter and First Course: Starter tiles should hang past the drip edge a minimum of 1/2" and no more than1-1/2" and should be fastened in the target areas provided.Center Line7.5" Exposure Line The gap between starter tiles should be approximately 1/4". The first course of slate should be installed even with the butt edge of the startercourse.Nail Targets The vertical joints between the starter and first course and all succeeding coursesshould be a minimum of 2". This ensures that nails are covered by the next courseand no through joints from roof surface to underlayment are exposed.Straight Courses: Strike horizontal chalk lines at the desired exposure level, to ensure that the slates are installed straight and uniform. 7.5" isthe maximum exposure when installing straight courses for roof pitches 5/12 and above. 7.5", 7", 6.5" and 6" exposure marks are provided on each tile. These are used by placing the mark on the top of the tile ofthe proceeding course.22.5157.54
Classic Slate Application GuidelinesStaggered Courses: The first course should be installed directly over the starter course. The first Chalk line should be 6.5"from the top of the first course. The top of the first slate should be placed on the chalk line. The next slate should be placed 1" belowthe chalk line. 6.5" is the maximum exposure when installing staggered courses for roof pitches below 4/12.19.5136.55
Classic Slate Application GuidelinesValleys: A valley is created at the downslope intersection of two roof planes. Install a full 36" piece of ice and water shield centered through the entire valley. Fasten the valley every 2' using metal cleats. Slates must cover valley flashing by a minimum of 4", make sure not to drive fasteners from slates into the valley flashing. An open or closed valley may be used.Open Valley Design: Open is good for snow, ice and debris. For an Open Valley Design a double “W’’ Valley isEXTEND SLATES 4''[100 mm] MIN. OVERVALLEY METALINSPIREROOFING TILESLOPErecommended to avoid seeing the structural ribbing.VALLEY METAL 18''[450 mm] WIDE MIN.LAP VALLEY METAL8'' [200 mm] MIN.AND SET INSEALANTVALLEY UNDERLAYMENTCONTINUOUSSTRIPPING PLYON BOTHSIDES OFVALLEY METALOPTION:FASTENERMETAL CLIP (APPROX. 2''[50 mm] WIDE) BENDCLIP BACK OVER TOCOVER FASTENERS. MIN. 2FASTENERS PER CLIPALTERNATE:Double W Profile6
Classic Slate Application GuidelinesClosed Valley Design: For a Closed Valley, a Single Diverter “W” Valley or Standing I Seam valley should be used. SlatesEXTEND SLATES 4''[100 mm] MIN. OVERVALLEY METALINSPIREROOFING TILESLOPEshould be butted next to the diverter.VALLEY METAL 18''[450 mm] WIDE MIN.LAP VALLEY METAL8'' [200 mm] MIN.AND SET INSEALANTVALLEY UNDERLAYMENTCONTINUOUSSTRIPPING PLYON BOTHSIDES OFVALLEY METALOPTION:FASTENERMETAL CLIP (APPROX. 2''[50 mm] WIDE) BENDCLIP BACK OVER TOCOVER FASTENERS. MIN. 2FASTENERS PER CLIPALTERNATE:W Profile7
Classic Slate Application GuidelinesFlashings: Flashings should be used around all roof penetrations, such as walls, chimneys, dormers, vent pipes,or skylights.Apron (Roof to Wall) Flashing: Apron flashing is used when a roof terminates to a wall causing a course to be cut andface nailed. It is installed over the slates and behind siding or counter/cap flashing.APRON FLASHING DIAGRAMSHEET METAL APRONFLASHING WITHHEMMED EDGESEALANTSHEET METALCOUNTERFLASHINGRAGGLEUNDERLAYMENTTURNED UP WALLSOLDERED ONEPIECE APRONFLASHINGCORNERSINSPIREROOFING TILE8
Classic Slate Application GuidelinesStep Flashings: When a pitched roof comes into contact with a vertical wall, individual pieces of metal flashing shouldbe installed at the end of each slate to prevent water intrusion. Step flashings should extend under the uppermost row ofthe roof slate, at least 4" over the slate immediately below the metal. The vertical leg of the metal should be turned up aminimum of 4" and extend 4" on the slate with an optional 3/4" hem. Flashings should have a minimum length of 12" andmust overlap a minimum of 2".STEP FLASHING DIAGRAMUNDERLAYMENTTURNED UP WALLAPPROX.4'' [100 mm]SIDING TOCOUNTERFLASHSTEPFLASHING AMIN. 2'' [50 mm]SHEET METALSTEPFLASHINGBUILDING PAPERINSPIREROOFING TILE9
Classic Slate Application GuidelinesVent, Pipe & Other Penetrations: Penetrations through the roof deck require a flat flange around the penetration.The flashing should be placed above the penetration and on top of the slate and below the penetration.SOIL STACK DIAGRAMMETAL FLASHINGSLEEVEINSPIREROOFING TILEUNDERLAYMENT TOOVERLAP UPPER FLANGEOPTIONAL SEALANTUNDER SLATEMIN. DOWNSLOPEFLANGE DIMENSIONTO BE EQUAL TOFIELD SLATEEXPOSURE4'' [100mm] MIN.TYP.10
Classic Slate Application GuidelinesHip and Ridge Detail: When pre-formed hip & ridge slates are used, nailin designated target area. Fasten hip slates with 2fasteners (one on each side). Use a max exposure of 7.5". Chalk a straight line by placing one piece of hip at theeave and one near the peak, hold the chalk line at theedge of the slate on the top and bottom pieces. This willhelp keep the hip straight in the event of a crooked hip. Cover exposed heads of fasteners with an adhesivesealant compatible with the slate. Preformed hip and ridge slate require 3”length fasteners. Fastener must penetrate deck a minimum of 3/4".Ridge Vent: During winter months ventilation is a key factor to remove moisture from the attic. Warm moist air inside abuilding travels up toward the attic. Problems occur when water vapor comes in contact with cold building materials andcondenses. The structural elements of the attic will absorb moisture and over time may lead to rotting wood and/or mold.For balanced ventilation system split between the ridge and soffit, 1 square foot of net free area is required for every 300square feet of attic floor space. It is required to have 1 square foot of ventilation for every 150 square feet of attic floor spaceif this balance cannot be achieved. Ventilation is necessary for extended life of the roof system. Inspire by Boral RoofingProducts will not warranty an un-vented roof and/or improperly vented roof system.Below are diagrams of Roof Truss and Ridge Pole construction applications. We recommend using RidgeMaster Plus with 3"roofing nails.RIDGE POLE CONSTRUCTIONTRUSS CONSTRUCTION11
A B O U TB O R A LR O O F I N GBoral Roofing LLC is a subsidiary of Boral USA and is the country’s largest premium provider of complete roofing and reroofing solutions for architects as well as commercial and residential builders. Boral Roofing operates manufacturing plantsthroughout the US.A B O U TB O R A LN O RT HA M E R I C AHeadquartered in Roswell, Georgia, Boral North America is a leader in key construction materials and building productsmarkets with operations across the USA, Canada and Mexico. In 2017 Boral acquired Headwaters Incorporated, expandingBoral’s product offering and manufacturing and distribution footprint across North America. In construction materials, Boralhas a national footprint and industry-leading position in the processing and distribution of fly ash – a by-product of coalcombustion – as well as a Texas-based concrete block business, and Denver concrete and quarries operations.In building products, Boral manufactures and supplies cladding, roof tiles, windows and other light building products forresidential and commercial markets nationally. Boral’s manufactured stone veneer includes leading brands Cultured Stone by Boral , Boral Versetta Stone , Eldorado Stone, Dutch Quality Stone and StoneCraft. Boral’s light building productsportfolio includes Boral TruExterior Siding & Trim – a pioneer of the innovative poly-ash category of exterior buildingproducts – as well as shutters, gable vents, mounting blocks and tool systems. In roofing, Boral is a leading manufacturerof clay and concrete roof tiles, and also produces composite polymer and stone-coated metal roof tiles.Boral also has a 50% share of the Meridian Brick joint venture, a leading clay and concrete brick manufacturer which wasformed with Forterra Brick in 2016.800.971.4148 BoralRoof.com 2018 Boral Roofing LLC BR129-11/1812
Step Flashings: When a pitched roof comes into contact with a vertical wall, individual pieces of metal flashing should be installed at the end of each slate to prevent water intrusion. Step flashings should extend under the uppermost row of the roof slate, at least 4" over the slate immediately below the metal.