Transcription
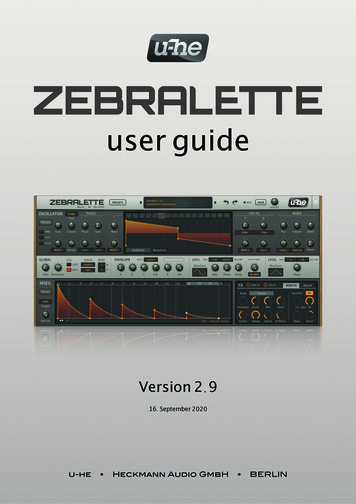
user guideVersion 2.916. September 2020u-he Heckmann Audio GmbH BERLIN
Table of ContentsIntroduction3Using Zebralette.4Control Bar5Upper Panel7Oscillator Presets .7Mode Buttons .7Tuning .8PHASE .8The Wave Editor .9OSC FX.13MIXER.15Centre Panel16GLOBAL.16ENVELOPE.17LFO1 .18LFOG .19Lower Panel20MSEG .20ModFX .22Delay .23Appendix25List of Modulation Sources.25Credits.252
TOCIntroductionAbout ZebraletteZebralette is a single oscillator plucked from Zebra2 and transplanted into a very simpleand easy-to-learn framework. The Zebra2 oscillators are so powerful that Zebralette is agreat little synth in its own right – with the same pristine sound as Zebra2. The LFOs,MSEG and effects are also simplified versions of Zebra2 modules.Unlike Zebra2, Zebralette doesn’t include ‘virtual analogue’ filters. However, the pair ofspectral effects are flexible enough to make some very squelchy filter-like sounds. Oneof them is even called ‘Filter’.Please note: Zebralette’s preset browser is not described in much detail here, and theconfiguration pages hardly get a mention. For more information about these features,please refer to the the Zebra2 user guide, which you will find in the documentationfolder: Click on the u-he badge, select Docs Folder then Zebra2 user guide.pdf.Online resourcesFor u-he product information, downloads etc., go to the u-he websiteFor a lively discussion about u-he products, go to the u-he forumFor friendship and informal news updates, visit to our facebook pageFor u-he tutorials and much more, go to our youtube channelFor u-he presets (free and commercial), go to our patch libraryInstallationGo to the Zebralette webpage, scroll down and click on the [Download] button. Doubleclick on the downloaded file and follow further instructions. Note that the installer alsoincludes a demo version of Zebra2 (in fact it is the same installer!)For your information, you will find the factory presets in the following directories:Windowslocal folderuser ra2.data\UserPresets\Zebralette\Mac OSXlocal folderuser folderMacintosh rary/Audio/Presets/u-he/Zebralette/UI sizeYou can temporarily change the size by right-clicking anywhere in the background andselecting from the list (70% to 200% in 10% increments). Sizes larger than your screenwill appear grey and are not available here.You can set a more permanent UI size in the Preferences (via the cogwheel top-right).For details, please refer to the Preferences chapter in the main Zebra2 user guide.3
TOCINTRODUCTIONUsing ZebraletteKnobsValues are adjusted via the usual click-and-drag, allowing finer resolution via the SHIFTkey on your computer. Note that several of the knobs are bipolar (centre-zero so youcan set negative values). Knobs can be reset to their default values via double-click.Tip for wheel-mouse owners: You don’t have to click on knobs or switches to changevalues – just ‘mouseover’ and roll the wheel and use SHIFT for fine tuning.ModulationAlong the bottom of the upper panel are eight knobs labeled none by default. These areuser-definable modulation depth controls for the following: Tune, Phase, Sync,Wave, OSC FX1 and OSC FX2 amounts, Pan and Volume. Click on the label to select asource, then adjust the knob for negative or positive modulation amounts.Note: The two OSC FX selectors look similar to modulation source selectors.LockingThis feature prevents values from changing whenever you load another preset. Rightclick on any knob or switch and select ‘Lock’ from the context menu. To unlock again,right-click and untick ‘Locked’.MIDI ControlZebralette can be remote-controlled / automated via MIDI messages from a hardwarecontroller or from your sequencer. For details please refer to the Zebra2 user guide’sConfiguration chapter.CONTROL BARUPPER PANEL – simplified Zebra2 oscillatorCENTRE PANEL – global parameters, envelope and LFOsLOWER PANEL – multi-segment envelopegenerator (MSEG) and effects (chorus, delay)Overview of the Zebralette panels4
TOCControl BarPresetsA click on the [PRESETS] button in the control bar opens Zebralette’s preset browser,which replaces all other panels except the control bar:Note: Only the most basic browser functions are mentioned here. For a full explanation,please refer to the Preset Browser chapter in the main Zebra2 user guide.Loading presetsOpen the preset browser by clicking on the [PRESETS] button. Select a folder from theDIRECTORY area on the left, then a preset from the central area. Immediately afterhaving selected a preset you can use the up/down cursor keys on your computer keyboard to scroll through all the others.To exit the preset browser, click on the [PRESETS] button again.Alternatively, you can load presets via the data display – see the next page.MIDI ProgramsAs well as containing preset folders 01 to 06, Local also contains MIDI Programs, aspecial folder which is initially empty but can contain up to 128 patches. As they are allloaded into memory when Zebralette starts, they can then be individually switched viaMIDI Program Change messages. For details, please refer to the Zebra2 user guide.SearchClick on the grey Search field and enter some text to look for particular presets. Notonly the file name but also the PRESET INFO content is included in the search. For details of this powerful feature, please refer to the Zebra2 user guide.3
TOCCONTROL BARData DisplayApart from showing the name of the currently selected patch, the central display has afew other duties: The triangles either side of the display step through presets.A click on the display opens a list of all presets in the currently selected directory. This isoften easier than opening the browser, selecting a preset and exiting the browser again.New feature in 2.9.1: If you drag a Zebralette preset from outside the plugin and drop itonto the Data Display, it will be loaded (but not automatically saved anywhere).Initialize presetWhenever you want to program a new sound from scratch, simply right-click on the datadisplay and select init.Undo / RedoThe curved arrows to the right of the data display can be used to fix recent mistakes.Although the number of steps in the buffer is limited, you can even undo a change ofpreset – so switching presets before saving doesn’t necessarily mean losing your work.MIDIThe MIDI activity indicator flashes whenever MIDI data is being received.SaveClicking on the [SAVE] button opens a window in which you can give your sound aname, enter your name (as author) and any details you want to add: preset description,performance control etc. Then confirm via Apply. The preset will be saved in the root ofthe User folder by default (see Preferences section in the Zebra2 user guide).OutputThe final volume after the effects. Normally set to 100%, a preset’s volume can beboosted up to 200% if necessary. Tip: If you find that most presets are too quiet or tooloud you could lock the Output knob to your preferred level (see Parameter Locking onthe next page).u-he BadgeClicking on the u-he company logo on the right opens a pop-up menu containing links tothis user guide, to other relevant documentation (including the Zebra2 user guide), toour website, to our support forum and to our presence in various social networks.CogwheelClicking on this symbol opens the Configuration pages where you can set up remotecontrol via MIDI CC as well as various global preferences. For details, please refer tothe Configuration chapter in the Zebra2 user guide.6
TOCUpper PanelOscillator PresetsPresetsApart from the main [Presets] button in the control bar, Zebralette has two more buttonsof the same name, one of which sits immediately below the OSCILLATOR label. Not tobe confused with the regular presets, oscillator presets only include parameters thatappear in the upper panel, plus Resolution (located in the centre panel as there was nomore room). This allows oscillator settings to be exchanged between Zebralette andZebra2, but please note that the oscillators in Zebra2 include a few more parameters:velocity scale, key scale, key follow, render mode. These parameters are interpretedcorrectly by Zebralette, but cannot be edited here without hacking the .h2p file.Left-click to select oscillator presets from a floating window. Right-click to open adrop-down menu offering Copy, Paste, Save, Show (in Finder/Explorer) functions aswell as the contents of the currently selected oscillator presets folder.Mode ButtonsPWMThis adds an inverted copy of the oscillator with Phase fixed at 0. If the wave is a saw,activating PWM turns it into a pulse. The Phase parameter (see below) then adjustspulse width, and modulating Phase gives you the classic PWM effect.Sync (button)Activates the hard-sync effect. See Sync (knob) on the next page.ResetCauses the wave to start at the same position (set by the Phase knob – see below)each time a note is played.7
TOCUPPER PANELTuningTuneOscillator pitch offset ( /- 48 semitones). This parameter has a modulation amount knoband source selector.DetuneDetune describes two slightly different jobs. When Stack is set to single, it adjusts finetuning ( /- 50 cents). If Stack is set to dual, quad or eleven it does not lower or raise theoverall pitch of the oscillator, but spreads detuning equally. Of course you can still donormal fine tuning via SHIFT Tune.Stacksingle / dual / quad / eleven1, 2, 4 or 11 oscillators in “unison”. The eleven mode could be called a superwave (i.e.not supersaw, hypersaw etc.) because the stacking effect works with any wave the oscillator can deliver.VibratoThe amount of pitch modulation directly from LFO1 (0 – 100). The maximum depth hereis only /- 50 cents – for deeper vibrato, use the Mod knob with LFO1 as source.PHASEPhaseThe Phase knob adjusts the horizontal position of the wave. It is mainly used for settingthe central position for Pulse Width Modulation, but can also affect the punch of asound when Reset is on and envelope Attack is at minimum.Phase has a modulation amount knob with source selector. For classic PWM, activatethe PWM switch (see above) and modulate Phase with a sine or triangle wave LFO.8
TOCUPPER PANELSync (knob)Offset for the oscillator-internal hard-sync effect. This type of sync adds a lot of upperharmonics. Note that Sync only works if the [Sync] button on the left is activated. TheSync parameter also has a modulation amount knob and source selector.The Wave EditorThe middle of the OSCILLATOR panel is where you create and edit your own waveforms.At the the top of the editor is a selector which is also controlled by the Wave knob WaveThe knob to the left of the editor smoothly scans through the waveset (1 to 16). Wavehas a modulation amount knob and source selector. Note: How smoothly waves are interpolated depends on the Resolution value (look in the GLOBAL panel).Dragging the wave selector to the left and right is almost the same function as adjustingthe Wave knob – if you move one, the other also moves. However, the selector doesn’tlet you set intermediate values e.g. wave 1.5, unlike the Wave knob.Mouse operations in the Wave Selectorrearrange(Mac) alt drag(PC) ctrl dragmorph (or blend)(Mac) cmd click on the desired target wave(PC) alt click on the desired target waveduplicate(Mac) alt cmd click on the desired target wave(PC) ctrl alt click on the desired target wavecontext menu (right-click)Morph, duplicate or exchange the clicked wave with the already highlighted one.Morph ModesAlthough there are four oscillator modes, only two editing methods are required. This section describes the two Morph waveform modes, and how to edit them:9
TOCUPPER PANELGeoMorphGeoMorph mode lets you draw waveforms by defining up to 32 handles, and (if you like)adjusting the curvature of the lines connecting them. Note that the first and last handlesdefine the level at 0 phase – they cannot be deleted or moved horizontally. The minimumnumber of handles is 4, and all waves in the waveset adopt the same number of handles.SpectroMorphAlthough it looks like GeoMorph, SpectroMorph is very different: It does not depict a waveform, but rather its harmonic spectrum. The 1023 harmonics are scaled logarithmicallyacross 10 octaves (or thereabouts). In SpectroMorph mode, a horizontal line across theentire width of the editor (all harmonics have the same level) describes a bright sawtooth.10
TOCUPPER PANELMouse operations in the Morph modescreate or remove a handle(Mac) cmd right-click(PC) alt right-clickmultiple selectionClick in the background and drag over one or more handlesShift click on a handle to add or remove it from the selectionTo move all selected handles, click and drag one of themadjust curvature (left, right)(Mac) alt drag, cmd drag(PC) ctrl drag, alt dragExperimenting with line curvature is better than a long-winded explanation here!context menu (right-click in the editor)i
For u-he tutorials and much more, go to our youtube channel For u-he presets (free and commercial), go to our patch library Installation Go to the Zebralette webpage, scroll down and click on the [Download] button. Double-click on the downloaded file and follow further instructions. Note that the installer also includes a demo version of Zebra2 (in fact it is the same installer!) For your .