Transcription
Farm Works Software For Windows TMFarm Trac MateFor version 10.0 and higherFarm Works is aDivision ofCTN Data Service, Inc.P.O. Box 250Hamilton, IN 46742-0250E-mail: farmwork@farmworks.comWebsite URL: http://www.farmworks.com(260) 488-3492FAX (260) 488-3737
Copyright 2004 by CTN Data Service, Inc.All rights reserved. No part of this book shall be reproduced, stored in a retrieval system,or transmitted by any means, electronic, mechanical, photocopying, recording, otherwise,without written permission from CTN Data Service, Inc. While every precaution has beentaken in the preparation of this book, CTN Data Service, Inc. assumes no responsibility forerrors or omissions. Neither is any liability assumed for damages resulting from the use ofthe information contained herein. For information, address CTN Data Service, Inc., P.O.Box 250, Hamilton, IN 46742-0250.Text was prepared with PageMaker 7.0. Printed in the United States of America.Norman Teegardin, CEOWriter/Prod. EditorR. Scott NusbaumDesktop PublishingKim HermanGraphics DesignBrian StarkCopy EditorClaudia WeesnerProgrammersAnthony BowersSean BakerLowell SmithPhil HaynesJoe CaprinoAll terms mentioned in this book that are known to be trademarks or service marks arelisted below. In addition, terms suspected of being trademarks or service marks havebeen appropriately capitalized. CTN Data Service cannot attest to the accuracy of thisinformation. Use of a term in this book should not be regarded as affecting the validityof any trademark or service mark.Windows is a trademark of the Microsoft Corporation.
Farm Trac MateBesides using the Farm Trac Mate manual, be sure to alwayscheck the Tutorial and Program Helps for the most recent updateson how to use all Farm Works Software
ContentsAbout Farm Works Software . 1Layout of this Manual . 2Using a Windows CE Device . 5Creating a partnership between the CE device and the desktopcomputer / laptop . 5Re-Setting the CE Device . 7Getting Started . 9Installing Farm Trac Mate . 9Installation Procedures . 10Registering Your Software . 11On-line Registration . 11Call Farm Works Software . 11Synchronizing Data . 13Synchronizing between Trac Mate and Farm Trac . 13Synchronizing between Trac Mate and Site Pro . 13Synchronization Process . 14Linking New Information . 16Saving information and preventing data loss . 19Viewing Data after Synchronization . 19Quick Start – First Time Users. 21Using Farm Trac Mate . 23Selecting a Project . 23New Job Screen . 24Job Setup Screen . 25People . 25Equipment . 25Supplies . 26Harvested Crop . 29The Job Tab . 29Entering Harvest Data with Scale Tickets: . 30Entering Yield Data without Scale Tickets . 31
Removing a supply from a current job . 33Adding a New Supply to a Current Job . 33Unfinished Jobs/Workorders . 37The Config Tab . 39Index . 41
About Farm Works SoftwareFarm Works Software features a complete line of farm management tools fortoday’s producer. The seven packages: Farm Trac , Farm Fund , FarmSite, Farm Stock, Farm Trac Mate, Farm Site Mate and Guide Mate offer thefarmer an integrated approach to farm management.Farm Trac is a basic field-mapping package that allows you to map yourfarm and then keep field histories and chemical records by farming the mapwith icons that represent your people and equipment. Farm Trac Mate integrates with Farm Trac to provide field record keeping for pocket andhandheld PCs running Microsoft Windows CE or Pocket PC as well aswith laptop computers with Windows 98 or higher. Trac Mate takes thehassle out of field record keeping and allows you to spend more time in thefield and less time in the office. Farm Fund adds a full-featured farm accounting program that includes both cash and accrual books. Farm Stockadds detailed livestock records. With Farm Stock, you can keep genealogicaland health records on an animal-by-animal basis. Farm Site brings yourmaps into the 21st century by adding an unlimited number of layers that maybe geo-referenced. Farm Site can import yield data from most yield monitorsand can be used for recording soil tests and mapping features such as soiltypes. Farm Site Mate works with pocket and handheld PCs runningMicrosoft Windows CE or Pocket PC as well as with laptop computerswith Windows 98 or higher. Site Mate works with a GPS receiver and offersthree integrated modules for basic mapping, scouting, and variable ratecontrol. The program works with ArcView Shape Files so that data may beused with any geographic information system. Guide Mate provides an easyto-use guidance solution that works with Farm Site Mate.1
Layout of this ManualThis manual is designed to give you explanations of how your Farm TracMate program works and what you need to do to use the program successfully. This manual is not designed to give you in-depth instructions on how tocomplete certain tasks. Refer to the on-line help for detailed descriptions ofhow to enter information into Farm Trac Mate. The on-line helps can beaccessed by selecting Help Topics from the File menu in Farm Trac Mate.This manual is designed so that you can sit down, read it in an evening, andhave a good idea of how Trac Mate works and what you will need to do to getstarted.Overview of Farm Trac MateFarm Trac Mate works with hand-held PCs running the Windows CE orPocket PC operating system, as well as laptops and other computers usingWindows 98 or higher. Farm Site Mate works with a GPS receiver formapping, scouting, and controlling many commonly used variable rate applicators. By combining Site Mate, Trac Mate and a reasonably-priced Windows CE device, farm producers finally have a low cost solution to meettheir needs.Farm Trac Mate works with Farm Trac and Site Pro to provide you with theability to enter crop and chemical records while in the field. Trac Mate includes the following features:· Works with Farm Trac and Site Pro so information, such as field names,equipment, personnel, and supplies, may be downloaded from your desktop computer into Trac Mate.· Includes an easy to use configuration process for adding new fields, personnel, equipment, and supplies while away from your desktop computer.· An integrated time clock can calculate hours worked by each person on anoperation.· Use the on-screen keyboard or the handwriting features of Pocket PCs toenter information. Trac Mate has been designed to minimize the amount2
of required data entry. Most information is easily entered by selecting itemsfrom a list of choices on the screen.· Use the metered feature to keep track of items such as tach hours. Simplyenter the meter reading at the start of the operation and again after theoperation is completed. Trac Mate will calculate the amount used on thisoperation as well as default the starting value for the next operation.· Detect possible calibration problems in the field by entering the total quantity of each supply used and have Trac Mate calculate the actual rate applied for each supply.· Record field and weather conditions at the time of application for requiredchemical reporting.· Use the Notes area to enter information such as observations about broken tiling, weed or insect problems, or anything that will help you manageyour farm more efficiently.· Updates permanent records by simply plugging the device into your desktop computer and starting the synchronization process from Farm Trac orSite Pro. All of your field histories, EPA records, and enterprise statements will be updated. If you are using Farm Fund , this will even updateyour supply inventories.3
4
Using a Windows CEDeviceIf using Farm Trac Mate with a Windows CE device ( Pocket PC orhandheld PC running Windows CE), you will need configure your CE device and desktop computer to work with Trac Mate. The appropriate softwaremust be installed and a partnership between the CE device and the desktopmust be created. If installing to a laptop/desktop platform, skip to the Installing Farm Trac Mate section of this manual.NOTE: There are frequent model changes for CE devices, due to supplyfactors from suppliers. Though every attempt has been made to have theseinstructions as comprehensive as possible, it may be necessary to referencethe CE device user manual for some instructions.Creating a partnership between the CE deviceand the desktop computer / laptopCreating a partnership allows the desktop computer and the CE device tocommunicate back and forth to each other. This communication is how thetwo computers will exchange information and how software will be installedonto the CE machine. A new partnership must be created before the CEdevice may be used with a desktop computer. The following are the basicsteps for creating a partnership:1. Connect the cradle (also known as a docking station or dock) of your CEdevice to your desktop computer or laptop. This will normally plug into aserial or USB port on the back of the desktop computer. Depending onyour computer, an adapter may be required.2. Install Microsoft Windows CE Services from the Microsoft Windows CE CD ROM. This CD should be packaged with your CE device. This5
program will run a setup wizard that will step you through installing thenecessary applications. You may also need your original Windows installation CD.3. After Windows CE Services has been installed, you will be prompted torestart your desktop machine. After it has restarted, place your CE deviceinto the cradle. The New Partnership Wizard should now appear. Enteradditional information such as a Device Name for your CE device. Thedevice name is how your CE device will be identified in Windows . Afterentering this information, the partnership will be complete.Each time you put your CE device into the cradle, a message window will bedisplayed that indicates that Windows is connecting to the CE device. Thisprocess will be important since it is what allows communication between thedesktop/laptop and the CE device.6
Re-Setting the CE DeviceIf at anytime the software “locks-up” and the CE device will not respond toany of the buttons, use the stylus and press the soft reset button.7
8
Getting StartedInstalling Farm Trac MateFarm Trac Mate will be installed using the CD-ROM on your desktop or laptopmachine regardless of whether the program will be run from desktop, laptopor from a CE device. If Trac Mate will be run from a CE device, the CE device must be synchronized with the desktop machine throughout the installation process.Following is a list of hardware and software required when installing to a CEdevice: Pocket, hand-held, or professional PC. Microsoft Windows CE or Pocket PC version 2.0 or higher. 4 megabytes or more of available memory.Following is a list of hardware and software required when installing to alaptop or desktop computer: Personal Computer with a Pentium processor or higher. 8 megabytes or more of RAM. Microsoft Windows 98 (or higher) installed.9
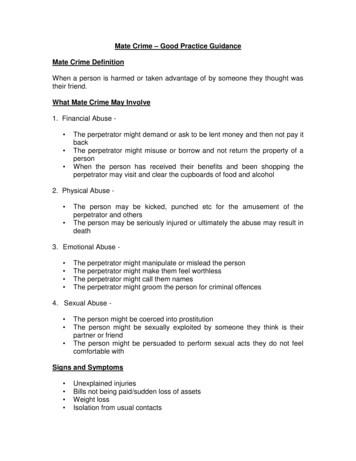
There are two important notes before you start installing your software: The files on all Farm Works installation CDs are compressed, so you cannot install Farm Works by copying the files. Choosing Cancel during installation halts the process and Farm Workswill not be properly installed on your computer.Installation Procedures1. Insert the Farm Works CD into the appropriate CD ROM drive.Windows will automatically begin the installation process for you. If the installerdoes not start itself, choose Run from the Start menu and then typeD:\Setup in the box under the command line (where “D” is your CD drive).Select OK.2. Select the “Install Farm WorksMate Programs” from the installation screen, and then select theprograms that you wish to install.Some programs will require a codein order to be installed. Code numbers will default to those previouslyentered if the selected programshave been installed in the past, butcan be changed if necessary.These codes are found on cardsthat are packaged with each program.3. Follow the instructions on the screen to complete the installation process.4. After the program has been successfully installed, a message will appearthat says, “Farm Works successfully installed.” You may now close theinstallation window.5. Exit Windows and reboot the computer.10
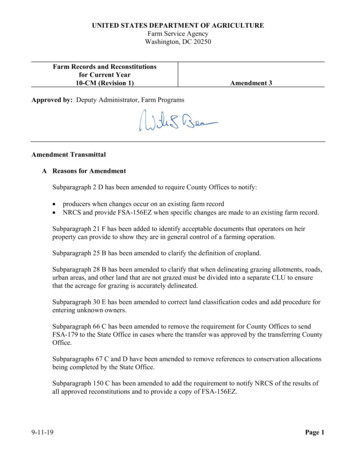
Registering Your SoftwareTo protect your copy of Trac Mate and to receive information on future upgrades to the program, you must register it under the owner’s name with anumber provided by Farm Works. Registration takes just a few moments tocomplete and there are two options available for receiving registration numbers.A. On-line Registration1. Go to www.farmworks.com/register.2. Select the programs you have installed.3. Enter the Machine ID that is displayed on yourscreen, along with your product code numbers and select Submit.4. Fill in your contact information, the place ofpurchase and select Submit Registration.If you have completed the information correctly, you will receive an e-mail containingyour registration numbers within an hour.B. Call Farm Works Software1. Call 1-800-225-2848 Monday – Thursday 8 AM –8 PM ESTFriday 8 AM – 6 PM ESTSaturday 8 AM – Noon ESTNOTE: Indiana does not observe Daylight Savings Time2. Make sure to have the Machine ID number ready or have theRegistration window brought up before calling.NOTE: If the registration window does not appear upon opening Trac Mate,it may be located by going to File-About Farm Site Mate-RegistrationInfo within the Farm Trac Mate program.11
When you receive the registration number, enter it in the Farm Trac MateRegistration box and choose OK. Be sure to write the Machine ID as well asthe registration number somewhere, such as on the inside front cover of yoursoftware manual, so that you will always have it. As long as the machine IDnumber stays the same, the registration number will work for future installs.12
Synchronizing DataOnce Farm Trac Mate has been installed and registered, the information thathas been entered in Farm Trac or Site Pro must be added to Trac Mate.This chapter is designed explain the synchronization process and prepareyou for entering data in the field. As always, refer to the program helps inTrac Mate for more details on using the program.Synchronizing between Trac Mate and Farm Trac The process of exchanging data between Farm Trac Mate on the CE deviceor laptop and Farm Trac on the desktop is called “synchronizing”. Thisprocess updates your permanent crop records in Farm Trac with thoseentered in the field, as well as the mobile CE unit with any new items addedto the list of fields, equipment, or supplies. Any planned jobs that have beencreated in Farm Trac are also updated. Farm Trac Mate adds the option ofsynchronizing more than one project. To synchronize more than one project,you will have to complete the synchronization process while in each project.Synchronizing between Trac Mate and Site ProThe process of exchanging data between Farm Trac Mate on the CE deviceor laptop and Site Pro on the desktop is called “synchronizing”. This processupdates your permanent crop records in Site Pro with those entered in thefield, as well as the mobile CE unit with any new items added, such as fieldsor supplies. Any planned jobs that have been created in Site Pro are alsoupdated. Farm Trac Mate allows the synchronization of more than oneclient’s information. To synchronize a client make sure a layer, preferably theMain Layer, for the desired client is active prior to completing the synchronization process.13
Synchronization ProcessDuring the synchronization process, differences between the lists kept on theTrac Mate program and the desktop are reconciled. This makes it possible toadd items in the field and on the desktop without worrying that the items willbe duplicated when the two machines are synchronized. When synchronizingbegins, you will be given the opportunity to match, or Link, new items fromthe Trac Mate program with those already on the desktop. This means that itis possible to be adding new supplies in the field with Trac Mate while someone else is using Farm Fund to record purchases of the same supplies.Before records can be synchronized, each farming action should be markedas finished in Trac Mate. Only finished actions can be synchronized withFarm Trac or Site Pro.14
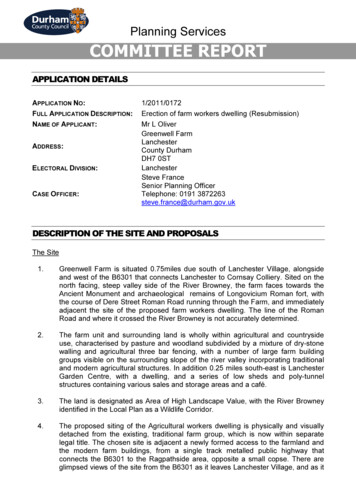
To begin synchronization:1. Make sure Farm Trac Mate is closed by selecting File-Exit within the TracMate program.2. If using a CE device, make sure it is in the cradle and that it is connectedand synchronized with the main computer.3. Select Sync Trac Mate from the File menu in Farm Trac or Site Pro.There will be several options available within this window.Synchronization TypeSelect the version of Trac Mate that you are using.Synchronization LocationRefers to the location of installation for the Farm Trac Mate program.Select the appropriate location from the dropdown list.Options View OperationsSelect this option if you want tobe able to view or edit the operationbefore the synchronization processis complete. If selected, the Farming box will be displayed, allowingyou to view or edit the farming operation.15
Upload BoundaryChecking this box allows you to view field boundaries whileworking in Farm Trac Mate when it is used with Site Mate.4. The Trac Mate synchronization screen will show the progress of the syncprocess. Each of the items will be marked with a check mark as they arecompleted.5. After the synchronization process is finished, you will get a message thatthe synchronization is complete.Linking New InformationThe synchronization process allows information that has been added to theCE unit while in the field to be linked to existing items on the desktop. Alternately the items may be added to the desktop.To Link information:1. Complete synchronization steps #1-3 as discussed previously. If new itemshave been added to Trac Mate, the Linker window will appear.2. Highlight the new item onthe left. This will be the itemthat was added to TracMate.3. Highlight the desired desktop resource on the rightside of the window. If theitem should be added as acompletely new item highlight new on the right. Ifthe item should be linked toan existing item in the list,highlight the appropriateitem.16
4. Select the Link button.5. Select OK.6. Complete the link process for each item that was added to Farm Trac Mateby repeating steps 2-5 for each item.7. Select OK at the Synchronization Complete window.If people or equipment were linked as new , you will be prompted to enterthe properties for each item as well as select an icon.The properties of new supplies will be entered during the synchronizationprocess. If using Farm Fund , an account will have to be assigned to newsupplies.Once the synchronization process is complete, the new people, equipmentand supplies will be available on the equipment and supplies tab, respectively. New fields are added to Farm Trac and Site Pro as deleted items.New field names can be selected from the drop-down list when they aredefined on your map.NOTE: If synchronizing with Site Pro, equipment will be linkedto new the first time they are used.If the crop enterprise was changed in Trac Mate, the Crop Enterprise window will appear during synchronization. There will be three options available:A. Keep ‘current enterprise’open and apply the operationto it - This will keep the current enterprise on the field,and add the operation to thefield. The result is that thechange in Trac Mate will be17
ignored.B. Close ‘current enterprise’ and apply the operation to the new enterprise –this option will close the current enterprise, open the new enterprise andapply the farming operation to the new enterprise.C. Change the open ‘current enterprise’ to be ‘new enterprise’ – Select thisoption if you want the current enterprise to be changed to the new enterprise name. All farming operations that were recorded under the ‘currententerprise’ will now be recorded under the new enterprise.When data is synchronized several things will happen: All field records (Jobs and Regions) that were marked as Finished withTrac Mate will be loaded into Farm Trac or Site Pro. This will result in theupdating of notations, crop histories, chemical records, and enterprise statements (with Farm Funds). The field patterns on your map will also reflectthe farming actions that have been recorded. For example, a field that hada planting operation recorded in Trac Mate will receive the pattern of theseed that was used. Any items such as fields, equipment, people, supplies, and crops that havebeen added to Farm Trac or Site Pro since the last time that you synchronized data will be added to the lists in Trac Mate. This process ensuresthat your Trac Mate program is always using an up-to-date list of items foryour farm. All of the field records that were marked as Finished will be removed fromTrac Mate. Jobs marked as Incomplete will be left in Trac Mate to befinished later.If using Farm Site Mate as well: An updated map that includes all field boundaries will be uploaded to TracMate, if the Upload Boundaries box has been checked. Job logs (GPS Maps) that were created in Trac Mate/Site Mate will beimported into Farm Site or Site Pro and placed on new layers.18
The process of synchronizing can be done as often as you like, however,remember that there are limits to the amount of data that a CE device canhold and there are risks to storing too much data on the CE device. The dataon the main memory of the CE unit will be lost if the unit loses battery poweror is destroyed. It is recommended the programs be synchronized at leastonce a week and, preferably, daily.Saving information and preventing data lossInformation is saved as it is entered and is kept even after the unit is turnedoff. However, if the main batteries go dead and the backup battery is dead,all data in all programs on the unit will be lost. Some units also have a “hardreset” option that will remove all programs and data from RAM. Refer to yourunit’s documentation for details on proper care and maintenance.If your WindowsTM CE Device has the capability of using a removable storagecard (Compact Flash or Secure Digital cards), you can protect your data bysaving to the storage card. Please refer to the owner’s manual of yourWindowsTM CE device for more details on making a full system back up ortransferring files to a storage card. You can also choose to synchronize TracMate data directly to a card by choosing “CE Card” for the SynchronizationLocation.Viewing Data after SynchronizationOnce the operations have been synchronized, there are several ways that thedata that was entered in Farm Trac Mate can be view in Farm Trac or SitePro.1. The information will be part of the notations for each of the fields. If usingSite Mate along with Trac Mate there will be an Op Map button in theNotations window. This will display the layer that was created by the SiteMate log as the active layer.2. Data may also be viewed is by selecting History-Operations-Maintenance.Select the field operation (limit the number of jobs that appear in the list byusing the Sort features to the left). After the operation is selected, click onthe Print button and you will get a report that includes all of the information19
that was entered for that job.NOTE: If using Site Pro, Operations Maintenance is available from thefield’s right click menu on the client’s Main Layer.Note: If you have Farm Site Mate, a coverage map was created. That mapcan also be viewed at this point by clicking on the View Map button foundwithin the Operation Maintenance screen.20
Quick Start – First Time Users1. Install Farm Trac Mate onto the appropriate platform. If installing to a CEdevice, a partnership will have to be established before installation canbe completed.2. Register the software.3. Synchronize information from the Farm Trac or Site Pro program to theTrac Mate program by going to File-Sync Trac Mate within the appropriate Farm Works desktop program.4. Open Trac Mate and select the Trac Mate Job button from the start upscreen. The New Job screen will appear.5. Make sure the correct project is selected. If not, select the Changebutton and highlight the appropriate project name.6. Enter the requested information – Field, Crop, Type and Date. If youwant to use the same setup as the last job, check the box for ‘SameSetup as Last Job’.7. Select OK. The Job Setup screen will appear.8. Select the People, Equipment and/or Supplies that will be used for thisjob.a. If desired, enter the correct initial quantity and expected applicationrate for each supply selected.b. Make sure the implement width is correct.9. Select OK. You will return to the Job tab and all selected information willbe displayed.21
10. Begin your farming operation.a. Select Change to edit the operation in any way, i.e. changing the person, equipment or supplies.b. If it is necessary to fill the implement within the same job, select thesupply to be filled on the farming screen. Select Fill and enter theamount added to the implement.Note: If using Site Mate and GPS:a. Select Go to begin recording the farming operation.b. Select Stop anytime during the operation that the actual operationhas been halted.c. Select Stop and Change to edit the operation in any way, i.e. changing the person, equipment or supplies.d. If it is necessary to fill the implement within the same job, select Stopand then select the supply to be filled on the farming screen. Select Filland enter the amount added to the implement.11. When the operation is complete, tap on the Finish button. Select Finished if the operation is completed or select Incomplete if you will bereturning to that operation during the same day.12. People, equipment, supplies and other items can be quickly added,edited or deleted by going to the Config tab and opening the Trac Mateheading.For more detail on the above items, refer to the following sections of thismanual.22
Using Farm Trac MateOnce Farm Trac Mate has been installed and registered, you may start entering field records. This chapter is designed to give you the basics on how touse Trac Mate for entering field records while having the choice to createcoverage or application maps. As always, refer to the program helps in TracMate for more details on using the program.Selecting a ProjectThe first time Trac Mate is opened, you will be prompted to select a project orclient. However, projects/clients can be changed at any time by selecting theChange Project button.If multiple projects/clients have been synchronized with Trac Mate, make surethe desired project/client has been selected before recording farmingoperations.To select/change a project:1. Select the Trac Mate Job or UnfinishedJobs/ Workorders button.2. Select the Change button. The Data Folderbox will display the location of the projectfiles. The Project box will display allprojects and/or clients that were synchronized from Trac or Site Pro to Trac Mate.3. Highlight the desired project/client.4. Select OK.23
Unwanted projects may be deleted from this screen by highlighting theunwanted project name and selecting Delete Project.New Job ScreenThis screen allows you to select the field, crop, type and date for a Trac Matejob. Field – The farming operations will be performed on the field selected here. All fieldsentered on the desktop will be available forselection from the drop down lists. Crop – The current crop in the field. Oncethe field is selected, the corresponding cropwill be displayed based on what was entered on the desktop. This value can bechanged if needed. Type – The Type item describes the farming operation that will be recorded. A Jobcannot be started until a Type has been entered.NOTE: There will be an Add/Edit option available for each of t
About Farm Works Software Farm Works Software features a complete line of farm management tools for today's producer. The seven packages: Farm Trac , Farm Fund , Farm Site, Farm Stock, Farm Trac Mate, Farm Site Mate and Guide Mate offer the farmer an integrated approach to farm management. Farm Trac is a basic field-mapping package that .