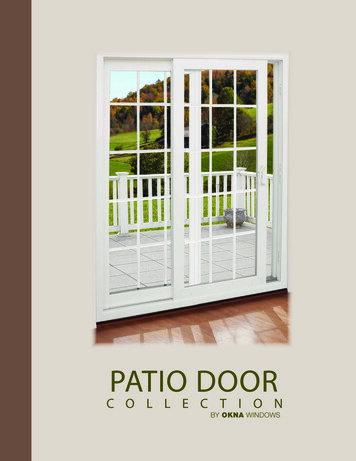
Transcription
Rolling Curtain door ManualInstallation Maintenance partsModel 944PHONEFAXwebsiteEMAILADDRESS800 448 8979800 236 8722www.tracrite.comtr@tracrite.com314 Wilburn RoadSun Prairie, WI 53590This manual MUST be left with the owner
Thank you for purchasing Trac-Rite’s model 944 door. The following is aninstructional guide to take you through the steps of installing your new door. Besure to read and understand this entire installation manual including the warnings,cautions, and notes before starting the installation of your new Trac-Rite door.The following terms are defined as:WARNING - serious personal injury or death can result from failure to follow instructions.CAUTION - minor injury or property damage can result from failure to follow instructions.NOTE - special attention should be given.WARNING!www.tracrite.comRolling steel doors are large, heavy objects that move with the help of springs under extreme tension. Since movingobjects and springs under tension can cause injuries, your safety and the safety of others depends on you readingand following the instructions in this manual. Check your work prior to operating door.POTENTIAL HAZARD EFFECTPREVENTIONMOVING DOORCan Cause Serious Keep people clear of opening while door is moving. GetInjury or Deathhelp or use support when lifting new door into place.EXTREME SPRINGTENSIONCan Cause Serious Installation, repairs, and adjustments must be made byInjury or Deatha qualified door mechanic using proper tools, methods,and instructions. Before winding torsion spring, makesure door is fully open and curtain is wrapped on barrel.WARNING!Components under extreme spring tension can cause SERIOUS INJURY or DEATH. Adjustments and repairs mustbe made by a qualified door mechanic using proper tools and instructions. Do NOT attempt to adjust door tensionunless the door is in the “UP” position. Winding bar should be solid steel 1/2” diameter rod or 3/8” x 1/2” flat.CAUTION!Spring Tension is Critical: Improper tensioning of the spring(s) can result in door damage and reduce the life of yourdoor. The door should not slam up or down during operation. Please refer to Page 8; Fig. 12. No warranty claims willbe honored due to damage caused by improperly tensioned spring(s).WARNING!Improper installation of anchoring devices or installation into unsound material may result in premature productwear, product failure, property damage or serious personal injury.1TRAC-RITE
Door Opening Inspection (See Figure 1):Proprietary Notice Is the framed opening width and height the sameInformation contained in this document is copyrightedsize as the door ordered? (A x B)by Trac-Rite and may not be duplicated in full or part Are the door jambs plumb and square?by any person without prior written approval of Trac Is the floor level and square with the door jambs?Rite. Its purpose is to provide the user with adequate Is there adequate jamb side clearance? (E)detailed documentation to efficiently install a model Is there adequate clearance above the door944 rolling curtain door.curtain roll? (G)For Customer Support regarding: Is there adequate clearance in front of the roll? (F)Parts orders Are the jambs structurally and/or dimensionallyTechnical helpadequate to accept door brackets and guides?Emergency supportInstallation questions2. PREPARATION:DamageClean the work area. Remove all debris and sharpShortagesobjects from the area where the door will beplaced on the floor. Sweep the area clean. It is alsorecommended that the door curtain assembly beplaced on a piece of cloth or cardboard to helpensure that the finished door surfaces will not bedamaged while the door is being prepared forinstallation.Please Call: 1-800-448-8979NOTE!DO NOT CUT BANDS which hold door in a roll untilinstructed to do so. Trac-Rite will not guaranteeor accept responsibility if door is not installed asinstructed.A - FRAMED OPENING WIDTHB - FRAMED OPENING HEIGHTC - MINIMUM BRACKET MOUNTING WIDTH:4”[10cm] FOR METAL OR WOOD;6”[15.2cm] FOR MASONRYD - MINIMUM HEADER HEIGHT:7-1/2”[19cm]E - MINIMUM JAMB WIDTH:2”[5cm] FOR METAL OR WOOD;4”[10cm] FOR MASONRYF - BACK ROOM:18”[46cm]*G - HEAD ROOM:15”[38cm]*16”[41cm]* DOORS 7’1” AND HIGHERH - SIDE ROOM:4”[10cm] FOR METAL OR WOOD;(9”[23cm] ON A SIDE WITH A CHAINSide ViewHOIST)* ADD 1”[25mm] FOR INSULATED DOORS800-448-8979Recommended tools for assembly: Wrenches or sockets 7/16” and 1/2” sizes Drill or screw gun1. Inspection: 3/8” and 7/16” hex drivers (wood mounting)Door and Hardware: Upon receiving the door 5/16” hex driver and 3/8” drill bit (steelshipment, immediately inspect the door andmounting)hardware for damage. Verify the product received 5/16” and 7/16” hex drivers and 5/16”with the packing list. Damage and/or shortages shouldmasonry bit (concrete or masonry mounting)be reported immediately to Trac-Rite customer service C-clamps or vise gripsat 800-448-8979. Please have your bill of lading and Safety glassespacking list to reference when reporting shortages Workglovesor damage. Do not install damaged material without Pliersauthorization from Trac-Rite.Front ViewFigure 1TRAC-RITE2
OutsideWall3. BRACKET AND GUIDE ASSEMBLY3.1 Position the guides and brackets inside thebuilding on the floor near their mounting location.WallDoor OpeningDoor Nest3.2 Place the guides on the ground with the mountingholes facing the ground and the bent curtain lead-inup and toward the door opening (See Figure 2 forexample of right hand guide).RightBracketLeftBracketInsideGeneral Assembly LayoutLeft Guide3.3 Now place each bracket with the correct guide.Each bracket is labeled left or right (See Figure 1A).Right Guide3.4 Attach a bracket to each guide with one (1) 5/16”flat head track bolt and one (1) whiz-nut as shownin Figure 2. Nuts go to outside of guide. Makesure the back of the bracket and guideare flush when done mounting bothbrackets (See Figure 4).Figure 1Awww.tracrite.comWHIZ-NUT & 5/16”TRACK BOLT3.5 Place a protective material on the floor of thework area to protect door nest while on the floor.TENSION PAWL3.6 With enough room between the guides for thedoor nest, bring the nest in and lay it between theguides on the floor. Orient the door nest in theopening as shown in Figure 3.RIGHT HAND DOORBRACKET3.7 Slide the door bracket over the door axle, throughthe bearing. If needed, rotate the tension wheel toallow the adjustment wheel to slide past the tensionadjustment pawl.DOOR GuideBENT CURTAIN LEAD INFigure 23.8 Install a steel washer onto the axle and securewith cotter pin through axle’s hole. If the washerblocks the cotter pin hole, don’t use the washer.3.9 Using pliers, bend both ends of the cotter pinback to secure it.inside OPENING LOOKING OUTRepeat steps 3.7 - 3.9 for other side of door.NOTE DIRECTION AND POSITIONOF BOTTOM SEALdoor NESTFigure 33TRAC-RITE
!CAUTIONUse proper lifting equipment and correct liftingprocedures to avoid injury.alternative fasteners2) WOOD FASTENERS PER BRACKET5/16” X 1 5/8” LAG BOLT (P/N 502860)2) MASONRY ANCHORS PER BRACKET5/16” X 1 1/2” ANCHOR (P/N 508330)NOTE!DO NOT LIFT BY THE GUIDES! They will bend andbecome unusable. For larger doors, a third person orlifting equipment may be required.door JAMB (STEEL OR WOOD)4. Door Mounting4.1 With one person on each end of the door nest, liftit and the attached brackets/guides into position.DRILL HOLESINTO DOOR JAMBFOR WOOD ANDMASONRY4.2 Temporarily secure door assembly to jamb withC-clamps, vise grips, or bar clamps.5/16” CARRIAGE BOLT/NUT WITHTEK-SCREW FOR METAL JAMBNOTE!door GUIDE800-448-8979door NEST4.3 Center the door in the opening with the doorbrackets perpendicular to the mounting surface.The door brackets will flare away from the opening toallow for the use of the tension system.Steel jambs4.4s Position the doorassembly in the opening asshown in Figure 4, and drilla 3/8” hole in the jamb tomatch up with the upperhole in the bracket if one isnot there already.4.5s Using the suppliedrounded head 5/16” carriagebolts, attach both doorbrackets to jambs. Drive atek screw into the lowestsmall hole through thebracket and into the jamb.Wood/masonry jambs4.4w Drill through bothslots. Hole sizes formasonry or wood mayvary, depending on thetype of fastener required.Verify the fastener sizebefore drilling (SeeFigure 4).METAL JAMBS5/16”-18 CARR.BOLT & NUT2 PER BRACKETWOOD JAMBSSCREW, HWH,5/16” X 1 1/8”2 PER BRACKETMETAL JAMBSSCREW, HWH SELFDRILLING 1/4”-14 X 7/8”4.5w Using the suppliedhardware, bolt bothdoor brackets to jambs.Use two (2) fastenersappropriate for yourjamb construction.WOOD JAMBSSCREW, HWH, #14 X 1 1/2”MOUNTING BRACKETFigure 44.6 After both door brackets are secured to the jambs,remove temporary clamping devices.TRAC-RITE4
NOTE!WIDTHHEIGHTup to:3' 0"3' 11"4' 6"5' 0"5' 1"7' 11"8' 0"9' 0"10' 8"7' 0"10' 4"When installing multiple doors of the same size,confirm the first door is operates correctly and isproperly tensioned and apply the same tensioningmethod to all doors.34WARNING!23Care must be taken to secure door so it does not spinaround free, as this may cause personal injuries anddamage to door curtain. Door is free to spin until doorstops and keepers are installed.325. DOOR TENSIONING:5.1 Determine the proper number of nest rotationsneeded to tension the door, based on the door size(See Figure 5). Rotate the nest towards the dooropening the appropriate number of turns to tensionthe system (See Figure 6).Spring Tension (Number of turns)www.tracrite.comFigure 55.2 Hold the door tightly to prevent unwinding.Remove the stretch wrap and cardboard stripswrapped around the door curtain and discard.NOTE!DO NOT REMOVE WHITE FELT TAPE on the inside ofthe door curtain. It is a door component, NOT packingmaterial.ROTATION DIRECTIONTOWARDS WALLDOORCURTAIN5.3 Guide the door curtain carefully into the doorguides and pull it down to approximately waist level.5.4 Hold the door in position until the door stopsand keepers are installed.STRETCHWRAP & CARDBOARDSTRIPSFigure 65TRAC-RITE
!WARNINGImmediately install keepers and door stops. Thesedevices will prevent the door from rolling up out of theguides and possibly causing injury.DOOR AXLE ASSEMBLY NOT SHOWN FOR CLARITY6. KEEPER AND TOP STOP ASSEMBLY6.1 Remove whiz nut from each side of door bottom bar(See Figure 7).BENT CURTAIN LEAD IN6.2 Attach one keeper to the bottom interior edge of eachside of the door with one (1) 1/4” carriage bolt and whiz nutthat was just removed. On doors with two handles, installone of the handles as you install the left side keeper (SeeFigure 10).DOOR BRACKETDOOR STOP5/16” TRACK BOLT & NUTDOOR GUIDE6.3 Tighten whiz nuts to fasten keepers.6.4 Slide the stops up into position so that the hook tabmates with the upper hole on the stop (See Figure 7). Fasteneach door stop to each bracket as shown using one (1) 5/16”track bolt and nut through the lower hole of the stop.BOTTOM OFDOOR CURTAINCAUTION800-448-8979!KEEPER1/4” CARRIAGE BOLT & NUTFigure 7Excessive force in operation may cause damage tothe door. If the door binds, adjust guides to allowappropriate movement.7. SECURING THE GUIDES7.1 Pull the door down to within 6” of the floor (See Figure8). Adjust the door guides so there is 1/8” to 1/4” of play sideto side. If the clearance is too small the door will be hard tooperate. Too much clearance will allow the door to moveside to side excessively and may cause the door to bind.DOOR GUIDEDOOR CURTAINMAINTAIN 1/8 TO 1/4” GAP (3-6MM)BETWEEN GUIDE AND WEAR GUARDBLOCK JAMB7.2 Attach the guides to the jambs as follows:7.2a For steel jambs, secure with supplied Tek screws, usingone fastener per mounting hole.NON-MASONRYFASTENING HOLES7.2b For wood jambs, secure with supplied lag bolts, usingone fastener per mounting hole.MASONRY ANCHORMASONRY CLIPTEK SCREWS #12-14 x 3/4”7.2c For masonry jambs, install masonry clips along theguide height, using one clip located next to each mountinghole on the guide. Make sure the clips are flush with theback of the guide. Attach each clip to the guide with two (2)small (#12-14 x 3/4”) supplied Tek screws (See Figure 8).Drill a hole in the masonry and fasten the clip in place usingsupplied anchors.TRACFigure 8-RITE6
8. FINAL ASSEMBLY8.1 Pull rope handle: Tie a knot in one end of therope. Slide the plastic handle onto the rope and pullthe knot up into the handle. Pass the other end ofthe rope through the hole in the center of the bottomedge of the door and tie another knot in the end tokeep the rope from pulling through (See Figure 9).PULL ROPEHANDLEwww.tracrite.comFigure 98.2 Exterior handle: Attach the handle(s) to the bottomexterior edge of the door with two (2) 1/4” carriagebolts and whiz nuts provided (See Figure 10). Doors8’ wide and larger will have two handles.EXTERIORHANDLEBOTTOMASSEMBLYFigure 108.3 Attach the guide warning label (See Figure 11)to wall next to the guide at eye level. If mounting toan unfinished surface such as bare masonry or wood,attach the label to a nonporous surface and usemechanical fasteners to mount on wall.Figure 117TRAC-RITE
WARNING!Components under extreme spring tension can cause SERIOUS INJURY or DEATH. Adjustments and repairs mustbe made by a qualified door mechanic using proper tools and instructions. Do NOT attempt to adjust door tensionunless the door is in the “UP” position. Winding bar should be solid steel 1/2” diameter rod or 3/8” x 1/2” flat.9. ADJUSTING DOOR SPRING TENSION9.1 A properly tensioned door should be balanced(does not fall closed or spring open) when opened towaist level. Step on the handle to close door fully.TENSIONLOCK PINTENSIONWHEEL9.2 To add tension, insert winding bar in therectangular hole in the tension wheel and pull downuntil ratchet clicks. Move up slightly until ratchet locksin place (See Figure 12). If more tension is needed,move winding bar to the next hole in the tensionwheel and repeat as necessary.WINDINGBAR9.3 To remove tension, insert winding bar into tensionwheel and move down 1” to unlock ratchet. Push thetension lock pin toward wall and raise winding bar 2”.Release tension lock pin. Move up 1/8 turn until theratchet locks in place.LESSTENSIONMORETENSIONFigure 12800-448-89799.4 If door has two tensioners be sure to equally addor remove tension to each side of door.!CAUTIONSpring Tension is Critical: Improper tensioning of thespring(s) can result in door damage and reduce thelife of your door. The door should not slam up or downduring operation. No warranty claims will be honoreddue to damage caused by improperly tensionedspring(s).10. OPTIONAL FIELD INSTALLEDDRAFT STOP OR BRUSH SEAL10.1 Close the door before installing the draft stop.Note that with the door down, the curtain may “bow”slightly near the top; this bowing is normal. For thedraft stop to be effective, it should follow the “bow” inthe door curtain so that it stays in contact across theentire width of the door curtain. Starting at one end,attach to header every 9” with appropriate fasteners. Ifnecessary, trim excess at other end.DOOR JAMBBRUSH SEALCURTAINDOOR GUIDE10.2 Close the door before installing the brush seal.Position brush seal so it just touches the flat portion ofthe inside of the curtain (See Figure 13). Fasten brushseal to jamb every 12” with appropriate fasteners.TRACFigure 13-RITE8
11. OPTIONAL INTERIOR LOCK INSTALLATION11.1 Position door at waist level.LEFT DOOR GUIDEDOOR CURTAINASSEMBLY11.2 Assemble components as shown in Figure 14,noting that two (2) high collar lock washers are placedover each 1/4” one-way screw to allow the lockbar toslide freely.NUTLOCK WASHERSLIDE BARLOCK COVERINT. LOCK STRIKE12. MAINTENANCE INSPECTION:Visually inspect the entire door monthly for generalcleanliness and ease of operation. Inspect the guides and curtain for wear and/oraccidental damage. Inspect all fasteners and anchor bolts for loose,damaged, or missing parts. If door is equipped with a chain hoistmechanism, inspect it for missing or loose parts.Figure 14www.tracrite.comCARRIAGEBOLTS11.3 As the 1/4” screws are being tightened, move thelockbar to assure that the high collar lock washers areinside the slots in the lockbar.ONE-WAYSCREWSHEX NUTSCleaning: No specific cleaning procedures areabsolutely required. Clean all parts of the door andguides as needed.LUBRICATION: Lubricate the following every sixmonths. When operating in dusty or wet enviromentslubrication may be required more often. Guides: Open the door. Spray silicone spray orZep 45 onto the door guide runners and insidethe guide. Latch: Spray the slide latch with silicone spray topromote smooth latch operation. Chain Hoist Parts: Apply a small amount of oil toroller chain. Spring: To ease friction and prevent squeakingapply silicone spray or Zep 45 across thespring.9TRAC-RITE
Door Assembly - Parts Layout800-448-8979TRAC-RITE10
Proprietary NoticeInformation contained in this document is copyrighted by Trac-Rite and may not be duplicated in full or partby any person without prior written approval of Trac-Rite. Its purpose is to provide the user with adequatedetailed documentation to efficiently install a model 944 rolling curtain door.PHONEFAXwebsiteEMAILADDRESS800 448 8979800 236 8722www.tracrite.comtr@tracrite.com314 Wilburn RoadSun Prairie, WI 53590 Trac-Rite522000 rev H (04/12)
TRAC-RITE Thank you for purchasing Trac-Rite’s model 944 door. The following is an instructional guide to take you through the steps of installing your new door. Be sure to read and understand this entire installation manual including the warnings, cautions, and notes before starting