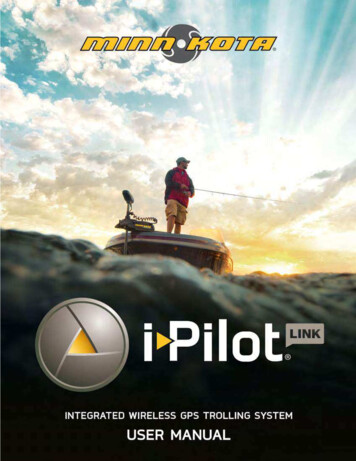
Transcription
Skip to contentManuals User Manuals Simplified.Home » MINN KOTA » MINN KOTA I-Pilot User GuideMINN KOTA I-Pilot User GuideContents [ hide1 I-Pilot1.1 REMOTE2 Menu Control Buttons3 ICONOGRAPHY3.1 SPOT-LOCK ENGAGING SPOT-LOCK3.2 DISENGAGING SPOT-LOCK3.3 RE-ENGAGE A SAVED SPOT-LOCK3.4 SPOT-LOCK JOG (Heading Sensor required.)4 CRUISE CONTROL4.1 ENGAGING CRUISE CONTROL4.2 DISENGAGING CRUISE CONTROL4.3 HIGH SPEED BYPASS ENGAGING HIGH SPEED BYPASS4.4 DISENGAGING HIGH SPEED BYPASS4.5 AUTOPILOT ENGAGING AUTOPILOT OR ADVANCEDAUTOPILOT4.6 DISENGAGING AUTOPILOT OR ADVANCED AUTOPILOT4.7 RECORDING AN iTRACK4.8 NAVIGATING AN iTRACK5 File Downloads6 References7 Related ManualsI-PilotQUICK REFERENCE GUIDECOMPATIBLE WITH ALL BLUETOOTH ENABLED i-PILOT SYSTEMSREMOTE
Menu Control ButtonsHomePressing this button will always bring up the Home Screen.OkPress to accept selections. Press to power remote on. Press and hold for 3 seconds to power remote off.Left Softkey & Right SoftkeyButtons change function based on the mode of operation and which screen is presently displayed. Softkey Labels atthe bottom of the display screen indicate current function.Menu Up & Menu DownUsed to navigate Softkey Labels and menus.Manual Control ButtonsSpeed DownSteer LeftSpeed UpSteer RightProp On/OffHigh Speed BypassDouble press to engage.Scan to view the complete i-Pilot Owner’s Manual online.Navigation ButtonsGO TOOpens the list of Spot-Locks and iTracks that are within navigable range.Cruise ControlPress to enable Cruise Control.Spot-LockPress to enable Spot-Lock.AutoPilotPress to enable AutoPilot or Advanced AutoPilot. 2016 Johnson Outdoors Marine Electronics, Inc.minnkotamotors.comHEADER10:50 ATime MotorBatteryGPS Signal StrengthRemote Battery10:50 A
GPS Signal StrengthShows the level of GPS signal strength. If no bars appear, no GPS signal is detected.Motor BatteryDisplays the battery level of the motor.TimeDisplays the current time.Remote BatteryDisplays the battery level of the remote.ICONOGRAPHYSpot-LockDisplays when Spot-Lock is engaged.Spot-Lock JogDisplays when Spot-Lock is engaged and the motor is communicating with a Heading Sensor.Legacy AutoPilotDisplays when AutoPilotis engaged and the AutoPilot Mode is set to Legacy.Advanced AutoPilotDisplays when AutoPilot is engaged and the AutoPilot Mode is set to Advanced.RecordDisplays when an iTrack is being recorded.TARGETiTrackDisplays when an iTrack is being navigated.Prop LockoutDisplays when the Prop is locked during certain functions.TrimDisplays when Trim is being adjusted.BrightnessDisplays when screen brightness is being adjusted.Only available with Ulterra.Only available with Ultrex.PropDisplays when the Prop is enabled. Rotates when the Prop is on. Blinks when a mode of navigation is used thatrequires the prop to be enabled.Prop SpeedDisplays the current Prop Speed. Can be adjusted in 1/2 speed increments between 0 and 10.Ground SpeedDisplays the current speed over ground.Cruise ControlDisplays the Target Speed when Cruise Control is engaged.LockDisplays when the Remote is locked.Scroll Up & DownDisplays when the softkey labels at the bottom of the display screen have more options available.i-PILOT QUICK REFERENCE GUIDE
COMPATIBLE WITH ALL BLUETOOTH ENABLED i-PILOT SYSTEMSSPOT-LOCKENGAGING SPOT-LOCK1. Press the Spot-Lock button on the remote.2. The information for the temporary Spot-Lock location will show up on the display screen. Use the Menu Up andMenu Down buttons to find the Save softkey label at the bottom of the display screen. To save the Spot-Lock,press the Left Softkey to open the Save menu.3. The Save menu brings up a list of Spot-Locks. Use the Menu Up and Menu Down buttons to select one of theSpot-Lock memory locations. Press the Left Softkey to Save the Spot-Lock into the selected memory location.DISENGAGING SPOT-LOCK1. When Spot-Lock is engaged, press the Spot-Lock button to disengage Spot-Lock, or use the Menu Up andMenu Down buttons to find the Cancel softkey label at the bottom of the display screen. Use the Right Softkeyto select Cancel.RE-ENGAGE A SAVED SPOT-LOCK1. Manually navigate the boat to within a quarter mile of a saved Spot-Lock location. Due to safety reasons, i-Pilotwill not re-engage a saved Spot-Lock location greater than a quarter mile away.2. Press the GOTO button on the remote.3. The Spot-Lock menu will appear on the display screen. Use the Menu Up and Menu Down buttons to scroll to asaved Spot-Lock location in the menu.4. Press the Ok button to select a saved Spot-Lock location.SPOT-LOCK JOG (Heading Sensor required.)1. To engage Spot-Lock Jog, first engage Spot-Lock. Use the Speed Down (jog backward), Speed Up(jog forward), Steer Left (jog left), and Steer Right (jog right) buttons to jog the Spot-Lock location 5 feet in theselected direction from the current Spot-Lock location.CRUISE CONTROLENGAGING CRUISE CONTROL1. Press the Cruise Control button on the remote.2. The Target Speed will appear on the display screen. Press the Speed Down or Speed Up buttonsto adjust the Target Speed.DISENGAGING CRUISE CONTROL1. When Cruise Control is engaged,press the Cruise Control button on the remote to disengage Cruise Control.HIGH SPEED BYPASS ENGAGING HIGH SPEED BYPASS1. Double press the High Speed Bypass button.2. The Prop Speed will automatically go to speed 10.DISENGAGING HIGH SPEED BYPASS1. When High Speed Bypass is engaged, press the High Speed Bypass button on the remote to disengage HighSpeed Bypass, or press the Speed Down button.AUTOPILOTENGAGING AUTOPILOT OR ADVANCED AUTOPILOT
1. Press the AutoPilot button onthe remote.2. The AutoPilot or Advanced AutoPiloticon will display on the screen.3. To adjust the desired heading,manually steer the motor to the new heading. i-Pilot will automatically lock onto the new heading.DISENGAGING AUTOPILOT OR ADVANCED AUTOPILOT1. When either AutoPilot mode is engaged, press the AutoPilot button on the remote to disengage AutoPilot.iTRACKRECORDING AN iTRACK1. Use the Menu Up or Menu Downbuttons to find the Record softkey label at the bottom of the display screen.2. Press the Left Softkey to select the Record menu.3. The Record menu brings up a listing of iTracks. Use the Menu Up and Menu Down buttons to scroll to one ofthe iTrack memory locations.4. Press the Ok button to select an iTrack memory location. Once a location is selected, the current location of theboat becomes the To Start location of the iTrack being recorded.5. Navigate the boat along the desired path or course. AutoPilot and/or Cruise Control can be used while recordingan iTrack.6. To stop recording an iTrack, use the Menu Up or Menu Down buttons to find the Stop softkey label at thebottom of the display screen.7. Use the Left Softkey to select Stop.8. The recording will end automatically if the two-mile distance limit is reached for the iTrack or if the Spot-Lock orGO TO button is pressed.NAVIGATING AN iTRACK1. Manually navigate the boat to within a quarter mile of the saved iTrack. Due to safety reasons, i-Pilot will not reengage a saved iTrack greater than a quarter mile away.2. Press the GO TO button on the remote. The remote default is to first bring up saved Spot-Locks. Press theRight Softkey to bring up saved iTracks.3. Use the Menu Up or Menu Down buttons to select an iTrack to navigate.4. Using the Left Softkey or Right Softkey select the softkey label to either go To Start or To End. The boat willnavigate to the closest point on the iTrack and then navigate To Start or To End depending on the selectionmade until it reaches that point.REVERSE AN iTRACK1. The direction that the iTrack isbeing navigated can be reversed while the GO TO action is taking place. Use the Menu Up or Menu Downbuttons to find the Reverse softkey label at the bottom of the display screen. Use the Left Softkey to selectReverse.minnkotamotors.comFile DownloadsUser GuideDownload [optimized]I-Pilot Compatible Bluetooth Enabled Systems Download
Referencesminnkotamotors.comBLUETOOTH Trademarki-PILOT TrademarkRelated Manuals1. GARMIN G3000 Integrated Avionics System Pilot’s Guide GARMIN G3000 Integrated Avionics System Pilot’s Guide –Download [optimized].2. BenQ Display Pilot User Manual BenQ Display Pilot Copyright and disclaimer Copyright Copyright 2019 BenQ.3. Cozy Pilot Pro Direct Vent CDV Furnaces User Manual Cozy Pilot Pro Direct Vent CDV Furnaces User Manual –.4. GARMIN 2021 Pilot Training Catalog Instruction Manual GARMIN 2021 Pilot Training Catalog Instruction ManualPILOT TRAINING CATALOG.
Home » MINN KOTA » MINN KOTA I-Pilot User Guide MINN KOTA I-Pilot User Guide Contents [ hide 1 I-Pilot 1.1 REMOTE 2 Menu Control Buttons 3 ICONOGRAPHY 3.1 SPOT-LOCK ENGAGING SPOT-LOCK 3.2 DISENGAGING SPOT-LOCK 3.3 RE-ENGAGE A SAVED SPOT-LOCK 3.4 SPOT-LOCK JOG (Heading Sensor required.) 4 CRUISE CONTROL 4.1 ENGAGING CRUISE CONTROL 4.2 .