Transcription
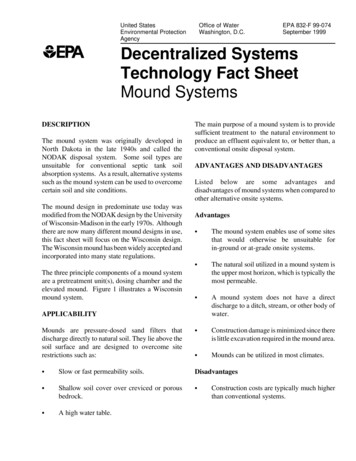
Compost MoundYard wastes can be composted without a bin if you don’t mind the appearance of an uncontainedcompost mound in your yard. The only costs are your time and work.What You Need shovel or pitchfork work gloves3 FEETBuilding a Compost MoundMaintaining Your Compost PileFind a good location and pile your yard waste ina mound about 3 feet x 3 feet x 3 feet (1 meterx 1 meter x 1 meter). If you cover the pile witha layer of soil, it will keep in moisture for the microorganisms and soil animals working to makecompost.It Is best to have two piles. After the first pile islarge enough, stop adding organic material andlet it work. In the meantime, add your wastes tothe second pile.Adding WastesAdd wastes as they become available. Nonwood materials such as grass clippings and garden wastes work best.Make sure the pile is moist, especially if it is notcovered with soil.You can turn the pile to speed up composting. Compost should be ready in three to fourmonths if you turn the pile, or in about one yearif you don’t turn the pile.Recycled Paper
Compost PocketsThis is an easy composting shortcut. You bury your fruit and vegetable wastes in small pockets inyour garden, and let the microorganisms and soil animals do the work. Store your kitchen scrapsin a plastic container until you are ready to compost them.What You NeedWhat to DoMaterials food wastes, collected in a plasticcontainer or bucket1. Dig holes 10 to 15 inches deep and less than 2feet across.Tools shovel work gloves2. Place food wastes in the holes and cover with soil.Make sure the soil cover is at least 8 inches deepso the buried materials do not attract animals.Recycled Paper
Garbage Can ComposterA garbage can composter is inexpensive andeasy to build. It can be used for food or garden wastes. You do, however, need to turnthe wastes.What You NeedMaterials garbage can with cover coarse sawdust, straw, or wood chipsTools drill pitch fork, shovel, or compost turner work glovesBuilding a Garbage Can ComposterAdding Wastes1. Drill three rows of holes 4 to 6 inches apartall around the sides of the garbage can. Thendrill several holes in the base of the can. Theholes allow air movement and the drainage ofexcess moisture.Add fruit, vegetable, and garden wastes. Makesure not to add too much of anyone waste at atime.2. Place 2 to 3 inches of dry sawdust, straw, orwood chips in the bottom of the can to absorbexcess moisture and let the compost drain.Regularly mix or turn the compost with a pitchfork, shovel, or compost turner and keep it covered. This adds air and mixes up the differentwastes, preventing the compost from gettingsmelly. A smelly compost pile may attract animals and cause neighbors to complain.Maintaining Your Compost PileRecycled Paper
Wire Mesh BinA wire mesh bin is inexpensive and easy to build out of either galvanized chicken wire or hardwarecloth.(Nongalvanized chicken wire can also be used butwill not last very long.) Posts provide more stabilityfor a chicken wire bin, but make the bin difficult tomove. A wire mesh bin made without posts is easyto lift, allowing you to get at the compost that is already “done” at the bottom at the pile while the topof the pile is still cooking.What You NeedMaterials 12.5 feet of 36 inch wide 1 inch galvanized chicken wire or 1/2 inch hardware cloth heavy wire for ties 3 or 4 4-foot wooden or metal posts (for chicken wire bins)Tools heavy duty wire or tin snips pliers hammer (for chicken wire bin) metal file (for hardware cloth bin) work glovesRecycled Paper
Wire Mesh Bin continuedBuilding a Wire Mesh BinAdding WastesIf using chicken wire:1. Fold back 3 to 4 inches of wire at each endof the cut piece to provide a strong, cleanedge that won’t poke or snag and which willbe easy to latch.Add wastes as they become available. Nonwood materials such as grass clippings andgarden weeds work best. You can speed up theprocess by chopping or shredding the wastes2. Stand the wire in a circle and’ set it in placefor the compost pile.3. Cut the heavy wire into lengths for ties. Attach the ends of the chicken wire togetherwith the wire ties, using pliers.4. Space wood or metal posts around theinside of the chicken wire circle. Holding theposts tightly against the wire, pound themfirmly into the ground to provide support.If using hardware cloth:1. Trim the ends at the hardware cloth so thewires are flush with a cross wire to get rid ofedges that could poke or· scratch hands.Lightly file each wire along the cut edge toensure safe handling when opening andclosing the bin.Maintaining Your Compost PileAs you keep adding wastes to the wire meshbin, the material at the bottom will become compost sooner than the material at the top. If youwant to use the compost at the bottom of thepile, you can remove the wire holding unit andlace it next to the pile. Then, use a pitchfork tomove the compost back into the moved holdingunit, adding the material from the top of the pilefirst. Continue until you have replaced all thecompost. Now the compost at the top of the binis ready to use.You also can scoop finished compost from thebottom of the pile by lifting one side at the unit.Although you do not need to turn this pile,make sure it is moist during dry spells. Compostshould be finished in about one year.2. Bend the hardware cloth into a circle, andstand it in place for the compost pile.3. Cut the heavy wire into lengths for ties. Attach the ends of the hardware cloth togetherwith the wire ties using pliers.Recycled Paper
easy to build. It can be used for food or gar-den wastes. You do, however, need to turn the wastes. What You Need Materials garbage can with cover coarse sawdust, straw, or wood chips Tools drill pitch fork, shovel, or compost turner work gloves Adding Wastes Add fruit, vegetable, and garden wastes. Make