Transcription
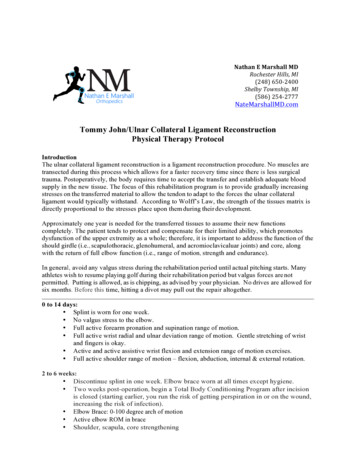
Nathan E Marshall MDRochester Hills, MI(248) 650-2400Shelby Township, MI(586) 254-2777NateMarshallMD.comTommy John/Ulnar Collateral Ligament ReconstructionPhysical Therapy ProtocolIntroductionThe ulnar collateral ligament reconstruction is a ligament reconstruction procedure. No muscles aretransected during this process which allows for a faster recovery time since there is less surgicaltrauma. Postoperatively, the body requires time to accept the transfer and establish adequate bloodsupply in the new tissue. The focus of this rehabilitation program is to provide gradually increasingstresses on the transferred material to allow the tendon to adapt to the forces the ulnar collateralligament would typically withstand. According to Wolff’s Law, the strength of the tissues matrix isdirectly proportional to the stresses place upon them during their development.Approximately one year is needed for the transferred tissues to assume their new functionscompletely. The patient tends to protect and compensate for their limited ability, which promotesdysfunction of the upper extremity as a whole; therefore, it is important to address the function of theshould girdle (i.e., scapulothoracic, glenohumeral, and acromioclavicaluar joints) and core, alongwith the return of full elbow function (i.e., range of motion, strength and endurance).In general, avoid any valgus stress during the rehabilitation period until actual pitching starts. Manyathletes wish to resume playing golf during their rehabilitation period but valgus forces are notpermitted. Putting is allowed, as is chipping, as advised by your physician. No drives are allowed forsix months. Before this time, hitting a divot may pull out the repair altogether.0 to 14 days: Splint is worn for one week. No valgus stress to the elbow. Full active forearm pronation and supination range of motion. Full active wrist radial and ulnar deviation range of motion. Gentle stretching of wristand fingers is okay. Active and active assistive wrist flexion and extension range of motion exercises. Full active shoulder range of motion – flexion, abduction, internal & external rotation.2 to 6 weeks: Discontinue splint in one week. Elbow brace worn at all times except hygiene. Two weeks post-operation, begin a Total Body Conditioning Program after incisionis closed (starting earlier, you run the risk of getting perspiration in or on the wound,increasing the risk of infection). Elbow Brace: 0-100 degree arch of motion Active elbow ROM in brace Shoulder, scapula, core strengthening
Scapula isometricsPain-free isometrics in brace (deltoid, wrist flex/ext, elbow flex/ext)Manual scapula stabilization exercises with proximal resistance6 to 12 weeks: Discontinue elbow brace at 6 weeks, avoid resistive valgus stress Restore full elbow ROM (Be conscious of pre-operative ROM as may be differentfrom contralateral elbow) Isotonics for scapula, shoulder, elbow, forearm, wrist Begin IR/ER strength @ 8 weeks Begin forearm pronation/supination strength @ 8 weeeks Neuromuscular drills PNF patters when strength adequate Eccentric training when strength adequate12 to 16 weeks: Advance IR/ER to 90/90 position Full upper extremity flexibility program Neuromuscular drills Plyometric program Continue endurance training Address truck and lower extremities Return to throwing program begins at about 4-6 months, beginning with short toss.*There should be no medial elbow pain during the return to throwing period. Please notify thedoctor if pain at medial elbow, other than soreness during any period of throwing program. Stopthrowing program immediately if significant pain experienced.NOTE: The Throwing Program is performed 3 - 4 times per week. Apply ice after each throwingsession to help decrease the inflammatory response to microtrauma.4 to 5 months:# of Throws2025-4010Distance (ft)20 (warm-up phase)30-4020 (cool down phase)5 to 6 months: Continue the Throwing Program by tossing the ball with an easy wind-up on alternatedays.# of ThrowsDistance (ft)1020 (warm-up)1030-4030-40501020-30 (cool down)
6 to 7 months: Continue increasing the throwing distance to a maximum of 60 feet. Continue tossing the ball with an occasional throw at no more than half speed.# of Throws101030-4010Distance (ft)30 (warm up)40-4560-7030 (cool down)7 to 8 months: Gradually increase to 150 feetPhase 1# of Throws101015-201010Distance (ft)40 (warm-up)50-6070-8050-6040 (cool down)Phase 2# of Throws101020-1302010Distance (ft)40 (warm-up)50-6080-9050-6040 (cool down)Phase 3Phase 4# of Throws101015-202010# of Throws101015-2020Distance (ft)40 (warm-up)60100-1106040 (cool down)Distance (ft)40 (warm-up)60120-150608 to 9 months: Progress to throwing off the mound at 1/2 to 3/4 speed. Try to use proper body mechanics,especially when throwing off the mound: Stay on top of the ball. Keep the elbow up. Throw over the top. Follow through with the arm and trunk.
Phase 1# of Throws1010301010Distance (ft)60 (warm-up)120-150 (lobbing)45 (off the mound)60 (off the mound)40 (cool down)Phase 2# of Throws1010202010Distance (ft)50 (warm-up)120-150 (lobbing)45 (off the mound)60 (off the mound)40 (cool down)Phase 3# of Throws101010103010Distance (ft)50 (warm-up)60120-150 (lobbing)45 (off the mound)60 (off the mound)40 (cool down)Phase 4# of Throws10101040-5010Distance (ft)50 (warm-up)120-150 (lobbing)45 (off the mound)60 (off the mound)40 (cool down)9 to 10 months: At this time, if the if the pitcher has successfully completed the above phase without painor discomfort and is throwing approximately 3/4 speed, the pitching coach and trainermay allow the pitcher to proceed to the next step of "Up/Down Bullpens". Up/DownBullpens is used to simulate a game situation. The pitcher rests in between a series ofpitches to reproduce the rest period in between innings.Day 1# of Throws10 warm-up10 warm-up40 pitchesREST 10 Minutes20 pitchesDay 2Day 3Distance (ft)120-150 (lobbing)60 (off the mound)60 (off the mound)60 (off the mound)OFF# of Throws10 warm-up10 warm-up30 pitchesDistance(ft)120-150 (lobbing)60 (off the mound60 (off the mound)
REST 10 Minutes10 warm-up20 pitchesREST 10 minutes10 warm-up20 pitchesDay 4Day 560 (off the mound)60 (off the mound)60 (off the mound)60 (off the mound)OFF# of Throws10 warm-up10 warm-up30 pitchesREST 8 minutes20 pitchesREST 8 minutes20 pitchesREST 8 minutes20 pitchesDistance ft)120-150 (lobbing)60 (off the mound)60 (off the mound)60 (off the mound)60 (off the mound)60 off the mound)10 to 12 months: At this point, the pitcher is ready to begin a normal routine, from throwing battingpractice to pitching in the bullpen. This program should be adjusted as needed by yourphysician, athletic trainer or physical therapist.Advancing to full return to Pitching:Typically 10-12 months, ideally 12-14 monthsIn order for full return to pitching, pitcher must demonstrate proper throwing mechanics, which isobtained with full function ROM, proper conditioning/endurance, strong shoulder andscapular musculature and stability of the kinetic chain with strong lower extremity andcore musculature
6
REST 10 Minutes 10 warm-up 60 (off the mound) 20 pitches 60 (off the mound) REST 10 minutes 10 warm-up 60 (off the mound) 20 pitches 60 (off the mound)
