Transcription
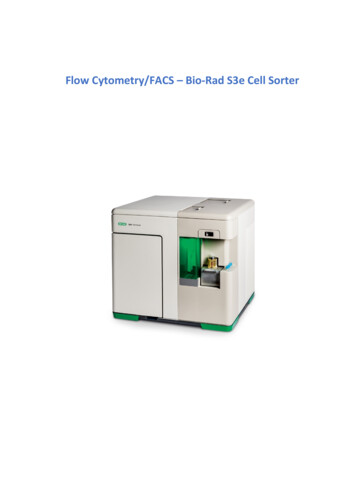
Flow Cytometry/FACS – Bio-Rad S3e Cell Sorter
ContentsBrief Description. 3Reference . 3Location . 3Suggestion for “Materials and Methods” . 4Suggestion for “Acknowledgements” . 4People and Contacts. 4Features and Specifications . 5Lasers/Filter-Sets . 6Additional Equipment . 7System Overview . 7WARNINGS and Advice . 8Available Techniques. 9Set Up . 9Sample Preparation . 9Initial Set Up: Start-up and Fluidics Procedure ( 20 minutes) . 10Initial Set Up: Quality Control ( 10 minutes) . 12Final Set Up: Low-Pressure Cleaning . 14Final Set Up: Shut Down . 15Acquisition. 18Sorting . 21Other Guidelines . 27Swapping Fluidics During Sorting: “Hot Swap” . 27Auto Compensation Wizard . 29Protocols and Workspace . 32Further Protocols, Tutorials and Guidelines . 332
Brief DescriptionThe S3e cell sorter is equipped with two lasers and four fluorescent detectors, plusboth forward and side scatters. Samples are analyzed using the traditional jet-in-airtechnology, and events can be sorted at high speeds while maintaining sensitivity andhigh-purity.The S3e cell sorter is largely efficient and user-friendly by automating the complexpresort setup with a unique technology (ProDrop technology). In detail, this cell sorterbrings forward several automated features, such as Startup/shutdown, Stream-to-laseralignment (Hands-free alignment), Drop delay calculation, Droplet break-off monitoringand feedback, Phase and deflection adjustments to sort stream, Daily QC reporting andtrending and Collection volume monitoring to prevent overfillingReferenceBio-Rad S3eTM Cell Sorter 145-1006LocationRoom 5.22 (Common Equipment Room), 5º floor, Instituto de Tecnologia Química eBiológica António Xavier (ITQB NOVA)3
Suggestion for “Materials and Methods”Flow cytometry data were acquired on a Bio-Rad S3e Cell Sorter and analyzed usingthe ProSort software, version 1.6.Flow cytometry data were acquired on a Bio-Rad S3e Cell Sorter operated by theProSort software, version 1.6, and analyzed using the Cytospec software from PurdueUniversity Cytometry Laboratories.Bacillus subtilis cells were sorted as alive GFP and dead GFP cells using a Bio-Rad S3eCell Sorter operated by the ProSort software, version 1.6.Suggestion for “Acknowledgements”This work was partially supported by PPBI - Portuguese Platform of BioImaging (PPBIPOCI-01-0145-FEDER-022122) co-funded by national funds from OE - "Orçamento deEstado" and by european funds from FEDER - "Fundo Europeu de DesenvolvimentoRegional”.People and ContactsAdriano O. Henriques, Microbial Development Group (aoh@itqb.unl.pt)Mónica Serrano, Microbial Development Group (serrano@itqb.unl.pt)Mariana Ferreira, PPBI (mariana.g.ferreira@itqb.unl.pt)Phone 351 214 469 524Extension 1524/15224
Features and Specifications Double-Laser System: 488 nm and 561 nm lasers of 100 mW for cell andparticle interrogation 4 Fluorescence Detectors, photomultiplier tube (PMT) -based Forward scatter (FSC) detector, photomultiplier tube (PMT) -based Side scatter (SSC) detector, photomultiplier tube (PMT) -based Droplet Frequency: 37–43 kHz Sorting type: True jet-in-air for high-performance sorting Sorting rate: No hardware limitations for sort rate, limited only by dropletfrequency and application Sorting purity: 99% pure Nozzle Size: 100 µm Sorting direction: 2-way sorting Sorting collection: Up to 5 x 5 ml tubes each direction; Up to 5 x 1.5 ml tubeseach direction; Microscope slides; 8-well strip each direction Sample and collection temperature control system: 4–37 C Onboard fluidics and dilution of 8x sheath fluid with deionized water5
Lasers/Filter-SetsLaserFilterFL1EmissionFilterBP 525/30FL2BP 586/25FL3BP 615/25FluorophoreExcitation MaximumEmission MaximumEGFP/GFP488507FITC495519Alexa Fluor 488499519EYFP/YFP514527PE496, 565578RFP554584PI536617PE-Texas Red496, 565619PE-Cy5496, 565670PE-Cy5.5490, 565693PE-Cy7496, 565785PE496, 610PI536617PE-Texas Red496, 565619PE-Alexa Fluor 647496, 565669PE-Cy5496, 565670PE-Cy5.5496, 565693PE-Cy7496, 565785488FL4FL2561FL3FL4FluorophoreFluorophore orDye655/LPBP 586/25BP 615/25655/LPBP stands for bandpass filterLP stands for longpass filter6
Additional EquipmentComputer Type: Desktop Brand: Dell Inc. Model: OptiPlex 3020 Features: Intel I5 4590 up to 3.7 GHz (quad-core); 4GB RAM; 500 GB HDD OS: Windows 7 Professional Available Software: ProSortMonitor Brand: Asus Model: VE248System Overview7
WARNINGS and Advice Before you get started for the first time on this cell sorter consult the responsiblepeople for proper training For the moment, bacterial pathogens, cell lines or any other agent of Biosafetylevel 2 or higher are not allowed, as well as radioactively labelled or flammablesamples Do not forget to check the fluidics before you start operating the cell sorter Use only MiliQ water in the water container While transferring a cap assembly to a new container, avoid touching theassembly to the outside surfaces of the containers. If it is necessary to lay the capassemblies down, set only on pre-sterilized surfaces It is recommended that resuspended adherent samples are mixed at high speedto prevent clumping Samples must be filtered prior to running. This will minimize clogs in the sampletube and nozzle tip Do not open the nozzle door Keep the green containment door closed as often as possible during the sortingprocedure Never try to access the laser beam paths Any adjustment to the toolbars should be avoid. Only knowledgeable users mustperform alterations to the current settings. Please, refer to the responsible people forany constraint Optimal settings are automatically determined during the quality controlprocedure. Adjusting any of these values will affect the sorting performance Do not adjust any setting of the global preferences menu Please confirm the bead lot before starting the quality control procedure. If thebead lot is not in the dropdown list, please refer to the responsible people Use always beads from the same lot to perform one quality control procedure When the remaining run time is down to 5 minutes, the system will automaticallyshut down. The fluidics will need to be refilled and the start-up procedure must beperformed. To prevent this, perform the fluidics “hot swap”.8
Operate quickly when performing the “hot swap” procedure, as time is limitedto three minutes for the operation. Bring containers of water or sheath fluid in advance. The maximum total volumes for a 5 and 1.5 ml collection tubes are 4 and 1 ml,respectively. Going above these will cause spilling and risk contamination You must empty the waste and refill the fluidic containers at the end of the use Perform a high-pressure cleaning protocols if you are the last user of the day.Otherwise, perform a low-pressure cleaning procedure Use only 70% ethanol and MiliQ water as cleaning solutions Please let us know if some solution or fluidic is running out Make sure to save all the data to your own storage device or cloud as weroutinely wipe out the computer’s data Do not forget to register your utilization in the logbook. Remember that futuremaintenance costs and repairs will be supported by the groups according to thelogbook data This equipment is only available for booking in the ITQB intranetAvailable Techniques Fluorescence-Activated Cell Sorting (FACS) Flow Cytometry AnalysisSet UpSample PreparationCells SuspensionTo avoid clogs when working with cells, resuspend cells into a single cell suspensionand always use a 40 µm or smaller filter prior to cell sorting9
Initial Set Up: Start-up and Fluidics Procedure ( 20 minutes)In case you are not the first user of the current day, please confirm with the previoususer whether a low-pressure cleaning final set up has been performed. If so, skip bothstart-up and quality control procedures. NEVERTHELESS, DO NOT FORGET TO CHECK THEFLUIDICS. IF NEEDED, PERFORM THE “HOT SWAP” PROCEDURE (See Swapping FluidicsDuring Sorting: “Hot Swap”).1.Open the bulk fluidics door2.Detach the quick disconnect from the cap assembly by pushing in the metalbutton and lifting the quick disconnect until it engages the magnetic holder above it3.Slightly lift and pull out the container4.Uncap the cap assembly from the container10
5.Refill, change or empty the container6.Carefully place the cap assembly into the container and tighten the cap7.Place the container into position8.Attach the quick disconnect to the cap assembly (you should hear a click)9.Switch on the computer10. Double-click in the ProSorticon in the desktop11. Log in into the group account (Contact the responsible people for more log inoptions)12. In the Setup and Maintenance tab, click in the Start-upbutton13. Box the Start-up Now option, and then click in the checkmark button of the Startup Settings dialog14. The start-up will be initiated and should take approximately 20 minutes11
Initial Set Up: Quality Control ( 10 minutes)In case you are not the first user of the current day, please confirm with the previoususer whether a low-pressure cleaning final set up has been performed. If so, skip bothstart-up and quality control procedures. NEVERTHELESS, DO NOT FORGET TO CHECK THEFLUIDICS. IF NEEDED, PERFORM THE “HOT SWAP” PROCEDURE (See Swapping FluidicsDuring Sorting: “Hot Swap”).1.Vortex a bottle of ProLine Calibration Beads and place 8-10 drops into a 5 mlsorter tube. Do not dilute these particles.2.Place the tube with beads into the sample input station and move the loadingstage into the run position3.Click in the Run QCbutton in the Setup and Maintenance tab4.Choose the correct bead lot in the Bead Lot dropdown list of the Quality ControlProcess dialog and then click in the checkmark button to begin the Quality Controlprocedure12
5.Once the drop delay calculation has been completed, click in the checkmarkbutton to accept the drop delay. The QC procedure estimates the optimal drop delayand performs the side and forward-scatter detectors calibration6.A QC report window will appear showing the QC test results. If all parametershave passed the QC test, click in the checkmark button to close the window7.The system is ready to acquire and sort samples13
Final Set Up: Low-Pressure CleaningThe low-pressure cleaning procedure should only be performed between uses. If youare the last user, please perform the shutdown procedure. See Final Set Up: Shut Downto do so.1.Fill a 5 ml tube with a minimum of 3 ml of cleaning solution (70% ethanol)2.Load the tube into the sample station and move it into the run position3.In the Set Up and Maintenance tab, click in the Clean System button4.A Clean Warning dialog will open with a prompt warning for the fact that thetube solution will be rapidly consumed. Click in the Yes option5.In the Clean System Modes window, select the Low Pressure Clean option andclick in the checkmark button6.A Clean System process window will be displayed7.When the cleaning protocol is complete, the prompt “Please put Loading Stageinto the Wash Position” will appear in the Clean System process window. Move theloading stage into the wash position to close such window8.Repeat this procedure using MiliQ water as cleaning solution14
9.Empty the waste and refill the fluidics containers using the “Hot Swap”procedure (See Swapping Fluidics During Sorting: “Hot Swap”)Final Set Up: Shut DownThe shutdown procedure is only recommended for the end of day’s use. If you arenot the last user, please perform a low-pressure cleaning procedure. See Final Set Up:Low-Pressure Cleaning to do so.1.Fill a 5 ml tube with a minimum of 3 ml of cleaning solution (70% ethanol)2.Load the tube into the sample station and move it to the run position3.In the Set Up and Maintenance tab, click in the Clean System button4.A Clean Warning dialog will open with a prompt warning for the fact that thetube solution will be rapidly consumed. Click in the Yes option5.In the Clean System Modes window, select the High Pressure Clean option andclick in the checkmark button6.A Clean Warning dialog will open with a prompt warning for the fact that thehigh-pressure cleaning will leave the sorter uncalibrated. Click in the Yes option7.A Clean System process window will be displayed15
8.When the cleaning protocol is complete, the prompt “Please put Loading Stageinto the Wash Position” will appear in the Clean System process window. Move theloading stage into the wash position to close such window9.Click in the Shutdownbutton in the Setup and Maintenance tab10. Select the Yes option to confirm that the system should be shut down at this time11. Select the Yes option to continue without saving protocols. Otherwise, selectAbort, save the protocols and repeat the previous steps.12. If you intend to use the Automatic Start-up option, box the Yes option and setboth start date and time in the Automatic Start-up window16
13. Yet in this window, select the Yes option for the Run Clean Procedure questionand click in the checkmark button14. When the prompt “Please Load Cleaning Solution” appears in the Clean andShutdown window, load a tube of water MiliQ and move the loading stage into the runposition15. After the cleaning procedure move the loading stage into the wash position16. At this time the system is fully shut down. The software will return to the openinglog in screen17. Close the ProSort software and switch off the computer18. Empty the waste and refill the fluidics containers17
Acquisition1.Go to File - New Protocol or Open Protocol (see Protocols and Workspace)2.Create at least one histogram and dot plot by clicking in the Histogram andDensity buttons of the Home tab3.Load the sample into the sample input station and move the loading stage intothe run position4.Detectors can be renamed for each parameter based on the fluorophores ormarkers used5.Box the Cycle Mode option to allow refresh of the data displayed18
6.Define the target event rate, trigger parameter and threshold valueEVENT RATE7.In the Instrument Control Panel window, click in the Startbutton to beginsample acquisition8.Adjust photomultiplier tube (PTM) voltages to place populations9.Adjust the target event rate, trigger parameter and threshold value19
10. Stop sample acquisition by clicking the Stopbutton11. Box and define the event limit. Gate Limit can be chosen, and Cycle Mode canbe unboxed at this time. You can enable the Auto Save option to automatically save thefile after the event limit is reachedCycle Mode can be enabled, or the refresh button can be used to refresh the data asadjustments are being made12. Re-collect the sample and save the FCS format file if Auto Save has not beenboxed13. Unlock the loading stage and remove the sample tube14. Move the loading stage into the wash position before running the next sampleWhen running multicolour experiments, compensation is necessary. To use the AutoCompensation wizard, single stained compensation control samples must be saved inaddition to the multi-coloured samples20
15. Run a single stained compensation control for each parameter16. Set the event limit high enough to visualize a positive population, then collectand save the file17. Use the Auto Compensation wizard to set compensation for multi-colouredsamples (see Auto Compensation Wizard)Sorting1.Go to File - New Protocol or Open Protocol (see Protocols and Workspace)2.Create at least one histogram and dot plot by clicking in the Histogram andDensity buttons of the Home tab3.If desired, adjust temperature control for sample input and collection area in theTemperature Control area of the Instrument Control Panel21
4.Acquire a small amount of the sample to be sorted5.Set sorting regions and gates (in the Set Up and Maintenance tab) on plots withthe populations of interestHint: Create a signal intensity versus time dot plot. The signal intensity and time shouldbe displayed on the y and x axes, respectively. Then, select as many dots as possiblelinearly disposed as if in a direct proportion. The dots contained in this region stand onlyfor single events. Use, therefore, this region of single events to fine sorting the sample.Notice that, single events can also be fine-tuned using a FSC height versus FSC area dotplot.22
6.Once all regions are set, right click in the desired region to be sorted and selectthe sort direction7.Repeat with a second region if two-way sorting is desired8.Click in the Sort Logic button and select a collection vessel in the Sort Logicdropdown menu23
9.Set the parameters in the Sort Logic window by selecting the sort mode (Purity,Enrich or Single) and event limit for each collection positionThe Enrich sort mode stands for sorting positive-match events, although there maybe contamination with negative-match events (advised for low concentrations)The Purity sort mode stands for sorting only positive-match events, although theremay be double or more events sorted at onceThe Single sort mode stands for sorting only single positive-match events10. Define the sort collection tube volume if you intend to track the collected volumefor preventing collection overflow. Set the volume of buffer or cushion liquid already inthe collection tubes24
11. Place the sort collection tubes in the sort collection device at the previouslyselected positions12. Make sure the 5 ml tubes (if it is the case) have at least 0.5 ml of buffer to cushionthe sorted cells13. Close the sort chamber door and click in the Start Sortingbutton of theInstrument Control Panel25
14. The Sort Statistics window will appear, and sorting will be initiated. This windowcan be reopened by clicking the Sort Statistics button in the toolbar26
Other GuidelinesSwapping Fluidics During Sorting: “Hot Swap”New containers or bottles should be prepared before clicking the Swap Fluidicsbutton, as the swap time is limited to only 3 minutes before the system startingto shut down due to low fluid levels.Read carefully all procedure before starting the “Hot Swap”1.Click in the Swap Fluidicsbutton of the Setup and Maintenance tab. TheSwap Fluidics window will open27
2.Click in the Playbutton of the Swap Fluidics windowAfter clicking the Play button, a countdown timer will start in the bottom of the SwapFluidics windowOperate quickly and carefully from now on3.Open the fluidics door located on the left side of the sorter4.Detach the quick disconnect from the cap assembly by pushing the metal button5.Lift the quick disconnect until it engages the magnetic holder. This will hold thequick disconnect away from the exchange area6.Slightly lift and pull out the container7.Uncap the cap assembly from the container8.Refill, change or empty the container9.Carefully place the cap assembly into the container and tighten the cap10. Place the container into position11. Attach the quick disconnect to the cap assembly (you should hear a click)12. Click in the Playbutton of the Swap Fluidics window again to finish theswapping procedure28
Auto Compensation WizardThe compensation wizard assists with establishing the proper compensation matrixcoefficient for each parameter. Single controls for each parameter and the associatedFCS files must be saved prior to compensation.1. Run single controls for each parameter and your multi-stained sample.2. Save the acquisitions as FCS files.3. Go to Home - Compensation Wizard4. Select the parameters for compensation5. Click the file icon for each selected parameter6. Locate and select the single control FCS file for each parameter7. Select whether to use height or area for all parameters8. Click the forward blue arrow to open the Automatic Compensation CalculationWizard window29
9. Adjust the scatter, negative, and positive regions as necessary. Note that thepositive and negative population gates must not overlap10. Click the blue forward arrow to go to the next control11. Repeat steps 9 and 10 for remaining controls30
12. After all controls are adjusted, click the checkmark button. This will complete theautomatic compensation calculation13. Check the compensation box on the axis of the desired histogram or density plotto display either the compensated, acquired or sort data14. The compensation matrix may be viewed at this point if desiredThe hyper log feature allows data that have values lesser than zero to be correctlydisplayed. This data display format is used only for compensated data. It converts a smallportion of the scale around zero to linear and adds a small amount of negative log scalingto each access, preventing negative events from piling up on the axis. This allows bettervisualization of compensated data.Note that the area parameter is greyed out and cannot be changed becausecompensate is checked. Compensation can only be applied to area or height dependingon which selection was chosen during auto compensation.31
Protocols and WorkspaceCreate a New Protocol1. Go to File - New Protocol2. A new protocol will open as a new tab in the workspace3. From the Home tab, you can add a histogram or density plot to your workspaceOpening ProtocolsYou can open a protocol from either a protocol format file or FCS format file1. Go to File - Open Protocol2. A Windows dialog will open to locate and open the desired protocol3. Search for the protocols directory4. To the right of the file name field, there is a dropdown box with the protocol orFCS file options5. If you select the FCS file open, a protocol can also be opened from a saved FCSfile (see below how to perform this in another way)Saving ProtocolsEach protocol is saved with the following information: plots; regions; gates; trigger;threshold; PMT voltages; sort logic; sort limits; sort modes; compensation settings; filterconfiguration1. Go to File - Save Protocol2. This will save a protocol format file in the currently assigned directoryLoading Instrument SettingsYou can load pre-existing instrument settings from a protocol format file into acurrently open protocol1. Open the protocol to be used or create a new protocol and save2. Go to File - Load Instrument Settings3. Select the protocol that contains the settings to be loaded4. This will load pre-existing instrument settings into the currently open protocol32
Opening FCS FilesYou can open a FCS file into two different ways: embedding the data into thecurrently open protocol; opening the data into the protocol in which it was saveda) To embed the data into the currently open protocol, go to File - Open FCS DataOnlyb) To open the data into its corresponding protocol, go to File - Open FCS withProtocolRemember that you can save FCS files after running acquisition or sorting procedures.In addition, the FCS files will not only save the procedures statistics as will also storethe protocol in useFurther Protocols, Tutorials and GuidelinesContact the responsible people to acquire the following tutorials and instructionmanuals: Instruction Manual Quick Guide Daily Procedures Filter Sets ProFlow Sort Grade 8x Sheath Fluid Instructions Handout ProFlow Sort Grade Water Instructions Handout ProLine Universal Calibration Beads Instructions Handout33
Flow cytometry data were acquired on a Bio-Rad S3e Cell Sorter and analyzed using the ProSort software, version 1.6. Flow cytometry data were acquired on a Bio-Rad S3e Cell Sorter operated by the ProSort software, version 1.6, and analyzed using the Cytospec software from Purdue University Cytometry Laboratories.