Transcription
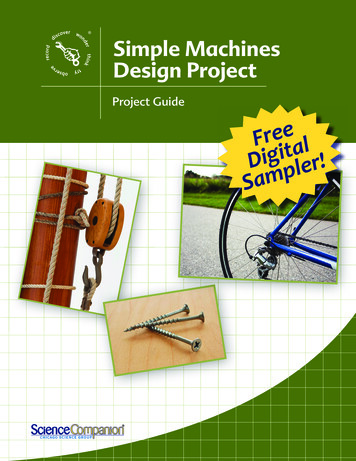
Simple MachinesDesign ProjectProject GuideFreetaligiD pler!Sam
Table of ContentsSimple Machines Design Project Digital SampleProject GuideProject Guide: Table of ContentsTeacher Background InformationDesign Project: Simple MachinesMaterials and PreparationSession 2Session 3AssessmentsTeacher MastersVisual PackI Wonder CircleMore about Science CompanionModule ComponentsFull Curriculum ListScience Companion Unique FeaturesOnline PilotsProfessional DevelopmentContact Us!Turn to the next page to learn how to usethis Digital Sampler.Simple Machines Design Project - Sample Project Guide2011 Edition, Release 1.0.1210Copyright 2010 Chicago Science Group.All Rights Reserved. Except as permitted under the United States Copyright Act, no part of this publication maybe reproduced or distributed in any form or by any means or stored in a database or retrieval system withoutthe prior written permission of the publisher. This publication is provided under a license agreement. (See www.sciencecompanion.com/terms-of-use.) Access and use are limited by the terms of that agreement.SCIENCE COMPANION , EXPLORAGEAR , the CROSSHATCH Design and the WHEEL Design are trademarks ofChicago Science Group and Chicago Educational Publishing, LLC.www.sciencecompanion.com Chicago Educational Publishing Company, LLC.
Navigation.How To Use This SamplerIf you are using Adobe Acrobat or the AdobeAcrobat Reader, you’ll have an easier time withnavigation if you give yourself a “Previous View”button. This tool works like a Back button, and willallow you to retrace your jumps within the file soyou don’t get lost.Previous View button onPage Navigation toolbar.Any text in blue is a link. Clicking blue text will takeyou to another page of the sample.Enjoy your digital experience!Science Companionwww.sciencecompanion.com
Project GuideThe Engineering Design Project Series was developed to support compatiblemodules by allowing students to design and/or build animal homes, tools, machines, and designsof their own creation. Taking between 4-6 sessions, the projects strengthen skills and ideas aboutchoosing materials, using tools, working with the limitations of materials, solving problemsand overall project design.Project Guide shows teachers how to integrate technology and design skills in a hands-on,inquiry format for their students. Through a series of sessions, students develop strong processand design skills.The Project Guide brings teachers up to speed for the science content with the design projectthrough “Teacher Background Information” and in-context session notes. Teachers can feelcomfortable with leading the class—whether they have a long history of teaching scienceand engineering or not.Each Project Guide focuses on a Big Idea. Through a series of different experiences anddiscussions over 4-6 sessions, students develop a deep understanding of the Big Ideaby designing a project to demonstrate their understanding.Sessions follow a consistent sequence.Engage – In this section of a session, the teacher introduces the topic. The goal is tobriefly generate interest, activate prior knowledge, or link the day’s activities to whathas come before.Explore – This is often (but not always) and hands-on exploration conducted in smallgroups.Reflect and Discuss – In this important section, the teacher and students discuss whatthey observed, share ideas and data, and reflect on the day’s activities. This portion ofsession brings the class back to the Big Idea.You’ll find that while the session format is very consistent, students explore science content,engineering principles and the process of “doing science” in a large variety of ways.You’ll also find that students LOVE the mix of active,hands-on, minds-on science.www.sciencecompanion.com
Table of ContentsProject Guide OverviewPhilosophy and Introduction. . . . . . . . . . . . . . . . . . . . . . . . . . . . . . . . . . . . . 6Teacher Background Information. . . . . . . . . . . . . . . . . . . . . . . . . . . . . . . . . 8Science Library and Web Links. . . . . . . . . . . . . . . . . . . . . . . . . . . . . . . . . . 14Materials. . . . . . . . . . . . . . . . . . . . . . . . . . . . . . . . . . . . . . . . . . . . . . . . . . . . . . . 16Simple Machines Design ProjectA Quick Look. . . . . . . . . . . . . . . . . . . . . . . . . . . . . . . . . . . . . . . . . . . . . . . . . . . 18Session 1: Exploring Simple Machines. . . . . . . . . . . . . . . . . . . . . . . . . . . 24Session 2: Simple Machine Walk. . . . . . . . . . . . . . . . . . . . . . . . . . . . . . . . . 27Session 3: Designing Machines. . . . . . . . . . . . . . . . . . . . . . . . . . . . . . . . . . 29Session 4: Building Machines. . . . . . . . . . . . . . . . . . . . . . . . . . . . . . . . . . . . 32Session 5: Demonstrating Machines. . . . . . . . . . . . . . . . . . . . . . . . . . . . . 34Assessments, Teacher Masters, VisualsAssessment: Simple Machines RubricTeacher MastersVisuals: Simple Machines in Our WorldSome portions of the design project are not included in this sample.Any text in blue is a link. Clicking blue text will take you to anotherpage of the design project.SIMPLE MACHINES DESIGN PROJECT Table of Contents 5
Teach e r Bac kgro undInf o r mat ionTeacher BackgroundInformationIntroductionHumans have been making and using machines for a long, longtime. We create these machines to help us to survive and do ourwork. We use these machines every day and in all aspects of ourlives. In this project, students will learn how very simple machinescan be utilized to make our work easier.MachinesWhen we do work, we must expend energy. To conserve ourenergy and make our work easier, humans have invented a widevariety of machines. Machines are simply devices that help us toapply forces and do work. Some machines, such as power saws,tractors, or cars are complicated and have many moving parts.For thousands of years, we have also used many simple machinesto help us do our work. Simple machines are devices that changethe force we can exert on an object. They allow us to lift heavierobjects or pull things with more force than we could without thesimple machine. Simple machines often have only one or evenno moving parts. The six simple machines that your students willexplore in this project are:8 Levers Inclined planes Wedges Screws Wheels and axles PulleysSIMPLE MACHINES DESIGN PROJECT Teacher Background Information
T each er B ac kgro undI nf or mat io nLeverA lever is a bar that rests on a support called a fulcrum. When forceis applied to one end of the lever it pivots around the fulcrumand is able to lift an object. When the fulcrum is moved closer toan object, the object is easier to lift, but cannot be lifted as high.When the fulcrum is moved farther away from an object, the objectis more difficult to lift, but it can be lifted higher.leverfulcrumInclined PlaneThe inclined plane is a very simple machine with no moving parts.It is a sloping surface with one raised end. The more gentle theslope of an inclined plane, the easier it will be to slide or roll theobject.A ramp is a common type of inclined plane. Furniture movers useramps because it is easier to slide or roll a heavy box up a rampthan to lift it up into a truck.WedgeA wedge is like an inclined plane, but instead of helping moveobjects to a higher point, a wedge helps to cut objects apart orhold them together.Knives and axes are common wedges used to cut objects apart,while a door stop is a wedge used to hold objects together. Thesharper the edge of a wedge, the easier it is to drive in or under anobject.SIMPLE MACHINES DESIGN PROJECT Teacher Background Information 9
ScrewA screw is a rod with a helical thread (groove) around its outsidesurface. There is often another matching piece with a holethreaded on the inside. The rod moves through this hole as it isturned. A nut and bolt is an example.Screws have many purposes including fastening objects together(wood or metal screws), making holes in the objects (drill bits), orsqueezing things together (a vise). A wood screw is a combinationof a screw (the threaded body) and a wedge (the sharp point).Wheel and AxleWheels and axles are used on many devices. On a bicycle, forexample, the wheel is connected to the axle and the axle isconnected to the frame. On a car, the steering wheel, which thedriver turns, is connected to an axle which turns machinery insidethe front of the car.Some wheels and axles move together as one piece and act assimple machines. If you apply a turning force on the outside of thewheel, then there is a much greater force applied to turning theaxle. An example of this type of wheel and axle is a water wheel.With a water wheel, the water pushes on the wheel and the wheelexerts a much greater force on the axle.Water Wheel10 SIMPLE MACHINES DESIGN PROJECT Teacher Background Information
Other types of wheels and axles are common and useful, butthey are not quite simple machines. Wheels, such as those ona skateboard, do not apply a force to the skateboard. Insteadthey help the skateboard to move because they cut down onfriction. Friction is a force that acts to resist the motion of objectsthat touch one another. Since a wheel rolls along the surface (asopposed to sliding), there is very little force opposing its motion.The distinction between the use of a wheel and axle as a simplemachine to change force and the use of a wheel to reduce frictionis not an important one for the children to make. The main pointis that a wheel and axle is very useful, both to change force and toreduce friction.PulleyA pulley is a special type of wheel and axle. It is a small wheel witha groove in the rim. A heavy object can be lifted by a rope or beltthat moves within the rim and is attached to the object. Severalpulleys can be combined to greatly reduce the force needed to lifta weight.A common type of pulley is a single pulley. A single pulley canbe set up as a fixed pulley or a moveable pulley (See illustrations,below.) With a fixed pulley, below left, the only advantage is thatyou pull down to raise the load, which is much easier than pullingupwards. The force applied is the same as the weight of the load.With a movable pulley the force applied to the rope is only halfof the weight of the load, but the rope must be pulled upward.(The illustration, below right, shows a combination of a fixed andmovable pulley.) That is why, as shown, the two types are oftencombined, so that the force required is only half and the pull isdownward.Fixed PulleyMoveable PulleySIMPLE MACHINES DESIGN PROJECT Teacher Background Information 11
WorkWork means many things to many different people, but in sciencework has a very special meaning. In science, work occurs when aforce acts to move an object. For example, when you lift a box offthe ground, you are doing work. You are using a force (the pull ofyour arm muscles) to move an object (the box). By contrast, if youhave lifted the box and are holding it at waist height, you are notdoing work. Even though your arm muscles are straining, since thebox is not moving, no work is being done.The amount of work done in a given activity depends on theamount of force as well as the distance that the object moves. Forexample, it takes more work to lift a 10 kg box to one’s waist thanto lift a 5 kg box to one’s waist. Similarly, it takes more work to lifta 10 kg box from the floor over one’s head than it takes to lift thatsame box waist high.Work and Simple MachinesWe can lift a 100 kg box using only a 20 kg force by using a longlever. But to raise the box 10 cm we have to move the other end ofthe lever by 50 cm. With the lever, the force you must apply is less,but the distance over which you must apply it is greater. The workdone is the same, but you can move the box with much less force.Simple machines don’t gain us energy, but they allow us to dothings with our own energy, which we could not do otherwise. Ifthere is no friction in the simple machine, the work (and energy)applied to the simple machine is the same as the work (andenergy) accomplished by the machine. If there is friction, such as ina pulley system, some energy is lost.12 SIMPLE MACHINES DESIGN PROJECT Teacher Background Information
SIMPLE MACHINES DESIGN PROJECT Teacher Background Information 13
S I M P L E M A C HIN E SDESIGN PROJECTSimple MachinesDesign ProjectA Quick LookBig IdeaSimple machines makemany tasks easier. They canbe used by themselves orin combination with othersimple machines.Students learn about the six types of simple machines and howthey make our tasks easier. They apply their knowledge of simplemachines to design machines that utilize at least two simplemachines. They plan and draw pictures of their designs, build theirmachines, and then demonstrate them for the class.Process SkillsKey Notes Classifying Creating and usingmodelsThe activities for this project will take at least two weeks and,depending on student interest and the complexity of theirprojects, could last longer. Planning a process ReasoningThis project is comprised of multiple sessions. Review theentire project before teaching the first session. If you think you’ll need students to bring any materials in fromhome for their simple machines design projects, send homethe Teacher Master “Request for Materials” a week prior tostarting the project. For more information about the science content in thisproject, see the Teacher Background Information on pages8-12.Technology/DesignSkills18Overview Designing or building Choosing materials Using tools Working with thelimitations of materials Solving problems SIMPLE MACHINES DESIGN PROJECT
Standards and BenchmarksWhile designing, building, and demonstrating their machines,students develop Science and Technology Standard E (Abilitiesof Technological Design): “Identify a simple problem Propose asolution make proposals to build something or get somethingto work better Implement proposed solutions Evaluatea pr
The Engineering Design Project Series was developed to support compatible modules by allowing students to design and/or build animal homes, tools, machines, and

