Transcription
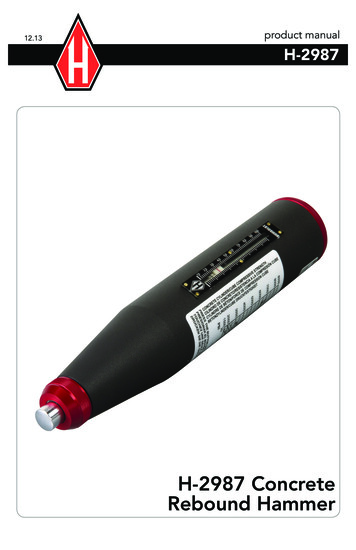
12.13product manualH-2987H-2987 ConcreteRebound Hammer
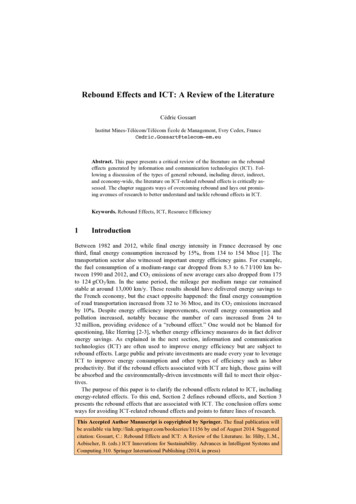
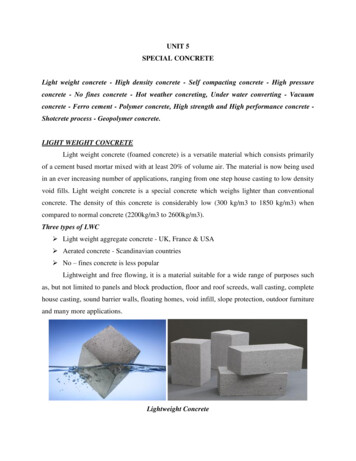
Using the Humboldt Concrete Rebound HammerAlways hold the Concrete Rebound Hammer in both hands while in use. Also,when in use, keep the hammer perpendicular to the surface you are testing withthe scale pointing up, making it easier to read.Figure 1: The Concrete Rebound HammerBefore the Hammer can be used for testing, the piston must be released out ofthe hammer into the testing position. Typically during storage and transportation, the Hammer piston will be locked inside the Rebound Hammer and willneed to be released from the storage position. If the piston is not extended intothe test position, place the end of the piston against a stiff surface and gentlypress the Rebound Hammer firmly against the surface. You will hear a click, andthe piston will extend into the test position.Figure 2: Always hold the Rebound Hammer with both handsperpendicular to the surfaceTo perform a test, make sure the piston is extended and gently press theRebound Hammer against the concrete surface to be tested. When the pistonis pressed all the way into the Rebound Hammer, continue to push harder untilyou hear a rattling sound. Keep the Rebound Hammer firmly pressed against theconcrete surface and read the rebound number on the scale.
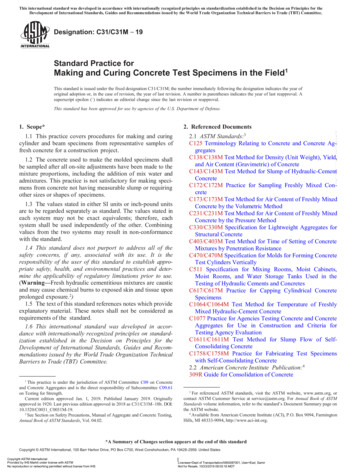
Figure 3: Push the piston in as far as it will goAs long as you hold the Rebound Hammer firmly against the concrete, the rebound number will remain on the scale. Record your reading. When you pull thennmmhammer away and allowthe piston to re-extend, the scale will return to zero.The Rebound Hammer is now ready for another test. If desired, once you get areading, you may press the button on the handle to lock the piston in place. Thismakes your test results easier to read, as it will also lock the indicator. Do nottouch the button until you get a reading. To release the piston again for thenext test, press against a hard surface. When you are finished using the ReboundHammer, lock the piston inside the Rebound Hammer for storage, as describedabove.Taking a MeasurementSelecting a Surface for TestingSelect a concrete surface that is: Smooth, dry, and fixed in place At least 4 inches (or 102 mm) thick Mature— at least 14 days old Free of any decay or scalingIf necessary grind a section of rough concrete smooth before taking yourreadings. A grind stone in a plastic case is provided with the hammer for thispurpose.Surfaces to AvoidAvoid testing concrete that is: Frozen Honeycombed or excessively porous Known to have rebar 2 cm or less below the surface Carbonated on the surfaceIf you must test a mature concrete surface that is damp from rain or flowingwater, or if you must test new concrete, keep in mind that you will probably get
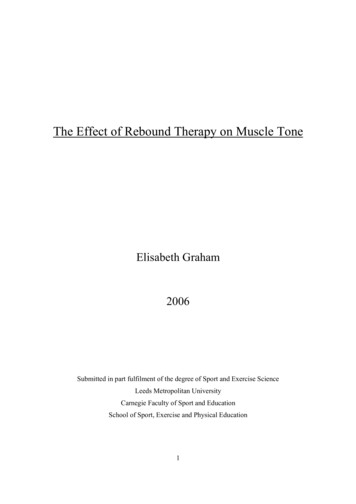
rebound numbers that are lower than they should be. Using the Rebound Hammer on new concrete may damage it if the strength is less than 1,000 PSI.If you are testing concrete with a lot of surface carbonation, the rebound readings will be significantly higher than normal. The thicker the layer of carbonatedconcrete, the higher the rebound numbers.Holding the Rebound Hammer against Walls, Ceilings, and FloorsThe Rebound Hammer will work against any concrete surface as long as youkeep it perpendicular to that surface. The Rebound Hammer can be usedagainst a ceiling (upward), a floor (downward), or a wall (forward). You will needto consider gravity when estimating the compressive strength of concrete. Therebound number found when pressing up against a ceiling will differ from thenumber that appears if you are pressing down against a floor. Please review thestrike angles A, B, and C and the correlation curves in “Reading your Results”below.Specialty ConcreteThe Rebound Hammer is designed to estimate the compressive strength of standard concrete. The correlation diagram for standard concrete is printed on theside of your Concrete Rebound Hammer. It shows the correlation curves determined when the compressive strength of standard concrete, as measured withyour Rebound Hammer, is directly compared to the compressive strength fromlaboratory tests of concrete cylinders or cubes.This diagram is not designed for use with: Light weight concrete Concrete using artificial aggregates High performance concreteIn order to gain an accurate rebound number for these specialty materials, youwill need to create your own correlation curves diagram intended for this use.See the standards ACI 228.1R-2010 and ASTM C-805-08.Reading your ResultsMake at least ten readings from a concrete surface and discard the highest andlowest rebound numbers. Average the remaining eight numbers. If desired, takea few test readings before you complete your series of ten regular tests. Use theaverage rebound number to estimate the strength of the concrete. Compareyour average rebound number to the chart shown on your Concrete ReboundHammer. Consider the diagram shown here:
Figure 4: Concrete Rebound Hammer correlation curvesRebound NumberCorrelation curves. This diagram shows the relationship between thecompressive strength for concrete, measured directly in a laboratory usingconcrete cylinders or concrete cubes, and the rebound numbers you receiveusing your Rebound Hammer.A refers to using the Rebound Hammer against a concrete floor (downward).B refers to using it against a concrete wall (forward).C refers to using it against a concrete ceiling (upward).The strength values shown in this diagram are directly based on compressivestrength testing in a laboratory, using concrete 14 to 56 days old. The tests useconcrete cylinders, 6 inches wide and 12 inches high (15cm x 20cm), or concretecubes six inches high.According to ASTM C-805-08, you should discard any readings that differfrom the average value rebound number by more than six units. Then, take anaverage for the remaining readings. If more than two readings differ by morethan six units from the average value, throw out all of your readings and performthe test over again. Take ten new readings with your Rebound Hammer in adifferent section of the concrete but in the same test area.
Note that some countries have set their own national standards for calculatingtest results. Therefore, follow the standards of the country where you are usingyour Rebound Hammer.MaintenanceWe recommend that you calibrate your Rebound Hammer regularly usingthe Humboldt Calibration Anvil, H-2972, ordered separately. For a ReboundHammer, you should start verifying the readings after approximately 2,000uses (or completed tests). You should also verify the readings if you havereason to suspect that your Rebound Hammer is giving you false data.Calibrating your Concrete Rebound HammerWhen tested against the Anvil, the impact energy level of the Rebound Hammermust be 1.64 foot-pounds or .227 kilograms-meter, and the rebound numbermust be a value of 80 2. As the Rebound Hammer approaches 2,000 uses, itmay start to read outside of the range of 80 2 on the test Anvil. At this pointyou should calibrate it.1. With the piston fully extended, twist the cap on the top of the ReboundHammer to open it. Keep your hand positioned on the top of the cap, as youwill feel some slight spring compression pushing against the cap. Set the Rebound Hammer aside and examine the cap. The cap has an adjustment screwand nut, which are used to calibrate the Rebound Hammer.Figure 5: Rebound Hammer cap2. Using a 10 mm wrench, loosen the adjustment nut away from the cap. If theRebound Hammer is reading low, tighten the adjustment screw (clockwise) intothe cap. If the Rebound Hammer is reading high, loosen the adjustment screw(counterclockwise) away from the cap. When you are finished, tighten the adjustment nut to lock the screw in this new position.3. Put the Rebound Hammer back together, and test it on the Anvil again to geta calibrated reading. If it reads 80 2, the Rebound Hammer is calibrated. If thereadings fall outside of this range, take the Rebound Hammer apart and try toadjust it again. Keep adjusting and testing the Rebound Hammer until it reads80 2.Clean the Rebound Hammer with a dry, clean cloth. Do not use solvents, abrasives, or water for cleaning. The springs in the Rebound Hammer may become
worn and ineffective after more than 8,000 tests. Therefore, if you have anolder Rebound Hammer that is no longer providing accurate measurements,and you tried to recalibrate it but it still doesn’t work properly, send it back toHumboldt for an evaluation and/or repair.:Safety: When using this device wear safety glasses Do not fire the Rebound Hammer against any body partSpecifications:Humboldt Concrete Rebound Hammer: H-2987Weight: 2lbs (0.9kilograms)Size: 10.5" (267mm) with plunger retractedShipping weight: Six pounds (2.7 kilograms)Carrying case: 15½ inches x 11½ inches x 2½ inchesHumboldt provides Repair andcalibration services for concreterebound hammers, Call: 09118H-2987 Replacement PartsKeyDescriptionPart#1Impact PlungerH-2975.13Housing, completeH-2975.34Rider with Guide RodH-2975.46Push-button, completeH-2975.67Hammer Guide BarH-2975.78Guide DiskH-2975.89CapH-2975.910Two-part RingH-2975.1011Rear CoverH-2975.1112Compression SpringH-2975.1213PawlH-2975.1314Hammer MassH-2975.1415Retaining SpringH-2975.1516Impact SpringH-2975.1617Guide SleeveH-2975.1718Felt WasherH-2975.1819Plexiglass WindowH-2975.1920Trip ScrewH-2975.2021Lock NutH-2975.2122PinH-2975.2223Pawl SpringH-2975.23
WarrantyHumboldt Mfg. Co. warrants its products to be free from defects in material orworkmanship. The exclusive remedy for this warranty is Humboldt Mfg. Co.,factory replacement of any part or parts of such product, for the warranty of thisproduct please refer to Humboldt Mfg. Co. catalog on Terms and Conditionsof Sale. The purchaser is responsible for the transportation charges. HumboldtMfg. Co. shall not be responsible under this warranty if the goods have beenimproperly maintained, installed, operated or the goods have been altered ormodified so as to adversely affect the operation, use performance or durabilityor so as to change their intended use. The Humboldt Mfg. Co. liability underthe warranty contained in this clause is limited to the repair or replacement ofdefective goods and making good, defective workmanship.Humboldt Mfg. Co.875 Tollgate RoadElgin, Illinois 60123 U.S.A.Testing Equipment forU.S.A. Toll Free: 1.800.544.7220Voice: 1.708.456.6300Fax: 1.708.456.0137Email: hmc@humboldtmfg.comConstruction MaterialsHUMBOLDTwww.humboldtmfg.com
If the Rebound Hammer is reading high, loosen the adjustment screw (counterclockwise) away from the cap. When you are finished, tighten the adjust-ment nut to lock the screw in this new position. 3. Put the Rebound Hammer back together, and test it on the Anvil again to get a calibrated reading. If it reads 80 2, the Rebound Hammer is calibrated.