Transcription
KitchenScienceTeacher’s Guide
This Teacher’s Guide was developed by theCenter for Informal Science Education at theFlorida Museum of Natural History/University of Florida underInnovation and Improvement Project Grant #90YD0206 from theU.S. Department of Health and Human Services,Administration for Children and Families, Office of Head Start.Copyright 2009 Florida Museum of Natural HistoryThis document is in the public domain and may be freely reproduced.
Kitchen ScienceTable of ContentsPageTeacher Background InformationMaterials List15Experiences1Solids and Liquids122Mixing Liquids143Mixing Solids and Liquids164Introduction to Bubbles5Experimenting with Bubbles186Play Dough7Changing Play Dough228Making a Gas269Bread2810Butter3011Clean Mud3212Color Mixing 13413Color Mixing 23614Ice Pops3815Ice Cream4016Popcorn42Take-Home Kit Information/Experience Card44Copy of MESS Recipe BookRecommended Books45Head Start Domains and Indicators58202451
Kitchen ScienceTeacher Background InformationWhat is the focus of this guide?This guide focuses on everyday substances and how we can change theirproperties by adding heat or cold, physically manipulating them, or mixing themtogether.What science concepts are covered in this guide?Everything in the world is a solid, liquid, gas, or a combination.Substances have many observable properties including size, shape, mass,and color.Physical actions can change the properties of substances.Heating and cooling can change the properties of substances.Substances vary in the way they react with other substances.Combining substances can produce a new substance with differentproperties.Why is this guide called “Kitchen Science?”We named this guide “Kitchen Science” because the experiences use common,everyday substances often found in the kitchen such as soap, vinegar, oil, andflour. Also, some of the experiences involve making things that can be eaten,ice cream and popcorn, for example. Others involve ingredients and actions thateasily can be extended to cooking projects.What is the science in “Kitchen Science?”In this guide, we encourage children to explore the properties of differentsubstances and to experiment with ways to change those properties. Thescience that underlies physical and chemical changes can be quite complex.Even seemingly simple questions—What happens when I fold paper? Where dobubbles go?—have complicated answers involving molecules and atoms and,sometimes, chemical reactions.It can be very challenging to offer explanations of change that are helpfulto young children. The focus of this guide is not, however, on explainingphenomena, but rather on engaging children in investigations of change. Theexperiences in this guide offer many valuable opportunities to make carefulobservations, compare materials, use descriptive vocabulary, generate1
Teacher Background InformationKitchen Sciencehypotheses, make predictions, draw conclusions, and share results with others.The “science” in kitchen science is the process of creating change. Before youget started, here is a brief review of some basic science facts.States of MatterAll substances are made of matter. Matter on Earth is in one of three states.Solids are forms of matter that have definite shapes. Apples and flour aresolids. Liquids are forms of matter that can flow freely and take the shape ofa container. Water and milk are liquids. The third state of matter is gas. Thegaseous form of water is steam. Carbon dioxide is a gas that can be producedeasily by combining vinegar and baking soda. The air that blows on our faces ona windy day is made up of a number of different gases.Physical Actions as a Cause of ChangeThere are many ways of changing the properties of substances. Actions suchas bending, folding, cutting, and tearing can change the size and shape ofmaterials. Because these actions are so straightforward, teachers sometimesneglect them in favor of more dramatic examples of change. This is unfortunatebecause exploration of these kinds of physical changes offer many opportunitiesto introduce vocabulary, tools, skills, and the idea that some changes can beundone or reversed, while others are irreversible.Sometimes, even simple physical actions can cause dramatic results. Forexample, shaking milk or cream for a while will produce butter. Why? Theshaking damages the membranes of fat globules and that allows the liquid fat toflow together into a continuous mass.The simple act of shaking is also key to making delicious ice cream. Shaking milkor cream while lowering its temperature adds air to the mixture. Without shaking,the ice cream would resemble an ice cube.Mixing as a Cause of ChangeAnother way to change substances is to mix them together. Some substancesmix together easily; others do not mix at all. For example, some liquids—vinegaror fruit juice, for example—readily mix with water. In contrast, when oil is2
Teacher Background InformationKitchen Sciencecombined with water, beads of it will float around and eventually settle on the top.Similarly, some solids mix with liquids, while others do not. For example, sugarand salt will dissolve in water, while sand or cornstarch will be suspended in theliquid and eventually settle on the bottom.Sometimes, mixing substances can create a new one. For example, mixingbaking soda with vinegar produces new substances, carbon dioxide and water.The changes we observe when mixing substances are due to the chemicalstructures of the substances and the reactions that take place between them.Temperature Varions as a Cause of ChangeAnother way to change the properties of a substance is through heating andcooling. Heating a substance can speed chemical reactions and cause physicalchanges such as shrinking, swelling, or vaporization.Young children already may be familiar with another effect of heat—melting.Melting changes a solid into a liquid. Different substances melt at differenttemperatures. Substances that melt very easily include wax, plastic, butter, and,of course, ice cream! Sometimes a change caused by melting can be reversed.For example, water that forms when ice is melted can be turned back into ice.Melting cheese, on the other hand, involves chemical changes that cannot bereversed.In this Guide, we describe two experiences that involve heat—baking bread andmaking popcorn. Heat plays different roles in the two experiences. In the caseof bread, heat is key in activating the yeast. The yeast then releases a gas thatmakes air pockets in the bread and causes the bread to rise. Once bread is inthe oven, the higher temperature kills the yeast and the bread stops rising.Popcorn pops because there is water inside the kernel that turns to steam whenheated. Pressure from the steam builds up until the entire kernel explodes! Thereason popcorn reacts to heat this way while other kinds of corn do not is thatpopcorn has a much thicker hull on the outside of the kernel than do other kindsof corn.3
Teacher Background InformationKitchen ScienceSimilarly, cooling can slow chemical reactions or cause changes in the physicalcharacteristics of substances. One exotic example is molten lava which turns torock when cooled. An everyday example is what happens when hot water from ashower or bath reaches the cool surface of a mirror—water drops form. Perhapsthe easiest way to demonstrate the effects of cooling is to explore freezing.Freezing is almost the exact opposite of melting. Freezing turns a liquid into asolid. As with melting, different substances freeze at different temperatures.What can I do to best support children’s investigations?To help children gain the most from these experiences, talk with them as theyexamine various substances. Encourage the children to explore the substancesusing different senses; describe characteristics such as color, texture, and shape;and explain the ways various substances are alike and different.When children manipulate substances such as play dough, ask them to describewhat they are doing. Help them set a goal (e.g., make a “snake”), and encouragethem to try to reach it. If children produce an outcome, ask them to show you howthey did it.Help children make connections across experiences. Begin each experience byreviewing what the children already know and conclude by reviewing what theyhave learned. Help children draw on their prior knowledge by asking them whatthey think will happen when they do various things to substances.And, when cool things happen, say “that’s science!”What measures should I take to make sure that the experiences in this Kit areappropriate and safe for young children?Keep potentially dangerous tools (e.g., graters) out of children’s reach.Be sure to keep electric outlets covered with safety caps when not in use.Be alert to items that pose choking hazards (e.g., food, balloons).Have children wash their hands well and frequently.Disinfect tabletops, counters, and cooking equipment when preparing food.Do not allow children to nibble during cooking.Wash fruits and vegetables before they are used.4
Teacher Background InformationKitchen ScienceBe alert to food allergies. Asymbol is near experiences that involve foodto remind you to check for food allergies and complete the necessarypaperwork.Teacher Vocabularychemical reaction – a process in which one or more substances are turned intonew substancesdissolve – to mix with a liquid so that the result is a liquid that is the samethroughoutfreezing – to change from liquid to solid by the loss of heatgas – a substance, usually invisible, that has no shape and spreads to fill spaceliquid – a substance that cannot change its volume, but can change its shapematter – anything that takes up space and has massmelting – to change from solid to liquid by the application of heatsolid – a material that keeps its shapevolume – the amount of space something takes up5
MESS Materials for Core and Center ExperiencesMaterialsExperience 1: Solids and Liquidsplastic test tubes with coversassortment of liquids (water, liquid soap,juice, paint)assortment of large and small solid objects(blocks, beads, shells)assortment of containers of different shapesExperience 2: Mixing Liquidsplastic test tubes with coverscooking oilvinegar or apple juicewater colored with food coloringfunnelsmeasuring cupExperience 3: Mixing Solids and Liquidsplastic test tubes with coversclear plastic cupsspoonscontainer of warm watersaltassortment of solid substances (cornstarch,glitter, instant coffee)Experience 4: Introduction to Bubblesbubble solutioncontainer of waterdish detergentwater table or shallow tubslarge and small round bubble wandsshallow trays to hold bubble solution6BooksSolids, Liquids, and Gasesby Angela RoystonChange It! by Adrienne MasonWhat Is a Scientist? by Barbara LehnSolids, Liquids, and Gasesby Angela RoystonChange It! by Adrienne MasonWhat Is a Scientist? by Barbara LehnSolids, Liquids, and Gasesby Angela RoystonChange It! by Adrienne MasonWhat Is a Scientist? by Barbara LehnDuck Soup by Jackie UrbanovicPurple Delicious Blackberry Jamby Lisa Westberg PetersBubbles, Bubbles Everywhereby Dwight Kuhn & Melvin BergerPop! A Book About Bubblesby Kimberly Brubaker Bradley
MESS Materials for Core and Center ExperiencesMaterialsExperience 5: Experimenting with Bubblesbubble solutionvariety of liquids such as soap, soda, andmilkbubble wands of varying sizes and shapesshallow trays to hold bubble solutionplastic test tubes with coversExperience 6: Play Doughmixing bowlmixing spoonmeasuring cup4 cups flour1 cup salt1 ½ cup warm watervegetable oil (optional)food coloring (optional)Experience 7: Changing Play Doughplay dough or claya variety of clay tools such as cutters,rollers, and stampersExperience 8: Making a Gasbaking sodavinegarclear containersfood coloring (optional)measuring cupsteaspoonBooksPop! a Book About Bubblesby Kimberly Brubaker BradleyBubbles, Bubbles Everywhereby Dwight Kuhn and Melvin BergerTallulah in the Kitchen by Nancy WolffWhat Is a Scientist? by Barbara LehnWhy we Measure by Lisa TrumbauerPancakes for Breakfastby Tomie de PaolaChange It! by Adrienne MasonChange It! by Adrienne MasonGases by Robin NelsonDuck Soup by Jackie Urbanovic7
MESS Materials for Core and Center ExperiencesMaterialsExperience 9: Bread2 cups all-purpose flour1 cup wheat flour1 package rapid-rise yeast3 tablespoons sugar1 cup warm water3 tablespoons nonfat dry milk1 teaspoon salt3 tablespoons vegetable oilmeasuring cupmeasuring spoons3 tablespoons vegetable oil8 ½” x 4 ½” x 2 ¼” loaf pandish towelheavy-duty gallon sealable bagovenExperience 10: Buttermeasuring cup¼ cup heavy cream per childsaltsmall container with lid per childspoons or knives (optional)bread or crackers (optional)timer (optional)marble (optional)Experience 11: Clean Mudmeasuring cupmixing spoongrater½ roll toilet paperbar of Dove or Ivory soap, gratedwarm waterassortment of tools and containers8BooksBread Comes to Lifeby George LevensonThe Little Red Hen (Makes aPizza) by Philomen SturgesWalter the Baker by Eric CarleThe Pizza that We Madeby Joan HolubBlue Bowl Down by C. M. MillenWhy We Measure by Lisa TrumbauerSolids, Liquids, and Gasesby Angela RoystonLet’s Make Butter by Eleanor Smithand Lyzz Roth-SingerPancakes for Breakfastby Tomie de PaolaPancakes, Pancakes! by Eric CarleBunny Cakes by Rosemary Wells
MESS Materials for Core and Center ExperiencesMaterialsExperience 12: Color Mixing 1red, yellow, and blue paintspaint brushespaperfood coloringwatercolor equation cardsplastc test tubes with coverscolor glassesExperience 13: Color Mixing 2color equation cardsred, yellow, and blue food coloringwaterice cube trays or small cupsfreezersmall plastic cups or bowlswarm waterplastic test tubes with coverscolor glassesExperience 14: Ice Popsice pop moldsfruit juicesmall cupsfreezerice cubesBooksMouse Paint by Ellen Stoll WalshLittle Blue and Little Yellow by Leo LionniWarthogs Paintby Pamela Duncan EdwardsMouse Paint by Ellen Stoll WalshLittle Blue and Little Yellow by Leo LionniWarthogs Paintby Pamela Duncan EdwardsChange It! by Adrienne MasonSolids, Liquids, and Gasesby Angela Royston9
MESS Materials for Core and Center ExperiencesMaterialsExperience 15: Ice Creamper serving1 cup half & half or whole milk2 tablespoons sugar½ teaspoon vanilla extract½ cup rock salt½ cup waterice to fill gallon bag half-way1 quart-size sealablefreezer bags2 gallon-size sealablefreezer bags1 small bowl or cup1 spoonExperience 16: Popcornhot air popcorn popperpopcornsaltcups or bowls for serving10BooksFrom Cow to Ice Creamby Bertram KnightFrom Milk to Ice Cream by Ali MitgutschWhy We Measure by Lisa TrumbauerPopcorn by Alex MoranThe Popcorn Book by Tomie de PaolaPurple Delicious Blackberry Jamby Lisa Westberg PetersDuck Soup by Jackie UrbanovicWarthogs in the Kitchenby Pamela Duncan Edwards
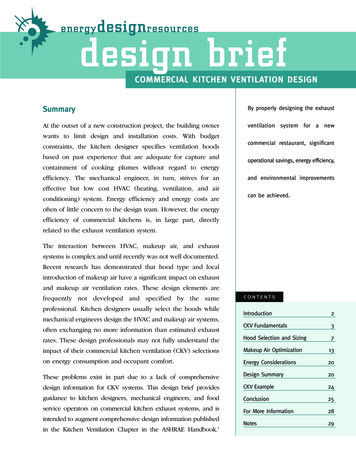
Experience1Solids and LiquidsScience ConceptsEverything in the world is either asolid, liquid, gas, or a combination.AimChildren will explore the differences betweensolids and liquids.Materialsplastic test tubes with coversassortment of liquids (water,liquid soap, juice, paint)assortment of large and smallsolid objects (blocks,beads, shells)assortment of containers ofdifferent shapesBooksSubstances have many observableproperties including size, shape,mass, and color.Solids, Liquids, and Gasesby Angela RoystonChange It! by Adrienne MasonWhat Is a Scientist?by Barbara proachIn advance, check for food allergies and completenecessary paperwork. Also, experiment with thematerials so that you can clearly demonstrate thedifferences between solids and liquids. Review thebooks and mark the pages relevant to this experience.Show the children a variety of solid objects. Ask thechildren to describe each object: What color is it? Is ithard or soft? Is it rough or smooth? Introduce the term“solid.” Explain that even though the objects differ inmany ways, they all are solids.Then show the children the different liquids. Help the children identify theliquids. Introduce the term “liquid.” Show how the different liquids move inside theircontainers. Pour one of the liquids into a shallow container. Explain that a liquidtakes the shape of what is holding it. Place solid objects in different containers.Talk about how solid objects do not change their shape.12
Science CenterPour different liquids in several plastictest tubes with covers and placesolid objects in others. Place in theCenter and encourage the children tomanipulate the tubes and compare howthe liquids and solids move.Integrated ExperiencesLiteracy 1: Have the children describe and illustrate their favorite liquid.Literacy 2: Create a class display showing different solids and liquids using photographs, illustrations,or the children’s drawings.Math: Compare how slowly a thick liquid such as syrup pours compared to a thin liquid such as water.Creative Arts (Art): Have the children make a mixed-media picture using solids and liquids (e.g., useglue to attach small objects to paper; paint a picture and add objects).Encourage the children to move the liquids and solids around in the containers.Ask: What is happening? What shape is it? Will moving it change its shape? Whatshape is it now?Review the concepts of solid and liquid by having the children find otherexamples of each in the classroom.13
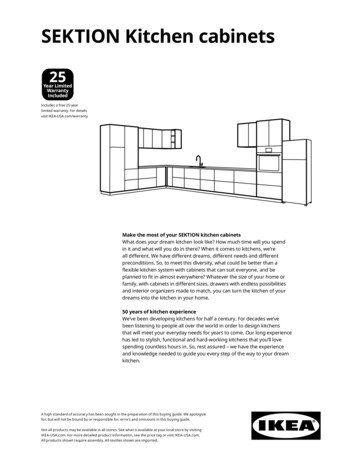
Experienc2Mixing LiquidsScience ConceptSubstances vary in the way theyreact with other substances.AimChildren will explore mixing different kinds of liquids.Materialsplastic test tubes with coversfunnelscooking oilvinegar or apple juicemeasuring cupwater colored with food coloringBooksSolids, Liquids, and Gasesby Angela RoystonChange It! by Adrienne MasonWhat Is a Scientist?by Barbara LehnVocabularyliquidoilvinegarwaterApproachIn advance, check for food allergies and complete necessary paperwork.Begin by reviewing what the children have already learned about liquids.Show the children the oil, vinegar, and water. Help the children identify thedifferent liquids. Encourage the children to compare them using their senses ofsight, taste, and smell.Explain that you are going to do an experiment to see what happens whenyou mix different liquids together. Help a child fill a plastic test tube about half fullwith water using a funnel. Have another child add some vinegar. Cover tightlyand shake. Ask the children to observewhat happens. Explain that becausethe vinegar and water are very similarliquids, they mix together easily.Repeat the steps using water andcooking oil. Draw the children’s attentionto the layer of oil that forms on top of thewater after a few moments. Explain thatbecause water and oil are very differentliquids, they do not stay mixed together.14
Extension 1Add some liquid soap to a water and oil mixture.Observe how the soap helps the oil mix withthe water for a while. Or, put a little oil on thechildren’s hands and have them try to wash it offwith just water and then with soap and water.Science CenterFill different plastic test tubes withcolored water and with varying levels of oilor corn syrup and water. Seal tightly andhave the children explore how the differentliquids behave when the tubes are moved orshaken.Extension 2Make your favorite oil and vinegar saladdressing.Integrated ExperiencesLiteracy: Help the children describe the experiment in their journals using words and pictures.15
Experienc3Mixing Solids andScience ConceptsLiquidsSubstances vary in the way theyreact with other substances.AimChildren will explore mixing solids and liquids.Materialsclear plastic cupsspoonscontainer of warm watersaltplastic test tubes with coversassortment of solid substances(cornstarch, glitter, instantcoffee)BooksEverything in the world is a solid,liquid, gas, or a combination.Solids, Liquids, and Gasesby Angela RoystonChange It! by Adrienne MasonWhat Is a Scientist?by Barbara LehnDuck Soup by Jackie UrbanovicPurple Delicious Blackberry Jamby Lisa Westberg tasteApproachIn advance, check for food allergies and complete necessary paperwork.Experiment with the substances to determine the amounts needed to produce thebest results.Begin by reviewing what the children have already learned about solids andliquids. Show the children a few grains of salt and water and help them identify eachas a solid or a liquid. Explain that they are going to explore what happens to the saltwhen it is mixed with a liquid.Distribute cups to the children. Have the children pourwater into their cups. Ask: What will happen if you mix salt inthe water? Will it sink to the bottom? Will it float on the top?Will it get mixed in? Encourage the children to explain theirthinking.Have the children stir salt into the water. Ask: What ishappening? Is the salt still in the water? Did it disappear?How can you find out? Allow the children to take smalltastes of the salt solution. Introduce the term “dissolve” andexplain that mixing salt and water makes saltwater. Talkabout how they know the salt is still in the water becausethey can taste it. Explain that even though they cannot seethe salt, it is still there.16
ExtensionExplore dissolving further using materials suchas sand and sugar. See if you can separate thesolids from the liquids by pouring the mixturethrough coffee filters.Science CenterFill the plastic test tubes with water and avariety of substances that dissolve and do notdissolve such as instant coffee, dirt, cornstarch, orglitter. Place in the Center for further exploration.Integrated ExperiencesLiteracy: Document the steps in the investigation using photographs.Creative Arts (Art): Mix powdered paint with water and have the children paint.17
Experienc4Introduction toBubblesScience ConceptsSubstances have many observableproperties including size, shape,mass, and color.Everything in the world is a solid,liquid, gas, or a combination.AimChildren will explore making bubbles.Materialsbubble solutioncontainer of waterlarge and small round bubblewandsshallow trays to hold bubblesolutiondish detergentwater table or shallow tubsBooksBubbles, Bubbles Everywhereby Dwight Kuhn and Melvin BergerPop! A Book About Bubblesby Kimberly Brubaker lipperysmallApproachIn advance (up to one week), have the children help you mix up a batch ofbubble solution. Pour some water in a container. Review the book so you canfocus on the appropriate photos and ideas.Begin by asking the children to share what they know about making bubbles:Have you ever made bubbles? How do you make bubbles? What do you need tomake bubbles?Review how you made the bubble solution. Encourage the children to feel thedifference between the slippery soap solution and water.Demonstrate how to make a bubble using a round bubble wand. Choose aclean wand and show that a bubble will not form using water alone.Distribute the bubble wands and encourageBubble Solution Recipe*the children to experiment. Ask: What happensMix together:1/2 cup Dawn or Joy liquid dishwhen you wave the wand quickly? Slowly?soapCan you make just one bubble?1 gallon water, preferably distilledAsk the children to describe the bubbles:2-3 tablespoons corn syrup orWhat colors are they? Which one is the biggest?glycerinWhat shape are the bubbles?Conclude by reviewing what the children* works best if allowed to sit athave learned about making bubbles.least one day18
Science CenterFill the water table with a soapy solution toencourage the children to explore bubblesfurther.Integrated ExperiencesLiteracy: Encourage the children to examine the bubbles carefully and to name the colors hey see.Make a list of the different colors they name.Math 1: As the children make bubbles, encourage them to count the bubbles and compare the sizes.Physical Health and Development (Gross Motor): Encourage the children to chase after the bubblesas they float in the wind.19
Experienc5Experimentingwith BubblesScience ConceptsSubstances have many observableproperties including size, shape,mass, and color.Everything in the world is a solid,liquid, gas, or a combination.AimChildren will experiment with bubble makers of differentshapes.Materialsbubble solutionbubble wands of varying sizesand shapesshallow trays to hold bubblesolutionvariety of liquids such as soap,soda, and milkplastic test tubes with coversBooksPop! a Book About Bubblesby Kimberly Brubaker BradleyBubbles, Bubbles Everywhereby Dwight Kuhn and Melvin ipperysmallstarApproachIn advance, prepare a batch of bubble solution.Begin by reviewing children’s previous discoveries about bubbles: How did wemake bubbles? What color were they? What shape were the bubbles?Show the children a round bubble wand and review that it made bubbles thatwere round like a ball.Show the children theother wands. Help the childrenidentify the shape of each wand.Encourage the children to predictwhat shape bubble each wandwill make: Do you think the bubblewill be round like a ball, or will ithave a star shape?Make a bubble with one ofthe wands that is not shapedlike a circle. Draw the children’sattention to the bubble’s shapeTalk about how all bubbles thatfloat in the air are round.20
ExtensionMake bubble wands from common materialssuch as pipe cleaners, plastic holders from6-packs of soda, and circles cut from the rims ofyogurt carton tops.Science CenterPour a variety of liquids such as soap,milk, and soda into the plastic test tubesand place in the Center along withmagnifying tools. Encourage the childrento explore the bubbles that are madewhen the liquids are shaken.Integrated ExperiencesLiteracy: Help children record their explorations of bubbles in their journals using illustrations andwords, or create a class log on a large sheet of paper.Math 1: Graph the children’s predictions about the shape the bubbles will take.Math 2: Investigate the classroom and playground for other objects that are shaped like spheres.Compare spheres with circles.Creative Arts (Art): Mix paint in bubble solution. Pour small amounts on a sheet of paper and have thechildren use straws to blow designs.21
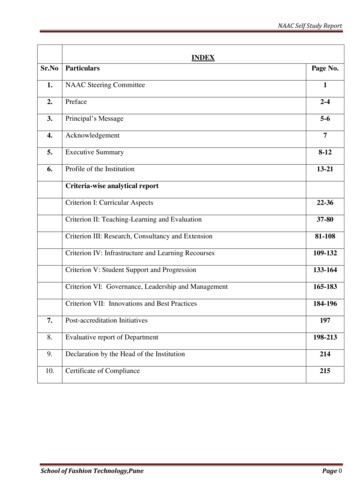
Experienc6Play DoughScience ConceptsEverything in the world is a solid,liquid, gas, or a combination.Combining substances can produce anew substance with new properties.AimChildren will participate in making play dough.Materialsmixing bowlmeasuring cupmixing spoonfloursaltwarm watervegetable oil (optional)food coloring (optional)BooksTallulah in the Kitchen by Nancy WolffWhat Is a Scientist? by Barbara LehnWhy We Measure by Lisa TrumbauerPancakes for Breakfastby Tomie de mixturerecipeApproachIn advance, check for food allergies and complete necessary paperwork.Experiment with the play dough recipe and adjust proportions to meet your needsand preferences. Using the sample recipe on page 44 as a guide, make a chartusing words and pictures that describe the steps you are going to follow.Show the children the ingredients and the chart. Explain that you are going tomix the ingredients together following the steps shown on the chart.Encourage the children to think about what the mixture is going to look and feellike: When these are all mixed together,what will it feel like? Will the mixture be asolid or a liquid?Help the children measure and mix theingredients. Draw their attention to the waythe dough changes when the water and oilare added. Demonstrate how to knead thedough by pushing it down with the heelsof your hands, folding it over, and folding itover again.22
ExtensionExperiment with the play dough recipe byvarying the amounts of flour, salt, water, and oil,or add sand or birdseed to make textured dough,packets of flavored gelatin to make scenteddough, or glitter to make a sparkly dough.Science CenterPlace the play dough in the Center forfurther exploration.Play Dough Recipe4 cups all-purpose flour1 cup salt1½ cup warm watersmall amount of vegetableoil (optional)food coloring (optional)Have the children knead the dough until it issmooth and elastic.As the children mix and knead the dough, askthem if it feels warm or cold, and to describe thetexture and how it changes.When your dough is ready, review the steps youfollowed to make the dough.Mix flour, salt, water, andoil and food coloring (ifdesired) in a large bowl.Stir with a spoon. Kneaduntil shiny.Store in an airtightcontainer when not in use.Consider this.Using recipes when cooking withchildren introduces another formof print and provides practicalexperience using measuring tools.23
Experienc7Changing Play DoughScience ConceptsSubstances have many observableproperties including size, shape, mass,and color.AimChildren will use a variety of tools to changethe appearance of a substance.Materialsplay dough or claya variety of clay tools such ascutters, rollers, and stampersBookPhysical actions can change theproperties of materials.Change It! by Adrienne MasonVocabularycutflatrolling pinroundstampApproachBegin by reviewing what the children have already learned about solids. Showthe children some play dough and ask for their ideas about ways to change what itlooks like: What can I do to make this ball smaller? Can I make it bigger? If I breakit into pieces, can I put it back together again?Show the children the different clay tools.Help the children name the tools. Encouragethem to describe how to use the tools: Howwould I use this with play dough? What would Ido with this one?Distribute the tools and play dough amongthe children. Encourage the children to describetheir actions and what happens to the playdough as a result: What does your play doughlook like? How did you make it look like this?Can you do it again?24
ExtensionExplore different ways of changing the size andshape of paper by cutting, tearing, bending,and folding. Talk about which actions can bereversed (e.g., folding) and which cannot (e.g.,cut
Substances that melt very easily include wax, plastic, butter, and, of course, ice cream! Sometimes a change caused by melting can be reversed. For example, water that forms when ice is melted can be turned back into ice. Melting cheese, on the other hand, involves chemical changes that cannot be reversed.