Transcription
PCI Express SATA cardDual Channel Serial ATA PCI Express Controller CardPEXSATA22Instruction ManualActual product may vary from photo
FCC Compliance StatementThis equipment has been tested and found to comply with the limits for a Class B digitaldevice, pursuant to part 15 of the FCC Rules. These limits are designed to providereasonable protection against harmful interference in a residential installation. Thisequipment generates, uses and can radiate radio frequency energy and, if not installedand used in accordance with the instructions, may cause harmful interference to radiocommunications. However, there is no guarantee that interference will not occur in aparticular installation. If this equipment does cause harmful interference to radio ortelevision reception, which can be determined by turning the equipment off and on, theuser is encouraged to try to correct the interference by one or more of the followingmeasures: Reorient or relocate the receiving antenna. Increase the separation between the equipment and receiver. Connect the equipment into an outlet on a circuit different from that to which thereceiver is connected. Consult the dealer or an experienced radio/TV technician for help.Use of Trademarks, Registered Trademarks, andother Protected Names and SymbolsThis manual may make reference to trademarks, registered trademarks, and otherprotected names and/or symbols of third-party companies not related in any way toStarTech.com. Where they occur these references are for illustrative purposes only anddo not represent an endorsement of a product or service by StarTech.com, or anendorsement of the product(s) to which this manual applies by the third-party company inquestion. Regardless of any direct acknowledgement elsewhere in the body of thisdocument, StarTech.com hereby acknowledges that all trademarks, registeredtrademarks, service marks, and other protected names and/or symbols contained in thismanual and related documents are the property of their respective holders.
Instruction ManualTable of ContentsIntroduction . . . . . . . . . . . . . . . . . . . . . . . . . . . . . . . . . . . . . . . . . . . . . . . . . . . . .1Features . . . . . . . . . . . . . . . . . . . . . . . . . . . . . . . . . . . . . . . . . . . . . . . . . . . . . . . .1Before you begin . . . . . . . . . . . . . . . . . . . . . . . . . . . . . . . . . . . . . . . . . . . . . . . . .1Installation . . . . . . . . . . . . . . . . . . . . . . . . . . . . . . . . . . . . . . . . . . . . . . . . . . . . . .2Specifications . . . . . . . . . . . . . . . . . . . . . . . . . . . . . . . . . . . . . . . . . . . . . . . . . . .8Technical Support . . . . . . . . . . . . . . . . . . . . . . . . . . . . . . . . . . . . . . . . . . . . . . . .9Warranty Information . . . . . . . . . . . . . . . . . . . . . . . . . . . . . . . . . . . . . . . . . . . . .9i
Instruction ManualIntroductionThank you for purchasing a StarTech.com PCI Express SATA II two port card - theperfect solution for adding SATA/SATA II drives to your computer, using the speed andpower of PCI Express. Featuring data transfer speeds of up to 300Mbps, this card canbe used in PCI Express slots with any of the following lane widths (x1, x2, x4, x8, x16),and is compliant with PCI Specification V2.2 as well as Serial ATA Specification V1.0.Features Fully compliant with one-lane 2.5 GB/s PCI Express Specification Compliant with Serial ATA 1.0 specifications Serial ATA Generation 2 transfer rate of 3.0 Gb/s Supports Windows 98, 2000, XP, 2003, Linux, and MAC OSBefore You BeginSystem Requirements Pentium-class computer with one available x1 PCI Express slot Microsoft Windows 2000, XP or Server 2003, Linux or Mac operating system CD-ROM/DVD-ROM drive (driver installation)ContentsThis package should contain: SATA PCI-E Host Card (1) Serial-ATA Cable (1) User Manual (1) Driver CD1
Instruction ManualInstallationWindows 2000/XP/2003 Fresh InstallationFollow the instructions in this section if you are performing a new installation of Windows2000/XP/2003, and you wish to boot from a drive attached to the SATA II to PCI ExpressCard.Prior to installation, it is advisable to create a boot diskette. To do so, please locate thefollowing folder, located on the Driver CD:D:\Serial-ATA\PCIEXPRESS\Siliconimage\2Ch\Raid driverCopy all files from this directory onto a blank floppy diskette. Remove the disk from thedrive, and label it accordingly.1. Shut down all power connected to the computer, as well as all devices connected tothe computer peripherally (i.e. Printers, Monitors, Scanners etc.). As an added step toensure safe installation, unplug the power supply from the computer.2. Remove the computer cover. For more detailed instruction on how to perform thisstep, please refer to the documentation that was included with your computer at thetime of purchase.3. Locate an empty PCI Express slot, removing the metal bracket covering theaccompanying empty port/socket.4. Position the card above the open PCI Express slot, ensuring that the card is properlyaligned with the slot. Insert the card firmly into the slot, distributing force evenly acrossthe length of the board. Once inserted, secure the card into the adjoining socket(previously covered by metal bracket), using the correct size screw (if necessary,please consult documentation that accompanied purchase of computer).5. Connect Serial ATA cable(s) between the SATA host card and the Serial ATA device(s).6. Replace the computer cover and re-connect all power to the computer.7. Turn on the computer. Upon booting up, Windows will instruct you to Press [ F6 ] forthird party SCSI or driver installation. As such, please hit F6 to continue.Press [ S ] when setup asks if you want to specify an additional device, and insert theboot diskette into your floppy drive.Press [Enter] and select [ Silicon Image SiI 3132 SATALink Serial ATA Controller ].Press [Enter] again when prompted to continue on with text mode setup.Follow the setup instructions to select your choice for partition and file system.After setup examines your disks, it will copy files from the CD to the hard driveselected above and restart the system. After restart, the setup process will resumeinstalling the new drive(s).2
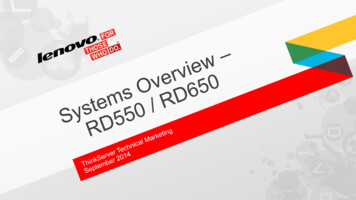
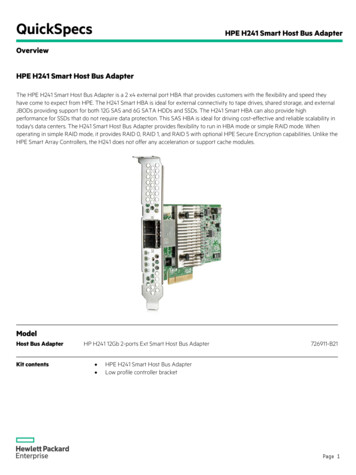
Instruction ManualAdding the SATA host card to an existing Windows 2000/XP installationFollow the instructions in this section to install the SATA host card on a system alreadyrunning Windows 2000 or Windows XP.1. Shut down all power connected to the computer, as well as all devices connected tothe computer peripherally (i.e. Printers, Monitors, Scanners etc.). As an added step toensure safe installation, unplug the power supply from the computer.2. Remove the computer cover. For more detailed instruction on how to perform thisstep, please refer to the documentation that was included with your computer at thetime of purchase.3. Locate an empty PCI Express slot, removing the metal bracket covering theaccompanying empty port/socket.4. Position the card above the open PCI Express slot, ensuring that the card is properlyaligned with the slot. Insert the card firmly into the slot, distributing force evenly acrossthe length of the board. Once inserted, secure the card into the adjoining socket(previously covered by metal bracket), using the correct size screw (if necessary,please consult documentation that accompanied purchase of computer).5. Connect Serial ATA cable(s) between the SATA host card and the Serial ATA device(s).6. Replace the computer cover and re-connect all power to the computer.7. Turn on the computer. During boot up, Windows will display the Found NewHardware Wizard. When you see the screen depicted below, please select No, notthis time, and click Next.3
Instruction Manual3. Select Include this location in the search, and click Browse. The necessary filesare located in: D: \Serial-ATA\PCIEXPRESS\Siliconimage\2Ch\Raid driver, whereD:\ is the drive letter designating your CD-ROM/DVD-ROM drive. Once this file hasbeen selected, click Next.4. The wizard will now copy the required files to the system and begin installing thedriver. Once the driver has been installed, the wizard will display a completion dialog.Click Finish to exit the wizard.4
Instruction ManualVerifying installationWindows 2000/XP/20031. Right-click on the My Computer icon. Select Properties, and left-click on theHardware tab. Click on the Device Manager button. Double click on SCSI and RAIDControllers. If there is no yellow [ ! ] or [ ? ] in front of the listing for Silicon Image SiI3132 Serial ATA Controller, the driver has successfully been installed.2. To view information about the devices attached to the controller, right click the SiliconImage SiI 3132 Serial ATA Controller and select Properties from the context menu,then select the tab labeled Device Info.5
Instruction ManualUpdating drivers on Windows 2000/XP/2003With the SATA host card already plugged in and the driver already installed, follow theinstructions below to update the SATA host driver:1. Right click on My Computer and select Properties. Under the System Propertiessection, click on the Hardware tab, and then on Device Manager. Click SCSI andRAID Controllers and right-click on Silicon Image SiI 3132 Serial ATA Controller,then select Properties from the context menu.2. Click on the Update Driver button on the Driver tab, and select Search for a suitabledriver for my device (Recommended) . Insert the Driver CD into the CD-ROM drive.3. Click Next to complete the driver installation.4. The system will go through the enumeration process and install the driver.Once Windows finds the necessary file, it will ask if you wish to continue with theupdate. Please click Next to update the driver. At the end of the process, click Yes toreboot the computer.After rebooting, ensure that the update was successful, by following the same steps usedto verify installation was complete.6
Instruction ManualSerial ATA Host Card GUI Utility installationInsert the Driver CD into the computer’s CD-ROM drive. When the autorun windowappears, select the path D:\Serial-ATA\PCIEXPRESS\Siliconimage\2Ch\GUI, where D:\specifies your CD-ROM/DVD-ROM drive.1. Click on GUI.exe2. Click Next. If you wish to specify a location for the software installation other than thatspecified by default, please make your selection now. Click Next, once the folder hasbeen specified.3. Choose the GUI function by placing a checkmark next to GUI, and click Next.4 . Once the GUI is installed, you will be notified and given the option to click Finish.Please do so, to allow the system to reboot.7
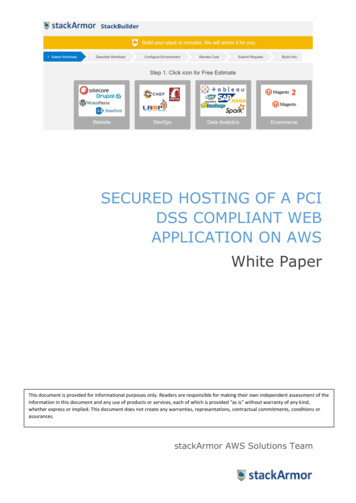
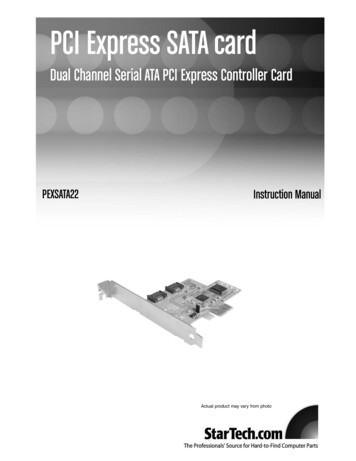
Instruction ManualRAID ExplainedRAID: Redundant Array of Independent DisksRAID technology manages multiple disk drives, to enhance I/O performance and provideredundancy in order to withstand the failure of any individual member, without loss ofdata. PEXSATA22 provides two RAID Set types: Striped (RAID 0) and Mirrored(RAID 1).Disk Striping (RAID 0)Striping is a performance-oriented, non-redundant data mapping technique. WhileStriping is discussed as a RAID Set type, it is actually does not provide fault tolerance.With modern ATA bus mastering technology, multiple I/O operations can be done inparallel, enhancing performance. Striped arrays use multiple disks to form a larger virtualdisk. This figure shows a striped set using three disks with stripe one written to disk one,stripe two to disk two, and so forth.Disk Mirroring (RAID 1)Disk mirroring creates an identical twin for a selected disk by having the datasimultaneously written to two disks. This redundancy provides instantaneous protectionfrom a single disk failure. If a read failure occurs on one drive, the system reads the datafrom the other portChannelOperating systems supportedOperation temperatureStorage temperatureOperation humidityOne-lane PCI-ExpressSATA II (backward compatible with SATA)Silicon Images Sil3132RAID 0 (Striping) and RAID 1 (Mirroring)2 independent Serial ATA II internal channelsWindows2000/XP/2003/ and Linux 2.4x, 2.6x0 57 C-20 C 85 C5 95% RH8
Instruction ManualTechnical SupportStarTech.com’s lifetime technical support is an integral part of our commitment to provideindustry-leading solutions. If you ever need help with your product, visitwww.startech.com/support and access our comprehensive selection of online tools,documentation, and downloads.Warranty InformationThis product is backed by a lifetime warranty. In addition, StarTech.com warrants itsproducts against defects in materials and workmanship for the periods noted, followingthe initial date of purchase. During this period, the products may be returned for repair, orreplacement with equivalent products at our discretion. The warranty covers parts andlabor costs only. StarTech.com does not warrant its products from defects or damagesarising from misuse, abuse, alteration, or normal wear and tear.Limitation of LiabilityIn no event shall the liability of StarTech.com Ltd. and StarTech.com USA LLP (or theirofficers, directors, employees or agents) for any damages (whether direct or indirect,special, punitive, incidental, consequential, or otherwise), loss of profits, loss of business,or any pecuniary loss, arising out of or related to the use of the product exceed theactual price paid for the product.Some states do not allow the exclusion or limitation of incidental or consequentialdamages. If such laws apply, the limitations or exclusions contained in this statementmay not apply to you.9
About StarTech.comStarTech.com is “The Professionals’ Source for Hard-to-Find ComputerParts”. Since 1985, we have been providing IT professionals with thequality products they need to complete their solutions. We offer anunmatched selection of computer parts, cables, server managementsolutions and A/V products and serve a worldwide market through ourlocations in the United States, Canada, the United Kingdom and Taiwan.Visit www.startech.com for complete information about all our productsand to access exclusive interactive tools such as the Parts Finder and theKVM Reference Guide. StarTech.com makes it easy to complete almostany IT solution. Find out for yourself why our products lead the industry inperformance, support, and value.Revised: 16 October 2006 (Rev. A)
and is compliant with PCI Specification V2.2 as well as Serial ATA Specification V1.0. Features † Fully compliant with one-lane 2.5 GB/s PCI Express Specification † Compliant with Serial ATA 1.0 specifications † Serial ATA Generation 2 transfer rate of 3.0 Gb/s † Supports Windows 98, 2000, XP, 2003, Linux, and MAC OS Before You Begin