Transcription
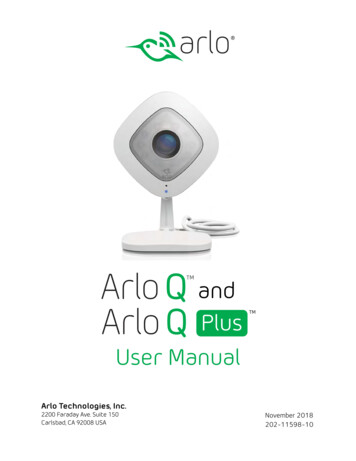
Arlo Q andArlo Q User ManualArlo Technologies, Inc.2200 Faraday Ave. Suite 150Carlsbad, CA 92008 USANovember 2018202-11598-10
SupportFor product updates and web support, visit http://www.arlo.com/en-us/support/.Trademarks Arlo Technologies, Inc. Arlo, Arlo logo, and Every Angle Covered are trademarks of Arlo Technologies, Inc. Other trademarks arefor reference purposes only.ComplianceFor regulatory compliance information including the EU Declaration of Conformity, visit www.arlo.com/about/regulatory/.See the regulatory compliance document before connecting the power supply.2
Contents1.Set Up Your System6Connect Your Arlo Q or Arlo Q Plus Camera 6Set Up a New Camera 8Add a Camera From Another Arlo Account 10Arlo Q Camera Position 12Place or Mount Your Arlo Q Camera 122.View Your Content14View the Camera Image Status 14View Camera Feeds.15Pan and Zoom Video.15Record Clips From Live Video 16Take a Snapshot From Live Video 16Talk and Listen.17Manage Your Cameras and Devices 17Cloud Recording.19View Recordings and Snapshots 20Share and Manage Library Recordings 223.Use an SD Card With Arlo Q Plus25Insert an SD Card.25View the SD Card Status 26Safely Eject and Remove an SD Card 26View Video Clips on an SD Card 27Change the SD Card Overwrite Setting 28Format an SD Card.28Turn SD Card Recording Off and On 293
4.Personalize Your Camera31Name Your Camera.31Profile Settings.31Grant Access to Friends 335.Modes, Rules, and Smart Alerts36Select a Mode.36Change Motion Sensitivity 38Automatically Stop Recording When Motion Stops39Change Audio Sensitivity 39Manage Alerts.40Set Up Geofencing.41Geofencing With Multipe Mobile Devices 43Geofencing Accuracy.44Geofencing First In Last Out 44Schedule Your Camera Rules 45Add a Mode.47Motion Detection Activity Zones 496.Settings51Turn the Arlo App Fingerprint ID Login On and Off51Change the Time Zone 51Status LED.52Audio Settings.54Change the WiFi Network 56View Device Information 56Restart the Camera.57Remove a Camera From Your Account 574
7.Manage Your Subscription Plan59Subscription Plans.59Upgrade to a Paid Subscription Plan 598.Arlo Connect60Use Arlo With IFTTT.60Use Arlo Cameras With SmartThings 60Use Arlo With Stringify 609.Use SmartThings With Arlo Cameras62Prepare Arlo to Work With SmartThings 62Integrate Your Arlo Cameras With the SmartThings App63Adjust the Motion Sensitivity Level 64Adjust Push Notifications 6510. Continuous Video Recording66View the Timeline.66Navigate Through the Timeline 67View the Timeline Calendar 6811. Troubleshooting69Manage Bandwidth for Streaming 69Can’t See Video Streams in a Browser 69Not Receiving Push Notifications 695
1. Set Up Your SystemSetting up your Arlo Q camera involves a few simple steps: Get the Arlo app, and thenuse the app to get an Arlo account and connect your camera to your network. YourArlo account lets you view videos from any Internet-connected computer or mobiledevice. You can use the same Arlo app to set up and manage both Arlo Q and ArloWire‑Free Cameras.Connect Your Arlo Q or Arlo Q Plus CameraYou can connect your Arlo Q camera using WiFi. You can connect your Arlo Q Pluscamera to the Internet in any of three different ways: WiFi. Connect the Arlo Q or Arlo Q Plus camera to your router using WiFi andpower the camera with the included micro USB cable and power adapter. Arlo Q Plus Power over Ethernet (PoE). Connect the Arlo Q Pluscamera to a PoE switch using the included PoE adapter if you want to powerand connect the camera to the Internet with a single cable. Arlo Q Plus Ethernet. Connect the Arlo Q Plus camera to your router withEthernet, but power the camera with the included micro USB cable and poweradapter.Connect an Arlo Q or Arlo Q Plus Camera With WiFi¾¾ To connect an Arlo Q or Arlo Q Plus camera with WiFi:1. Connect the micro USB cable that was included with your camera to theconnector on the back of the camera.For Arlo Q Plus, connect the micro USB cable to the larger half of the port onthe back of the camera. See the following diagram.This example showsan Arlo Q Plus camera6
Set Up Your System2. Connect the other end of the micro USB cable to the power adapter.3. Plug the USB adapter into a wall socket and wait for the camera LED to blinkamber.4. Continue installing your camera.For more information, see Set Up a New Camera on page 8.Connect an Arlo Q Plus Camera With PoE¾¾ To connect an Arlo Q Plus camera with PoE:1. Connect the PoE adapter to the camera.2. Connect your own Ethernet cable to the PoE adapter.3. Connect the other end of the Ethernet cable to your PoE switch.4. Continue installing your camera.For more information, see Set Up a New Camera on page 8.7
Set Up Your SystemConnect an Arlo Q Plus Camera With Ethernet¾¾ To connect an Arlo Q Plus camera with Ethernet:1. Connect the PoE adapter to the back of your camera.561422. Connect your own Ethernet cable to the PoE adapter.3. Connect the other end of the Ethernet cable to an Ethernet switch or a router.4. Connect the included micro USB cable to the side of the PoE adapter.5. Connect the other end of the micro USB cable to the USB power adapter.6. Plug the USB adapter into a wall socket.7. Continue installing your camera.For more information, see Set Up a New Camera on page 8.Set Up a New CameraUse the Arlo app and your Arlo account to set up your Arlo Q or Arlo Q Plus camera.If you already set up an Arlo account, you can add the camera to your account.¾¾ To set up a new Arlo Q or Arlo Q Plus camera:1. Tap the Arlo iconon your mobile device.Your moble device must be connected to the same WiFi network as the Arlocamera.8
Set Up Your SystemIf you are using a computer, enter https://my.arlo.com/#/login in the address barof a browser.If you are using a mobile device with a Touch ID fingerprint identity sensor,you are prompted to enable Touch ID or skip.2. To use Touch ID, tap Enable Touch ID.If you tap Skip, you can turn on the Arlo app fingerprint ID login later. See Turnthe Arlo App Fingerprint ID Login On and Off on page 51.3. Tap or click New to Arlo?.A list of cameras displays.4. Tap or click the camera that you want to set up.5. Apply power to your camera: Arlo Q camera. Plug in your Arlo Q camera. Arlo Q Plus or Arlo Q camera WiFi connection. See Connect an Arlo Q orArlo Q Plus Camera With WiFi on page 6. Arlo Q Plus camera PoE connection. See Connect an Arlo Q Plus CameraWith PoE on page 7. Arlo Q Plus camera Ethernet connection. See Connect an Arlo Q PlusCamera With Ethernet on page 8.6. Wait until the camera LED is blinking amber.A slow blinking amber LED indicates that the camera is powered on and is readyfor setup.7. Tap or click Continue.8. Enter the name and password for the WiFi network that you want your camerato connect to.If you use an existing Arlo Wire-free system, do not sync your Arlo Q camera toyour base station.9. Press the Sync button on your camera until the blue LED starts blinking.A slow blinking blue LED indicates that the camera is connecting to a WiFinetwork. A fast blinking blue LED indicates that the camera is connecting toArlo servers.10. Tap or click Continue.9
Set Up Your System11. Hold the QR code 4 to 8 inches (10 to 20 cm) in front of the camera until youhear a chime sound.12. Tap or click Yes if you heard a chime sound.Tap or click No if you did not hear a chime sound.13. Wait for the app to discover the Arlo Q camera.If you did not hear a chime sound, try moving the camera closer to or fartheraway from the QR code. If you hear a buzz sound, try the following remedies: Check to ensure that you entered the WiFi network name and passwordcorrectly. The WiFi network name and password are case-sensitive. Try moving your Arlo Q camera closer to your WiFi router. Do not place yourcamera farther than 300 feet (91 meters) from your WiFi router.Note: For initial setup, you can place the camera in the same room as your WiFi router,and then move the camera to another location after you finish the setup. During setup,the Arlo Q camera must connect to the same WiFi network that you plan to use later.14. Choose a service plan.For more information, see Subscription Plans on page 59.Your Arlo account is set up.Add a Camera From Another Arlo Account¾¾ To add a camera from another Arlo account:1. Tap the Arlo iconon your mobile device.If you are using a computer, enter https://my.arlo.com/#/login in the address barof a browser.The Devices page displays.2. Log in to the old Arlo account.3. Tap or click Settings.The Settings page displays.4. Tap or click My Devices.A list of cameras displays.5. Tap or click the camera.10
Set Up Your SystemThe settings for the camera display.6. Scroll down and click the Remove Device button.The camera is removed from your account.7. Log out of the Arlo app.8. Log in to your current Arlo account.9. Tap or click Add Device.10. Tap or click the image of the Arlo Q camera.11. Plug in your camera and wait until the light is blinking amber.A slow blinking amber LED indicates that the camera is powered on and is readyfor setup.12. Tap or click Continue.13. Enter the name and password for the WiFi network that you want your camerato connect to.14. Tap or click Continue.15. Press the Sync button on your camera until the blue light starts blinking.A slow blinking blue LED indicates that the camera is connecting to a WiFinetwork. A fast blinking blue LED indicates that the camera is connecting toArlo servers.16. Tap or click Continue.Your monitor or mobile device displays a QR code.17. Hold your camera in front of your monitor or hold your smartphone or mobiledevice in front of your camera until you hear a chime sound.18. If you hear a chime sound, tap or click Yes.19. If you do not hear a chime sound, tap or click No and follow the onscreeninstructions.11
Set Up Your SystemArlo Q Camera PositionWhen positioning your Arlo Q camera, keep these tips in mind: Avoid positioning the camera in an area that gets a lot of light shining directlyinto the camera lens. You can configure Arlo Q cameras to monitor part of the field view and todetect motion only in the areas that you want monitor. Keep active locations in the camera’s field of view.Arlo Q provides a 130-degree viewing angle. Position your camera so that thespace that you want to monitor is within the camera’s field of view. Aim with the cloud.To help with positioning your camera, do a live stream from the Arlo Q camera.Aim the camera while watching the video feed on your Arlo smartphone app tomake near-real-time adjustments to the camera’s position.Place or Mount Your Arlo Q CameraYou can place your Arlo Q camera on a shelf or a flat surface or you can mount iton the wall.¾¾ To mount your Arlo Q camera on the wall:1. Make sure that the mounting plate is separate from the camera base.2. Place the wall plate and secure it in place with four screws.12
Set Up Your SystemNote: If you’re mounting the camera to drywall, be sure to use the plastic drywallanchors that are provided.3. Slide the camera into the wall plate.Arlo Q also comes with a magnetic plate that can attach to any flat steel or ironsurface. (Magnets do not stick to aluminum or stainless steel.)Caution: Do not attempt to mount the Arlo Q camera to a half-dome Arlo Wire‑freeCamera mount. This might result in the camera falling from the mount and beingdamaged.For more information, see the YouTube video How to Install Arlo Q Smart HomeSecurity Cameras https://www.youtube.com/watch?v gI-Mk9FOmoQ.13
2. View Your ContentVideos recorded by your camera are stored in a library. You can view your recordingsand snapshots, mark them as favorites, and search using the filter.View the Camera Image StatusWhen you launch the Arlo app, the Devices page displays.Camera nameCamera statusCamera imageUnviewed recordingsSelect devicesSettingsRecordingslibraryLive FeedIconDetectionmodesTap or click Live to displayCameraStatus IconDisplay is based on the mode andcamera setupPauseMotion detection is onRecord video manuallySound detection is onSnapshotWiFi signalBrightnessArlo Q Plus powerMicrophone. Start using Talk and ListenArlo Q Plus EthernetSpeaker. Mute the audioArlo Q Plus SD cardFull screen.14
View Your ContentView Camera FeedsYou can view your Arlo Q camera feeds at any time.¾¾ To view camera feeds:1. Tap the Arlo iconon your mobile device.If you are using a computer, enter https://my.arlo.com/#/login in the address barof a browser.The Devices page displays. The icons above each camera feed depend on therules in the currenty selected mode and how the camera is connected. Forinformation about these icons, see View the Devices page on page 14.2. To view and listen to a live feed, tap or click Live on the camera feed image.A row of live feed icons displays below the live stream image for the camera.3. To stop viewing and listening to the live feed, tap or click the Pause icon.Pan and Zoom VideoYou can pan and zoom to focus in on the high-def details of any live or recordedvideo. Just pinch and drag any image as you do with photos on your smartphone.¾¾ To pan and zoom video:1.Tap the Arlo iconon your mobile device.If you are using a computer, enter https://my.arlo.com/#/login in the address barof a browser.The Devices page displays.2. Tap or click Library.The calendar displays on the top of the page.3. Tap or click any live video or prerecorded video from your Arlo library.4. To pan and zoom using a mobile device, do the following: To zoom in and out of the video, use the pinch gesture. To move around the zoomed-in frame, touch and drag.15
View Your Content5. To pan and zoom using a computer, do the following: To zoom in and out, click the Zoom icon. To move around in the frame, use your mouse button.Record Clips From Live Video¾¾ To record clips from live video:1. Tap the Arlo iconon your mobile device.If you are using a computer, enter https://my.arlo.com/#/login in the address barof a browser.The Devices page displays.2. Tap or click Live in the camera feed image.The camera feed icons display at the bottom of the camera feed image.3. Tap or click Record Video.This icon turns red to indicate that you are recording the live feed.4. To stop recording, tap or click Record Video.Take a Snapshot From Live Video¾¾ To take a snapshot from live video:1. Tap the Arlo iconon your mobile device.If you are using a computer, enter https://my.arlo.com/#/login in the address barof a browser.The Devices page displays.2. Tap or click Live in the camera feed image.3. Tap or click Snapshot.The snapshot is saved in your library.16
View Your ContentTalk and Listen¾¾ To talk and listen:1. Tap the Arlo iconon your mobile device.If you are using a computer, enter https://my.arlo.com/#/login in the address barof a browser.The Devices page displays.2. Tap or click Live in the camera feed image.3. Tap or click Microphone.A microphone button displays.4. Wait for the button to turn bright green.This can take up to five seconds. When the button is bright green, Talk andListen is ready.5. Press and hold or click and hold the Microphone button and speak.Manage Your Cameras and DevicesIf you use more than one camera, you can change the order in which the camera feedsare displayed on the Devices page. You can also zoom, invert, or rotate the cameraimage.Change the Camera Order¾¾ To change the camera order on the Devices page:1. Tap the Arlo iconon your mobile device.If you are using a computer, enter https://my.arlo.com/#/login in the address barof a browser.The Devices page displays.2. Tap or click Settings.The Settings page displays.3. Under System, tap or click Camera Order.17
View Your ContentA list of cameras displays in the order that they display on the Devices page.4. If you are using a smartphone or tablet, tap Edit at the top of the page.A list icon displays.5. Tap and hold or right-click the list icon and drag the camera to the correctposition on the list.6. Tap or click Done.Your settings are saved.Zoom a Camera ImageTo zoom a camera image:1. Tap the Arlo iconon your mobile device.If you are using a computer, enter https://my.arlo.com/#/login in the address barof a browser.The Devices page displays.2. Tap or click Settings My Devices.A list of cameras displays.3. Tap or click the camera.The camera settings display.4. Tap or click Video Settings.5. Under Activity Zones, tap or click Zoom.6. Resize and position the image box as necessary.7. Tap or click Zoom.Your settings are saved.Note: To zoom an image temporarily while a camera is streaming, pinch the camera screenon your mobile device.18
View Your ContentRotate a Camera FeedYou can invert the video feed image.¾¾ To rotate the video display:1. Tap the Arlo iconon your mobile device.If you are using a computer, enter https://my.arlo.com/#/login in the address barof a browser.The Devices page displays.2. Tap or click Settings My Devices.A list of cameras displays.3. Tap or click the camera.The camera settings display.4. Tap or click Video Settings.The Video Settings page displays.5. Tap or click Rotate Image.The camera image is inverted.Cloud RecordingWith cloud recording, everything the Arlo Q cameras record is sent to the cloud forsecure storage in your library. Cloud recording is included in free and paid plans.Arlo Pro 2 cameras record when they detect motion or sound. Recordings areencrypted with the user name and password that you that create. No one else canaccess your recordings.You can access your recordings from your mobile device or from a Windows-basedor Mac computer. You can download recordings from the cloud and save them toyour mobile device or computer for long-term storage.19
View Your ContentView Recordings and SnapshotsYour Arlo Q camera stores recordings and snapshots in the library. You can use thefilter and the calender to find and view specific recordings.Use the LibraryYou can use the library to find and view recordings based on the date.¾¾ To use the library:1. Tap the Arlo iconon your mobile device.If you are using a computer, enter https://my.arlo.com/#/login in the address barof a browser.The Devices page displays.2. Tap or click Library.The calendar displays on the top of the page.3. If it is more than one month since you started recording, use the arrows oneither side of the month to select a month to view.Days on which a video clip was recorded are indicated with a green circle.4. Tap or click a highlighted date.Recordings from that date display below the calendar.20
View Your ContentUse the FilterYou can use the filter to find and view recordings based on criteria that you select.¾¾ To use the filter to view your library:1. Tap the Arlo iconon your mobile device.If you are using a computer, enter https://my.arlo.com/#/login in the address barof a browser.The Devices page displays.2. Tap or click Library.3. Tap or click the Filter iconin the upper left corner of the page.The filter page displays.4. Tap or click the filtering criteria that you want to use.5. To remove filtering, tap or click Reset.6. Tap or click Done.The Filter iconbecomes solid green to show that you are using filtering.Recordings that match your filter selections display. Dates with recordings arehighlighted in dark green.Turn Off the FilterThe Filter iconon the Library page is solid green when you are using filtering.When filtering is used, only the recordings in your library that match your filtercriteria display. You can turn off filtering.¾¾ To turn off filtering for your library:1. Tap the Arlo iconon your mobile device.If you are using a computer, enter https://my.arlo.com/#/login in the address barof a browser.The Devices page displays.2. Tap or click Library.21
View Your Content3. Tap or click the Filter iconin the upper left corner of the page.The Filter page displays.4. Tap or click Reset at the bottom of the page.Filtering is turned off. The Filter iconfiltering is not in use.becomes an outline to show thatShare and Manage Library RecordingsYou can download recordings, mark them as favorites, share, and donate them.Download Recordings¾¾ To download a clip from the library:1. Tap the Arlo iconon your mobile device.If you are using a computer, enter https://my.arlo.com/#/login in the address barof a browser.The Devices page displays.2. Tap or click Library.The Library page displays.3. Tap or click a snapshot or video.4. Tap or click.5. Tap or click OK to confirm.The file you selected is downloaded.Add a Recording to Your Favorites¾¾ To add a recording to your favorites:1. Tap the Arlo iconon your mobile device.If you are using a computer, enter https://my.arlo.com/#/login in the address barof a browser.The Devices page displays.22
View Your Content2. Tap or click Library.The Library page displays.3. Tap or click a snapshot or video.4. Tap or click.Share Recordings¾¾ To share a recording:1. Tap the Arlo iconon your mobile device.If you are using a computer, enter https://my.arlo.com/#/login in the address barof a browser.The Devices page displays.2. Tap or click Library.The Library page displays.3. Tap or click a snapshot or video.4. Tap or click.5. Share the file.Donate Recordings for ResearchYou can donate video or snapshot files to Arlo Technologies to use for researchand development of Arlo products.¾¾ To donate a recording:1. Tap the Arlo iconon your mobile device.If you are using a computer, enter https://my.arlo.com/#/login in the address barof a browser.The Devices page displays.2. Tap or click Library.The Library page displays.3. Tap or click a snapshot or video.23
View Your Content4. Tap or click.5. Tap or click OK to confirm.The file is sent to Arlo.Delete Recordings¾¾ To delete a recording:1. Tap the Arlo iconon your mobile device.If you are using a computer, enter https://my.arlo.com/#/login in the address barof a browser.The Devices page displays.2. Tap or click Library.The Library page displays.3. Tap or click a snapshot or video.4. Tap or click.5. Tap or click OK to confirm.The file is deleted.24 page
11. Plug in your camera and wait until the light is blinking amber. A slow blinking amber LED indicates that the camera is powered on and is ready for setup. 12. Tap or click Continue. 13. Enter the name and password for the WiFi network that you want your camera to connect to. 14. Tap or click Continue. 15.