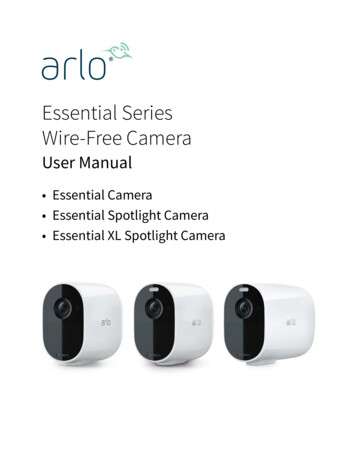
Transcription
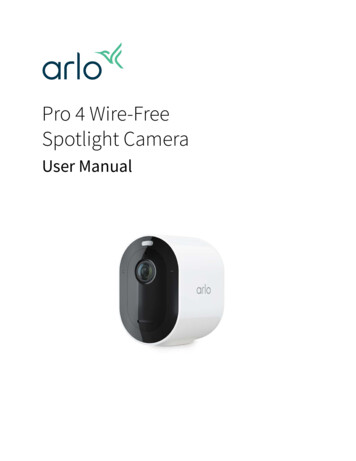
Pro 4 Wire-FreeSpotlight CameraUser Manual
Contents1.Get to Know Your Camera6Get the Arlo app. 6Meet your Pro 4 Spotlight Camera. 6Accessories. 72.Get Started8Use the Arlo app. 8Insert the battery. 8Check the LED. 9Find a good location for your camera. 9Wall-mount your camera with the magnetic mount. 9Install an optional outdoor mount (sold separately). 11Install an XL rechargeable battery and housing (sold separately) 12Install an Anti-Theft Mount (sold separately). 13Check your camera’s field of view. 14Position your camera to detect motion in specific areas. 15Test motion detection. 17Arm your camera. 17HEVC 2K playback-supported devices. 173.WiFi Setup and Connections19WiFi connection options for your camera. 19Tips for optimal WiFi performance. 19Connect your mobile device to a 2.4 GHz WiFi network during setup 20Connect an optional Arlo SmartHub. 21Connect an optional Arlo Base Station with Siren. 22Move your camera’s WiFi connection to a SmartHub or base station 24Move your camera’s WiFi connection to a direct router connection 244.Use your Pro 4 Spotlight Camera26Turn the camera spotlight on and off manually. 27Foresight. 28Record clips from live video. 282
Pro 4 Spotlight CameraTake a snapshot from live video. 29CVR with an optional Arlo SmartHub or base station . 29Customize your camera feed image. 29Motion detection activity zones. 302-Way Audio. 31Turn the camera siren on and off manually. 32View recordings and snapshots. 32Download recordings. 335.Modes, Rules, and Alerts35Arm or disarm all your Arlo devices. 35Select a mode. 36Mute Notifications. 36Rules for modes. 37Change motion sensitivity. 37Automatically stop recording when motion stops. 37Control whether the spotlight turns on when motion is detected at night 38Change audio sensitivity. 38Use a rule to activate the the camera’s siren. 39Add a rule with an optional base station siren trigger. 39Manage alerts. 40Schedule when your camera is armed. 40Set up Arlo Geofencing. 41Geofencing with multiple mobile devices. 43Detect audio alarms with your camera. 466.Access Your Arlo Account50Two-step verification. 50Use face or fingerprint authentication. 52Customize your profile. 53Change your Arlo password. 53Reset a forgotten password. 54Grant access to friends. 547.Change Your Settings57Camera settings. 57Contents3User Manual
Pro 4 Spotlight CameraVideo Settings. 58Change the audio settings. 62Adjust the flicker setting. 62Restart the camera from the Arlo app. 62View device information. 63Remove a device from your account. 638.SmartHub or Base Station USB Storage64View the USB storage device status. 65View available USB device storage. 65Turn USB recording off and on. 66Turn local 2K recording off and on. 66Change the USB device overwrite setting. 66Format a USB device. 67Safely eject a USB storage device. 67View videos on a USB device. 679.SmartHub SD Card Storage69Insert a microSD card. 69View the SD card status. 70View available SD card storage. 70Turn SD card recording off and on. 70Turn on Best Local Recording. 70Change the SD card overwrite setting. 71Format a microSD card. 71Safely eject an SD card. 71View videos on a microSD card. 7210. Arlo Connect73Use Arlo with Amazon Alexa. 73Add your camera to the Google Assistant app. 74Use Arlo with IFTTT. 7511. Arlo Rechargeable Battery76Charge your camera battery. 76Charge batteries in the Arlo Dual Charging Station (sold separately) 76Replace a Pro 4 Spotlight Camera battery. 77Contents4User Manual
Solar Panel charging. 78Battery life. 79Safe handling and usage guidelines for removable and rechargeable batteries12. Troubleshooting8082Scan a QR code during setup. 82Optimize multiple 2K streams. 83Troubleshoot Arlo Geofencing. 83Can’t see video streams in a browser. 84Not receiving push notifications for Arlo alerts. 85Arlo Smart Alarm Detection isn’t working. 865
1. Get to Know Your CameraRest easy knowing your home is protected, whether you’re there or away with Arlo Pro 4.With no wires, your camera connects directly to your WiFi network so you can easily install inminutes. See more details with color night vision, an integrated spotlight, and a wider field ofview.Get the Arlo appDownload the Arlo app. The Arlo app lets you create an Arlo account in the cloud and set upand manage all your Arlo devices.Note: If you already use the Arlo app, make sure that you’re using the latest version. To findout if an update is available, go to the app store and search for Arlo.Meet your Pro 4 Spotlight CameraYour camera consists of two parts: the camera with a battery compartment, and the housing.6
Pro 4 Spotlight CameraPro 4 Spotlight Camera features 2K video with HDR. Zoom in on objects and see clearer details and colors in 2K HDR. Color night vision. See what’s lurking with color night vision or black and white. Integrated spotlight. Light up the night and ward off unwelcome guests. Fast and easy wire-free set up. Magnetic mount makes it easy to install and adjust. 160 degree view. Keep an eye on more of what matters with a wider field of view. Magnetic charging. Fast charging cable easily snaps into place. 2-Way Audio. Hear and speak to visitors clearly with superior audio quality. Built in smart siren. Trigger your siren remotely or automatically during an event. Rechargeable battery. Convenient and long-lasting takes the expense out of security.AccessoriesYour Pro 4 Spotlight Camera works with these accessories, which are sold separately: SmartHubs and base stations. You can connect the camera with WiFi to an Arlo SmartHubVMB5000 or VMB4540, or an Arlo base station VMB4500 or VMB4000. See WiFi connectionoptions for your camera on page 19. Additional charging options: Solar Panel Charger. Connect an Arlo Solar Panel charger to your camera and harvestpower from the sun to keep your camera battery charged. See Solar Panel charging onpage 78. Rechargeable battery. Keep fully charged spare batteries (sold separately) on hand. Dual Charging Station. Quickly charges up to two batteries at the same time. For moreinformation, see Charge batteries in the Arlo Dual Charging Station (sold separately) onpage 76. Magnetic charging cable. Longer 8’ magnetic charging cable . Outdoor power cable. An outdoor weather-resistant cable that powers your camerainstead of using batteries XL Battery & Housing. Upgrade your Arlo Pro 4 with a high-capacity battery. Anti-Theft Mount. Lockable mount prevents the camera from being rotated and removed.Get to Know Your Camera7User Manual
2. Get StartedUse the Arlo appThe free Arlo app helps you complete setup and guides you through theinstallation process.1. Open the Arlo app and connect to your WiFi network.If you don’t have the app, you can download it and create your Arloaccount.Once you set up your Arlo account, you can access it from the Arloapp on a smartphone or tablet, or from a computer using a web browser. If you’re using acomputer, enter https://my.arlo.com/#/login in the address bar of the browser.2. Open the Arlo app and connect to your WiFi network. Then select Add New Device andadd your camera.Insert the batteryThe Pro 4 Spotlight Camera consists of two parts. The camera part is where you insert thebattery. The housing protects the camera.Note: The battery comes partially charged. We recommend that you fully charge the batterybefore using your camera. See Charge your camera battery on page 76.To insert the battery:1. Align the battery and insert it into the batterycompartment.The battery only inserts one way.The LED on the camera blinks blue.2. Insert the camera into the camera housing bypushing down on both the left and right sides ofthe camera until it clicks into place.8
Pro 4 Spotlight CameraCheck the LEDThe camera LED lights when the camera is powered on. The LED changes color and blinksdepending on the battery charge and to indicate the status of activities such as pairing thecamera and updating the camera firmware. Slow blinking blue. The camera is in the process of pairing with the SmartHub. Fast blinking blue. The camera paired with the SmartHub. Blinking amber. The camera is out of range, a connection error occurred during pairing, orthe camera battery charge is low (15% or less). Alternating blue and amber. The camera failed to pair with the SmartHub, or a firmwareupdate is in process, or a reset is in process.Find a good location for your cameraSelect a location for your camera with a clear vantage point to fully optimize the wide fieldof view. For the best experience, choose a location with a strong WiFi signal. You can checkthe WiFi signal strength in the Arlo app. For information about WiFi connections, see WiFiconnection options on page 19.Wall-mount your camera with the magneticmountYour Pro 4 Spotlight Camera comes with a magnetic-based camera mount. The mount has abuilt in groove where you can hide your cable and provide strain relief if you want to keep thecamera mounted and plugged into a wall source.To install a magnetic mount:1. Select a location for the mount up to 6.5 feet(1.9 meters) high.*2. Fasten the mouting screw into a wall.If you’re working with drywall, use the plasticdrywall anchor that we provide.Use the plastic stopper to help guide how farto screw it into the wall.*At 6.5 feet (2 meters) or higher, we recommend using the Arlo Outdoor Mount.Get Started9User Manual
Pro 4 Spotlight Camera3. If you’re using your camera connected to a charging cable, wrap the excess charging cablearound the back of the mount.4. Snap the magnetic mount onto the screw and the stopper.The mount clicks into place.5. Attach your camera to the wall mount.The magnet in the mount holds the camera onto the mount.6. Adjust the camera to your preferred viewing angle.Note: You can replace the battery in your camera without removing the camera housing fromthe mount.Get Started10User Manual
Pro 4 Spotlight CameraInstall an optional outdoor mount(sold separately)1. Place the outdoor mount and secure it with screws.If you’re mounting the camera on drywall, use the drywall anchors we provide.2. Attach the camera to the mount.3. Adjust the camera angle.Get Started11User Manual
Pro 4 Spotlight CameraInstall an XL rechargeable battery and housing(sold separately)1. Place the outdoor mount and secure it with screws.For drywall, use the wall anchors we provide.2. Release the camera from the camera housing.Press the button on the charging port underneath the camera. The camera clicks as itdisengages from the camera housing.3. Pull the camera all the way out of the camera housing.4. Insert the XL Battery into the camera and then slide the camera and battery into the XLHousing.Get Started12User Manual
Pro 4 Spotlight Camera5. Attach the camera to the outdoor mount and swivel to adjust the camera angle.Install an Anti-Theft Mount (sold separately)1. Place the wall plate against the wall, with the arrow pointing up, and secure it with screws.Note: If you are mounting your Anti-Theft Mount on drywall, we recommend using theincluded wall anchors.2. Release the camera from the camera housing.Press the button on the charging port underneath the camera. The camera clicks as itdisengages from the camera housing.3. Pull the camera all the way out of the camera housing.4. Insert your camera with its battery into the Anti-Theft Mount housing.5. To attach the housing to the wall plate:Get Started13User Manual
Pro 4 Spotlight Camera Align the small screw on the mount and the dot on the wall plate. Turn the housing clockwise, until it clicks in place. Use the security key to tighten the small screw.Note: The security key came in the package with your Anti-Theft Mount.6. Adjust your camera position, then finger-tighten the mount lock (clockwise) to lock thecamera in position.Note: To release your camera from the housing, insert the security key in the security keyholeand turn the key clockwise.Check your camera’s field of viewThe field of view is the area in which the camera can detect motion. You can set the field ofview to Full (110 degrees), Wide (125 degrees), or Super Wide (160 degrees).Get Started14User Manual
Pro 4 Spotlight CameraArlo automatically corrects the image to reduce the fisheye effect for each field of viewsetting.Change the field of viewYou can set the field of view to Full (110 degrees), Wide (125 degrees), or Super wide (160degrees).110 125 160 1. Open the Arlo app.2. Tap Settings My Devices.3. Select the camera.4. Tap Video Settings Video Mode.5. Tap a field of view to automatically apply it to your camera.Position your camera to detect motion inspecific areasYou can mount and aim your Pro 4 Spotlight Camera in different ways to optimize thecamera’s ability to detect motion in specific areas. The lower two-thirds of the camera’s fieldof view is the motion-sensitive part of the image. Aim the camera so that any motion you wishto detect appears within this part of the image.If you want to monitor motion closer to thecamera, such as visitors to your front door,mount the camera at least 6.5 feet (1.9meters) high* and aim it so that visitorsappear in the lower two-thirds of the image.*At 6.5 feet (2 meters) or higher, we recommend using the Arlo Outdoor Mount.Get Started15User Manual
Pro 4 Spotlight CameraThis angle works well to avoid motion alerts for movement in the top third of the image, suchas vehicles driving by.To monitor motion occurring farther away,such as children playing on a lawn, aim thecamera higher to frame the area within thelower two-thirds of the image.It’s best to position the camera so that motionis moving from side-to-side across its fieldof view rather than directly toward or awayfrom the camera. Also, though the camera candetect motion up to 25 feet (7.6 meters) away,the best area for motion detection is 5 to 20feet (1.5 to 6 meters) from the camera position.Use camera positioning to aim your cameraCamera positioning is available only when the camera is not streaming, recording motion, orusing the Motion Detection test. During camera positioning, the camera streams video as fastas possible, without buffering. You can aim your camera while watching on your smartphoneand making near real-time adjustments to the camera position. This means that you mightsee lower-quality video while you are positioning your camera.To position your camera:1. Open the Arlo app.2. Tap Settings My Devices.3. Select the camera.4. Tap Device Utilities Camera Positioning.The camera starts streaming video. The signal strength bar indicates the WiFi signal thatyour camera is receiving at its current location.Get Started16User Manual
Pro 4 Spotlight CameraTest motion detectionYou can use the motion detection test to find the right motion sensitivity setting for yourcamera.1. Open the Arlo app.2. Tap Settings My Devices.3. Select your camera.4. Tap Device Utilities Motion Detection Test.5. Move in front of the camera.During this test, the LED blinks amber when motion is detected.6. Move the slider to adjust the motion sensitivity level as needed.This motion sensitivity setting is used during the motion detection test. It is notautomatically applied to the camera rules used by modes to arm your camera. When youare satisfied with a particular motion sensitivity level in the test, note the setting so thatyou can add it to your rules.7. Edit the rule for your camera to enter the motion sensitivity level that you want to use. SeeChange motion sensitivity on page 23.Arm your cameraWhen your camera is armed it detects sound and motion. You can control when your camerais armed using these features: Arm or disarm all your Arlo cameras and devices. See Arm or disarm all your Arlo devices onpage 35. Select a mode such as Armed, Disarmed, Schedule, or Geofencing. See Select a mode onpage 36.HEVC 2K playback-supported devicesHigh Efficiency Video Coding (HEVC) is a video compression standard that enables you todownload and stream 2K videos with ease. To use HEVC on the Arlo app, you must use asupported device and meet the minimum requirements. Your device must: Run iOS 9.0 or higher (Apple devices) Run Android 5.0 or higher (Android devices) Have the latest version of the Arlo app (for mobile)Get Started17User Manual
Pro 4 Spotlight Camera Use a web browser that supports HEVCNote: To check if your web browser supports HEVC, visit https://caniuse.com/#feat hevc.HEVC is supported on: iPhone 7/7 Plus or newer iPad Pro or newer Samsung Galaxy S7/S7 Plus or newer Galaxy Note 8 or newer Google Pixel/Pixel XL or newer Huawei P9 or newer Xiaomi Mi 5 or newer LG G5 or newer HTC U10 or newer Sony Xperia X or newer Moto Z or newer OnePlus 3 or newer.Get Started18User Manual
3. WiFi Setup and ConnectionsWhen you install and set up your camera, the Arlo app guides you through the process ofconnecting the camera to your router’s 2.4 GHz WiFi network or to an optional Arlo SmartHubor base station.WiFi connection options for your cameraWhen you install your camera you can connect it directly to your router’s 2.4 GHz WiFi band, oryou can connect the camera with WiFi to an Arlo SmartHub VMB5000 or VMB4540, or an Arlobase station VMB4500 or VMB4000.An Arlo SmartHub or base station isn’t included in the package with your camera. They aresold separately. Using your camera with a SmartHub or base station gives you access to theseadditional features: 2K local streaming and 2K local recording Auto Zoom and Tracking CVR (with a subscription) Use local storage on an SD card in a VMB5000 SmartHub or on a USB storage deviceconnected to the SmartHub VMB4540 or base station VMB4500 or VMB4000. Use remote access for SmartHubs VMB5000 and VMB4540.After you install and set up your camera, you can move its WiFi connection from your routerto a SmartHub or base station. You can also move your camera’s WiFi connection from aSmartHub or base station and connect it directly to your router’s 2.4 GHz WiFi band. To dothis, you must remove the device from your account and reinstall through the Arlo app,selecting the appropriate option to move back and forth.Tips for optimal WiFi performanceThe distance between WiFi devices can affect the WiFi signal: Maximum recommended distance. We recommend that you place your floodlgiht within300 feet (90 meters) of your WiFi router. The maximum line-of-sight range of 300 feet isreduced by each wall, ceiling, or other major obstruction between the camera and therouter.19
Pro 4 Spotlight Camera Minimum recommended distance. To reduce WiFi interference, allow at least 6½ feet (2meters) between your camera and any Arlo cameras that you install.These materials can reduce WiFi signal strength if they are located between WiFi devices: Unusually thick walls and ceilings Brick Concrete Stone Ceramic Glass, especially mirrors Metal Large quantities of water, such as the water in a fish tank or water heaterConnect your mobile device to a 2.4 GHz WiFinetwork during setupIf you’re connecting your camera directly to your router’s WiFi network, it’s important tounderstand that your mobile device must connect to the same WiFi network as the cameraduring setup.Your camera can only connect to a 2.4 GHz WiFi network. Many routers broadcast WiFinetworks in both 2.4 GHz and 5 GHz bands, so your phone might connect to the 5 GHz WiFiband. During setup, connect your phone to your 2.4 GHz WiFi network, then connect yourcamera to that same 2.4 GHz WiFi network.Find your 2.4 GHz WiFi network name and passwordYour phone might connect to your 5 GHz WiFi network most of the time. If you’re not sureabout how to find the 2.4 GHz WiFi network: Look on your WiFi router label.Many routers have a label that shows the WiFi network name, which is also called an SSID.Your 2.4 GHz network name might have a 2, 2.4, or 2G at the end. Your 5 GHz networkname might have a 5 or 5G at the end. If you changed your WiFi settings, then check theplace where you saved your custom settings. If your WiFi network name or SSID doesn’t indicate whether it’s 2.4 GHz or 5 GHz, ask yourinternet service provider (ISP) or the person who set up your WiFi router. If you have a mesh WiFi network, it uses only one WiFi network name for both WiFi bands.The camera finds and connects to the 2.4 GHz WiFi band. As long as you connect yourphone to the same mesh network, Arlo can discover the camera.WiFi Setup and Connections20User Manual
Pro 4 Spotlight CameraConnect your iOS (Apple) device to a 2.4 GHz network1. Unlock your device and tap Settings.2. Tap Wi-Fi, near the top of the list of Settings options.3. Turn on WiFi by tapping the switch next to Wi-Fi at the top.Note: WiFi is activated when the switch is green.4. Select a 2.4 GHz WiFi network.This is commonly indicated by a 2, 2.4, or 2G at the end of the network name.
Color night vision. See what’s lurking with color night vision or black and white. Integrated spotlight. Light up the night and ward off unwelcome guests. Fast and easy wire-free set up. Magnetic mount makes it easy to install and adjust. 160 degree view. Keep a