Transcription
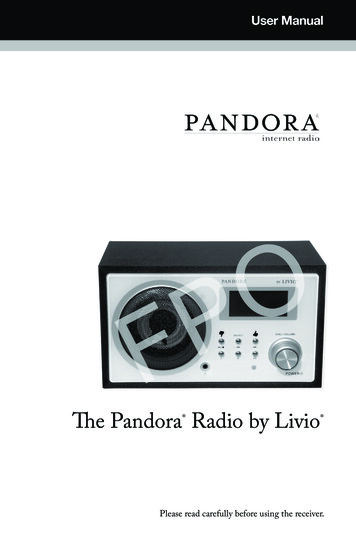
User ManualThe Pandora Radio by Livio Please read carefully before using the receiver.
Table of ContentsAbout Pandora About Pandora . . . . . . . . . . . . . . . . . . . . . . . . . . . . . . . . . . . . . . . . . . . . . . . . . . . . . . . . . . . . . . . . . . . . . . . . . . . . . 2When was the last time you fell in love witha new artist or song?Panodra Radio Controls . . . . . . . . . . . . . . . . . . . . . . . . . . . . . . . . . . . . . . . . . . . . . . . . . . . . . . . . . . . . . . . . . . . 3Remote Control . . . . . . . . . . . . . . . . . . . . . . . . . . . . . . . . . . . . . . . . . . . . . . . . . . . . . . . . . . . . . . . . . . . . . . . . . . . . 4Setting Up . . . . . . . . . . . . . . . . . . . . . . . . . . . . . . . . . . . . . . . . . . . . . . . . . . . . . . . . . . . . . . . . . . . . . . . . . . . . . . . . . 6Using the Pandora Radio . . . . . . . . . . . . . . . . . . . . . . . . . . . . . . . . . . . . . . . . . . . . . . . . . . . . . . . . . . . . . . . . . . . 9Troubleshooting . . . . . . . . . . . . . . . . . . . . . . . . . . . . . . . . . . . . . . . . . . . . . . . . . . . . . . . . . . . . . . . . . . . . . . 12At Pandora, we have a single mission: To play music you’ll love – and nothing else.To understand just how we do this, and why we think we do it really, really well, you needto know about the Music Genome Project. Since we started back in 2000, we have been hard at work on the Music Genome Project.It’s the most comprehensive analysis of music ever undertaken. Together our team offifty musician-analysts has been listening to music, one song at a time, studying andcollecting literally hundreds of musical details on every song. It takes 20-30 minutes persong to capture all of the little details that give each recording its magical sound – melody,harmony, instrumentation, rhythm, vocals, lyrics . and more – close to 400 attributes!We continue this work every day to keep up with the incredible flow of great new musiccoming from studios, stadiums and garages around the country.With Pandora you can explore this vast trove of music to your heart’s content. Justdrop the name of one of your favorite songs or artists into Pandora and let the GenomeProject go. It will quickly scan its entire world of analyzed music, almost a century ofpopular recordings – new and old, well known and completely obscure – to find songswith interesting musical similarities to your choice. Then sit back and enjoy as it creates alistening experience full of current and soon-to-be favorite songs for you.You can create as many “stations” as you want. And you can even refine them. If it’s notquite right you can tell it so and it will get better for you.Software Licence informationThis product contains software licensed under version 2 of the GNU publiclicense and version2.1 of the GNU Lesser Public License. The source codefor this software is available from: http://www.reciva.com/gpl. This productincludes technology owned by Microsoft Corporation and under a licence fromMicrosoft Licensing GP. Use or distribution of such technology outside of thisproduct is prohibited without a license from Microsoft Corporation and/orMicrosoft Licensing, GP as applicable.The Music Genome Project was founded by musicians and music-lovers. We believein the value of music and have a profound respect for those who create it. We like allkinds of music, from the most obtuse bebop, to the most tripped-out drum n’ bass, to thesimplest catchy pop tune. Our mission is to help you connect with the music YOU like.We hope you enjoy the experience!2
Pandora Radio ControlsRemote Control123213457698104567158131716119Pandora Controls3101412(1) PowerPress to switch the internetradio ON/OFF.(10) VOL -Use to adjust the volume.(2) MutePress to mute the voice.(11) UP\DOWNUse to search for stations,and use to change the optionshow on the display.(3) ReplyReserved for future services.(12) BrowsePress to view the name ofthe track currently playingand then turn the dial to seethe list of tracks waiting inthe play queue.(4) 0---9Numeric buttons for Storeand Recall functions.(13) Play/PausePress to play/pause playback.(5) StoreUse to store 100 (0-99)radio stations.(14) StopPress to stop playback, witha track name displayed, pressand hold to delete the track.Other Key Features(1) Thumbs downPress when you dislikethe song being played(4) Headphone JACKConnect headphones forprivate listening here(2) skip trackPress to skip thenext track(5) powerPress to turn the PandoraRadio on or off(3) thumbs upPress when you like thesong being played(6) favoritesPress to mark a song asfavorite for preferred play(7) back menucommandFor use in the Menumode(6) RecallUse to Play up the pre-setting stations.(15) PREVPress to start playback at theprevious track.(8) volume/menuselectTurn to adjust volumeor select station when inMenu mode(7) --/-Select the numeric bits (16) NEXTPress to start playback at thenext track.Connect an ethernet cablehere to wired internet use(8) SelectPress to select a displayedoption (17) MODE(9) ethernet jackPress to switch Repeat ON/OFF and Shuffle ON/OFFmode.(10) dc power jackConnect included powersupply here(9) BackPress to go back to theprevious display.4
Setting UpStep 1: Switching on the RadioPlug the cable from the AC adaptor into thesocket labeled 9V DC on the back of the radio,then switch on at the mains.The display on the front of the radio will lightup and say:Re c v i a R a d i oPOARM P o w e re dFafter a few seconds, this will change to show:Connecting toNe t w o r kStep 2: Connect to the NetworkNOTE: At first, you need to select network;(1) Press the SELECT button;(2) Turn the dial until the display says “Configure”;C o n f i g u re(3) Press the SELECT button;(4) Turn the dial until the display says “Network Config”;Ne t w o r k C o n f i gCautionUse only the mainadaptor supplied withthe radio. Connectinga power supply witha different ratingwill cause permanentdamage to theradio and may behazardous.(5) Press the SELECT button;(6) Turn the dial until the display says “Wired/Wireless”;Wired/ Wireless(7) Press the SELECT button;(8) Turn the dial until your appropriate equipment;AutoWired OnlyWireless OnlyIf you select Auto, it will be select automatically.If you select Wired Only, It will be only used for Wired Ethernet.If you select Wireless Only, It will be only used for Wireless Wi-Fi connection.(9) W hen the ESSID for the access point you want to connect to be displayed on thescreen, press the SELECT button. You might need to enter the correct WEP (WiredEquivalent Privacy) or WPA (Wi-Fi Protected Access) code. If your network is notconfigured to need a WEP or a WPA code, the display will show:Network OKIf the screen displays:OPFEncryption Key R equiredThen the network is using one of the encryption systems: Wired Equivalent Privacy(WEP) or Wi-Fi protected Access (WPA). You therefore need to enter the correctWEP or WPA code into the radio for it to communicate with you network.After 3seconds the display goes into the code entry mode or press SELECT. To enterthe code, use the dial to select each character of the code in turn, pressing the SELECT56
Setting UpUsing the Pandora Radiobutton after each character.Listening to your Pandora RadioMake sure the character you want is shown in the centre of the display to be able toselect it.(1) With Station the highlighted menu, press the SELECT button.WEP and WPA codes are case sensitive to upper and lower case characters so youmust enter them exactly.After the final character, use the dial to select END and press the SELECT key. { } END 0 S tations Or if the screen does not display stations , turn the dial until it does and then pressthe SELECT button.(2) Turn the dial to choose from Location or Genre . Location enables you to choose a station from a particular country.The display shows “Connecting to network” as the radio connects to the network: Genre enables you to choose radio stations according to their content, forexample 90s, Classical, Dance or Rock.Connecting to Network Then it will be displayed:L ocation ORNe t w o r k O K You may see a message saying Station Update From Reciva . This indicates thatsome new radio stations may be available since you last connected, or others may haveceased to broadcast. The list of available stations will change.Genre (3) P ress the SELECT button to choose the option you want: The display will show thenumber of stations that are loading. The 1st station name will be displayed – stationsare listed alphanumerically.(4) P ress SELECT button for the stations you would like to listen. The display will show Station Selected Buffering x% while the station are buffering.When you are listening to a particular station, the following information will show onthe display:For example:BBC Radio 1(Station Name)32 kbps WMA(Transmission Information)Real Enabled(Media player capabilities)78
Using the Pandora RadioChanging the VolumeYou can change the volume by turning the dial clockwise to increase the volume andanticlockwise to decrease the volume. The display shows the volume bar. You cannotchange the volume when you are in a menu or when the radio is connecting to a station.Configuration Options Network Config Enables you to configure your radio’s network settings, scan again for a connectionto another wireless network, or to manually configure the network parameters. Thisis useful if you take the Internet radio to another building where you want to use. Version Displays the versions numbers of the various parts of software the hardware on youInternet radio. Upgrade Firmware Use this option to download new firmware for the radio from the Reciva portalon the internet. If there is new firmware available, the radio will prompt you ifyou want to download it or not. Note, at this stage, you can press the radio’s BACKbutton to cancel the radio beginning a firmware upgrade. A firmware upgrade maytake several minutes, so do no switch off the power to the radio until the operationis complete otherwise the radio may become permanently damaged. Language Allows you to change the display language. Factory Reset Puts all the setting back to their default as they were when they left the factory.If you perform a factory reset on your radio you will loss all you presets and yourwireless network connection. Register This will display a key that can be used to register the radio on the RecivaCustomer portal. Clock Use this option to set the time, to set an alarm and to view the current alarmsetting, see’’ Setting the clock’’, ‘’Setting the alarm’’. Sleep Timer Selecting this option will enable the Internet radio to switch itself off after aset period.(1) After selecting the ‘Sleep Timer’ menu item, the radio will display:‘Sleep Timeout’ and the sleep timer value in the form ‘00:00:00’(hours:minutes: seconds).(2) Rotate the knob to change to sleep timer value and then press SELECT to beginthe sleep timer.(3) The radio will continue to play as normal, but it will go into standby mode afterthe sleep timer has expired.(4) To turn the radio back on again, simply press the ON/OFF button. Backlight Selecting this option will alter the internet radio’s backlight values.(1) After select the ‘Backlight’ menu item, the radio will display its list of threemenu modes: ‘Inactive’, ‘Active’ and ‘Standby’. These three states areexplained below:‘Inactive’ state when there is no user activity for 30 seconds.‘Active’ state is when there is user activity.‘Standby’ is the state when the radio has been turned off(2) Rotate the knob to highlight the desired menu mode and press SELECT.(3) The radio will now display the current backlight value for the menu mode.You can alter this value by rotating the knob to increase or decrease it.Storing a Radio Station in a Preset by the Panel ControlWhen a radio station is playing, just hold down one of the preset buttons to store thestation (e.g. to store preset1: press and hold the preset).A s s i g n e d t o Pre s e t 1Playing a preset radio station when a radio station is playing, briefly press the PRESETbutton (I, II, III) for the station you want.Configure MenuChoosing the option you want from the Configure Menu(1) Press the SELECT button. (NOTE: If you make a mistake at any point ,press BACKbutton to go back to the previous screen.)(2) Turn the knob until ‘Configure’ is displayed(3) Press the SELECT button.(4) Turn the knob until the display shows the option you want.(5) Press the SELECT button to choose the option shown on the display. The options areexplained in the table to the right.910
Troubleshooting(1) If you have trouble connecting the radio to your wirelessnetwork, these steps may help to resolve the problemConfirm that a Wi-Fi or Ethernet Wired connected PC can access the internet (i.e.can browse the web) using the same network. Check that a DHCP server is available,or that you have configured a static IP address on the radio. Check that you firewall isnot blocking any outgoing ports. As a minimum the radio needs access to UDP andTCP ports 80,554,1755,5000, and 7070.Some access points may be set so that only equipment with registered MACaddresses can connect to them. This is one possible cause of the Internet Radiobeing unable to connect to the Wi-Fi network, and the Internet Radio displaywill show Bad ESSID or key. To overcome this problem you will need to add theInternet Radio’s MAC address to the list of allowed equipment in your access point.The Internet Radio’s MAC address can be found using the menu item Configure Network Config - View Config - MAC address. You will need to refer to theguide for you Access Point in order to enter the Internet Radio as an allowed pieceof equipment. If you have an encrypted network, check that you have entered thecorrect key or passphrase into the radio. Remember that text-format keys are casesensitive.If your wireless network name(ESSID) is ‘Hidden’(a setting on the wireless accesspoint), then you can either turn on the name, or you can manually enter the nameinto the internet radio and media player, Select Configure, Select network, EnterESSID. Confirm if the Network is encrypted, e.g. requires a WEP or WPA key, thenenter the network name.Still need help? Go to www.livioradio.com/helpPC, use the form at http://www.reciva.com/station/add station.asp to notify us so thatwe can change the station data that is used by the radio.If you have a laptop, try connecting it if your Internet Radio cannot find the station.(3) If the Internet Radio keeps re-buffering radio station:The Internet Radio is streaming the data from the radio station via your broadbandconnection, if there is a high error rate on your broadband connection, or theconnection is intermittent, then it will cause the Internet Radio to pause until theconnection is re-established and it has received enough data to start playing again.If your Internet Radio keeps stopping, please check the DSL modem to ensure thatthe Broadband line is not suffering a high error rate or disconnections. If you areexperiencing these problems, you will need to contact your broadband supplier.(4) What is Buffering?When playing a stream, the Internet Radio/Media player, downloads a small amountof the stream before it starts playing. This is used to fill in any gaps in the stream thatmay occur if the internet or the wireless network is busy.The Internet Radio streams music data from the PC while you are listening. If astream gets blocked or experiences Internet congestion while transferring it maystop/interfere with the quality of play. If this happens, check your internet connectionspeed- it must be faster than the speed of the streams.(2) If your radio can connect to the network successfully,but is unable to play particular stations, it may be due toone of the following reasons:The station is not broadcasting at this time of the day (remember it may be located ina different time zone). The station has too many people trying to attach to the radiostation server and the server capacity is not large enough. The station has reached themaximum allowed number of simultaneous listeners. The station is not broadcastinganymore.The link on the radio is out of date. This is updated automatically every day, so thenext time you turn on the link will be recognised. The internet connection betweenthe server (often located in a different country) and you is slow. Some internet serviceproviders may fail to stream in certain geographical areas. Try using a PC to playback the stream via the broadcaster’s web sit. If you can play back the station with a1112
Caution:(1) 15.21 statement:changes or modifications not expressly approved by the party responsible for compliancecould void the user’s authority to operate the equipment.(1) 15.105 statement:This equipment has been tested and found to comply with the limits for a Class B digitaldevice, pursuant to Part 15 of the FCC Rules. These limits are designed to providereasonable protection against harmful interference in a residential installation. Thisequipment generates, uses and can radiate radio frequency energy and, if not installed andused in accordance with the instructions, may cause harmful interference to radiocommunications. However, there is no guarantee that interference will not occur in aparticular installation.If this equipment does cause harmful interference to radio or television reception, which canbe determined by turning the equipment off and on, the user is encouraged to try to correct the interference by one or more of the following measures:-- Reorient or relocate the receiving antenna.-- Increase the separation between the equipment and receiver.-- Connect the equipment into an outlet on a circuit differentfrom that to which the receiver is connected.-- Consult the dealer or an experienced radio/TV technician for help.The antennas used for this transmitter as shown in this filing must be installed to provide aseparation distance of at least 20 cm from all persons and must not be co-located oroperating in conjunction with any other antenna or transmitter.13
The Pandora Radio by Livio www.pandora.com 2005-2008 Pandora Media, Inc., All Rights Reserved.Pandora and the Music Genome Project are registered trademarks of Pandora Media, Inc. 2008 Livio. All rights reserved.
Storing a Radio Station in a Preset by the Panel Control When a radio station is playing, just hold down one of the preset buttons to store the station (e.g. to store preset1: press and hold the preset). Playing a preset radio station when a radio station is playing, briefly press the PRESET button (i, ii, iii) for the station you want .