Transcription
CX Cloud Agent OverviewContentsOverviewPrerequisitesCritical Domains AccessAcronymsCisco DNA Center Certified VersionsSupported BrowsersDeploying CX Cloud AgentConnecting CX Cloud Agent to CX CloudDeployment and Network ConfigurationOVA DeploymentThick Client ESXi 5.5/6.0 InstallationWeb Client ESXi 6.0 InstallationWeb Client vCenter InstallationOracle Virtual Box 5.2.30 InstallationMicrosoft Hyper-V InstallationNetwork ConfigurationSetting CX Cloud AgentSetup Using ConsoleSetup Using CLIAdd Additional Cisco DNA CentersSet Up Syslog Forwarding on Cisco DNA CenterPrerequisiteConfigure Syslog Forwarding SettingEnabling Info Level Syslog SettingsSecurityPhysical SecurityUser AccessAccount SecurityNetwork SecurityAuthenticationHardeningData SecurityData TransmissionLogs and MonitoringSecurity SummaryFrequently Asked QuestionsCX Cloud AgentDeploymentReleases and PatchesAuthentication and Proxy configuration
Secure Shell SSHPorts and ServicesCX Cloud Agent Connection with Cisco DNA CenterCX Cloud Agent Used Diagnostic ScanCX Cloud Agent System LogsTroubleshootingCollection Failure ResponsesDiagnostic Scan Failure ResponsesPortal SupportAddendumOverviewCisco's Customer Experience (CX) Cloud Agent is a modernized modular on-prem softwareplatform that unifies all existing on-prem applications into lightweight containerized microservicecapabilities. These capabilities can be installed, configured, and managed on customer premisefrom the cloud. CX Cloud Agent is a major advancement in how we create, deploy, and manageon-prem software capabilities that are tied to business offers. It expedites the monetization of newoffers, scales existing capabilities, and helps to develop next-generation services driven by bigdata, analytics, automation, Machine Learning/Artificial Intelligence (ML/AI), and streaming.CX Cloud Agent ArchitecturePrerequisitesCX Cloud Agent runs as a virtual machine (VM) and is available for download as an Open VirtualAppliance (OVA) or a Virtual Hard Disk (VHD).Requirements to deploy are: Any of the following hypervisors: VMWare ESXi version 5.5 or aboveOracle Virtual Box5.2.30Hypervisor version 2012The hypervisor should be able to host a VM which requires: 8 Core CPU16 GBMemory/RAM200GB Disk Space
For customers storing CX Cloud data in Amazon Web Services (AWS) US data centers:The CX Cloud Agent must be able to connect to the following servers, using both the FQDNand the IP address, and using HTTPS on TCP port 443:FQDN: concsoweb-prd.cisco.com/IP address: 72.163.7.113For customers storing CX Cloud data in AWS APJC data centers:The CX Cloud Agent must be able to connect to the following servers, using both the FQDNand the IP address, and using HTTPS on TCP port 443:FQDN: concsoweb-prd.cisco.com/IP address: 72.163.7.113For customers storing CX Cloud data in the AWS European data centers:The CX Cloud Agent must be able to connect to both of the following servers, using both theFQDN and the IP address, and using HTTPS on TCP port 443:FQDN: concsoweb-prd.cisco.com/IP address: 72.163.7.113FQDN: concsoweb3-prd.cisco.com/IP address: 173.38.212.48For customers using the AWS European region, connectivity to FQDN: concsowebprd.cisco.com IP address: 72.163.7.113 is required only for registering the CX Cloud Agentwith CX Cloud during initial setup. Once the CX Cloud Agenered with CX Cloud, thisconnection is no longer required.For local management of the CX Cloud Agent, port 22 should be accessible.Other notes on CX Cloud Agent: An IP will automatically be detected if DHCP is enabled in the VM environment otherwise afree IPv4 address must be assigned to the CX Cloud Agent, know about the Subnet mask forthe network, the IP of the Default Gateway and optionally the IP of the DNS serverOnly IPv4 is supported, not IPv6The certified single node and HA Cluster Cisco Digital Network Architecture (DNA) Centerversions from 1.2.8 to 1.3.3.9 and 2.1.2.0 to 2.2.3.0 are required.System events (AFM): The CCO ID given at the time of registration should have devicecontracts associated with it to raise automated TAC cases.Critical Domains AccessTo start the CX Cloud journey, users require access to the following domains.Major Domains:cisco.comcsco.cloudsplit.ioOther Domains: amics.comtiqcdn.comjquery.comAcronyms
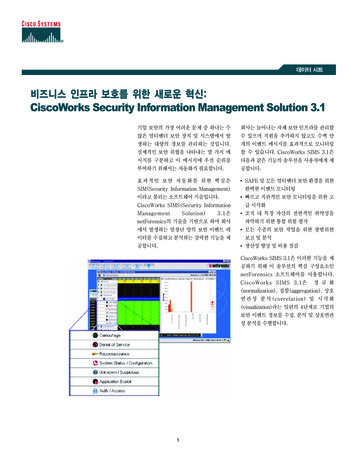
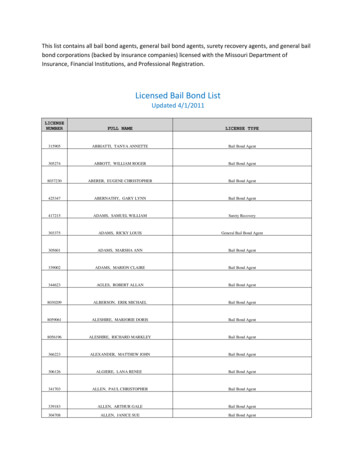
The list of acronyms used in this document are: API – Application Program InterfaceBDB – Big Data BrokerCX – Customer ExperienceDHCP – Dynamic Host Configuration ProtocolCisco DNA Center – Cisco Digital Network Architecture CenterOVA – Open Virtual ApplianceSSH – Secure Socket ShellTLS – Transport Layer SecurityVHD – Virtual Hard DiskCisco DNA Center Certified VersionsCertified single node and HA Cluster Cisco DNA Center versions are from 1.2.8 to 1.3.3.9 and2.1.2.0 to 2.1.2.6.Multi-Node HA Cluster Cisco DNA CenterSupported BrowsersFor the best experience on Cisco.com, we recommend the following browsers: Google Chrome (latest official release)Microsoft Edge (latest official release)Mozilla Firefox (latest official release)Deploying CX Cloud AgentTo deploy CX Cloud Agent:1. Click cx.cisco.com to log in to CX Cloud.2. Select Campus Network and navigate to Assets & Coverage tile.3. Click Continue Setup to start the deployment.
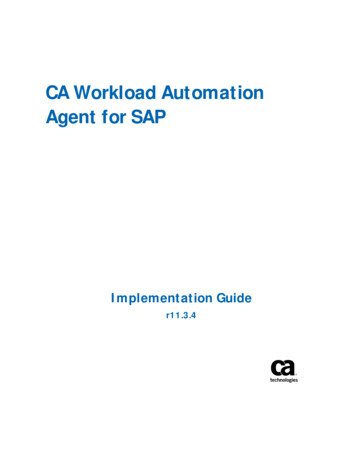
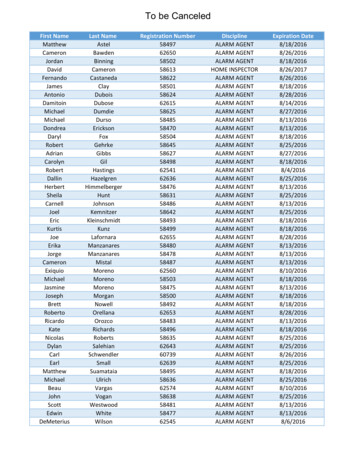
Home Page4. Read through the prerequisites and click Continue.
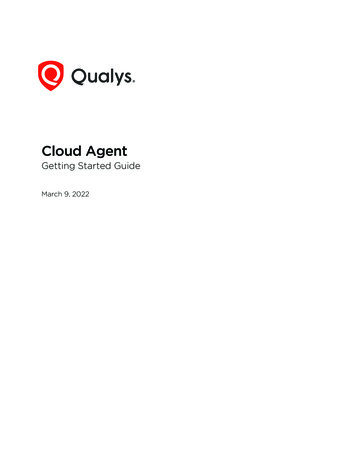
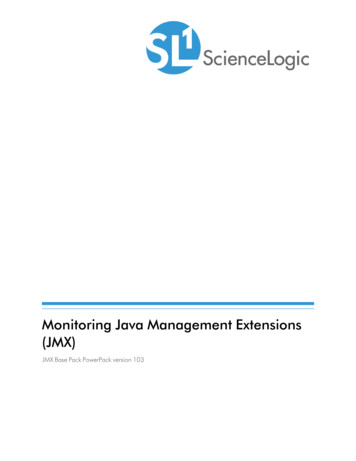
Prerequisites5. Verify the auto-populated information in the First Name, Last Name, E-mail, and COO UserId fields.6. Select the Business division’s functions.7. Indicate whether a listed government entity is applicable.8. Select the Confirmation check box to agree to the usage conditions.9. Click Accept to agree to the Encryption agreement.
Encryption Agreement10. Click Accept to accept the end-user license agreement.
End User License Agreement11. Select the format you require to install. Click Download Image to get the installation file.Your preferred data center is displayed.Download Image12. Click View step-by-step tutorial on the next screen for help deploying the set up. Thestep-by-step tutorial is explained in the Deployment and Network Configuration section. Thedownload depends on the network speed.
VM and Console TutorialConnecting CX Cloud Agent to CX Cloud1. Enter the Pairing Code that you got from the console dialog or CLI. For more info refer toNetwork Configuration.Pairing Code2. Click Configure to add the configurations for Cisco DNA Center(s) details that you haveadded using Console dialog or CLI. Refer Network Configuration.
Configure Cisco DNA Center3. Select the location from the list and you can choose either run now or schedule the collectionlater. You can schedule the ongoing Inventory collection and click Save. ClickContinue.Note: Two different assets having configured for the same IP address behind twoseparate DNA Center clusters is not supported currently.4. Cisco DNA Center is ready to use. Click Continue.5. CX Portal landing page appears. If the data is not populated on the screen within 8 to 24hrs., Contact support for the queries.
Connect Cisco DNA CenterSuccessful ConfigurationCX Portal Landing Page6. To view the configured Cisco DNA Center, navigate to Admin Settings Data Source.
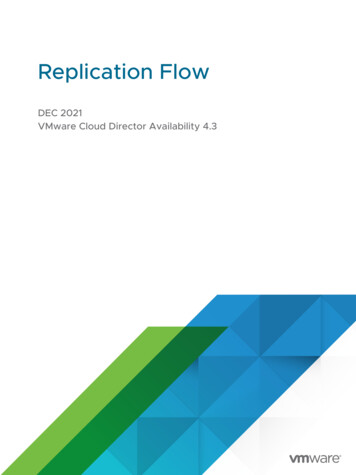
Data SourceDeployment and Network ConfigurationYou can choose any one of the below options to deploy CX Cloud Agent:Deployment Environments If you select VMware vSphere/vCenter Thick Client ESXi 5.5/6.0 go to Thick ClientIf you select VMware vSphere/vCenter Web Client ESXi 6.0 go to Web Client vSphere orCenterIf you select Oracle Virtual Box 5.2.30 go to Oracle VMIf you select Microsoft Hyper-V go to Hyper-VOVA DeploymentThick Client ESXi 5.5/6.0 InstallationThis client allows you to deploy CX Cloud Agent OVA using the vSphere thick client.1. After downloading the image, launch the VMware vSphere Client and log in using thecredentials.
Login2. Navigate to File Deploy OVF Template.vSphere Client
3. Browser to select OVA file. Click Next to proceed.OVA Path4. Verify the OVF Details and click Next to proceed.
Template Details5. Enter a Unique Name and click Next to proceed.
Name and Location6. Select Disk Format and click Next to proceed (recommended Thin Provision).
Disk Format7. Check Power on after deployment and click Finish.
Ready to Complete8. Deployment may take several minutes. Wait until you get a success message.
Deployment in ProgressDeployment Completed9. Select the virtual machine you just deployed and open the console. Go to IP Configuration.Web Client ESXi 6.0 InstallationThis client allows you to deploy CX Cloud Agent OVA using the vSphere web.1. Log in to VM Ware UI with the use of these credentials.
VMware ESXi Login2. Open Virtual Machine Create / Register VM.Create VM
OVA Deployment3. Select Deploy a virtual machine from an OVF or OVA file and click Next.4. Enter the Name of the VM, browse to select the file or drag and drop the downloaded OVAfile. Click Next.OVA Selection
5. Select Standard Storage and click Next.Select StorageDeployment Options6. Select the Deployment options and click Next.
Ready to CompleteSuccessful Completion7. Review the settings and click Finish.8. Select the virtual machine you just deployed and click Console Open browser console.
Open Console9. Navigate to Network Configuration.Web Client vCenter Installation1. Use Login to vCenter Client using the credentials.Login
Home Screen2. On the Home page click Hosts and Clusters.3. Select the VM and click Action Deploy OVF Template.Actions
Select Template4. You can either add the URL directly or browse to select the ova file and click Next.5. Enter a unique name and only if required browse to the location. Click Next.Name and Location6. Select the source and click Next.
7. Review the details and click Next.Review Details8. Select the virtual disk format and click Next.
Select Storage9. Click Next.Select Networks10. Click Finish.
11. You can see a new VM is added and to see the status click Home Tasks.12. Once installed power on the VM and open the console.
13. Navigate to IP Configuration.Oracle Virtual Box 5.2.30 InstallationThis client allows you to deploy CX Cloud Agent OVA using the Oracle Virtual Box.Oracle VM1. Open the Oracle VM UI click File Import Appliance.2. Browse to import the OVA file.Select File3. Click Import.
Import File4. Select the virtual machine you just deployed and click Start.
VM Console StartupImport in Progress
Open the Console5. Navigate to Network Configuration.Microsoft Hyper-V Installation1. Click on Import Virtual Machine as highlighted on the screen.Hyper-V Manager2. Click Next to start Import.
Introduction Screen3. Browse and select the download folder. Click Next .
Folder to Import4. Select the Virtual Machine and click Next .
Select VM5. Choose Copy the virtual machine (create a new unique ID), click Next .
Import Type6. Browse to select the folder for VM files. It is recommended to use default paths, click Next .
7. Browse and select the folder to store the VM hard disk. It is recommended to use defaultpaths, Click Next .
Folder to Store Virtual hard Disks8. Virtual Machine summary appears, if all inputs are fine, click Finish.
Summary9. After the import is completed successfully a new VM is created on Hyper-V. Open the VMsetting. Select the network adaptor on the left pane and choose the available Virtual Switchfrom the drop-down.
Virtual Switch10. Click connect as shown on the figure to start the VM.
Starting VM11. Navigate to Network Configuration.Network ConfigurationVM Console1. Click Set Password to add a new password for cxcadmin OR click Auto Generate
Password to get the new password.Set Password2. If Set Password is selected, enter the password for cxcadmin and confirm it. Click SetPassword and go to Step 3.New PasswordOR If Auto Generate Password is selected, copy the password generated and store it forfuture use. Click Save Password and go to Step4.
Auto Generated Password3. Click Save Password to use it for authentication.Save Password4. Enter the IP Address, Subnet Mask, Gateway, and DNS server, then click Continue.Network Configuration5. Confirm the entries and click Yes, Continue.Confirmation
6. If you want to set the proxy details, click Yes, Set Up Proxy. Else click No, Continue toConfiguration to complete the configuration, go to step 8.Proxy Setup7. Enter the Proxy Address, Port Number, Username, and Password. Click BeginConfiguration.Proxy Configuration8. Configuration may take 8 -10 minutes to complete.Configuration in ProgressSetting CX Cloud AgentSetup Using ConsoleUse the console option to add the Cisco DNA centers and for generating the pairing code to
proceed with cloud agent registration.1. Enter the IP/ FQDN, Username, and Password, click Add.Add Cisco DNA Center2. Click Add Another Cisco DNA Center to add one or multiple Cisco DNA Centers or clickContinue to CX Cloud to start the registration process. You can add only 10 Cisco DNACenters.Cisco DNA Center3. Click Register to CX Cloud to get the pairing code.
Register to CX Cloud4. Copy the Pairing Code and return to CX Cloud to continue the setup. Refer Connecting toCustomer Portal.Pairing Code5. If the Pairing Code expires, then click Register to CX Cloud to get the code.Code Expired
6. Click OK.Registration SuccessfulSetup Using CLIThe other option to add Cisco DNA Centers and generating the pairing code is by using the CLIoption.1. Log in to the Cloud Agent via ssh using cxcadmin user credential.2. Use the command cxcli agent addController and enter IP/ FQDN, Username, and Passwordto add cisco DNA Center.Add Cisco DNA Center CLI3. To add more cisco DNA Centers, enter Y else N to continue.
Additional Cisco DNA Center4. Generate the pairing code using the command cxcli agent generatePairingCode.Generate Pairing code CLI5. Copy the Pairing Code and return to CX Cloud to continue the setup. Refer Connecting toCustomer Portal.Regenerate Pairing Code CLI6. If the Pairing Code expires, execute the command cxcli agent generatePairingCode again
to get the fresh pairing code. Note: It is recommended to use one of the options at atime.AddAdditional Cisco DNA CentersTo add additional cisco DNAcenters after initial Cloud Agent setup, perform the following:Log in to the Cloud Agent viassh using cxcadmin credentials.Use the command cxcli agent addController and enter IP/FQDN, Username, and Password to add cisco DNA Center.To add more cisco DNACenters, enter Y else N to continue.
Add Cisco DNA Centers CLINote: You can add only 10 Cisco DNA centers.To configure thenewly add cisco DNA center(s), perform the following:Navigate to CX Cloud Settings DataSource.Click Configure for any one of the unconfigured DNACs that will take you to the nextwindow to configure all the unconfigured DNACs.Data SourcesClick Configure to set the location and collection schedule.Connect Cisco DNA Center
Select the location from the list and you can choose either run now or schedule the collectionlater. You can schedule the ongoing Inventory collection and click Save. Click Continue.Set Location and Collection ScheduleSetUp Syslog Forwarding onCisco DNA CenterPrerequisiteEnsure that you are using certified Cisco DNACenter versions from 1.2.8 to 1.3.3.9 and from 2.1.2.0 to 2.2.3.0.Configure SyslogForwarding SettingTo configure Syslog Forwarding to CX Cloud Agent in Cisco DNACenter using UI, perform the following:Launch Cisco DNA Center. Go to Design NetworkSettings Network. For each site, add the CX Cloud Agent IP as the Syslog Server.
Syslog ServerNotes:- Once configured, all the devices associated with that site are configured to send syslog withlevel critical to CX Cloud Agent.- The devices should be associated to some site for enabling the syslog forwarding from thedevice to CX Cloud Agent.- When a syslog server setting is updated, all the devices associated with that site will beautomatically set to default critical level.Enabling Info Level Syslog SettingsTomake Syslog Info Level visible, perform the following:Navigate to Tool Telemetry.Tool Menu
Click Site View Tab. Expand and select a site from site hierarchy.Site ViewSelect the required site and select all devices using the check box before Device name andunder Actions select Optimal Visibility.ActionsSecurityPhysical SecurityYou need to deploy CX Cloud Agent OVA imagein a secured VMWare server firm. The OVA is shared securely through cisco softwaredownload center.Bootloader (Single user mode) password is set with a randomly uniquepassword. Users must refer to FAQ to set this bootloader (single-user mode)password.User AccessCustomer cloud (User) uses the CX Cloud Agent APIs exposed toaccess the features/functionalities of the CX Cloud Agent.User can log in to the applianceonly through ssh.Account SecurityOn deployment, cxcadmin user account is created.User is forced to set a password for the same during the initial configuration.cxcadminuser/credentials are used to access both the CX Cloud Agent APIs and to connect theappliance over ssh.cxcadmin user has restricted access with least privileges. cxcadminpassword follows the security policy and is one-way hashed. It has an expiry period of 90days.cxadmin user can create a cxcroot user using the utility called remoteaccount. Thecxcroot user can gain root privileges. Passphrase expires in 2 days.Network SecurityCXCloud Agent VM can be accessed using ssh with cxcadmin user credentials.Incoming ports
are restricted to 22 (ssh), 514(Syslog).AuthenticationPassword based authentication:Appliance maintains a single user - ‘cxcadmin’ which enables the user to authenticate andcommunicate with the CX Cloud Agent.Root privileged actions on the appliance using sshcxadmin user can create cxcroot user, using a utility called remoteaccount. This utilitydisplays an RSA/ECB/PKCS1v1 5 encrypted password which can be decrypted only fromSWIM portal. Only authorized personnel have access to this portal. cxcroot user can gainroot privileges using this decrypted password. Passphrase is valid only for two days.cxcadmin user needs to recreate the account and get the password from SWIM portal postpassword expiry.HardeningCX Cloud Agent appliance follows CIS hardening standardsand has achieved high scores.Data SecurityCX Cloud Agent appliance does not store anycustomer personal information.Device credential application (running as one of the pods)stores encrypted Cisco DNA Center server credentials inside secured database. Cisco DNACenter collected data is not stored in any form inside the appliance. The data collected isuploaded to the backed soon after the collection is complete, and the data is purged from theagent.Data TransmissionA secure TLS 1.2 channel is established between CX CloudAgent and RP (Reverse proxy) server.Ciphers supported are AES256-SHA and AES128SHAThe Reverse proxy authenticates the connection establishment using symmetrichashing. Unique shared key generated per appliance is used to perform the symmetrichashing.Logs and MonitoringLogs do not contain any form of sensitive information.Audit logs capture all security-sensitive actions performed on the Cloud Agentappliance.Security SummaryFrequentlyAsked QuestionsCX CloudAgentDeploymentQ - With "Re-install" option, can the user deploy the new Cloud Agentwith new IP Address?A - YesQ - Flavours of InstallableA - OVA and VHDQ - What is the environment on which the installable can be deployed?A - OVAVMWareESXi version 5.5 or aboveOracle Virtual Box 5.2.30 or aboveVHDHyper-VQ - Can CX Cloud Agent detect IP address in a DHCP environment?A - Yes, in case ofDHCP environment, the IP address assignment during IP configuration is taken care.However, the IP address change expected for the CX Cloud Agent at any point in future isnot supported. Also, the customer is recommended to reserve the IP for the Cloud Agent intheir DHCP environment.Q - Does CX Cloud Agent support both IPv4 and IPv6configuration?A - No, only IPV4 is supported.
Q - During IP configuration, is IP address validated?A - Yes, IP address syntax and duplicateIP address assignment will be validated.Q - What is the approximate time taken for the OVA deployment and IP configuration?A The OVA deployment depends on the speed of the network to copy the data. The IPconfiguration takes approximately 8-10 minutes that includes Kubernetes and containercreations.Q - Is there any limitation with respect to any hardware type?A - Host machine on which OVAis deployed must meet the requirements provided as part of the CX portal setup. The CXCloud Agent is tested with VMware/Virtual box running on a hardware with Intel Xeon E5processors with vCPU to CPU ratio set at 2:1. If a less powerful processor CPU or largerratio is used, the performance might degrade.Q - Can we generate the pairing code anytime?A - No, the pairing code can be generatedonly if the Cloud Agent is not registered.Releases and PatchesQ - What are the different kinds of versions listed for the upgrade ofCX Cloud Agent?A - Below are the set of the released versions of CX Cloud Agent that arelisted:A.x.0 (where x is the latest production major feature release, example:1.3.0)A.x.y(where A.x.0 is mandatory and incremental up-gradation to be initiated, x is the latestproduction major feature release, and y is the latest upgrade patch that is live, example:1.3.1).A.x.y-z (where A.x.0 is mandatory and incremental up-gradation to be initiated, x is thelatest production major feature release, and y is the latest upgrade patch that is live, and z isthe spot-patch that is an instant fix for a very short span of time, example: 1.3.1-1)where A isa long-term release spread across 3-5 years spanAuthentication and ProxyconfigurationQ - What is the default user of the CX Cloud Agent Application?A - cxcadminQ - How the password is set for the default user?A - Password is set during Networkconfiguration.Q - Is there any option available to reset the password after Day-0?A - No specific option isprovided by the agent to reset the password, but you can use the linux commands to resetthe password for cxcadmin.Q - What are the password policies to configure CX Cloud Agent?A - Password policiesare:Password Maximum Age (length) set to 90 daysPassword Minimum age (length) set to8Password Maximum length 127 characters.At least one upper case and one lower caseshould be provided.Should contain at least one special character (for example,
! % &*() - \ {}[]:";' ?,/).The following characters are not be permitted Special 8-bitcharacters (for example, , Å , , ë, ø, ü)SpacesThe password should not be the lastrecently used 10 passwords.Should not contain regular expression i.e. should not contain thefollowing words or derivatives thereof cisco, sanjose, and sanfranQ - How to set Grub password?A - To set the Grub Password, perform the following:Run sshas cxcroot and provide the token [Contact the support team to get the cxcroot token]Executesudo su, provide the same tokenExecute the command grub-mkpasswd-pbkdf2 and set theGRUB password. Hash of the provided password will be printed, copy the content.vi to thefile /etc/grub.d/00 header. Navigate to the end of file and replace the hash output followed bythe content password pbkdf2 root ***** with the obtained hash for the password you got instep 3Save the file with the command :wq!Execute the command update-grubQ - What is the expiry period for password of cxcadmin?A - The password expiry in 90 days.Q - Does the system disable the account after consecutive unsuccessful login attempts?A Yes, the account gets disabled after 5 consecutive unsuccessful attempts. The lockoutperiod is 30 minutes.Q - How to generate passphrase?A - Perform the following steps,Run ssh and login ascxcadmin userExecute the command “remoteaccount cleanup”Execute the command“remoteaccount create”Q - Does proxy host support both hostname and IP?A - Yes, but to use hostname, usershould have provide the DNS IP during network configuration.Q - Are both IPv4 and IPv6 supported for proxy?A - No, only IPv4 is supported.Secure ShellSSHQ - What are the ciphers supported by ssh shell?A - chacha20poly1305@openssh.com, aes256-gcm@openssh.com, aes128-gcm@openssh.com ,aes256-ctr, aes192-ctr, aes128-ctrQ - How to login to console?A - Follow the steps to login:Login as cxcadmin user.Provide thecxcadmin password that is set.Q - Are ssh logins logged?A - Yes, it is logged as part of the var/logs/audit/audit.log.Q - What is the idle session out time?A - ssh session timeout occurs if the Cloud Agent is idlefor five minutes.Ports and ServicesQ - What are the ports kept open by default on the CX Cloud Agent?A They are,Outbound port: The deployed CX Cloud Agent can connect to concsowebprd.cisco.com on HTTPS port 443 or via a proxy to send data to Cisco.
The deployed CX Cloud Agent can connect to Cisco DNA Center on HTTPS port443.Inbound port: For local management of the CX Cloud Agent 514(Syslog) and 22 (ssh)should be accessible.The customer must allow port 443 in their Firewall to receive data from CX Cloud.CXCloud Agent Connection with Cisco DNA CenterQ - What is the purpose andrelationship of Cisco DNA Center with CX Cloud Agent r?A - Cisco DNA Center is the CloudAgent which manages the customer premise network devices. CX Cloud Agent collects theinventory information of the devices from the configured Cisco DNA Center and uploads theinventory information that is available as “Asset View” in CX Cloud.Q - Where can the user provide Cisco DNA Center details on the CX Cloud agent?A - Duringthe CX Cloud Agent setup, the user will be prompted to provide the Cisco DNA Centerdetails or user can use CLI command cxcli agent addController to add the Cisco DNACenters.Q - How many Cisco DNA Centers can be added?A - 10 Cisco DNA Centers.Q - What role the Cisco DNA Center user should have?A - The user role should be eitheradmin or observer.Q - How are the Cisco DNA Center details stored in CX Cloud Agent?A - Cisco DNA Centercredentials are encrypted using AES-256 and stored in CX Cloud Agent database. CX CloudAgent database is protected with a secured user ID and password.Q - What kind of encryption will be used while accessing Cisco DNA Center API from CXCloud Agent?A - HTTPS over TLS 1.2 is used for the communication between Cisco DNACenter and CX Cloud Agent.Q - What are the operations performed by CX Cloud Agent on the integrated Cisco DNACenter Cloud Agent?A - Different operations performed by CX Cloud Agent on the integratedCisco DNA Center Cloud Agent are,CX Cloud Agent collects data that Cisco DNA Centerhas about the network devices.It uses the Cisco DNA Center command runner interface totalk to end devices and execute CLI commands (show command).No config changecommands are executed.Q - What are default data collected from Cisco DNA Center and uploaded to backend?ANetwork EntityModulesShow versionConfigDevice image informationTagsQ - What are the additional data collected from Cisco DNA Center and uploaded to Ciscobackend?A - You get all the information here.
Q - How is the inventory data uploaded to backend?A - CX Cloud Agent uploads the data viaTLS 1.2 protocol to Cisco backend server.Q - What is the frequency of inventory upload?A - Collection gets triggered as per the userdefined schedule and gets uploaded to CISCO backend. UTC and gets uploaded tobackend.Q - Can the user re-schedule inventory?A - Yes, an option is available to modify theschedule information from Admin Settings à Data Sources.Q - When does the connection timeout occur between Cisco DNA Center and CloudAgent?A - Timeouts are categorizes as follows:For initial connection, timeout is max 300seconds. If connection is not established between Cisco DNA Center and Cloud Agent withinmax 5 minutes, then the connection terminates.For recurring, typical, or updates: responsetimeout is 1800 seconds. If the response is not received or not able to read within 30minutes, then the connection terminates.CX Cloud Agent Used Diagnostic ScanQ - What are the commands executed onthe device for scan?A - The commands that need to be executed on the device for the scanis dynamically determined during the scanning process. The set of commands can changeover time, even for the same device (and not in control of Diagnostic Scan).)Q - Where are the scan results stored and profiled?A - The scanned results are stored andprofiled in cisco backend.Q - Are the duplicates (By hostname or IP) in Cisco DNA Center, added to Diagnostic Scanwhen Cisco DNA Center source is plugged in?A - No, the duplicates will be filtered and onlythe unique devices will be extracted.Q - What happens when one of the command scans fails?A - The device scan will becompletely stopped and will be marked as unsuccessful.CX Cloud Agent System LogsQ - List of health information that is sent to the CXCloud?A - Application logs, Pod status, Cisco DNA Center details, audit logs, system details,and hardware details.Q - What system details and hardware details are collected?A - Sample output:system details":{"os atingSystem":"linux",
"osImage":"Ubuntu 20.04.1 bdadb"},"hardware details":{"total cpu":"8","cpu utilization":"12.5%","total memory":"16007MB","free memory":"9994MB","hdd size":"214G","free hdd size":"202G"}}}Q - How is the health data sent to backend?A - With CX Cloud Agent, the health service(servicability) streams the data (via kafka), after which websocket connection is establishedwith the Cisco backend and from there the data is streamed (via kafka).Q - What is the CX Cloud Agent’s health data log retention policy i
If you select Oracle Virtual Box 5.2.30 go to Oracle VM If you select Microsoft Hyper-V go to Hyper-V OVA Deployment Thick Client ESXi 5.5/6.0 Installation This client allows you to deploy CX Cloud Agent OVA using the vSphere thick client. After downloading the image, launch the VMware vSphere Client and log in using the credentials. 1.