Transcription
Eclipse Signature SeriesVideo Management SoftwareManualManual Version: V1.01
Thank you for purchasing our product. If there are any questions,or requests, please do not hesitate to contact the dealer.NoticeCAUTION!The default password is used for your first login. To ensure accountsecurity, please change the password after your first login. You arerecommended to set a strong password (no less than eightcharacters). The contents of this document are subject to change withoutprior notice. Updates will be added to the new version of thismanual. We will readily improve or update the products orprocedures described in the manual.Best effort has been made to verify the integrity andcorrectness of the contents in this document, but nostatement, information, or recommendation in this manualshall constitute formal guarantee of any kind, expressed orimplied. We shall not be held responsible for any technical ortypographical errors in this manual.The illustrations in this manual are for reference only and mayvary depending on the version or model. So please see theactual display on your device.This manual is a guide for multiple product models and so it isnot intended for any specific product.Due to uncertainties such as physical environment,discrepancy may exist between the actual values andreference values provided in this manual. The ultimate rightto interpretation resides in our company.Use of this document and the subsequent results shall beentirely on the user's own responsibility.
ConventionsDocument ds, keywords, parameters and GUIelements such as window, tab, dialog box, menu,button, etc.Italic fontVariables for which you supply values. Separate a series of menu items, for example,Device Management Add Device.SymbolsSymbolDescriptionContains important safety instructions andindicates situations that could cause bodilyWARNING! injury.CAUTION!NOTE!Means reader be careful and improperoperations may cause damage or malfunctionto product.Means useful or supplemental informationabout the use of product.
ContentConventions.4Document on, Upgrade, and Uninstall.2System Starting Components.4Video Management Software.4Video Storage Software.6Media Switch Software.6i
4.Live View.8Encoding Device Management.8Add an Encoding Device.8Modify an Encoding Device.10Delete an Encoding Device.11Remotely Perform Operations on an Encoding Device.11Check Device Operation Status.11Group Management.12Add a Group.12Delete a Group.12Import Cameras.13Play Live Videos.13Play Live Video in a Window.14Live View Toolbar.14Shortcut Menu of Live View.16ii
Play Live Videos by View.17PTZ Control.19Sequence Display.22Enable Sequence Display by Camera Group.22Enable Sequence Display by Default View.23Enable Sequence Display by Custom View.245.Recording and Playback.25Storage Device Management.25Add a Storage Device.25Modify a Storage Device.25Delete a Storage Device.25Configure a Storage Device.26Restart the Storage Service.28Recording Configuration.29Configure Recording Schedule.29iii
Manually Record Videos.31Alarm-Triggered Video Recording.32Playback.32Play Back Remote Recordings.33Play Back Local Recordings.36View Local Snapshots.37Download.38Smart Search.396.Stream Media Server.41Stream Media Server Management.41Add a Stream Media Server.41Modify a Stream Media Server.42Delete a Stream Media Server.42Configure a Stream Media Server.42iv
7.Decoding and Displaying Videos on the Video Wall.43Decoding Device Management.43Add a Decoding Device.43Modify a Decoding Device.44Delete a Decoding Device.44Remotely Configure a Decoding Device.44Video Wall Management.45Add a Video Wall.45Modify a Video Wall.45Delete a Video Wall.45Configure a Video Wall.46Video Wall Operations.47Display Live Video on Video Wall.47Close Live Video on a Video Wall.48Split Screen for a Decoding Output Channel.49v
Enable Sequence Display on a Video Wall.50Play Back Recordings on Video Wall.51Alarm-Triggered Live Video to Video Wall.538.E-map.53E-map Management.53Add an E-map.53Modify an E-map.54Delete an E-map.54Add a Hot Spot.55Modify a Hot Spot.55Delete a Hot Spot.55Add a Hot Region.56Modify a Hot Region.56Delete a Hot Region.56E-map Operations.57vi
View a Hot Spot.57View a Hot Region.57View Hot Spot/Hot Region Alarms.58Clear Hot Spot/Hot Region Alarms.589.Voice Communication.59Video Associated Audio.59Two-Way Audio.59Voice Broadcast.6010.Alarm Management.61Configure Alarm-Triggered Action.62Alarm Records.65Acknowledge Live Alarms.65Query History Alarms.65Acknowledge History Alarms.66Export Alarm Records.vii
6711.Operation Logs.67Query Operation Logs.67Export Operation Logs.6812.Other Functions.68Auxiliary-Monitor Preview.68Multi-Window Display.68Cloud Device Management.69Log in to the cloud.69Configure a cloud device.6913.Other Configurations.70System Configuration.70User Management.75Add a User.75Modify User Account Information.76viii
Delete a User Account.77ix
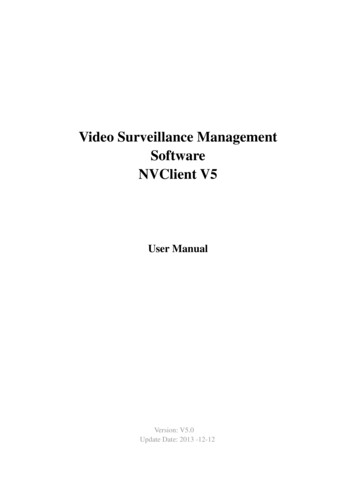
1.IntroductionThe Video Management Software is a device management softwaresuite for small video surveillance solutions. It is easy to deploy andoperate and suitable for scenarios with relatively small number ofvideo channels, such as super markets, park areas, and residentialcommunities.The Video Management Software implements various videosurveillance services, such as live view, playback, cameramanagement, recording storage management, alarms, sequencedisplay, video wall and e-map. The Video Management Softwarealso integrates various storage functions, such as NVR storage, DVRstorage, and the Video Storage Software. It is applicable formedium- and small-sized video surveillance applications.1.Typical Application1
2.Installation, Upgrade, and UninstallSystem RequirementsThe Video Management Software components shall be installed onPCs that meet the performance requirements. They can beinstalled on a single PC or on separated PCs.System requirements for Video Management SoftwareItemRequirementsOperatingSystemMicrosoft Windows 7/Windows 8 (32-bit or 64-bit).CPUIntel Pentium IV 3.0 GHZ or higher.Memory1 GB or higher.NetworkcardGigabit Ethernet network card (or higher) arerecommended.Displaydefinition1280*720 or higher.System requirements for Video Storage SoftwareItemRequirementsOperatingSystemMicrosoft Windows 7/Windows 8 (32-bit or 64-bit).CPUIntel Pentium IV 3.0 GHZ or higher.Memory1 GB or higher.1 TB or higher.HDDNetworkcardNote:The capacity of hard disk depends on the volume ofdata to be stored. You can figure out the capacity bythe formula provided in the note below.Gigabit Ethernet network card (or higher) arerecommended.2
System requirements for Media Switch SoftwareItemRequirementsOperatingMicrosoft Windows 7/Windows 8 (32-bit or 64-bit).SystemCPUIntel Pentium IV 3.0 GHZ or higher.Memory1 GB or higher.NetworkcardGigabit Ethernet network card (or higher) arerecommended.NOTE! Previewing multi-channel videos simultaneously orvideos of higher resolution requires higher hardwareconfiguration. The software operates on a 32-bit operating system,or on a 64-bit operating system that can host 32-bitsoftware programs. The recommended hard disk space for Video StorageSoftware should be able to store 1080P (6 Mbps bitrate) video for one week. To store more channels ofvideos with longer time, use hard disks with largercapacities. To figure out the hard disk space required,please use the formula: capacity (GB) stream (Mbps)x 60 x 60 x 24 x days x channel numbers/8/1024. Forexample, the capacity required for a 6 Mbps video tobe stored for seven days is about 443 GB and that for25 channels of CIF (1 Mbps stream) is about 1.8 TB.InstallationTo install the Video Management Software:1. Double-click the setup file. Follow the instructions to proceed.2. All components will be installed by default. To customize the3.installation, clickto choose whether to install thecomponent.The Video Management Software is installed on the systemdisk by default, for example, C:\Program Files\Video3
Management Software. After the installation is completed,theandicons are displayed on desktop.UpgradeTo upgrade the Video Management Software, please use theinstallation package of the new version to reinstall. For detailedsteps, see Installation.UninstallYou can uninstall the Video Management Software by the uninstallshortcut or using the uninstall option of the installer.Quickly Uninstall4. Select Start All Programs and go to the program folder.5. Click Uninstall.6. Click Yes to uninstall the software.Uninstall Using the Setup File7. Double-click the setup file. The installation wizard appears.Click Next.8. Select Remove and click Next to uninstall.3.Starting ComponentsVideo Management SoftwareAs a centralized management platform for video surveillancedevices, the Video Management Software allows you to configureparameters, maintain the system, and query video recordings andperform other basic surveillance service operations.1.2.Double-clickand enter the login interface.Use the default username admin and password 123456 foryour first login.4
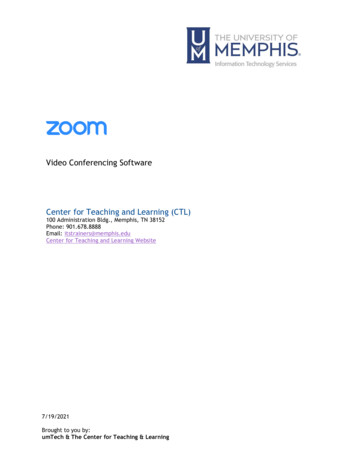
CAUTION!Upgrading or reinstalling the software will not change the previouspassword (admin, 123456 or any other custom password) for theadmin user.After successful login, the control panel appears. The followingtable describes the icons on the panel.IconDescriptionSystem MenuLockSwitch UserUser ManualLatest AlarmsHistorical InfoTask ManagementCurrent UserNOTE!Before performing operations on the interface, make surethat you have related operation permissions. For details, seeUser Management. It is recommended that you change your password after yourfirst login. For details, see Modify User Account Information. 5
Video Storage SoftwareAs a storage server, the Video Storage Software receives and storesdata from the edge devices and provides VOD (video on demand)services.3.After the installation is completed, double-clickto runthe software. Theicon that appears in the lower rightcorner of the task bar indicates the software is running.4. Right-clickin the task bar and choose Auto Run.If you select Auto Run, the PC will automatically run thesoftware upon startup.If you select Auto Login to Windows and then enter theusername and password for the Windows, you willautomatically log in to the Windows after the PC is started.Media Switch SoftwareAs a stream media server, the Media Switch Software forwards livepreview data on a camera if video streams on the camera reachthe limit or the network bandwidth is insufficient.5.After the installation is completed, clickmenu to enter the software interface.6on the start
NOTE!After the software is started, the media switch service is startedby default. Click Stop to stop the service if required.2. In the dialog box that appears, click Config.3.4.To run the service automatically upon PC startup, select AutoRun. To automatically log in to Windows, select Auto Login toWindows, enter the username and password.Click OK to complete the configuration.7
4.Live ViewYou need to add an encoding device before using the VideoManagement Software to view live video on the encoding device.Encoding Device ManagementAdd an Encoding DeviceCAUTION! It is recommended that you add an IP camera only in oneVideo Management Software to ensure proper management. You can add an IP camera to the Video Management Softwaredirectly or by adding its connected NVR or DVR. The settingparameters displayed for IP cameras may vary, depending onthe way of adding. For the actual parameters, see the displayon your device. The following uses the way of direct adding asan example.Search for and add an online deviceOn the control panel, select Device Management, and then followthe steps shown in the figure below.8
NOTE! By default, the system automatically searches for all onlinedevices on the LAN and updates the list periodically. If youwant to search by the network segment, clickand selectthe IP Segment check box. You can also click . Then the system searches for all onlinedevices on the same network and automatically adds them tothe device list.By clicking, you can select Add to add the encoding device tothe default group or select Add to Group to add the device to aspecified group. The devices that are added after search arenamed in format of device type IP address.You can right-click an online device in the list to configure theauxiliary parameters. The following table describes theparameters.ParameterDescriptionEdit NetworkAddressChange the device IP into the specified IP.Note: You need to be the administrator toaccess this function.Browse WebPageOpens the login page for the device inInternet Explorer.Manually add one deviceTo manually add one device:On the control panel, select Device Management, and then followthe steps shown in the figure below.9
In the Device Info dialog box, you can click Add to add theencoding device to the default group or click Add to Group to addthe device to a specified group.Manually add devices in batchesTo manually add device in batches:On the control panel, select Device Management, and then followthe steps shown in the figure below.In the Device Info dialog box, you can click Add to add theencoding devices to the default group or click Add to Group to addthe devices to a specified group.Modify an Encoding DeviceTo modify an encoding device:1. On the control panel, select Device Management.2. Select Device Encoding Device.3. Select the desired device and click Edit.10
4.In the Device Info dialog box (as shown in Manually add onedevice) that appears, modify parameters.Delete an Encoding DeviceTo remove a device with storage resource configuration, you needto delete storage resource first (see Configure a Storage Device).To delete an encoding device:5. On the control panel, select Device Management.6. Select Device Encoding Device.7. Select the device(s) to be deleted and click Delete.8. In the Info dialog box, click Yes.Remotely Perform Operations on an Encoding DeviceCAUTION!Ensure that an encoding device is online before configuringdetailed parameters for the device.To remotely perform operations on a device:1. On the control panel, select Device Management.2. Follow steps in the following figure to perform operations onthe device. Configure: You need to log in to the corresponding Webinterface before configuration.Restart: Perform this operation with caution because thisoperation may affect the ongoing services.Check Device Operation StatusTo check the operation status of the devices:3. On the control panel, select Device Management.11
4.Follow steps in the following figure to check device operationstatus.Group ManagementThe system manages device channels by group.Add a GroupTo add a group:On the control panel, select Device Management, and then followthe steps shown in the figure below.The added group is displayed in the group list on the left.Delete a GroupTo delete a group:5. On the control panel, select Device Management.6. Click the Group tab.7. In the group list on the left, select the desired group and clickDelete Group.8. In the Info dialog box, click Yes.12
Import CamerasTo import cameras to a group:On the control panel, select Device Management, and then followthe steps shown in the figure below to import the desiredcamera(s) to a specified group.You can click Import All to import all cameras to a specified group. Clickto add a group. Clickto delete a camera from the group.to modify the name of the camera. ClickAs shown in the following figure, the imported cameras aredisplayed in the list on the right. You can edit, delete, or configurea camera.Play Live VideosYou can play live audio/video of a camera in a window.After a camera is imported to a group, you can play live video in awindow, manipulate the live video by clicking the buttons on theLive View toolbar.13
Play Live Video in a WindowTo play a live video in a window:On the control panel, select Live View, and then follow the stepsshown in the figure below.NOTE!If you click a camera and then clickon the right, you canchoose to play live video from the camera with the main, sub orthird stream.Live View ToolbarThe live view toolbar is under the panes. The following tabledescribes the buttons on the toolbar.ButtonDescriptionSwitches screen layout.Saves the current view.Saves the current view as another name.14
ButtonDescriptionCloses all windows playing videos.Plays the live video of the previous camera orview.,Pauses/Resumes sequence display.Adjusts the sequence display interval.Plays the live video of the next camera orview.Adjusts the MIC volume or mutes the MIC forthe PC in two-way audio.Full screen.The following table describes the buttons on the floating toolbar.ButtonDescriptionTakes snapshots.Note:You can set the path to store screenshots inSystem Configuration.Records and locally stores the live videoplayed in current pane. Click this buttonagain to stop recording.,Note:You can set the path to store video records inSystem Configuration.Opens PTZ control.Note:This function is available only for cameras withPTZ configured.15
ButtonDescriptionStarts/Stops digital zooming.,Note:Zooms in a region of the live video played inthe current pane. Click this button again tostop.,Adjusts the speaker volume or mute it for thePC.Starts instant playback.Note:Plays back the live video playing in thecurrent window for the last 5 minutes and 30seconds (the time cannot be changed). Theplayback pauses at the end.Bit rate and resolution of the current video.Shortcut Menu of Live ViewThe following table describes key parameters on the shortcutmenu.ParameterDescriptionDigital ZoomZooms in a region of the live video playing in thecurrent pane. Click this button again to stop.Stream TypeSelects a stream type for the current window:Auto-adaptive, main, sub and third stream.Note: The option of sub and third stream will beavailable only when the device supports thisfeature. This feature is unavailable in sequence display.16
ParameterDescriptionTriggers manual alarm.Tip:It is recommended that you configure triggeredManual Alarm actions for manual alarms first (see ConfigureAlarm-Triggered Action). Each time you click thisbutton, an alarm is generated and reported andthe corresponding action is taken.Camera InfoDisplays information about the cameracorresponding to the current window, includingthe frame rate, bit rate, encoding format, andpacket loss rate.SystemConfigureShortcut to enter the system parameterconfiguration interface. For details, see SystemConfiguration.Play Live Videos by ViewBy default viewTo play live videos by default view:On the control panel, select Live View, and then follow the stepsshown in the figure below.After you click an x-split view, the live videos of the cameras inthe camera list are played in x windows.For example, a four-split default view is displayed with fourwindows. Window 1 plays the live video of the first camera in thecamera list, and window 2 plays the second and so on.17
By custom viewYou need to save a custom view before playing it.To save the current view as a custom view:On the control panel, select Live View, and then follow the stepsshown in the figure below.The Custom View list on the left displays the view that issuccessfully added.To add or modify a custom view, follow the steps shown in thefigure below.Clickto save the current view. Clickview as another view.18to save the current
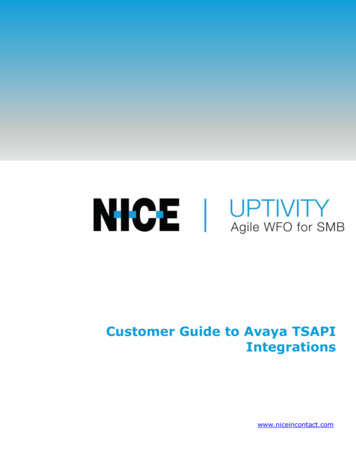
In the Custom View list, double-click a view or select the view andclick thebutton to play the live video according to thespecified surveillance layout.PTZ ControlThrough PTZ control, you can remotely control PTZ, zooming,focus distance, wiper, and so on. The system also allows you to setpreset positions for a PTZ, select camera patrol route, and so on.With PTZ positions preset, you can set a preset position as aguarding position. You can also accessing the auxiliary functionssuch as 3D positioning, shortcut PTZ, and so on.After finishing the preparation tasks, you can perform PTZ controlthrough PTZ panel.NOTE!PTZ control is only available to cameras with PTZ configured.Whether or not a PTZ control operation can take effect isdetermined by the functions and PTZ protocols that the PTZcamera supports. For example, some preset positions of certainPTZ cameras are assigned to special functions (such as wiper,menu, and so on). So you need to refer to PTZ cameraspecification before performing PTZ control.1.2.On the control panel, select Live View.Play Live Video in a Window.3.Click the window and then clickthe PTZ control panel.4.See the following table to perform PTZ control.19on the toolbar to open pag
The Video Management Software is a device management software suite for small video surveillance solutions. It is easy to deploy and operate and suitable for scenarios with relatively small number of video channels, such as super markets, park areas, and residential communities. The Video Management Software implements various video