Transcription
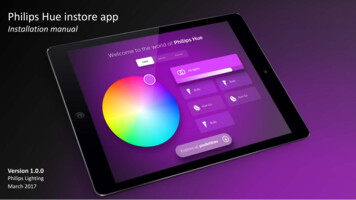
Philips Hue instore appInstallation manualVersion 1.0.0Philips LightingMarch 20171
DisclaimerThis app is intended only for use in store.The functionality of this app is dedicated for demonstration purposes and does not necessarily reflect the fullcapabilities of the Philips Hue system.2
IntroductionThis manual will help you to install the Philips Hue instore demo app.To complete the installation a basic understanding of how to install a Philips Hue system is required. The regularPhilips Hue app must be used to setup the system. For example lights and accessories have to be commissioned to thesystem via the Philips Hue app.EquipmentThe app has to be setup with the equipment (router, bridge, lights, accessories) that is going to be used at the store. Achange of equipment (for example a different router) requires part of the installation to be repeated.Single app modeInstructions are provided to put the app into ‘single app mode’. This means that app cannot be exited, and after areboot the iPad will directly open the app again. In order to enable this mode a Macbook is required. How to put theiPad in ‘single app mode’ is explained in this document. Please note that this step is advised, but not mandatory.3
The iPad app has a fixed orientation. This means that the iPad should bemounted in landscape orientation with the Home button and connectoron the LEFT4
Table of contents5
Table of contents1. Installationa. Installation procedurea. How to access the Settings menub. Checklist – before you get startedb. Where can I find the Bridge ID?c. Prepare the system with the Philips Hue appc. I want to connect to another bridged. Installing the Philips Hue instore demo appd. What is ‘Single App Mode’e. Setting up the iPadf. Setting up the instore demo app62. TroubleshootingI.Connecting to the bridgeII.Select the lights to use with the app *III.Select the Accessories to display in the app *IV.Install the required bridge features *
Installation procedureAssemblerequiredmaterialsCommission thelights to thebridge using thePhilips Hue AppSupervise theiPad from aMacbook *Install the PhilipsHue instoredemo on theiPadClean up theiPadConnect to thebridgeRemove iCloudAccountInstall correctscriptsRemove iTunes &App Store AccountTest the appForgetunnecessarynetworksRemove passcode* These steps are optional and ensures that the iPad will only display the Philips Hue Instore demo app.This means the instore app only will become the only app which can run on the iPad; no other applications can be run; and access tothe settings screen is only possible once the iPad has been put out of this supervised mode7Put the iPad insingle app mode*
Checklist – Before you get startedHue Bridge 2Hue lightsHue accessoriesMake sure that you have the following products available beforeyou start the installation. Hue Bridge 2 power supply Hue Lights (at least 1, maximum 50) Hue AccessoriesRouter RouterEthernet cable Ethernet cable iPad (with latest iOS version) Philips Hue app 2.x (download from App store) Philips Hue instore demo app (download from App store) Macbook (with OSX 10 or higher) *only for ‘single app mode’Philips Hue app8iPadMacbook
Prepare the system with the Philips Hue appTo ensure a proper operation of the demo installation werecommend that you use a new bridge. If you wish to re-use anexisting bridge, we recommend you to factory reset the bridge.1. If the bridge is not new: factory reset the bridgea. Power the bridgeb. Use a small object to press the button next to ‘restorefactory settings’Image courtesy: www.howtogeek.com9
Prepare the system with the Philips Hue appThe Philips Hue instore demo app cannot be used to setup thesystem. To setup the system the regular Philips Hue app has to beused.Take the following steps to prepare the system.1. Power all lamps for the demo installation2. Download the Philips Hue app 2.x from the App storeiOS: 281310?mt 8Android: https://play.google.com/store/apps/details?id com.philips.lighting.hue23. Connect the Philips Hue app 2.x to the bridge– If you are requested to update the bridge – do so.– Follow the on-boarding steps to setup the system. You can put alllights in one room.10
Prepare the system with the Philips Hue appThe Philips Hue instore demo app cannot be used to setup thesystem. To setup the system the regular Philips Hue app has to beused.Take the following steps to prepare the system.Example: “C819F6”4. Add the desired lights to the bridgeSettings Lamp Configuration Plus button ( )In case the lamps have been used before you have to search the lampsby using the 6-digit serial number code that is printed on the lamp. Enterthat serial number in the app before clicking ‘search’5. Add the desired Accessories to the bridgeSettings Accessory Configuration Plus Button ( )If you want to display a Hue Tap, Hue Dimmer Switch, or Hue Motionsensor please add that device using the regular Philips Hue app.11
Supervise iPadQUICK SUMMARYThis step is only necessary in case you want to lock down the iPad in ‘Single AppMode’ otherwise, proceed to slide 25.Single App Mode makes it impossible for consumers to exit the instore app.After a reboot Single App Mode will automatically start the app again.For more information on ‘Single App Mode’, please see ‘Troubleshooting’.12Supervise iPad1.Remove iCloud account from the iPad2.Start Apple Configurator 23.Connect iPad to the Macbook via USB4.Select the iPad and go to Actions Prepare 5.Select ‘Manual’ ‘Do Not Enroll in MDM’6.Make sure you select ‘Allow devices to pair with other computers’7.Create a Supervision profile, or use an existing one8.Only select Language, Region and Home Button for the Setup Assistant9.Erase the iPad and follow the setup flow
Supervise iPad113Remove the iCloud account from the iPad. Go to ‘Settings’ ‘ iCloud’ ‘Sign Out’ ‘Sign Out’This makes sure you don’t lock yourself out of the iPad.
Supervise iPad2Start Apple Configurator 214
Supervise iPad3Connect the iPad to the Macbook via USB15
Supervise iPad4Select the iPad and go to ‘Actions’ ‘Prepare’16
Supervise iPad5Set the Configuration to Manual.17
Supervise iPad6Set Server to ‘Do not enroll in MDM’.18
Supervise iPad719Leave the checkbox check – so you can unlock it from another Macbook.Note: If you do not check this box you’ll need the same Macbook to unlock the iPad!
Supervise iPad820If you have not created a supervision identity select ‘Generate a new supervision identity’ Otherwise, select the previously created identity.
Supervise iPad9Provide the Organization Details21
Supervise iPad1022Select ‘Language’, ‘Region’ and ‘Home Button’ for the iOS Setup Assistant.Leave the other options unchecked. Click Prepare.
Supervise iPad11The iPad will now be erased. This process cannot be reversed.If an iCloud account was already assigned to the iPad, make sure that you have the login information orremove the iCloud account from the iPad first.Once the iPad has rebooted follow the provided setup flow.23
Supervise iPad12Once the iPad has rebooted follow the provided setup flow.24
Steps to clean up the iPadRemoveiCloudAccount25RemoveApple IDForgetunnecessarynetworksRemovePasscode
Clean up the iPadTo make sure that the Philips Hue instore demo app is notinterrupted, several elements have to be disabled. This will reducethe chance that the iPad shows erroneous behavior. Remove iCloud accountBy removing the iCloud account your iPad will not automaticallydownload iOS updates or create back ups.Settings iCloud Sign Out Sign Out Remove Apple IDRemoving the Apple ID ensures that apps will not be updatedautomaticallySettings iTunes & App store Apple ID Sign Out Forget unnecessary networksBy forgetting all unnecessary networks you prevent the iPadfrom connecting to a network without a bridge.26Clean up iPadSettings Wi-Fi Info button Forget This Network
Clean up the iPadTo make sure that the iPad behaves as intended some elementshave to be disabled. This will reduce the chance that the iPadshows erroneous behavior. Remove iCloud accountBy removing the iCloud account your iPad will not automaticallydownload iOS updates or create back ups.Settings iCloud Sign Out Sign Out Remove Apple IDRemoving the Apple ID ensures that apps will not be updatedautomaticallySettings iTunes & App store Apple ID Sign Out Forget unnecessary networksBy forgetting all unnecessary networks you prevent the iPadfrom connecting to the27Settings Wi-Fi Info button Forget This Network
Clean up the iPadTo make sure that the iPad behaves as intended some elementshave to be disabled. This will reduce the chance that the iPadshows erroneous behavior. Remove iCloud accountBy removing the iCloud account your iPad will not automaticallydownload iOS updates or create back ups.Settings iCloud Sign Out Sign Out Remove Apple IDRemoving the Apple ID ensures that apps will not be updatedautomaticallySettings iTunes & App store Apple ID Sign Out Forget unnecessary networksBy forgetting all unnecessary networks you prevent the iPadfrom connecting to the28Settings Wi-Fi Info button Forget This Network
Clean up the iPadTo make sure that the iPad behaves as intended some elementshave to be disabled. This will reduce the chance that the iPadshows erroneous behavior. Remove iCloud accountBy removing the iCloud account your iPad will not automaticallydownload iOS updates or create back ups.Settings iCloud Sign Out Sign Out Remove Apple IDRemoving the Apple ID ensures that apps will not be updatedautomaticallySettings iTunes & App store Apple ID Sign Out Forget unnecessary networksBy forgetting all unnecessary networks you prevent the iPadfrom connecting to the29Settings Wi-Fi Info button Forget This Network
Clean up the iPadTo make sure that the iPad behaves as intended some elementshave to be disabled. This will reduce the chance that the iPadshows erroneous behavior. Remove passcodeRemoving the passcode will make sure that once the app is insingle app mode can directly start the appSettings Touch ID & Passcode ‘Turn Passcode Off’ Enable restrictions (optional)By enabling restrictions you can disable certain functionality ofthe iPad, for example to install other apps or to access thecamera. This is advised if the iPad is not used in ‘Single AppMode’Settings General Restrictions ‘Enable Restrictions’30
Clean up the iPadTo make sure that the iPad behaves as intended some elementshave to be disabled. This will reduce the chance that the iPadshows erroneous behavior. Remove passcodeRemoving the passcode will make sure that once the app is insingle app mode can directly start the appSettings Touch ID & Passcode ‘Turn Passcode Off’ Enable restrictions (optional)By enabling restrictions you can disable certain functionality ofthe iPad, for example to install other apps or to access thecamera. This is advised if the iPad is not used in ‘Single AppMode’Settings General Restrictions ‘Enable Restrictions’31
Clean up the iPadTo make sure that the iPad behaves as intended some elementshave to be disabled. This will reduce the chance that the iPadshows erroneous behavior. Remove passcodeRemoving the passcode will make sure that once the app is insingle app mode can directly start the appSettings Touch ID & Passcode ‘Turn Passcode Off’ Enable restrictions (optional)By enabling restrictions you can disable certain functionality ofthe iPad, for example to install other apps or to access thecamera. This is advised if the iPad is not used in ‘Single AppMode’Settings General Restrictions ‘Enable Restrictions’32
Clean up the iPadTo make sure that the iPad behaves as intended some elementshave to be disabled. This will reduce the chance that the iPadshows erroneous behavior. Remove passcodeRemoving the passcode will make sure that once the app is insingle app mode can directly start the appSettings Touch ID & Passcode ‘Turn Passcode Off’ Enable restrictions (optional)By enabling restrictions you can disable certain functionality ofthe iPad, for example to install other apps or to access thecamera. This is advised if the iPad is not used in ‘Single AppMode’.If you are asked for a password, you can use 5 6 2 1.Settings General Restrictions ‘Enable Restrictions’33
Instore demo appQUICK SUMMARYInstore demo app341.Install Philips Hue Instore demo app 22.Connect to the bridge in the app3.Select 6 ‘hero’ lights to be controlled from in the app4.Select the accessories to be displayed in the app5.Optional: Install the required features to the bridge
Installing the Philips Hue instore appThe Philips Hue instore demo app can be found in the App Store eapp/id1191767292?ls 1&mt 8 Download the Philips Hue instore demo app from the App Store35
Installing the Philips Hue instore appQuick overview of the Instore app Control: Control selected lights with colors, color temperatureand/or scenes Propositions: An overview of our core propositions withexplanations behind each card Comparison: A comparison chart to find the best suitable lightfor you Accessories: An overview of the accessories that you can use toextend your Hue system36
Setting up the instore appQUICK SUMMARYConnecting to the bridgeTo connect to the bridge you have to access the Settings screen.10 secondsPress and hold the screen with two fingers for ten seconds.The Settings screen is protected with the default password 5 6 2 15621Under Settings select the option Bridge.The current network you are connected to is shown in bold. Make sure you areconnected to the same network as your bridge.If you know the IP address of the bridge you want to connect to, please fill in theadvanced field. Otherwise press Search. The app will now search for a bridge.Once bridges are found on the network the icon is shown to pair the bridge to theapp. Press the button on top of the bridge. The app is now paired to this bridge!Please note: once you pair to the bridge, the password to enter the Settings ischanged automatically to the Bridge ID (6 characters). You can find the Bridge ID onthe bottom of the bridge, or via the Philips Hue app (Settings Hue Bridges Info ‘ID: ’).37
Setting up the instore app110 secondsPress and hold the screen with two fingers for ten seconds.38
Setting up the instore app2Enter the code 5 6 2 1 to access Settings the first time39Note: the code will change after setting up the bridge to the Bridge ID
Setting up the instore app3Go to ‘Bridge’40
Setting up the instore app4Search for the bridge41
Setting up the instore app5Wait for the search to finish42
Setting up the instore app6Press the button on top of the bridge43
Setting up the instore appSelect lights to use in the appIn the Philips Hue instore demo app under ‘Settings’ ‘Lights’ you can select up to 6lights that can be individually controlled from the app.Please note: any additional lights will be used by the app, for example in scenes, butthey cannot be controlled individually on the color picker page.Change the names of lightsClick ‘Edit’ on top of the screen to change the names of lights. The names of the lightsyou have selected will be displayed in the app.Click ‘Done’ once you have renamed the lights. The app will now update the names ofthe lights on the bridge.Change the order of lightsClick ‘Edit’ on top of the screen to change the order in which lights are displayed. Usethe three stripes on the right of a light to drag it up or down.Click ‘Done’ once you are satisfied with the order.44
Setting up the instore appSelect lights to use in the appIn the Philips Hue instore demo app under ‘Settings’ ‘Lights’ you can select up to 6lights that can be individually controlled from the app.Please note: any additional lights will be used by the app, for example in scenes, butthey cannot be controlled individually on the color picker page.Change the names of lightsClick ‘Edit’ on top of the screen to change the names of lights. The names of the lightsyou have selected will be displayed in the app.Click ‘Done’ once you have renamed the lights. The app will now update the names ofthe lights on the bridge.Change the order of lightsClick ‘Edit’ on top of the screen to change the order in which lights are displayed. Usethe three stripes on the right of a light to drag it up or down.Click ‘Done’ once you are satisfied with the order.45
Setting up the instore appSelect lights to use in the appIn the Philips Hue instore demo app under ‘Settings’ ‘Lights’ you can select up to 6lights that can be individually controlled from the app.Please note: any additional lights will be used by the app, for example in scenes, butthey cannot be controlled individually on the color picker page.Change the names of lightsClick ‘Edit’ on top of the screen to change the names of lights. The names of the lightsyou have selected will be displayed in the app.Click ‘Done’ once you have renamed the lights. The app will now update the names ofthe lights on the bridge.Change the order of lightsClick ‘Edit’ on top of the screen to change the order in which lights are displayed. Usethe three stripes on the right of a light to drag it up or down.Click ‘Done’ once you are satisfied with the order.46
Install featuresStartup color for lightsThis script sets the lights to a pre-defined color after the bridge reboots.Light script for videoThis script plays lights effects in sync with the main video of the Instore App. If you donotOverride controls for light scriptWhenever you have an Accessory (e.g., Hue Tap, Hue Dimmer Switch) on display andthe light script installed, you should also install this script. It will stop the light scripttemporarily when a user interacts with one of the Accessories.47
Install featuresStartup color for lightsThis script sets the lights to a pre-defined color after the bridge reboots.Startup brightnessThe brightness at which the lights switch onStartup CTThe color temperature at which ct-lamps (e.g., Hue White Ambiance) switch onStartup ColorAll color capable lamps will go to this setting.Continuous changeWhen enabling this the lamps will continuously be set to the pre-defined colors. Thismeans that if a light is switched off and on, it will return to the pre-defined color.TimeHow often the lights should be updated.48
Install featuresLight script for videoThis script plays lights effects in sync with the main video of the Instore App. If you donotMaximum brightnessDefine the maximum brightness for the lamps within the light script.49
Install featuresOverride controls for light scriptWhenever you have an Accessory (e.g., Hue Tap, Hue Dimmer Switch) on display andthe light script installed, you should also install this script. It will stop the light scripttemporarily when a user interacts with one of the Accessories.TimeHow long an Accessory can override the light script.You can select the Accessories that are allowed to override the light script.50
Congratulations!You have now successfully setup the instore appIf you wish to put the app into Single App Mode, continue on the next slide51
Put iPad in Single app modeQUICK SUMMARYThis step is only necessary in case you want to lock down the iPad in ‘Single AppMode’Single App Mode makes it impossible for consumers to exit the instore app.After a reboot Single App Mode will automatically start the app again.Make sure that you have Supervised the iPad first! (see slide 10)Single App Mode521.Start Apple Configurator 22.Connect iPad to the Macbook via USB3.Select the iPad and go to Actions Advanced Start Single App Mode4.Click Options. Uncheck ‘Sleep/Wake’ Button.5.Click the Philips Hue instore demo app and press Select App.6.The Macbook will now put the iPad into Single App mode.
Putting the iPad in ‘single app’ mode1Start Apple Configurator 253
Putting the iPad in ‘single app’ mode2Connect the iPad to the Macbook via a USB cable54
Putting the iPad in ‘single app’ mode3Select the iPad and go to ‘Actions’ ‘Advanced’ ‘Start Single App Mode ’55
Putting the iPad in ‘single app’ mode4If you see a warning that the iPad is not supervised.Click Prepare.Follow instructions on how to supervise the iPad.Click Options. (left)56
Putting the iPad in ‘single app’ mode5Make sure the option ‘Sleep/Wake Button’ is not checked.Leave the other options as shown in the image. Click Apply.57
Putting the iPad in ‘single app’ mode6Select the Hue instore demo app. Click Select App.58
Putting the iPad in ‘single app’ mode7The Macbook prepares the iPad. Single App Mode is enabled.59
Troubleshooting60
How to access the Settings menuIn the Philips Hue instore demo app press and hold the screen with two fingers for 10seconds. After 10 seconds the Settings screen will open.10 secondsTo access the Settings screen you are required to fill in a passcode. If you have not connected a bridge, the default passcode is active 5 6 2 15621orXXXXXXBridge ID61 If a bridge is connected, the passcode is the Bridge ID(The Bridge ID is printed at the bottom of the bridge; see next slide)
Where can I find the Bridge ID?The Bridge ID can be found in different places:1. Bottom of the bridgeSee the images on the left2. In the Philips Hue appBridge ID: 200984In the Philips Hue app go to Settings Hue Bridges Information (i)The Bridge ID is written in bold after ID.3. Via a webbrowserYou have to know the IP address of the bridge. Using a webbrowser (e.g., Chrome,Safari, Internet Explorer) you navigate to the following address:Bridge ID: 147E4Dhttp:// ipaddress /api/configReplace ipaddress with the actual address of the bridge (e.g. 192.168.1.20).After “bridgeid” the last 6 digits represent the Bridge IDExample: 001788FFFE2009D2 means that the Bridge ID is 2009D2.62
I want to connect to another bridgeIn the Philips Hue app access the Settings menu.Navigate to ‘Bridge’. A button ‘Forget’ will be shown at the bottom of the page.Click ‘Forget’. This will remove the connection between the App and the Bridge.You are now ready to setup a new connection to a different bridge.63
What is ‘Single App Mode’?Single App Mode ensures that the iPad only runs one app. Single App Mode willdisable all other buttons, for example the Home button or the Power button.The benefits of using Single App Mode: Store visitors cannot exit the app. When the iPad reboots, it automatically starts the selected app.The disadvantages of Single App Mode: Store personnel cannot exit the app, for example to select a Wi-Fi network A MacBook Pro is required to unlock the iPad from Single App ModeConsider carefully whether Single App Mode is appropriate for your channel.64
65
6 1. Installation a. Installation procedure b. Checklist - before you get started c. Prepare the system with the Philips Hue app d. Installing the Philips Hue instore demo app
