Transcription
EQIP Entity Portal User GuideJuly 9, 2021version 1.0
Table of Contents1Introduction . 32Credentialling . 32.1Administrative Proxies . 33Accessing the Portal . 44First Time Users & The Enrollment Workflow . 55674.1EQIP Entity Point of Contact Information . 64.2EQIP Entity Information . 74.2.1Individuals. 74.2.2Groups of Care Partners . 84.3Administrative Proxy . 104.4Episode & Intervention Selection. 114.5Payment Remission Recipient . 124.6Finalize Enrollment . 13The Landing Page. 145.1.1Program Resources. 155.1.2Program Status Tracking . 155.2View / Edit Episode & Intervention Selection . 155.3View Baseline Data. 165.4Care Partner Participation Dashboard . 175.5View Performance / Savings Summary . 185.6Performance Dashboard (Requires PHI Access). 18CRP Entity Functionality. 186.1Care Partner Arrangement Management . 196.2Payment Remission Management . 20State Administrator Functionality. 217.1Care Partner Vetting – State View . 217.2Program Admin Reports. 22EQIPEQIP Entity Portal User Guide 20210709aPage 2 of 22
1 IntroductionThis document provides users with details guidance on gaining access to and using the EQIP Entity Portal to enroll inthe Episode Quality Improvement Program (EQIP), view data, and understand the resources available to EQIPEntities.EQIP is a new care redesign program track and may change over time, per HSCRC and CMS policy. This User Guidewill be updated to reflect any changes in program policy or the EQIP Entity Portal application; if downloading a PDFcopy for offline reference, be sure to check the version on the cover and download the most recent version asrequired.2 CredentiallingTo gain access to the EQIP Entity Portal, you must be a registered CRISP Reporting Services (CRS) user and beprovisioned with an account.If your organization already has a Participation Arrangement in place with CRISP, reach out to your organization’sPoint of Contact (POC) and request access as an ‘eqip participant’ under the CRP Management application. If you donot know if your organization is registered with CRISP, or if you do not know who your POC is, just reach out tosupport at support@crisphealth.org or 877-952-7477.If your organization is not registered with CRISP Reporting Services, you will need to go through the onboardingprocess and execute a Participation Agreement. Reach out to CRS Support at the contact information above andthey will help you work through this process.2.1Administrative ProxiesEQIP policy allows EQIP Entities to designate ‘administrative proxies’ to view and manage their enrollmentinformation and episode data on their behalf. An EQIP Entity must first establish an account in the portal with aneligible Care Partner to serve as a primary point of contact, prior to appointing an administrative proxy. Theadministrative proxy submitted by the EQIP Entity’s primary point of contact will then be contacted by CRISP forcredentialing into the portal. After approval and credentialing, administrative proxies have the same accessprivileges as the EQIP Entity that designated them.Administrative proxies serving multiple different EQIP Entities will be able to select the EQIP Entity they wish to viewor edit data for on the Landing Page as described under Section 5 below. Any workflow or dashboard launched witha given EQIP Entity selected will automatically use that EQIP Entity for the duration of that workflow. To select adifferent EQIP Entity, simply return to the landing page, select the new EQIP Entity, and launch the desiredworkflow.EQIP Entities can revoke access for administrative proxies at any time in the same way that they revoke access forother users. The organizational Point of Contact (POC) for the EQIP Entity simply removes the ‘eqip participant’ rolefor that user in the LogOnce user management interface. However, to add an administrative proxy, EQIP Entitiesmust use the ‘Designate Administrative Proxy’ functionality in the Landing page as described below.EQIP Entity Portal User Guide 20210709aPage 3 of 22
3 Accessing the PortalTo access the EQIP Entity Portal directly, navigate to the login page at https://crp.crisphealth.org. You will beprompted to enter your username and password, followed by the multi-factor authentication prompt you selectedduring the CRISP credentialling process.If you forget your password or otherwise need to change it, simply hit the ‘Reset Password’ link on this login pageand an automated email will be sent with instructions and a link for updating it. The bottom of the login page alsocontains contact information for CRISP support if you experience any issues logging in.If you are a frequent CRS user and familiar with the CRS Landing Page, you can also access the EQIP Entity Portal viathe ‘EQIP Enrollment Portal’ link under ‘Medicare Population’ card on the CRS Landing Page. This card is available forall users provisioned with an EQIP Entity role.Note for ECIP UsersEQIP Entities who are also engaged with the Episode Care Improvement Program, ECIP, will see an additional togglein the upper right-hand corner of the EEP landing page that allows them to navigate between the ECIP ManagementInterface and EQIP Entity Portal. These two applications are part of the same Care Redesign system and use thesame URL endpoint. You will still be able to access the ECIP Management Interface in the same way you have in thepast, either via the direct URL or the ECIP card on the CRS Landing Page.EQIP Entity Portal User Guide 20210709aPage 4 of 22
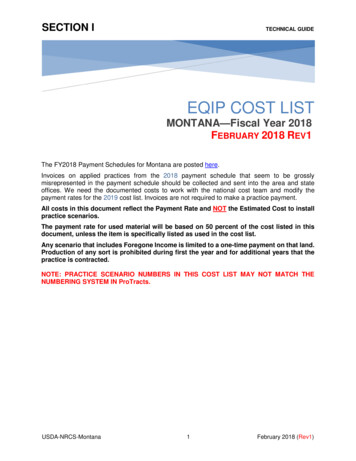
4 First Time Users & The Enrollment WorkflowThe first time a prospective EQIP Entity user logs into the Portal, only one option will be available, as shown in thescreenshot below – Start Enrollment Process. This button will be highlighted in orange – simply click on it to getstarted. You can save, exit, and return to the enrollment process at any time. The main purpose of this workflow isto make enrollment as straightforward and fast as possible, while allowing flexibility to view data and adjustselections during the open enrollment period.This workflow will take you through each of the following required enrollment steps:1.2.3.4.5.6.EQIP Entity Type & Primary Point of ContactEQIP Entity & Care Partner InformationAdministrative Proxy DesignationEpisode & Intervention SelectionPayment Remission RecipientFinalize EnrollmentA full description of the enrollment process and workflow is provided in the sections that follow. All steps must becompleted to finalize enrollment. Note that only an eligible Care Partner with a valid National Provider Identifier(NPI) can establish an EQIP Entity, and all final enrollment data must be entered before enrollment closes onSeptember 1st.EQIP Entity Portal User Guide 20210709aPage 5 of 22
4.1 EQIP Entity Point of Contact InformationTo start that enrollment process, an eligible Care Partner intending to participate in EQIP must create an EQIP Entityprofile and submit their information. All fields on this page are required and must be completed before theenrollment process can continue. After this stage of the process is complete, EQIP Entities may designate anadministrative proxy to manage your EQIP participation.Required Data1.For the Care Partner primary point of contact, you must supply a:a. First nameb. Last namec. Contact emaild. Phone numberThen, you must select whether the participating ‘EQIP Entity’ you areenrolling as will be an individual Care Partner or a group of Care Partners.Later in the enrollment process, you will be asked for additional information(including NPI, name, contact information and specialty) on all of the CarePartner(s) participating under this EQIP Entity. Note that after September 1,2021, participation is locked in for the first year of the program (calendaryear 2022), and changes cannot be made in the list of participating NPIsuntil enrollment opens for the next period. However, you may change yourdecision (and associated list of submitted Care Partners) freely until then.When this is complete, simply hit the Next button to continue to the nextstep in the workflow.EQIP Entity Portal User Guide 20210709aSaving Your WorkAt any point in the enrollmentprocess - or any other workflow you can use the ‘Save & ContinueLater’ button in the upper righthand corner of the application tosave your progress safely beforeexiting the application. You canreturn to complete enrollment atany time before enrollment for theperiod closes.Page 6 of 22
4.2 EQIP Entity InformationIn this step, you will submit all required information on all Care Partner(s) participating under this EQIP Entity. Adifferent intake screen will be shown depending on whether you selected Individual Care Partner or Group of CarePartners in the first step in the workflow. Each of these is described in more detail below. Note that if you aredesignating an Administrative Proxy, all you need to do on this page is enter the EQIP Entity Name (or name of theindividual Care Partner), and then you can proceed to the next screen to enter the administrative proxy information.If you do so, the proxy will need to return to complete any additional required fields prior to the closure of theenrollment period.Note that if you make modifications to your list of participating Care Partner(s) after selecting episodes, you willneed to review your episode selections to ensure that you still meet the episode volume requirements with the newlist of NPIs. Episode eligibility and volume thresholds are discussed in further detail in Section 4.4 below.4.2.1IndividualsIf you are participating as an individual Care Partner and the EQIP Entity is the same individual as the primarycontact submitted in Step 1, you can select ‘Yes’ in the first dropdown to pre-populate fields you have alreadycompleted for that individual. If not, all fields on this page must be completed independently.Required Data1.For each Care Partner participating as part of the EQIP Entity, you must supply a:a. National Provider Identifier (NPI). This is the primary identifier used for episode attribution,eligibility vetting, and program evaluation, so it is particularly important that this is enteredaccurately.b. First namec. Last named. Email addressEQIP Entity Portal User Guide 20210709aPage 7 of 22
e.f.Business mailing address (this must be a complete address including street, city, state and ZIPcode)SpecialtyOnce you have completed this, hit the Next button to continue to the next step in the workflow.4.2.2Groups of Care PartnersIf you are participating as a group, an ‘EQIP Entity Name’ must be provided to identify the group as a collective EQIPEntity in the program. Enter it in the field provided at the top of the page. You will then be prompted to provideinformation on each individual Care Partner you intend to register as part of that EQIP Entity.Required Data1.For each Care Partner participating as part of the EQIP Entity, you must supply a:a. National Provider Identifier (NPI). This is the primary identifier used for episode attribution,eligibility vetting, and program evaluation, so it is particularly important that this is enteredaccurately.b. First namec. Last named. Email addresse. Business mailing address (this must be a complete address including street, city, state and ZIPcode)f. SpecialtyThese can be entered manually or uploaded as a batch. To enter each manually in the application, simply click the‘Manually Add Care Partners’ button on the right-hand side of the screen, and a grid will appear. Click the ‘Add New’button at the top of the table and fill in all required fields. Repeat this process for each Care Partner, being sure toclick the ‘Save’ button immediately beneath each row as you complete it before moving on to the next.EQIP Entity Portal User Guide 20210709aPage 8 of 22
You have two options for uploading a batch of Care Partners. If you have already entered some Care Partners (orpreviously uploaded) and simply want to add to the existing list, use the middle button ‘Upload Care Partner List(Append to Existing).’ Download the submission template using the link provided, populate it with Care Partnerdetails, and upload. All Care Partners will be added to any existing list previously uploaded or entered.If this is your first time submitting data or you wish to overwrite a previously submitted list of Care Partners, use theleftmost button ‘Upload New Care Partner List (Overwrite Existing).’ The process of downloading the template,populating it, and uploading is the same as previously described for appending Care Partners, except that thisupload will erase and overwrite any previous submissions.For both batch upload workflows, if an error is observed in the template or an issue occurs with upload, an errormessage will appear describing the issue with instructions on resolution and re-uploading the file.After an upload successfully completes, the table on the page will populate, and you will have the opportunity toreview any make any manual edits you like. Once you have completed this, hit the Next button to continue to thenext step in the workflow.EQIP Entity Portal User Guide 20210709aPage 9 of 22
4.3 Administrative ProxyEQIP allows EQIP Entities to designate “Administrative Proxies” – that is, non-Care Partner administrators – tomanage their enrollment and view their data. The next screen in the enrollment workflow provides the opportunityto do so. Administrative proxies have the same application and data access privileges as EQIP Entities, the onlydifference is that they themselves are not the legal EQIP Entities in the program with CMS and the State.If you do not wish to designate an administrative proxy and intend to complete the intake process yourself, simplyleave the drop-down on this page as ‘No’ and hit Next to continue on to the next step in the workflow.If you do wish to designate an administrative proxy, click on the down after the question and select ‘Yes.’ Additionalfields will then appear in which you can provide information on the desired administrator.Required Data1.For each administrative proxy, you must supply a:a. First nameb. Last namec. Contact emaild. Organizational affiliationTo add an additional proxy, simply hit the blue ‘ Add Additional Proxy’ button near the bottom of the screen.If you are a EQIP Entity who is planning on having an administrative proxy manage the rest of the enrollmentprocess, you can save and exit the application after entering your administrative proxy’s contact information. Thiswill be submitted for the HSCRC for review, and they will be sent a notification email containing instructions ongaining access to the application and continuing the enrollment process on your EQIP Entity’s behalf.EQIP Entity Portal User Guide 20210709aPage 10 of 22
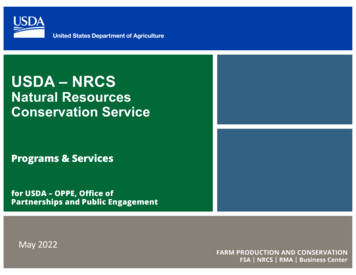
4.4 Episode & Intervention SelectionThe next page allows EQIP Entities to select the clinical episode categories in which they intend to participate, alongwith the general categories of care redesign interventions they will be pursuing as part of the program.Definitions for clinical episode categories can be found on the HSCRC uality-Improvement-Program.aspx.To be eligible for a given clinical episode category, the participating EQIP Entity (group or individual as selectedabove) must collectively have more than 11 episodes in that specific category during the baseline period to ensure aminimum viable volume for evaluation. The column ‘Eligible’ in the selection table will indicate whether thecurrently selected EQIP Entity (that is, episodes associated with NPIs submitted in the previous step) meet thenecessary volume thresholds.In addition, the total volume of episodes across all selected clinical episode categories during the baseline periodmust be at least 50 in order to ensure the robustness of program target price and savings calculations.The selection table shows the baseline volume for each episode category in the corresponding row. Note that as thisis not a PHI-level application, the volume for any episode category with less than 11 episodes during the baselineperiod will be masked. Detailed baseline data can be viewed from the Landing Page – simply click the ‘View BaselineData’ link in the Program Data section. More information on the Baseline Data Report can be found in Section 5.3below. The baseline period on which these volumes are assessed includes all potential episodes that would havetriggered between January 1, 2019 – December 31, 2019, and the average episode cost shown is displayed in actualbaseline period dollars.To select an episode, simply click on the appropriate row in the ‘Participating’ column and select ‘Yes.’ Then, do thesame for each intervention type (Clinical / Care Redesign, Beneficiary / Caregiver Engagement, Care Coordination /Care Transitions). At least one intervention type must be selected for each episode category, though you may selectEQIP Entity Portal User Guide 20210709aPage 11 of 22
different interventions for different episode categories as you see fit. A PDF with sample intervention descriptionscan be downloaded by clicking the ‘Intervention Examples’ link in the upper right-hand corner of this screen.As you make your selections, the total episode volume for episode categories will be displayed at the bottom andwill change from red to green when the minimum volume threshold is met to visually indicate that the selectionsmeet the minimum program criteria. You will not be able to proceed to the next screen unless the minimums aremet.Once you are satisfied with your selections, you may click Next to continue to the next step in the workflow.4.5 Payment Remission RecipientThe final enrollment step requires indicating the ’Payment Remission Recipient’ for any shared savings that areearned during the program year in which you are enrolling. The information collected here will be used to generatea Care Partner Arrangement for each NPI, or Care Partner, included in the EQIP Entity. This payment remissionrecipient will be responsible for determining the allocation of shared savings between Care Partner(s) and thendistributing the shared savings payments. Only one payment remission recipient is allowed per EQIP Entity.A payment remission recipient can be an individual Care Partner, a Group, administrative proxy, or other locationdesignated by the EQIP Entity. Serving as a payment remission recipient does not constitute a formal relationshipwith the HSCRC, EQIP program or EQIP payment policy. Care partners will attest to their external relationship withthe payment remission recipient in their executed Care Partner Arrangement.The data provided her will be used to contact the Payment Remission Recipient and establish preferred paymentoperations outside of the EQIP Entity PortalRequired Data1.To complete the payment remission recipient, you must provide:EQIP Entity Portal User Guide 20210709aPage 12 of 22
a.b.c.Payment recipient organization namePayment recipient address (this must be the full address, including street, city, state, and ZIP)A payment remission point of contact for ensuring payment is processed correctly and to resolveany issues that arise, including for that POC:i. First nameii. Last nameiii. Emailiv. Phone numberAfter reviewing to ensure this is correct, you can hit the Next button to continue to the final step in the workflow4.6 Finalize EnrollmentThere is no formal submission of the EQIP enrollment process – in this step, you are prompted to review allinformation for accuracy and download a PDF copy of your application, however the workflow will remain open untilSeptember 1st and can be modified at any time up until enrollment closes at 11:59 PM Eastern Time on August 31,2021.After downloading a copy of the application, you can click the navigation link to return to the landing page or log outof the system.EQIP Entity Portal User Guide 20210709aPage 13 of 22
5 The Landing PageWhen logging into the EQIP Entity Portal after completing enrollment, you will arrive at the same EQIP Entity PortalLanding Page, but with all of the currently available workflows and dashboards now enabled. This page containslinks to all of the data, resources, and workflows that you will need to enroll and participate in EQIP.The top of the page contains a number of navigation links and program selection dropdowns. Select the programperiod and EQIP Entity for which you would like to view or edit data. If you are only affiliated with a singleperformance period and/or EQIP Entity, only a single option will be available for selection, and that value will beselected by default on login. Any workflow launched using the links described below will apply to the selected EQIPEntity and performance period.You can log out at any time by clicking the ‘Logout’ button in the upper-right corner, next to where your username isdisplayed.The center of the page contains links to all of the EQIP program dashboards. Each is described in greater detailbelow, but in summary, each EQIP Entity will find links broken down into three categories:1.2.Enrollment – the top link on the page allows you to initiate or continue the enrollment process for theselected periodProgram Participation Management – this section contains links that allow you to manage yourparticipation during enrollment and the performance period. Currently, two dashboards are available:a. Participation Dashboard – allows you to view and edit all of the Care Partners you submittedduring enrollment, view PA status, and moreb. View / Edit Episodes & Intervention Selections – allows you to view your EQIP Entity’s episode &intervention selections. This is the same screen as you will see during the enrollment process.EQIP Entity Portal User Guide 20210709aPage 14 of 22
3.5.1.1Program Data – this section contains to additional data and information on the episodes, target prices, andsavings for your EQIP Entity during the baseline and performance period, broken down as follows:a. Baseline Data Dashboard – contains aggregate, non-Protected Health Information (non-PHI) datafor each clinical episode based on the baseline period for the selected performance periodb. Performance / Savings Summary – contains aggregate, non-PHI performance data for each clinicalepisode your EQIP Entity is participating in during the performance period. This link will be inactiveuntil the first data update of the performance period.c. Performance Dashboard – contains a link to an external application with detailed episode andbeneficiary-level details on your baseline and performance period episodes. The HSCRC is alsoworking on performance improvement and opportunity analysis views to facilitate programanalysis that will be included in this suite as well. This application requires PHI access for thebeneficiaries in question and additional access privileges. This link will be inactive until January2022 when the performance dashboard goes live. If you do not have access after the launch date,contact your organizational POC or CRS Support to request PHI-level access for the application.Program ResourcesThe left-hand side of the page contains links to other CRISP resources. All of these links will open in a new tab, soany existing work in the portal will be maintained and you can return as you like.1.2.3.5.1.2The HSCRC Care Redesign Website is likewise an external, publicly facing website with policy documents,meeting minutes, and state program announcements.The EQIP Help link allows you to quickly contact support if you have any questions or issues.The EQIP Entity Portal (EEP) User Guide, where you can download a copy of this PDF.Program Status TrackingOn the right-hand side of the screen, you will see an Enrollment Status Tracker and Enrollment Deadline countdowntimer. These provide at-a-glance information on where your application currently stands in the enrollment processand how much time remains before enrollment for the currently selected performance period closes.5.2 View / Edit Episode & Intervention SelectionUse this link to go back and view or edit your EQIP Entity’s episode and intervention selections after the initialenrollment process. Additional details on the use of this interface are provided under Section 4.4 above.EQIP Entity Portal User Guide 20210709aPage 15 of 22
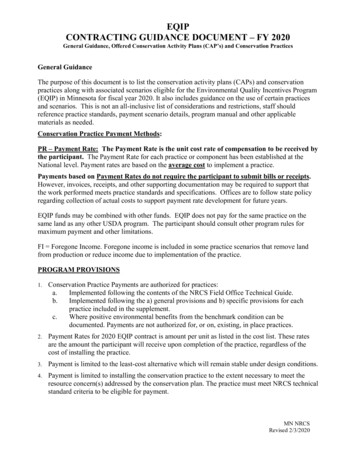
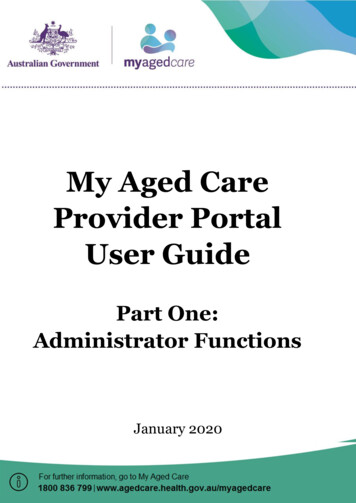
5.3 View Baseline DataAfter you have submitted the NPIs for the Care Partners participating under your EQIP Entity, you can view thebaseline data for episodes associated with those NPIs in the Baseline Data Dashboard.By default, the table will display each episode group andall of the included clinical episode categories availablefor the selected performance period. Each row will thencontain the baseline volume, statewide episodepercentile rank, and total episode payments associatedwith that clinical episode category. As this is a non-PHIapplication, data will be masked for any rows with lessthan eleven episodes.Clicking on the information icon in the page header willbring up additional details on the data elementscontained in this page. In particular, the ‘StatewideEpisode Percentile Ranks’ are explained in detail, asshown in the dialogue that appears at right.EQIP Entity Portal User Guide 20210709aPage 16 of 22
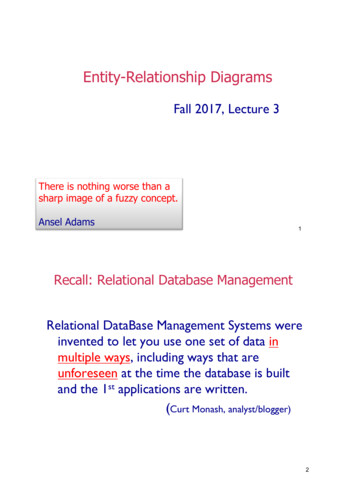
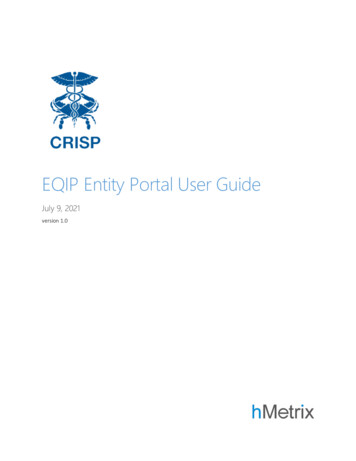
5.4 Care Partner Participation DashboardThe main purpose of the Care Partner Participation dashboard is to allow the EQIP Entity to add, remove, and editCare Partners for the Participation Year. This dashboard is open from July through September 1st of each year whenit will close for vetting to the Centers for Medicare and Medicaid (CMS) to allow Care Partner participation for thefollowing Performance Year. You will see a table containing all the individual Care Partners participating under yourEQIP Entity. If you are participating as an individual Care Partner, this table will contain only one entry.You can edit or remove any care partner in the table byclicking the links on the right-hand side of the screen.However, note that once enrollment is complete, nochanges can be made for that performance period – allchange requests will be logged and applied to the nextperformance period.If you request to remove a Care Partner in this way, youwill see the dialogue box at right and be asked for areason for removal.In the top right corner of the page, you will see anindicator that shows the current status of your CarePartner Arrangement with the CRP Entity. Care PartnerArrangements must be fully executed before an EQIPEntity is formally approved for program participation.Care Partner Arrangements will be executed after theAugust 31st close date of the Care Partner ParticipationDashboard.EQIP Entity Portal User Guide 20210709aPage 17 of 22
5
the Episode Quality Improvement Program (EQIP), view data, and understand the resources available to EQIP Entities. EQIP is a new care redesign program track and may change over time, per HSCRC and CMS policy. This User Guide will be updated to reflect any changes in program policy or the EQIP Entity Portal application; if downloading a PDF