Transcription
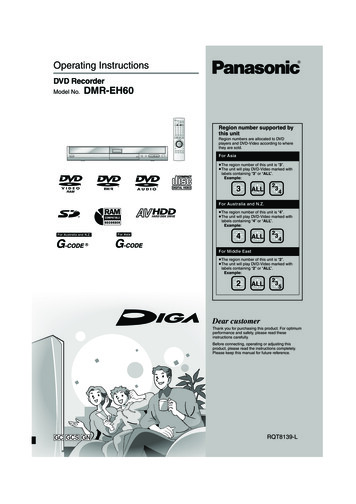
EH60.bookPage 1 Monday, June 27, 20054:57 PMOperating InstructionsDVD RecorderModel No.DMR-EH60Region number supported bythis unitRegion numbers are allocated to DVDplayers and DVD-Video according to wherethey are sold.For Asia The region number of this unit is “3”. The unit will play DVD-Video marked withlabels containing “3” or “ALL”.Example:3ALL234For Australia and N.Z.HARD DISK DRIVE[For]Australia]and]N.Z.][For]Asia] The region number of this unit is “4”. The unit will play DVD-Video marked withlabels containing “4” or “ALL”.Example:4ALL234For Middle East The region number of this unit is “2”. The unit will play DVD-Video marked withlabels containing “2” or “ALL”.Example:2ALL235Dear customerThank you for purchasing this product. For optimumperformance and safety, please read theseinstructions carefully.Before connecting, operating or adjusting thisproduct, please read the instructions completely.Please keep this manual for future reference.GC GCS GNRQT8139-L
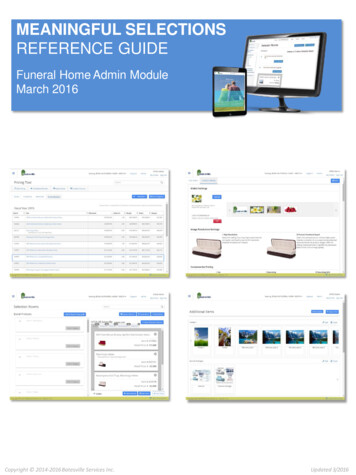
EH60.bookPage 2 Monday, June 27, 20054:57 PMCAUTION!Caution for AC Mains LeadTHIS PRODUCT UTILIZES A LASER.USE OF CONTROLS OR ADJUSTMENTS ORPERFORMANCE OF PROCEDURES OTHER THAN THOSESPECIFIED HEREIN MAY RESULT IN HAZARDOUSRADIATION EXPOSURE.DO NOT OPEN COVERS AND DO NOT REPAIR YOURSELF.REFER SERVICING TO QUALIFIED PERSONNEL.WARNING:TO REDUCE THE RISK OF FIRE, ELECTRIC SHOCK ORPRODUCT DAMAGE, DO NOT EXPOSE THIS APPARATUSTO RAIN, MOISTURE, DRIPPING OR SPLASHING AND THATNO OBJECTS FILLED WITH LIQUIDS, SUCH AS VASES,SHALL BE PLACED ON THE APPARATUS.(For Saudi Arabia)For your safety, please read the following text carefully.This appliance is supplied with a moulded three pin mains plug foryour safety and convenience.A 5-ampere fuse is fitted in this plug.Should the fuse need to be replaced please ensure that thereplacement fuse has a rating of 5-ampere and that it is approvedby ASTA or BSI to BS1362.Check for the ASTA mark Ï or the BSI mark Ì on the body of thefuse.If the plug contains a removable fuse cover you must ensure that itis refitted when the fuse is replaced.If you lose the fuse cover the plug must not be used until areplacement cover is obtained.A replacement fuse cover can be purchased from your localdealer.CAUTION!CAUTION! DO NOT INSTALL OR PLACE THIS UNIT IN A BOOKCASE,BUILT-IN CABINET OR IN ANOTHER CONFINED SPACE.ENSURE THE UNIT IS WELL VENTILATED. TO PREVENTRISK OF ELECTRIC SHOCK OR FIRE HAZARD DUE TOOVERHEATING, ENSURE THAT CURTAINS AND ANYOTHER MATERIALS DO NOT OBSTRUCT THEVENTILATION VENTS. DO NOT OBSTRUCT THE UNIT’S VENTILATION OPENINGSWITH NEWSPAPERS, TABLECLOTHS, CURTAINS, ANDSIMILAR ITEMS. DO NOT PLACE SOURCES OF NAKED FLAMES, SUCH ASLIGHTED CANDLES, ON THE UNIT. DISPOSE OF BATTERIES IN AN ENVIRONMENTALLYFRIENDLY MANNER.[For]Australia]and]N.Z.]THIS UNIT IS INTENDED FOR USE IN MODERATE CLIMATES.[For]Asia]and]Middle]East]THIS UNIT IS INTENDED FOR USE IN TROPICAL CLIMATES.This product may receive radio interference caused by mobiletelephones during use. If such interference is apparent, pleaseincrease separation between the product and the mobiletelephone.The socket outlet shall be installed near the equipment andeasily accessible or the mains plug or an appliance coupler shallremain readily operable.IF THE FITTED MOULDED PLUG IS UNSUITABLE FOR THESOCKET OUTLET IN YOUR HOME THEN THE FUSESHOULD BE REMOVED AND THE PLUG CUT OFF ANDDISPOSED OF SAFELY.THERE IS A DANGER OF SEVERE ELECTRICAL SHOCK IFTHE CUT OFF PLUG IS INSERTED INTO ANY 13-AMPERESOCKET.If a new plug is to be fitted please observe the wiring code asstated below.If in any doubt please consult a qualified electrician.IMPORTANTThe wires in this mains lead are coloured in accordance with thefollowing code:Blue: Neutral, Brown: Live.As these colours may not correspond with the coloured markingsidentifying the terminals in your plug, proceed as follows:The wire which is coloured Blue must be connected to the terminalwhich is marked with the letter N or coloured Black or Blue.The wire which is coloured Brown must be connected to theterminal which is marked with the letter L or coloured Brown or Red.WARNING: DO NOT CONNECT EITHER WIRE TO THEEARTH TERMINAL WHICH IS MARKED WITH THELETTER E, BY THE EARTH SYMBOL Ó ORCOLOURED GREEN OR GREEN/YELLOW.THIS PLUG IS NOT WATERPROOF—KEEP DRY.Before useRemove the connector cover.How to replace the fuseThe location of the fuse differ according to the type of AC mainsplug (figures A and B). Confirm the AC mains plug fitted and followthe instructions below.Illustrations may differ from actual AC mains plug.1. Open the fuse cover with a screwdriver.Figure AFigure BFuse cover2. Replace the fuse and close or attach the fuse cover.Figure A- VISIBLE AND INVISIBLE LASER RADIATION WHEN OPEN.(FDA 21 CFR)AVOID DIRECT EXPOSURE TO BEAM.CAUTION - VISIBLE AND INVISIBLE LASER RADIATION WHEN OPEN.AVOID EXPOSURE TO BEAM.(IEC60825-1)ATTENTION - RAYONNEMENT LASER VISIBLE ET INVISIBLE EN CAS D’OUVERTURE.EXPOSITION DANGEREUSE AU FAISCEAU.ADVARSEL - SYNLIG OG USYNLIG LASERSTRÅLING VED ÅBNING.UNDGÅ UDSÆTTELSE FOR STRÅLING.DANGERVARO!Figure BFuse(5 ampere)Fuse(5 ampere)- AVATTAESSA OLET ALTTIINA NÄKYVÄÄ JA NÄKYMÄTÖNLASERSÄTEILYLLE. ÄLÄ KATSO SÄTEESEEN.VARNING - SYNLIG OCH OSYNLIG LASERSTRÅLNING NÄR DENNA DELÄR ÖPPNAD. BETRAKTA EJ STRÅLEN.ADVARSEL - SYNLIG OG USYNLIG LASERSTRÅLING NÅR DEKSEL ÅPNES.UNNGÅ EKSPONERING FOR STRÅLEN.VORSICHT - SICHTBARE UND UNSICHTBARE LASERSTRAHLUNG, WENN ABDECKUNGGEÖFFNET. NICHT DEM STRAHL AUSSETZEN.-RQLS0233(Inside of product)Keep the small memory cards such as the SDMemory Card out of reach of children. Ifswallowed, seek medical advice immediately.RQT81392-If you see this symbolInformation on Disposal in other Countries outside theEuropean UnionThis symbol is only valid in the European Union.If you wish to discard this product, please contactyour local authorities or dealer and ask for the correctmethod of disposal.
EH60.bookPage 3 Monday, June 27, 20054:57 PMTable of contentsRemote control . . . . . . . . . . . . . . . . . . . . . . . . . . . . . . . . . . . . 12Main unit . . . . . . . . . . . . . . . . . . . . . . . . . . . . . . . . . . . . . . . . . 13The unit’s display . . . . . . . . . . . . . . . . . . . . . . . . . . . . . . . . . . . 13STEP 1 Connection . . . . . . . . . . . . . . . . . . . . . . . . . . . . 14STEP 2 Channel reception settings . . . . . . . . . . . . . . . 16STEP 3 Set up to match your television andremote control . . . . . . . . . . . . . . . . . . . . . . . . . . . . . . . 18To enjoy progressive video . . . . . . . . . . . . . . . . . . . . . . . . . . . 18RecordingRecording television programmes . . . . . . . . . . . . . . . . 20Rec for High Speed dubbing . . . . . . . . . . . . . . . . . . . . . . . . . . 22Flexible Recording . . . . . . . . . . . . . . . . . . . . . . . . . . . . . . . . . . 22Playing while you are recording. . . . . . . . . . . . . . . . . . . . . . . . 23Timer recording . . . . . . . . . . . . . . . . . . . . . . . . . . . . . . . 24Using G-CODE system to make timer recordings . . . . . . . . . . . 24Manually programming timer recordings . . . . . . . . . . . . . . . . . 26Check, change or delete a programme . . . . . . . . . . . . . . . . . . 27Playing backPlaying recorded video contents/Playing play-only discs . . . . . . . . . . . . . . . . . . . . . . . . 28Operations during play. . . . . . . . . . . . . . . . . . . . . . . . . . . . . . . 29Simple editing operations during play . . . . . . . . . . . . . . . . . . . 30Changing audio during play . . . . . . . . . . . . . . . . . . . . . . . . . . . 30Using menus to play MP3 . . . . . . . . . . . . . . . . . . . . . . . 31Playing still pictures (JPEG/TIFF) . . . . . . . . . . . . . . . . . 32Useful functions during still picture play. . . . . . . . . . . . . . . . . . 33Using on-screen menus/FUNCTIONS window and Statusmessage . . . . . . . . . . . . . . . . . . . . . . . . . . . . . . . . . . . . 34Using on-screen menus. . . . . . . . . . . . . . . . . . . . . . . . . . . . . . 34FUNCTIONS window. . . . . . . . . . . . . . . . . . . . . . . . . . . . . . . . 35Status messages . . . . . . . . . . . . . . . . . . . . . . . . . . . . . . . . . . . 35EditingEditing titles/chapters . . . . . . . . . . . . . . . . . . . . . . . . . . 36Editing titles/chapters and playing chapters . . . . . . . . . . . . . . . 36Title operations . . . . . . . . . . . . . . . . . . . . . . . . . . . . . . . . . . . . . 37Chapter operations . . . . . . . . . . . . . . . . . . . . . . . . . . . . . . . . . . 37Creating, editing and playing playlists . . . . . . . . . . . . . 38Creating playlists . . . . . . . . . . . . . . . . . . . . . . . . . . . . . . . . . . .Editing and playing playlists/chapters. . . . . . . . . . . . . . . . . . . .Playlist operations . . . . . . . . . . . . . . . . . . . . . . . . . . . . . . . . . .Chapter operations . . . . . . . . . . . . . . . . . . . . . . . . . . . . . . . . . .38393939Editing still pictures . . . . . . . . . . . . . . . . . . . . . . . . . . . . 40Picture and folder operation . . . . . . . . . . . . . . . . . . . . . . . . . . . 40Transferring (Dubbing)Transferring (dubbing) titles or playlists . . . . . . . . . . . 41One Touch Transfer (dubbing) . . . . . . . . . . . . . . . . . . . . . . . . . 42Transferring (dubbing) using the transferring (dubbing) list . . . 42Transferring (dubbing) a finalized DVD-R, DVD-RW (DVD-Videoformat) and R . . . . . . . . . . . . . . . . . . . . . . . . . . . . . . . . . . . . 44Recording from a video cassette recorder. . . . . . . . . . 45Manual recording . . . . . . . . . . . . . . . . . . . . . . . . . . . . . . . . . . . 45DV automatic recording (DV AUTO REC) . . . . . . . . . . . . . . . . 45Transferring (dubbing) still pictures . . . . . . . . . . . . . . . 46Transferring (dubbing) using the transferring (dubbing) list . . . 46Transferring (dubbing) all the still pictures on a card—COPY ALLPICTURES . . . . . . . . . . . . . . . . . . . . . . . . . . . . . . . . . . . . . . . 47Convenient functionsHDD, disc and card management . . . . . . . . . . . . . . . . . 48Common procedures . . . . . . . . . . . . . . . . . . . . . . . . . . . . . . . .Setting the protection . . . . . . . . . . . . . . . . . . . . . . . . . . . . . . . .Providing a name for a disc . . . . . . . . . . . . . . . . . . . . . . . . . . .Erasing all titles and playlists—Erase all titles . . . . . . . . . . . . .Erasing all the contents of a disc or card—Format. . . . . . . . . .Enabling discs to be played on other equipment . . . . . . . . . . .484848494950Table of contents/Useful featuresGetting startedUseful features . . . . . . . . . . . . . . . . . . . . . . . . . . . . . . . . . 3HDD (Hard disk drive) handling care . . . . . . . . . . . . . . . 4Disc and card handling . . . . . . . . . . . . . . . . . . . . . . . . . . .5Unit care . . . . . . . . . . . . . . . . . . . . . . . . . . . . . . . . . . . . . . .5Inserting, Removing the SD card . . . . . . . . . . . . . . . . . . 6Note to owners of progressive compatiblePAL system televisions . . . . . . . . . . . . . . . . . . . . . . . . . .6Using DVD-R, DVD-RW and R on this unit . . . . . . . . . . 7Included accessories . . . . . . . . . . . . . . . . . . . . . . . . . . . . 8The remote control information . . . . . . . . . . . . . . . . . . . 8HDD, disc and card information . . . . . . . . . . . . . . . . . . . 9Control reference guide . . . . . . . . . . . . . . . . . . . . . . . . . 12Entering text . . . . . . . . . . . . . . . . . . . . . . . . . . . . . . . . . . 51Child Lock . . . . . . . . . . . . . . . . . . . . . . . . . . . . . . . . . . . . 52Changing the unit’s settings . . . . . . . . . . . . . . . . . . . . . 52Common procedures . . . . . . . . . . . . . . . . . . . . . . . . . . . . . . . .Summary of settings . . . . . . . . . . . . . . . . . . . . . . . . . . . . . . . . .Tuning. . . . . . . . . . . . . . . . . . . . . . . . . . . . . . . . . . . . . . . . . . . .Clock settings . . . . . . . . . . . . . . . . . . . . . . . . . . . . . . . . . . . . . .TV System . . . . . . . . . . . . . . . . . . . . . . . . . . . . . . . . . . . . . . . .5253565758ReferenceMessages. . . . . . . . . . . . . . . . . . . . . . . . . . . . . . . . . . . . . 59Frequently asked questions . . . . . . . . . . . . . . . . . . . . . 60Troubleshooting guide . . . . . . . . . . . . . . . . . . . . . . . . . . 61Glossary. . . . . . . . . . . . . . . . . . . . . . . . . . . . . . . . . . . . . . 65Specifications . . . . . . . . . . . . . . . . . . . . . . . . . . . . . . . . . 66Safety precautions . . . . . . . . . . . . . . . . . . . . . . . . . . . . . 67Index. . . . . . . . . . . . . . . . . . . . . . . . . . . . . . . . . Back coverUseful featuresThis DVD Recorder records high quality pictures to rapid random access capable HDD (Hard disk drive) and DVD-RAM. This has resulted inmany new features that outperform older tape formats. The following information summarizes a few of these features.Instant recordingInstant playYou no longer need to search for empty disc space. By pressing therecording button, the unit finds available recording space and beginsrecording right away. There is no need to worry about overwritingalready recorded content.There is no need to rewind or search forward. Direct Navigatorguides you to the beginning of the recorded video immediately.1 Sec. Quick Start for Recording on DVD-RAM and HDDThere is no need to wait until recording is complete. Withoutstopping recording, you can play the video currently being recordedfrom its beginning.From the power off state, recording on DVD-RAM and HDD startsabout 1 second after first pressing the Power button and thensequentially pressing the REC button (Quick Start Mode).HDD recordingYou can keep on recording your favorite programmes to an internalHDD that is able to record up to 355 hours [EP (8 Hours) mode].You can also high speed transfer (dub) your favorite programmes toDVD-RAM, DVD-R, DVD-RW (DVD-Video format) or R and create abackup disc.Chasing playbackSimultaneous Recording and PlaybackWhile recording, you can play another video programme that wasrecorded previously.Time SlipDuring play, and also while recording, you can jump to the scene youwish to view by specifying the skip time.SD card slot, DV input terminal The SD card slot of this unit lets you play digital cameraphotographs and transfer (dub) them from a card to DVD-RAM foreasy storage without using a computer. The DV automatic recording function of this unit lets you easilytransfer (dub) a video to the HDD by connecting only a single DVcable.RQT81393
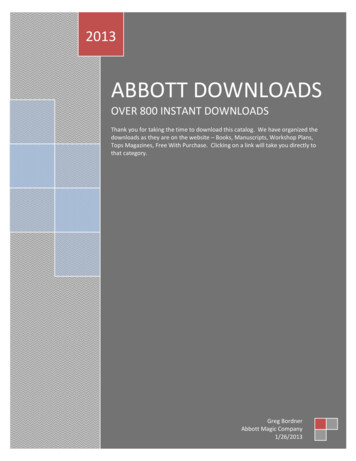
EH60.bookPage 4 Monday, June 27, 20054:57 PMHDD (Hard disk drive) handling careThe HDD is a high precision recording instrument and because of its long recording capability and high speed operation it is a very special devicethat is easily susceptible to damage.As a basic rule, save important content to a disc as backup. The HDD is a device that is not built to withstand vibration/shock or dustDepending on the setup environment and handling of the HDD some content may become damaged and play and recording may no longer bepossible. Especially during operation, do not subject the unit to any vibration, shock, or remove the AC mains lead from the household mainssocket. In the event of a power failure during recording or play, the content may be damaged. The HDD is a temporary storage deviceThe HDD is not an everlasting storage device for recorded content. Use the HDD as a temporary storage place for one-off viewing, editing, orsaving recorded content to a disc. Immediately save (backup) all content as soon as you feel there may be a problem with the HDDHDD (Hard disk drive) handling careIf there is an irregularity within the HDD, repetitive strange sounds or problems with picture (block noise, etc.) may result. Using the HDD in thiscondition may worsen the problem and in the worst case the HDD may no longer become usable. As soon as you notice this type of problem,transfer (dub) all content to disc and request service. Recorded content (data) on a HDD that has become unusable is unrecoverable. When the HDD has been automatically placed in the SLEEP mode ( below), or the unit is turned on or off, there may be an unexpected sound.This does not indicate a problem with this unit. Setup precautions Do not place in an enclosed area so the rear cooling fanand the cooling vents on the side are covered up. Place the unit on a surface that is flat and not subject tovibration or impact. Do not place on anything thatgenerates heat like a video cassetterecorder, etc.This unit Do not place in an area often subject toVCRtemperature changes. Place in an area where condensationdoes not occur. Condensation is a phenomenon where moistureforms on a cold surface when there is an extreme change intemperature. Condensation may cause internal damage to theunit. Conditions where condensation may occur–When there is an extreme change in temperature (moving froma very hot location to a very cold location, or vice versa, orwhen subjected to an air conditioner or when cooled airdirectly impacts the unit). When the HDD (warms duringoperation) is subjected to cold air, condensation may form onthe inside of the HDD and may cause damage to the HDDheads, etc.–When there is high humidity or a lot of steam in the room.–During the rainy season. Cigarette smoke etc. causes malfunction orbreakdownThe unit may breakdown if cigarette smoke or bug spray/vapor,etc. gets inside the unit. While operating Do not move the unit or subject to vibration or impact. (TheHDD may become damaged.) Do not remove the AC mains lead from the household mainssocket, or flip the power breaker switch.While the unit is on, the HDD is rotating at high speed. Sound ormovement due to rotation is normal. When moving the unit1 Turn the unit off. (Wait until “BYE” disappears from thedisplay.)2 Remove the AC mains lead from the household mains socket.3 Move only after the unit has come to a complete stop (approx.2 minutes) in order to avoid subjecting to vibration and shock.(Even after turning the unit off, the HDD continues operatingfor a short time.)In the above situation, without turning the unit on, let the unitadjust to the room temperature and wait 2–3 hours untilcondensation is gone. HDD recording time remainingThis unit records using a VBR (Variable bit rate) data compression system to vary recorded data segments to match video data segments whichmay cause differences in the displayed amount of time and space remaining for recording.If the remaining amount of time is insufficient, erase any unwanted titles to create enough space before you start recording. (Erasing a playlist willnot increase the amount of time.) When “HDD SLP (SLEEP)” appears on the unit’s displayThe HDD has been automatically placed in the SLEEP mode. (The HDD continues to rotate at high speed while the unit is on. In order to extendthe life of the HDD, the HDD will be placed in the SLEEP mode if no operation has been performed for 30 minutes while there is no disc on thedisc tray.) Press [HDD] to activate. While in SLEEP mode play or recording may not start right away because the HDD takes time to be re-activated. When not using the unit, we recommend removing the disc in the tray in order to set the HDD to the SLEEP mode. Indemnity concerning recorded contentPanasonic does not accept any responsibility for damages directly or indirectly due to any type of problems that result in loss of recording oredited content (data), and does not guarantee any content if recording or editing does not work properly. Likewise, the above also applies in acase where any type of repair is made to the unit (including any other non-HDD related component).RQT81394
EH60.bookPage 5 Monday, June 27, 20054:57 PM How to hold a disc or card Handling precautionsDo not touch the recorded surface or the terminal surface. Do not attach labels or stickers to discs. (This may cause discwarping and un-balanced rotation, rendering it unusable.) Write on the label side of the disc only with a soft, oil-based feltpen. Do not use ballpoint pens or other hard writing implements. Do not use record cleaning sprays, benzine, thinner, staticelectricity prevention liquids or any other solvent. Do not use scratch-proof protectors or covers. Do not expose the terminals of the card to water, garbage or otherstrange things. Do not drop stack, or impact discs. Do not place objects on them. Do not use the following discs:–Discs with exposed adhesive from removed stickers or labels(rental discs, etc.).–Discs that are badly warped or cracked.–Irregularly shaped discs, such as heartshapes. Concerning non-cartridge discsBe careful about scratches and dirt. If there is dirt or condensation on the discWipe with a damp cloth and then wipe dry. Do not place in the following areas:–In direct sunlight.–In very dusty or humid areas.–Near a heater.–Locations susceptible to significant difference in temperature(condensation can occur).–Where static electricity or electromagnetic waves occur. To protect discs from scratches and dirt, return them to their casesor cartridges when you are not using them.Disc and card handling/Unit careDisc and card handlingThe manufacturer accepts no responsibility and offers no compensation for loss of recorded or edited material due to a problemwith the unit or recordable media, and accepts no responsibility and offers no compensation for any subsequent damage caused bysuch loss.Examples of causes of such losses are A disc recorded and edited with this unit is played in a DVD Recorder or computer disc drive manufactured by another company. A disc used as described above and then played again in this unit. A disc recorded and edited with a DVD Recorder or computer disc drive manufactured by another company is played in this unit.Unit careThe precision parts in this unit are readily affected by theenvironment, especially temperature, humidity, and dust.Cigarette smoke also can cause malfunction or breakdown.To clean this unit, wipe with a soft, dry cloth. Never use alcohol, paint thinner or benzine to clean this unit. Before using chemically treated cloth, carefully read theinstructions that came with the cloth.Observe the following points to ensure continued listening andviewing pleasure.Dust and dirt may adhere to the unit’s lens over time, making itimpossible to record or play discs.Use the DVD lens cleaner about once every year, depending onfrequency of use and the operating environment. Carefully read thelens cleaner’s instructions before use.DVD lens cleaner: RP-CL720EDo not place the unit onamplifiers or equipmentthat may become hot.The heat can damage the unit.[Note]Do not obstruct the rear panel’s internal cooling fan.Before moving the unit, ensure the disc tray is empty.Failure to do so will risk severely damaging the disc and theunit.RQT81395
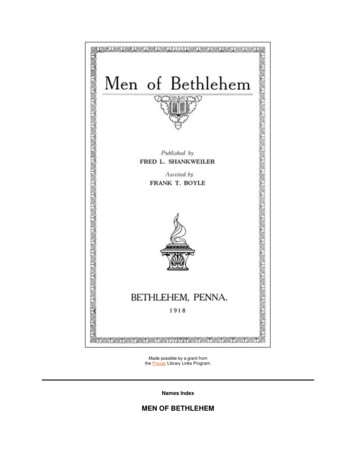
EH60.bookPage 6 Monday, June 27, 20054:57 PMInserting, Removing the SD cardOnly insert or remove the SD card after turning the unit off.When the card indicator (“SD”) on the unit’s display is flashing, the card is being read from or written to. Do not turn off the unit or remove the card.Such action may result in malfunction or loss of the card’s contents.Opening the coverInserting, Removing the SD card / Note to owners of progressive compatible PAL system televisionsPress down.Inserting the cardRemoving the cardPress on the centre of thecard until it clicks intoplace.If you are using aminiSDTM card, insert itinto the miniSDTM cardadaptor that comeswith the card.Insert and remove thisadaptor from the unit.1 Press on the centre ofthe card.2 Pull it straight out.Closing the coverPush up.ADAPTERInsert the card label up withthe cut-off corner on the right.(Do not forget to close the cover. right) You can use SD Memory Cards with capacities from 8 MB to 1 GB ( 11).Note to owners of progressive compatible PAL system televisions If you have an LCD/plasma television or LCD projectorUsing progressive output, you can enjoy high-resolution videorecorded on media such as DVD-Video. Connect this unit’scomponent video output terminals to your television and turn on theprogressive output setting ( 15, 18).COMPONENTVIDEO INProgressive outputCOMPONENTVIDEO OUTRQT81396 If you have a regular television (CRT: cathode ray tube)Use component output with progressive “Off” (Factory setting 55),even if it is progressive compatible, because progressive output cancause some flickering. This is the same for multi system televisionsusing PAL mode.COMPONENTVIDEO INProgressive outputCOMPONENTVIDEO OUT
EH60.bookPage 7 Monday, June 27, 20054:57 PMUsing DVD-R, DVD-RW and R on this unitRestrictions with DVD-R, etc.§ 16:9 aspect programmes are recorded in 4:3 aspect. The main (M 1) or secondary audio (M 2 ) only can be recorded for bilingual broadcasts. Playing the disc on other DVD players is not possible before finalizing.DVD-R, DVD-RW and R are collectively referred to as “DVD-R, etc.” on this page.M2M1The selected audio only is recorded.e.g.,HelloHalloe.g., M 1 onlyRecord to DVD-R, etc.Hello16:9 aspect programmewith main andsecondary audio4:3 aspectTherefore, follow the steps below when you use DVD-R, etc. When recording a bilingual programme to DVD-R, etc.Select the audio to record before recording or transferring (dubbing).Some television programmes are broadcast with main (M 1) or secondary audio (M 2 ). You have to select the audio recording type beforerecording or transferring (dubbing) them to DVD-R, etc. If you do not connect external equipmentSelect “M 1” or “M 2” in “Bilingual AudioSelection” in the SETUP menu ( 54).M1Record to DVD-R, etc. The selected audio only is DisplayConnectionDynamic Range CompressionOffM1Bilingual Audio SelectionDigital Audio OutputAudio Mode for XP Recording Dolby DigitalStereo 1Audio Mode for DV InputTABUsing DVD-R, DVD-RW and R on this unit§HelloSELECT If you connect external equipment–Select “M 1” or “M 2” on the external equipment. When you want to transfer (dub) titles in high speed mode from the HDD to DVD-R, etc.Set “Rec for High Speed dubbing” to “On” before recording to the HDD ( 22).You can transfer (dub) titles in high speed mode (max. speed is 64k§); however, the following settings are necessary before recording to theHDD.§ Depending on the disc, max. speed may vary.Set “Rec for High Speed dubbing” to “On” ( 22).SETUPTuningRecord to the HDDHigh speed transfer (dub) to DVD-R, etc.Settings for recordingRecording time in EP mode EP (8 Hours)Rec for High Speed dubbingOnHDDDiscPictureSoundDisplay Playing the disc on other DVD playersThe disc must be finalized after recording or transferring (dubbing) ( 50).It is necessary to finalize DVD-R, etc. on this unit after recording or transferring (dubbing) titles to them. You can then play them as a commerciallysold DVD-Video. However, the discs become play-only and you can no longer record or transfer (dub).§§You can record and transfer (dub) again if you format DVD-RW.Play on other DVD equipmentRecord to DVD-R, etc.PLAY MODESETUPÍ TOP 9VÍ /IÍDOUBLE RE-MASTER CD SEQUENTIALDISC12345 ;1:/65/9DISC EXCHANGEDISC SKIP RERQT81397
EH60.bookPage 8 Monday, June 27, 20054:57 PMIncluded accessoriesPlease check and identify the supplied accessories.(Product numbers correct as of July 2005. These may be subject to change.) [For]Asia,]Australia]and]N.Z.]1 Remote control[For]Asia]1 AC mains lead 1 RF coaxial cable 2 Batteriesfor remote control(EUR7729KF0)Included accessories/The remote control information[For]Australia]and]N.Z.]1 AC mains lead[For]Middle]East]1 Remote control[For]Middle]East]2 AC mains leadFor Saudi Arabia(EUR7729KJ0) For use with this unit only. Do notuse it with other equipment.Also, do not use cords for otherequipment with this unit.The remote control information Batteries Use Insert so the poles (i and j) match those in the remote control.Remote control signal sensorR6/LR6, AA2030 Do not use rechargeable type batteries. Do not mix old and new batteries. Do not use different types at the same time. Do not heat or expose to flame. Do not take apart or short circuit. Do not attempt to recharge alkaline or manganese batteries. Do not use batteries if the covering has been peeled off.Mishandling of batteries can cause electrolyte leakage which candamage items the fluid contacts and may cause a fire.Remove if the remote control is not going to be used for a longperiod of time. Store in a cool, dark place.Remote control operations ( 12)[Note]If you cannot operate the unit or television using the remote controlafter changing the batteries, please re-enter the codes ( 19).RQT8139820307 m directly in front of the unit 1 Audio/videocable
EH60.bookPage 9 Monday, June 27, 20054:57 PMHDD, disc and card informationHDD and discs you can use for recording and playLogoIndicated in theseinstructions byData that can be recordedand playedMain useMaximum recording timeDVD-RAM 4.7 GB/9.4 GB, 12 cm 2.8 GB, 8 cmHard disk drive (HDD) 200 GB–[HDD][RAM][-R] before finalization[DVD-V] after finalizationVideoStill picturesVideoStill picturesVideoTemporary storageAs re-writable discs for backup useAs one time recording discs for backup use(recordable until the disc is full)Approx. 355 hoursApprox. 8 hours (Approx. 16 hours on adouble-sided disc§)Only on DVD-RAM compatible players.Play on other players–Compatible with high–Up to 5k recording speed discs.speed recordingWhat you can do on this unit (Y: Can do t: Cannot do)Chasing playbackYYRecording broadcasts thatYY [CPRM ( 65) compatible discs only.]allow one copyRecording both M 1 andYYM 2 for bilingual broadcastsRecording 16:9 aspectYYpictureEntering textYYErasing titlesYYCreating playli
Thank you for purchasing this product. For optimum performance and safety, please read these instructions carefully. Before connecting, operating or adjusting this product, please read the instructions completely. Please keep this manual for future reference. Region number supported by this unit Region numbers are allocated to DVD