Transcription
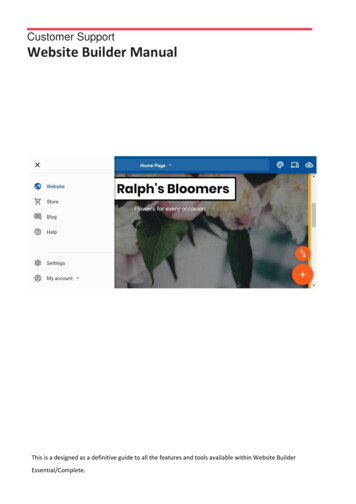
Customer SupportWebsite Builder ManualThis is a designed as a definitive guide to all the features and tools available within Website BuilderEssential/Complete.
Customer Support Website Builder Essential/Complete ManualContentsIntroduction . 1Getting Started . 1Setup Your Site . 1Complete Your Site Profile . 4Adding Content . 8Text . 10Adding Text. 10Editing Text . 11Formatting Text . 12Creating Links . 13Removing Text . 14Images. 15Adding Images . 15Uploading Images . 16Editing Images . 17Additional Image Settings . 27Removing Images . 30Page Layout. 31Divider . 31Spacer . 32Gallery . 33Adding a Gallery to a Page . 33Add Images to the Gallery . 34Additional Gallery Settings . 35Page 1
Customer Support Website Builder Essential/Complete ManualSlideshow . 36Adding a Slideshow to a Page . 36Add Images to the Slideshow . 37Additional Slideshow Settings. 38Forms . 40Adding a Form to a Page . 40Additional Form Settings . 41Testing a form. 43Downloadable Files . 44PDF . 45Dropbox – Other Files . 47Video and Audio . 50Finding the YouTube Embed Code . 50Finding the SoundCloud Embed Code. 52Adding a YouTube Video to Your Site . 53Adding SoundCloud Audio to Your Site. 55Social . 56Adding a Facebook Like Button . 56Adding a Tweet Button . 58Adding a Twitter Feed to a Page . 60Adding Yelp Reviews to a Page . 62Embed Widget . 63Adding an Embed Widget to a Page . 63Editing the Embed Code . 63Store Widgets. 65Adding a Store Widget to a Page . 65Page 2
Customer Support Website Builder Essential/Complete ManualProducts List . 65Featured Products . 66Categories . 68PayPal Buy Now . 69Blog Widgets . 71Adding a Blog Widget to a page. 72Post list . 72Blog search . 73Disqus . 73Other Widgets . 74Adding a Button to a Page . 74Customising a Button . 75Call Me. 78Map . 79Moving Content . 82Moving Individual Widgets . 82Moving Sections of a Page . 82Deleting Content . 83Removing Individual Widgets . 84Deleting Sections of the Page . 84Site Style . 85Designs . 86Colours . 87Fonts . 89Background . 91Page Management . 95Page 3
Customer Support Website Builder Essential/Complete ManualAdd a New Page . 96Cloning an Existing Page . 97Page Settings . 98Choosing your home page . 98Rename a page . 99Choosing what to publish . 100Organising Your Pages. 101Creating a folder . 101Moving a Page to another Folder . 103Removing a page . 104Navigation . 104Changing the Order of Your Pages . 104Create a Sub Navigation Menu. 105Showing Pages in the Navigation Menu . 106Navigation Menu Appearance. 108Blog . 108Setting Up Your Blog . 108Blog Posts . 110Adding a blog post . 110Adding categories and tags to your posts . 113Importing WordPress posts into your blog . 114Displaying Your Blog Posts . 116Store . 118Setting Up Your Store . 118Store details . 120Payment methods . 120Page 4
Customer Support Website Builder Essential/Complete ManualShipping . 121Products . 123Adding Products to Your Store . 123Adding Categories and Tags to Products . 124Product Variants . 126Managing Product Inventory . 130Importing products from a CSV file. 131Displaying Products on Your Site . 132Adding Tax Rates to Your Store . 133Discount Codes . 135Enabling discount codes . 135Adding discount codes . 136Using the Store Analytics . 137Store Terms and Conditions . 139Enabling terms and conditions . 139Editing your terms and conditions page . 140Site Settings . 142Profile. 143Logo . 143Basic Information. 144Contact Details . 145Favicon . 145Google Analytics. 146SEO and Optimisation . 148Adding site wide SEO data . 148Disable image compression . 149Page 5
Customer Support Website Builder Essential/Complete ManualAdding page specific SEO data . 150Changing the language of your site . 151Debug Mode . 152Redirects . 153Cookies. 155Resetting Your Site . 157Securing Your Site . 158Publishing Your Site . 159Previewing Your Site . 161Publishing Specific Pages. 162Page 6
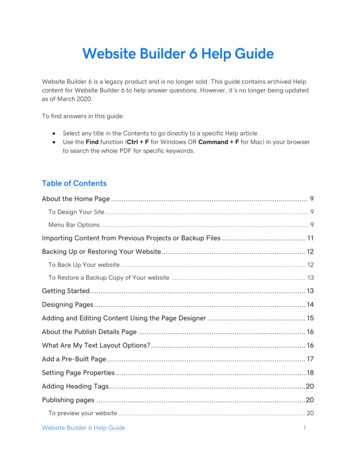
Customer Support Website Builder Essential/Complete ManualIntroductionWebsite Builder Essential/Complete is a powerful application with a broad selection of features that allow you tocreate websites without the need to learn HTML language or web design skills. It comes with ready-madetemplates according to your requirements that can be modified with text and images, allowing you to create awebsite that suits your needs.Getting StartedSetup Your SiteStep 1When you first log in you will be asked for the title of your website. This will appear at the top of your pages,such as the home page.Step 2Click the dropdown for What you will use your website for and select the most appropriate option. If thedescriptive options are not suitable then you can select Other.Page 1
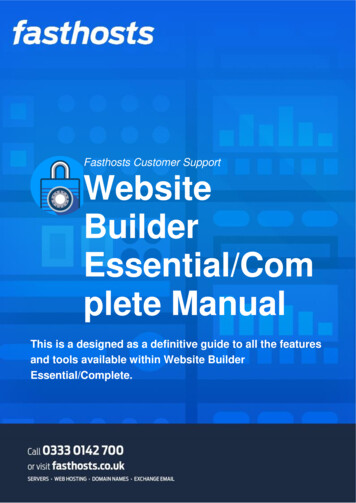
Customer Support Website Builder Essential/Complete ManualStep 3Select the category which will best describe the content of the site. If you selected Testing the sitebuilder orOther in Step 2 you will not have a set of options at this stage.Page 2
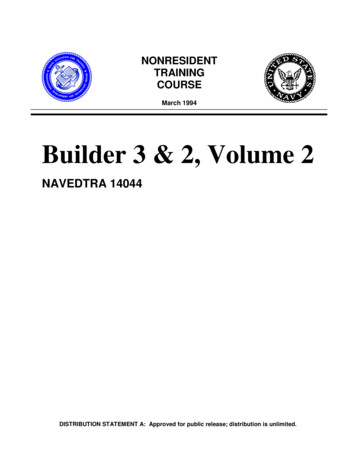
Customer Support Website Builder Essential/Complete ManualQuick tip: The category selected at this stage determines which basic template yourwebsite will start with.Step 5Once you are happy with the options you have selected, click Continue to proceed to select the design of thesite.Step 6You can select from several designs. Click on a Design, as indicated below, to preview how it would look on yoursite.Page 3
Customer Support Website Builder Essential/Complete ManualQuick tip: If you want to try another theme then you can press the back button inyour browser to return to the previous page and select different options.Once you have found a design that you are happy with, click Done in the top right to apply the Design to yoursite. You will be taken to the site editor and can start creating your new site.Complete Your Site ProfileStep 1Page 4
Customer Support Website Builder Essential/Complete ManualClick Settings from the main menu.Step 3Select Profile from the list of Common settings.Page 5
Customer Support Website Builder Essential/Complete ManualStep 4You can add a logo to your site on this page by dragging and dropping a file from your local machine or clickingChoose an image and then selecting an image using the pop-up box.Step 5Click the Basic Information tab and fill in the details on the page. Business name: Fills in the name of your site in the header, as well as filling the "site name" metadata.This metadata is not visible to you but is visible to Google and other search engines. Headline and Strap line: These will appear at the top of your home page. Company Description: This may appear in the header or footer of the site depending on your chosentemplate. Copyright: The date of your copyright (if applicable). PayPal account email: The email address of the PayPal account you want to use. Currencies: Select the currency that you want to use.Page 6
Customer Support Website Builder Essential/Complete ManualStep 6Optionally, you can fill in the contact details that you want to be displayed on your contact page. To do this, clickthe Contact Details tab and fill in the details on the page. Email: Enter your contact email address. Country: Enter the country that you want to be displayed on your contact page. Address: Enter the postal address that you want to be displayed on your contact page. Postal code: Enter the postcode that you want to be displayed on your contact page. Phone: Enter your contact phone number. Twitter: Enter your twitter username. LinkedIn URL: Enter the LinkedIn URL that you want to be displayed on your contact page. Facebook URL: Enter the Facebook URL that you want to be displayed on your contact page. RSS Feed: Enter the URL of an RSS feed that you want to be displayed on your contact page. Instagram: Enter the URL of the Instagram profile that you want to be displayed on your contact page.Page 7
Customer Support Website Builder Essential/Complete Manual Pinterest: Enter the URL of the Pinterest profile that you want to be displayed on your contact page. YouTube Page URL: Enter the URL of the YouTube channel that you want to be displayed on yourcontact page. Vkontakte URL: Enter the URL of the Vkontakte page that you want to be displayed on your contactpage.Step 7Once you have entered your information click Save in the top right of the screen.Adding ContentTo add content to your site you will need to ensure that you are in the Site Editor. When logged into WebsiteBuilder click the three lines in the top left corner to expand the menu.Next to this icon will be the title of the website builder section you are currently in.From the expanded menu, on the left, the area of the website builder you are currently in will also be blueinstead of grey.If you are not already on the Site editor, click Website from the menu on the left.Page 8
Customer Support Website Builder Essential/Complete ManualYou will now be in the site editor and from here you can manage the content on your pages and add newcontent using the Add widget and Add content buttons.Both contain the same elements and features with some differences.Content contains many preset layout and appearance options but these can only be placed in a Section of thepage. Widget contains basic versions of the elements, these can be customised and more freely moved andplaced around the page; this documentation will detail the processes using widgets.To add any widget to a page, click the Add widget button, scroll to the relevant section and then drag thedesired widget onto the page where you want it to appear.Page 9
Customer Support Website Builder Essential/Complete ManualQuick tip: The appearance of certain widgets and content will be based on yourtheme and site style. If you are not happy with the theme the Website Builder hasselected then you can reset the site and complete the initial setup again.If you add the wrong widget or content then you can delete elements from your pages. If it has just been placedin the wrong location then you can move widgets and content around the page.TextAdding TextNote: Some software (such as Microsoft word) will add hidden formatting code toyour text. If want to copy and paste text into your website, make sure that you“Paste as Plain Text”.Page 10
Customer Support Website Builder Essential/Complete ManualIn the widget menu, from the Content section, drag the Text widget onto the section of the page where youwant to add text. A new text box will appear where you drop it.Editing TextStep 1Click the text widget you want to edit to open the text editor.Step 2Make any changes that you want to the text. You can type into the box provided and once you are happy withthe content, click outside of the box to apply the changes.Page 11
Customer Support Website Builder Essential/Complete ManualFormatting TextQuick tip: This section will show you how to change the formatting of one textwidget. To change the styles of text across your site please see FontsClick the text widget you would like to format.Select the text you would like to re-format and choose how you would like to reformat the text using theseoptions detailed below within the text editor.1.Bold2.ItalicPage 12
Customer Support Website Builder Essential/Complete Manual3.Add Link4.Font Colour5.Format6.Increase Font Size7.Decrease Font Size8.Align Left9.Align Centre10.Align Right11.Justify Text12.Unordered List13.Ordered ListCreating LinksStep 1Click the text widget that you want to create a link in and highlight the text that you want to turn into a link.Step 2Click the Add link to icon and in the field provided you can enter a URL, email address or page on your site to linkto.An external page:Page 13
Customer Support Website Builder Essential/Complete ManualEnter the URL into the field to create a link to an external page.An email address:Enter the email address you want the link to use in the field provided.A page on my site:You can enter the exact name of a page on your site to add a link to it. If you start typing the Add link to tool willgive you auto-complete options.Once you have entered the URL, email address or name of the page you want to link to, click Done to create thelink.Removing TextHover over the text widget that you want to remove and a delete icon will appear in the top right corner of thebox. Click this icon to delete the text widget and remove the text from the page.Page 14
Customer Support Website Builder Essential/Complete ManualImagesAdding ImagesStep 1In the widget menu, from the Content section, drag the Image widget onto the section of the page where youwant to add text. An image will appear where you drop it.Step 2Page 15
Customer Support Website Builder Essential/Complete ManualClick the image widget on the page and select Add new image or Choose from recent. You can either upload anew image, select from recent images, select Facebook to upload a picture from your Facebook profile or theStock image option to pick from Website Builder's library of stock images.Uploading ImagesStep 1Click the image widget on the page and select Add new image.Step 2You can either drag and drop a JPG or PNG image from your computer into the window or click Upload A NewImage to upload your image manually.Page 16
Customer Support Website Builder Essential/Complete ManualEditing ImagesTo make changes to an image click an image widget on a page to open the settings window and select Editimage. This will bring up the image editor.Image editor: TransformStep 1Open your image in the image editor and select Transform from the menu on the left-hand side.Page 17
Customer Support Website Builder Essential/Complete ManualStep 2You can select from several preset crops from the pane on the left-hand side.Or you can select Custom from this pane. You can then drag the corners of the overlay on the image in the rightpane to crop the image as required.Step 3You can use the tools at the bottom of the right pane to further transform the image.Page 18
Customer Support Website Builder Essential/Complete Manual1.Flip Horizontal2.Flip Vertical3.Rotate Image4.Rotate 90 Left5.Rotate 90 RightNote: The rotate image utility above is a slider. This allows you to rotate the imageto the desired degree in either direction, instead of just 90 left or right.Image editor: FilterStep 1Open your image in the image editor and select Filter from the menu on the left-hand side.Step 2Page 19
Customer Support Website Builder Essential/Complete ManualSelect a filter from the options available in the pane on the left-hand side.You can then use the slider on the selected filter to adjust the filter opacity.Image editor: AdjustStep 1Open your image in the image editor and select Adjust from the menu on the left-hand side.Page 20
Customer Support Website Builder Essential/Complete ManualStep 2From the options available you can make various adjustments to change the look of the image with basicsettings such as brightness, saturation, and contrast.You can drag the sliders to make adjustments or type in the desired values.There are also some more advanced Refinements to allow you to further adjust the look of the image.Page 21
Customer Support Website Builder Essential/Complete ManualImage editor: FocusStep 1Open your image in the image editor and select Focus from the menu on the left-hand side.Step 2Page 22
Customer Support Website Builder Essential/Complete ManualYou can select from the focus options available in the left pane of the image editor. These change the focus ofthe image by blurring parts of the image.You can then use the slider on the selected focus option to adjust the intensity of the blur.Step 3In the pane on the right, you can drag the focus area to change the point of focus.Page 23
Customer Support Website Builder Essential/Complete ManualYou can also drag the circle on the edge of the focus area to change the size and with certain focus options theshape, of the focus area.Image editor: TextStep 1Open your image in the image editor and select Text from the menu on the left-hand side.This will create a text box on the image in the right pane to allow you to add text to the image.Step 2Page 24
Customer Support Website Builder Essential/Complete ManualFrom the pane on the left-hand side you can customise the appearance of the text on the image. These optionsallow you to change fonts, size, spacing and colours.Step 3Double click the text box in the pane on the right-hand side to edit the text.You can use the 3 options above to make changes to an individual text box.Page 25
Customer Support Website Builder Essential/Complete Manual1.Bring to front2.Duplicate the text box3.Delete the text boxImage editor: OverlaysStep 1Open your image in the image editor and select Overlays from the menu on the left-hand side.Step 2Select an overlay from the left pane. This will appear blended over the top of your image.Step 3Page 26
Customer Support Website Builder Essential/Complete ManualYou can use the slider to adjust the opacity of the overlay. You can also click the arrows to change the blendingoption.Note: The blending option can drastically change the appearance of the image andoften the default option looks best.Once you are done editing an image, click Done in the top right corner of the image editor to apply the changes.Quick tip: You can select Library from the menu on the left to quickly edit otherimages or upload a new image to edit.Additional Image SettingsYou can click the image widget of the page to bring up the settings window. As well as the options to select oredit an image there are additional options for the image widget.Image linkYou can click the Link to drop down and select A page on my site, an external page or an email address. Thiswill make the image into a link to the specified page or email address.Page 27
Customer Support Website Builder Essential/Complete ManualA page on my siteFrom the Internal link drop down you can select from your existing pages.An external pageStep 1In the External link field enter the URL of the external page you want to link to.Step 2From the Target window drop down, select if you want the external page to be opened in the current tab or anew tab opened for the specified URL.Page 28
Customer Support Website Builder Essential/Complete ManualAn email addressIn the Mail field enter the e-mail address you want to link to.Display OptionsScaleFrom the Scale drop down menu you can scale the image to a specific size.There are options for specific purposes such as thumbnail or you can scale the image to a percentage of itsoriginal size.Image alignmentYou can select one of the 3 options to change the alignment of the image to align to the left, centre or right ofthe page.Page 29
Customer Support Website Builder Essential/Complete ManualSEOThere are a number of fields under the SEO section of the image settings to improve usability of your site andgeneral optimisatio
Website Builder Essential/Complete is a powerful application with a broad selection of features that allow you to create websites without the need to learn HTML language or web design skills. It comes with ready-made templates according to your requirements that can be modified with text and images, allowing you to create a .