Transcription
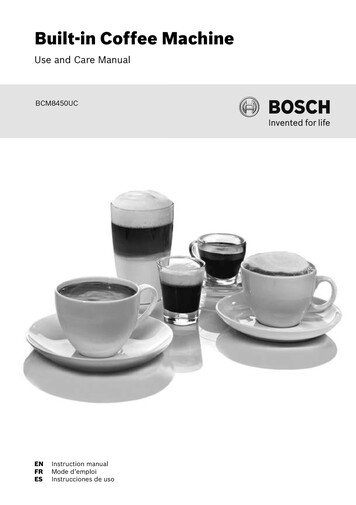
Built-inBuilt-inCoffeeCoffeeMachineMachineBuilt-in Coffee MachineUse andUseCareandManualCare ManualUse and Care ManualBCM8450UCBCM8450UCBCM8450UCENFRESEN Instruction manualFR Mode d’emploiESde usoInstructionEN InstruccionesInstructionmanual manualModeFRd’emploiMode d’emploiInstruccionesES Instruccionesde usode uso
enEnglish2frFrançais35esEspañol72AIncluded in delivery (see page 6)Contenu de lʼemballage (voir page 40)Lista de partes incluidas (Ver pág.77)bcefgdi110 155 92 00636455a155 110 92 h
B2normalhighEspresso4 ozOff2a2b2cCnormalhighEspresso4 ozOff11b31a2121c3a21b21a
D1818a6c6d6b8a6a681110 951713 2019E-Nr. .FD .7a44d4c4a16b16a4b7122116
E14 14b2.1.1314a1.2.15
en ContentsImportant Safety Precautions 4Included in delivery 6Overview 7Controls 8Initial use 8Control panel 10Preparing drinks 10Preparation using coffee beans 13Preparation using milk 13Preparation using ground coffee 14Dispensing hot water 14Personalized drinks 15Adjusting the grind setting 16Child-proof lock 16Menu 16Home Connect 18Care and daily cleaning 21Service programs 25Tips on energy saving 27Frost protection 27Storing accessories 27Accessories 28Disposal 28Simple troubleshooting 28Technical specifications 32Warranty 33This Bosch Appliance is made byBSH Home Appliances Corporation1901 Main Street, Suite 600Irvine, CA We look forward to hearing from you.2
enHow to use these instructionsYou can open up the front cover of thisinstruction manual. There you will findillustrations of the appliance with each partnumbered. These numbers will be referredto throughout the text.Example: brewing unit (15)These instructions also show display textsand symbols in a special way. This enableyou to clearly see where we refer to textsor symbols that are marked or displayed onthe appliance.Display indicators: “Espresso”EspressoSafety Definitions¡¡WARNINGThis indicates that death or serious injuriesmay occur as a result of non-observance ofthis warning.¡¡CAUTIONThis indicates that minor or moderate injuries may occur as a result of non-observance of this warning.NOTICE:This indicates that damage to the appliance or property may occur as a result ofnon-compliance with this advisory.Note:This alerts you to important informationand/or tips.Buttons and controls on the display: CThe appliance comes with a quick reference guide where you can find the most important functions at a glance. It canbe stored in the accessory drawer of theappliance.Pay special attention to the importantsafety instructions in the “ImportantSafety Precautions” section. 3
en Important Safety Precautions AAIMPORTANT SAFETY PRECAUTIONSREAD AND SAVE THESE INSTRUCTIONSWhen using electrical appliances, basicsafety precautions should always befollowed, including the following:1. Please read and follow the operatinginstructions carefully and keep them forlater reference. If the unit is transferredto another party, please be sure toinclude these instructions.2. Check the appliance after unpacking it.Do not connect the appliance if it hasbeen damaged in transit.3. Do not touch hot surfaces. Use handlesor knobs.4. Be sure that all components areassembled and fastened properly.5. To protect against fire, electric shockand injury to persons, do not immersecord, plugs, or body in water or in anyother liquid. See Use and Care Guidefor cleaning.6. Close supervision is necessary when theappliance is used by or near children.7. Unplug from outlet when not in use andbefore cleaning. Allow to cool beforeputting on or taking off parts, and beforecleaning the appliance.8. Do not operate any appliance witha damaged cord or plug or after itmalfunctions, or has been damaged inany manner. Return appliance to thenearest authorized service facility.9. The use of accessories attachmentsnot recommended by the appliancemanufacturer may result in fire, electricshock or injury to persons.10. Do not use outdoors or in a damp area.11. Do not let cord hang over edge of tableor countertop, or touch hot surfaces.12. Do not place unit or components on ornear a cooktop or range, or in a heatedoven.4 13. Always attach plug to appliance first,then plug cord into the wall outlet. Todisconnect, turn control to “off”, thenremove plug from wall outlet.14. This appliance must not be used bychildren without adult supervision or bydisabled persons without assistance.15. Do not use appliance for anything otherthan its intended use.16. Save these instructions.17. Please note the special information oncleaning in the instructions.STATE OF CALIFORNIAPROPOSITION 65 WARNING:WARNINGCancer and reproductive harm www.P65Warnings.ca.govIMPORTANT!This appliance is designed fordomestic and not commercial use.Use indoors at room temperature only.Do not use at more than 6560 feet /2000 meters above sea level.Protect your Coffeemaker against freezingor it will be damaged.Supervise children to ensure that they donot play with the appliance.
Important Safety PrecautionsenAAIMPORTANT SAFETY PRECAUTIONSREAD AND SAVE THESE INSTRUCTIONS¡¡WARNINGTo reduce risk of fire and electric shock:InstallationConnect and operate the appliance onlyaccording to the rating plate specifications.Use appliance only with transformerwhich is identified as Type 8001010566.Do not connect the appliance to oroperate it by means of a time switch orremote control socket. The unit must notbe operated with an extension cord.Use the Coffeemaker only if power cordand appliance show no signs of damage.Should a problem occur, pull the plug anddisconnect from the power immediately.Never immerse the appliance or powercable in water or any liquid. Avoid spillageon the connector.GroundingThis appliance may only be connected toa power supply with 120 Volt AC via acorrectly installed receptacle with ground.RepairsTo avoid potential hazards, repairs mustonly be carried out by authorized servicepersonnel.If the power cord of this appliance isdamaged, it must be replaced by aoriginal replacement power cord, whichcan be purchased from our CustomerService Department.¡¡CAUTIONTo avoid the risk of scalding:Please note that the beverages are veryhot when dispensed.Do not use chemically softened water!¡¡CAUTIONRisk of scalding (Home Connect)!If an unattended remote start takes place,third parties may be scalded if they reachunder the coffee dispenser during drinksdispensing. You should therefore makesure that with an unattended remote startthat there is no risk to other people, inparticular not to children, or to property.To avoid the risk of suffocation:Do not allow children to play withpackaging material. Store small partssafely as they can be a choke hazard.To avoid the risk of injury:Keep descaling tablets out of the reach ofchildren. Keep children away from theappliance and power cable.Do not reach into the grinding unit.Be careful not to pinch your fingers whenclosing the door. A misuse of the appliancecan potentially lead to injury.To avoid the risk of burns:The beverage outlet gets very hot. Afteruse, allow to cool down first before touching. After use, the heating elementsurfaces and warming plate can retainheat. Wait until cool before touching.Freshly prepared beverages are very hot.Leave to cool a little as necessary.To avoid the risk of influence electronicimplants:The appliance contains permanentmagnets that may influence electronicimplants such as pacemakers or insulinpumps. Persons wearing electronicimplants must maintain a minimum distance of 4″ (10 cm) from the front of theappliance and from the following partsupon removal: milk container, milksystem, water tank and brewing unit. 5
en Included in delivery Included in delivery(Figure A on the fold-out pages)a Fully automatic coffee machineb Instruction manualc Quick reference guided Home Connect leaflete Measuring spoonf Water hardness testing stripg Milk tube (set)h Milk containeri Suction pipe6 Congratulations . on purchasing this fully automatic coffeemachine! You have now acquired a highquality and modern kitchen appliance. Itcombines innovative technology with arange of functions and is easy to use. It willenable you to prepare a variety of delicioushot drinks quickly and simply – whetheryou’re in the mood for an invigoratingespresso, a creamy cappuccino, a smoothlatte macchiato or white coffee, or a traditional cup of coffee. At the same time theappliance offers you a wide range of optionsfor adapting it to your individual taste.To ensure that you can use this fullyautomatic coffee machine with all its functions and features reliably and safely, werecommend you familiarize yourself withits components, functions, displays andcontrols. These instructions are designedto help you. So please take the time to readthem before you switch on the appliance.
Overview enOverview(Figures B to E on the fold-out pages)1 Appliance doora) Recessed grip (for opening the door)b) Drip tray2 Control panel (see next page)a) Control ringb) Information displayc) Touch display (left and right)3 Outlet system (coffee, milk, hot water),height-adjustablea) Cover4 Milk systema) Snap leverb) Beverage outlet (upper part,lower part)c) Milk tube (2 pieces)d) Connecting element, metal(for magnet holder)5 Power switch J (power supply)6 Accessory drawer(for quick reference guide andaccessories)a) Quick reference guideb) Measuring spoonc) Water hardness stripd) Milk tube (set)7 Removable water tanka) Lid for water tank8 Removable bean containera) Lid for bean container9 Slide regulator for grinding degreesetting10 Magnet holder (for connecting element)11 Removable drawer(for ground coffee/cleaning tablet)12 Holder (for milk tube)13 Protective cover (for brewing unit)14 Brewing unita) Locking mechanismb) Cover15 Eject lever16 Removable drip traya) Drip tray coverb) Coffee grounds container17 Collecting tray18 Holder (for suction pipe)a) Suction pipe19 Rating plate (E number, FD)20 Shelf with sensor (for milk container)21 Milk containera) Stainless steel containerb) Lower part of the lidc) Upper part of the lidNote:Further information about the appliance,such as how to change the opening angleof the door, can be found in the InstallationInstructions. 7
en Controls ControlsThe appliance features user-friendly menunavigation to ensure that operation is aseasy as possible while at the same timeoffering a wide range of functions. Thatmeans a range of options can be selectedwith just a few operating steps.Power switch JThe power switch J (with the dooropen) is used to switch the appliance on, orto switch it off fully (power supply off).NOTICE:Do not press the power switch while theappliance is in use. Switch off the applianceonly when it is in energy saving mode, sothat it can rinse automatically.Control panel (touch field)Note:These operating instructions refer toseveral models. In some models I andC are touchscreen elements.I on/offPress I to switch on the applianceor put it into energy saving mode. The appliance is rinsed automatically.The appliance does not rinse if: if it is still warm when switched on, or if no coffee was dispensed before it wasswitched off.The appliance is ready for use as soon asthe images for the drinks selection appearon the display.C start/stopPress C for either beverage preparationor to launch a service program.Press C again while the drink is beingprepared to prematurely halt dispensing.There are four menu fields in the controlpanel which can be activated by pressing.The active menu field lights up red.mm lights up as soon as theappliance is in operation. Drinks can beselected and dispensed or settings for thedrinks can be changed.8 B MyCoffeePress B to open the selection of“ Personalized beverage preparation”.Personal settings for coffee drinks canbe saved and called up (see the section“ Personalized drinks”).A MenuPress A to call up the menu. Settingscan be made and information called up(see the section “Menu”).E ServicePress E to open the selection of serviceprograms. Run the desired program asdescribed in the section “Service programs”.Note:Press A, E or B again to exit therespective menu.Control ringTurn the control ring to navigate in thedisplay or to change parameters.Information displayThe round display shows the drink selected,the settings or information.Touch display (left and right)Depending on the setting, different fieldsare shown in both the touch displays. A fieldis activated when pressed either to entersettings or change values.Initial useGeneralFill the appropriate container using onlypure, cold, uncarbonated water and onlyroasted beans. Do not use coffee beansthat have been glazed, caramelized ortreated with other additives containingsugar, since they will block the brewing unit.¡¡WARNINGBefore the appliance can be switched onand used, it must be assembled and connected according to the enclosedassembly instructions.
Setting up the appliance Remove any protective plastic film.NOTICE:Only use the appliance in a frost-freeroom. If it has been transported or storedat temperatures below 32 F, wait at least3 hours before initial use. Take hold of the appliance door by therecessed grip and open. Remove the water tank, rinse it and fill itwith fresh water up to the “max” mark. Replace the water tank and click intoplace. Remove the bean container, fill withcoffee beans and replace. Set the power switch to I and closethe appliance door.The appliance heats up and is rinsed.The control panel is activated.“Language” appears. Turn the control ring with your finger toselect the desired language and press the[ Water hardness ] field.Note:It is important to set the water hardnesscorrectly to enable the appliance to accurately indicate when the descaling programshould be run. The preset water hardnessis level 4. If a water softener is installed inthe house, please set the water hardness tolevel 3. You can also check the water hardness by asking your local water supplier. Use the enclosed test strip to determinethe water hardness. Briefly dip the teststrip in water and check the result afterone minute.Level Water hardnessgr/gal (US)11.0426 - 7.298528.3412 - 14.597315.64 - 21.896422.938 - 31.279 Turn the control ring with your finger toset the water hardness determined. Press [ Set-up complete ]. The settings aresaved.Initial useenThe appliance is ready to use as soonas the drink images are shown and them lights up.The integrated fan switches on each timea drink is dispensed and switches off againafter a few minutes.Note:When the appliance is used for the first timeafter running a service program, or if it hasnot been operated for a long period, the firstbeverage will not have the full aroma.When the fully automatic coffee machineis first used, a suitable thick and stable“crema” is only achieved after the first fewcups have been dispensed.Switch off appliance Press I.The appliance rinses and switches toenergy saving mode.Exception: If only hot water is dispensed,the appliance switches off without rinsing. To switch the appliance off completely,open the appliance door and set thepower switch to h.NOTICE:Do not press the power switch while theappliance is in use.Note:The factory settings of the fully automaticcoffee machine are programmed for optimalperformance. The appliance switches automatically to the energy saving mode aftera specified time and rinses (duration canbe set, see “Switch off after” in the section“Menu”).Note:The appliance is equipped with a sensor.If there is a milk container, this will becorrespondingly shown on the display whenswitching to the energy saving mode. Ifthere is milk in the container, please store inthe fridge. 9
en Control panel Control panelInformation is shown on the display orsettings can be entered by pressing thetouchscreen and the control ring.DisplayThe control panel shows the selecteddrinks, settings and setting options, aswell as messages about the appliance’s operating status.e.g. Drink selectionY very stronghigh ORistrettoR 1 ozOff e.g. InformationWater tankalmost emptyInformation disappears after operating theappliance or after a short time.The information remains, however in theinformation display in the form of a smallsymbol.abcdefBean container almost emptyWater tank almost emptyReplace water filterCleaning program necessaryDescaling program necessaryCalc'nClean program necessaryPrompts to take actionFillwater tankNote:If the action required was carried out, e.g.filling the water tank, the correspondingmessage and symbol will disappear.10 OperationPress texts or symbols combined withturning the control ring to navigate in thecontrol panel (for an example, see section“Drink adjustment”).An audible signal is heard when pressingthe touch display. These audible signalscan be switched on or off (see the section“Menu – Key tones”).Preparing drinksThis fully automatic coffee machine canbe operated using coffee beans or groundcoffee (but not instant coffee).If using coffee beans, they will be freshlyground for each brewing. For optimumquality, store the beans in a cool place insealed containers.Note:Cups should be prewarmed, e.g. with hotwater. This applies particularly to smallthick-walled espresso cups.NOTICE:Fill the water tank with fresh, uncarbonated,cold water every day. The tank shouldalways contain sufficient water for operatingthe appliance.Note:For some settings, coffee is preparedin two stages (see the section“Aroma Double Shot” and “Two cups atonce”). Please wait until the process iscompletely finished.Beverage selectionTurn the control ring to select different drinks:The image and the name of the selecteddrink will appear in the middle of the infor mation display.The values currently set, e.g. for the coffeestrength and temperature are shown on theleft and right of the touch display.Y very stronghigh ORistrettoR 1 ozOff
enPreparing drinksThe following drinks can be selected:RistrettoEspressoEspresso MacchiatoCoffeeCappuccinoLatte MacchiatoCafé LatteMilk frothWarm milkHot waterThe drink selected can be directly preparedwith the pre-set values or first adjusted toindividual taste.Drink adjustmentPress one of the fields shown on the touchdisplay, e.g. H to activate the field, Hturns red.Turn the control ring to change the setting.Press H again to save the setting.An example:The values for a cup of Coffee can bechanged as follows: Turn the control ring and select “Coffee”.Y normal Turn the control ring and set the desiredcoffee strength in the middle of the information display , e.g. to “very strong”.Y Strengthvery strongStrengthR 4 oz Press the field F. Turn the control ring to set the requiredamount of coffee, e.g. “5 oz”.Y very strong5 ozQuantityR Quantity Press the field D. Turn the control ring and set the desiredtemperature, e.g. “very high”.high OTemperature OCoffeeR 4 ozOff Press the field, e.g. H to active, Hlights up red.Y StrengthnormalStrengthR 4 ozvery highTemperatureOff Save the settings by pressing the activefield or by starting to dispense the drink.Y very strongvery high OCoffeeR 5 ozOff Note:There are different setting optionsdepending on the type of drink. For coffeedrinks, for example, the strength, temperature and quantity can be set; for milk, onlythe volume. 11
en Preparing drinks The following settings are possible:Coffee strengthmildnormalstrongvery strongDouble ShotDouble Shot Double Shot Note:Aroma Double ShotThe longer coffee is brewed, the morebitter substances and undesirable aromasare released. This has a negative effecton the taste and makes the coffee lesseasily digested. For extra strong coffee,the appliance has therefore a specialAroma Double Shot function. When half thequantity has been prepared, it grinds andbrews fresh coffee beans so that only thepleasant, aromatic scents are released.Note:When the 12 oz (360 ml) or 16 oz (480 ml)volume is selected, the Aroma Double Shotfunction is not aperable.Note:The Aroma Double Shot function is notavailable for Ristretto, Espresso Macchiato,and when ground coffee is used.VolumeThe volume differs depending on the typeof drink and can be set in “oz” or “ml” increments. The factory setting is in “oz” and canbe converted to “ml”, see chapter “Menu Volume units”.Note:The volume dispensed can fluctuatedepending on the quality of the milk.Drinks temperatureValues for coffee drinks:normalhighvery highValues for hot water:The factory setting is in “ F” and can beconverted to “ C”, see chapter “Menu Temperature format”.White tea160 F (70 C)180 F (80 C)Green tea200 F (90 C)Black teaMaxFruit teaNote:If no controls are activated for approx.30 seconds, the appliance will automaticallyexit the settings mode. The settings madewill be automatically stored.Two cups at oncePress G to prepare two cups of theselected drink simultaneously. The setting isshown as text, e.g. “2 x Espresso”. Press G.very high O2xEspressoOn Place two cups left and right underneaththe beverage outlet. Press C to start dispensing.The selected drink is prepared and thendispensed into both cups.Note:The drink is prepared in two stages (twogrinding operations). Please wait until theprocess is completely finished, to remove thecup.Note:When the 12 oz (360 ml) or 16 oz (480 ml)volume is selected, it is not possible todispense two cups at once.12
Preparation using coffee beansNote:Two cups at once cannot be dispensedfor the settings “Aroma Double Shot” or“ground coffee”.Preparation usingcoffee beansThe appliance must be ready for use. Place a cup underneath the beverageoutlet. Turn the control ring and select“ Ristretto”, “Espresso” or “Coffee”.The display shows the selected drink alongwith the preset values for the drink.Y very strongvery high OenMilk containerThis milk container has been speciallydesigned to use together with this fully automatic coffee machine. It is solely intendedfor use in the household, and for storingmilk in the refrigerator.NOTICE:Remove cups or glasses before openingthe door to prevent them from falling.Connecting the milk container or a milkcarton: Open the appliance door. Remove the cover of the beverage outlettowards the front. Connect and fix the milk tubes andconnecting elements as illustrated.CoffeeR 5 ozOff Note:The settings can be changed as describedin the section “Drink adjustment”. Press C to start dispensing.The coffee is brewed and then dispensedinto the cup.Press C again to prematurely haltdispensing. Attach the cover firmly from the front onto the beverage outlet. Attach the suction pipe and insert into themilk container.Preparation using milkThis fully automatic coffee machine hasan integrated beverage outlet. This can beused to prepare coffee drinks with milk ormilk froth and warm milk.¡¡CAUTIONRisk of burns!The beverage outlet gets very hot. Afteruse, always let it cool down before youtouch it. Close the appliance door.Note:Dried milk residues are difficult to remove,therefore always clean immediately afteruse (see the section “Cleaning the milksystem”). 13
en Preparation using ground coffee Coffee drinks with milk Place a cup or glass underneath thebeverage outlet. Turn the control ring and select“Espresso Macchiato”, “Cappuccino”,“Latte Macchiato” or “Café Latte”.The display shows the selected drink alongwith the preset values for this drink.The appliance must be ready for use. Open the appliance door. Remove the ground coffee drawer.The removable drawer must be dry. Put in coffee grounds (maximum 2 levelmeasuring spoons); do not press firmly.Note:The settings can be changed as describedin the section “Drink adjustment”. Replace the ground coffee drawer. Close the appliance door.Press C to start dispensing.The milk is dispensed into the cup or glassfirst. Then the coffee is brewed and runsinto the cup or glass.Press C again to stop the current step ofthe process prematurely.Milk froth or warm milk Place a cup or glass underneath thebeverage outlet. Turn the control ring and select“Milk froth” or “Warm milk”.Note:The settings can be changed as describedin the section “Drink adjustment”. Press C to start dispensing.Milk froth or warm milk is dispensed fromthe beverage outlet.Press C again to prematurely halt thedispensing process.Preparation usingground coffeeNote:When using ground coffee, the settingfor the strength of the coffee, dispensingtwo cups at once and dispensing largervolumes (12 oz/360 ml or 16 oz/480 ml)is not operable. If the message “Doubledispensing not possible with ground coffee”appears, please select a volume smallerthan 12 oz/360 ml.NOTICE:Remove cups or glasses before openingthe door to prevent them from falling.14 NOTICE:Do not use whole beans or instant coffee.Note:If coffee is not dispensed within 90 seconds,the brewing chamber empties automaticallyto avoid an overflow. The appliance is thenrinsed.Place a cup underneath the beverageoutlet. Turn the control ring and select a coffeedrink or a coffee drink with milk.The display shows the selected drink, ameasuring spoon and the preset values forthis drink.Note:The settings can be changed as describedin the section “Drink adjustment”.Note:For coffee drinks with milk, please observethe instructions in the section “Preparationusing milk”. Press C to start dispensing.The coffee is brewed and then dispensedinto the cup. When selecting coffee drinkswith milk, the milk is first dispensed andthen the coffee brewed.Note:For another drink with ground coffee, repeatthe procedure.Dispensing hot water¡¡CAUTIONRisk of burns!The beverage outlet gets very hot. Afteruse, always let it cool down before youtouch it.
The appliance must be ready for use. Remove the milk tube from the milkcontainer. Remove any milk or coffee residue fromthe outlet. Place a cup or glass underneath thebeverage outlet. Turn the control ring and select“Hot water”.Note:The settings can be changed as describedin the section “Drink adjustment”. Press C to start dispensing. The message appears “Milk hose separated from milk container and coffeeoutlet cleaned?”. If still connected, remove the milk tubeand press [ Yes ] on the display.Hot water flows out of the beverage outlet.Press C again to prematurely halt thedispensing process.Personalized drinksPress B to open the selection for personalized drinks.Up to 8 storage spaces can be used. Saveyour favourite drinks that are frequentlydispensed here with all their settings.Note:Press B to exit the menu without savingat any time.Entering or changing drinks Press B.The selection of memory locations appears. Turn the control ring to choose an emptymemory location (empty glass) to make anew entry, change an occupied memorylocation, or delete a favourite drink.enPersonalized drinks Select [ new ] at an empty memory location or [ Details ] at an occupiedmemory location.MyCoffee3] newThe menu for adjusting the drinks opens.The last drink dispensed is shown with thelast settings selected. If you do not wish to save last drinkdispensed, turn the control ring and selectanother drink. Press each setting to be changed andturn the control ring to adjust the valuesas desired.Other setting options appear depending onthe selection. Press [ Further details Save ] to enterother settings.Note:For milk drinks, the mixing ratio of coffeeand milk can be set. The settings can be stored under an individual name. Press [ Name ]. The screenfor entering the name opens.Backto DetailsAnnaNamemDeleteletterSaveletterSave Turn the control ring and select a letter ora symbol. Press [ Save letter ] to confirm the letterselected or [ Delete letter ] to delete it. Select other letters or symbols andconfirm. With [ Save ] the entry is saved.The selection menu opens. Press B to exit the menu. 15
en Adjusting the grind setting Deleting a drink Press B Turn the control ring and select the occupied memory location. Press [ Details ] and [ Further details Save ]. Press [ Delete beverage ] and then[ Delete ].The memory location is again free.Select a personalized drink and dispensePress B. The selection of memory locations opens. Turn the control ring and select thedesired memory location. Place a cup or glass underneath thebeverage outlet. Press C to start dispensing.Adjusting the grind settingThis fully automatic coffee machine has anadjustable grinding unit. This enables thegrinding level of the coffee to be individuallychanged. Open the appliance door. Slide the regulator to select the grindingdegree setting between finely groundcoffee V and coarsely ground coffee W.Note:If the display shows the message “Selecta coarser degree of grinding”, this meansthat the beans are being ground too finely.Adjust the grinding level to a coarsersetting.Child-proof lockThe appliance can be locked to protectchildren against scalding and burns. Press and hold A for at least4 seconds. “Child-proof lock activated”briefly appears on the display.No further operation is now possible; onlyA can be pressed. To deactivat
b) Coffee grounds container 17 Collecting tray 18 Holder (for suction pipe) a) Suction pipe 19 Rating plate (E number, FD) 20 Shelf with sensor (for milk container) 21 Milk container a) Stainless steel container b) Lower part of the lid c) Upper part of the lid Note: Further information about the appliance, such as how to change the opening angle




![[Ringle Material] 3rd wave coffee (Philz Coffee and Blue .](/img/22/2592b1ca.jpg)

