Transcription
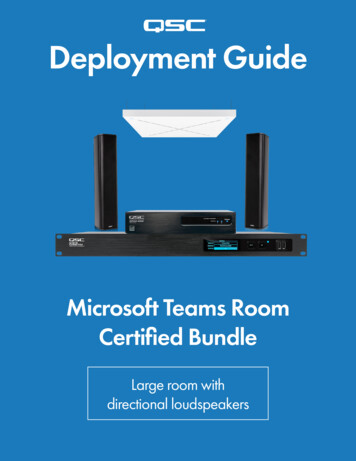
Deployment GuideMicrosoft Teams RoomCertified BundleLarge room withdirectional loudspeakers
Deployment GuideMicrosoft Teams Room Certified Bundle:Large room with directional loudspeakersUse this guide to connect, set up and commission your new system to the Microsoft Teams Room Devicecertification standard. Make sure you have the current Q-SYS Designer file, Q-SYS Control for MicrosoftTeams Rooms application installer, and the Q-SYS feature license for Teams Rooms before you start.1. Items included in this bundleQSC Q-SYS Core 110f processor1QSC SPA Series SPA2-200 power amplifier1QSC AcousticDesign SeriesAD-S802T column surface-mount loudspeaker2QSC Q-SYS NS-1108P network switch1Sennheiser TeamConnect Ceiling 2 microphone1Sennheiser SL CM EB US ceiling brackets17’ Cat6 Ethernet cable150’ Cat5e Plenum Ethernet cable2USB 3.0 A male to B male cable150’ 16 AWG 2-Conductor Plenum Speaker Cable1Additional items needed Microsoft Teams Room compute device with Touch Controller. Configuration laptop running Q-SYS Designer Software, Sennheiser Control Cockpit and Dante Controller.
Deployment GuideMicrosoft Teams Room Certified Bundle:Large room with directional loudspeakers2. DiagramsEthernetRoom Size: Large14 ft x 28 ft (4.3 m x 8.5 m)USBSeat Count: 14-18Mic/LineLoudspeakerQ-SYS NS-1108Pnetwork switchSennheiserTeamConnect Ceiling 2microphoneQ-SYS Core 110f processorSPA Series amplifierMicrosoft Teams Roomscompute deviceQSCAcousticDesign SeriesloudspeakersMicrosoft Teams RoomCertified USB accessories
Deployment GuideMicrosoft Teams Room Certified Bundle:Large room with directional loudspeakers3. Sennheiser TeamConnect Ceiling 2 Microphone Setup3.1 - The Sennheiser TeamConnect Ceiling 2 (TCC2) is a ceiling-mounted dynamic beamforming microphone that supports Dante foraudio transport. The Sennheiser Control Cockpit software is required to begin the setup process. With your configuration laptop and theTCC2 Ethernet PoE/Ctrl port connected to the network switch, the browser-based Control Cockpit interface will detect and identify theTCC2 as shown below (using mDNS).(Figure 3.1 – Control Cockpit Device List)Select the unit to be configured from the Device List(Figure 3.1). This will enable the Properties windowwhere audio, device and network parameters canbe examined and edited.3.2 - Select the Network tab (Figure 3.2) toconfigure the Ethernet settings of the microphone.If using static IP address for your system set yourIP address and click save. You will need the IPaddress of the microphone later in the set up (Step6.4) to complete the control connection betweenthe Q-SYS Core and the microphone.(Figure 3.2 – Control Cockpit Network Tab)3.3 - The Zones tab (Figure 3.3) shows the current focus of the TCC2automatic beam-steering, which can be tracked in real time. Click Edit tomanually configure vertical and horizontal exclusion zones, which preventsdetection of noise and sounds in these zones (e.g., ceiling mounted ACvents, projector fans).In some reverberant environments, applying an exclusion zone, directedtoward the front of the room and in the direction of the video display canimprove accoustic echo cancellation (AEC) performance.Note: Refer to the TeamConnect Ceiling 2 instruction manual for moreinformation.(Figure 3.3 - Zones Tab)
Deployment GuideMicrosoft Teams Room Certified Bundle:Large room with directional loudspeakers4. Install Q-SYS Designer SoftwareOn your configuration laptop, install the current version of Q-SYS Designer Software (9.0 or later) and open the provided Q-SYS Designerfile. Once open, select Tools from the ribbon and select Show Configurator. This will open Q-SYS Configurator and you will see yourCore processor listed on the left pane of the window. Choose your Core processor and click on the Configuration Page link to openQ-SYS Core Manager Network Settings. Review/configure the Core’s network settings. For more information, see Initial Discovery andConfiguration. Set the name of the Core to a unique name that suits your needs. Return to the design file and ensure that the Core’s name inyour design matches the Hostname you just set in Q-SYS Core Manager. Save the design to the Core and Run (F5). See About Designs onthe Core.If the Core’s firmware does not match that of Q-SYS Designer on your configuration laptop, you will be prompted to update the firmware.Refer to Updating Q-SYS Software and Firmware.5. Configuring the Microsoft Teams Room Compute5.1 - Before you start this step, you will need to have your Microsoft Teams Rooms connected to the network and to the Q-SYS Core asshown in the drawing earlier in this guide. Refer to your network administrator and the Microsoft Deployment Overview for details ingetting your Microsoft Teams Room compute device running. From the Admin account, install the included Q-SYS Control for Teams RoomInstaller on your Microsoft Teams Room compute device. You will also need to capture the Host name (preferred) or IP address of theapplication to be used later in the setup (Step 6.5).5.2 - To set the Q-SYS Core as the Default Microphone and Speakers for the Microsoft Teams room system select “More” on the touchcontroller then select “Settings”. Enter the password for the system (SFB is the default) and select “Peripherals” from the left pane. In thecenter window, select “Echo Cancelling Speakerphone (Core 110f)” for both the microphone, speaker and default speaker boxes. Press“Save and Exit” to go back to the main control window.6. Commissioning the Q-SYS Design fileWith the Microsoft Teams Rooms design for Q-SYS runningon your Core, the next steps will complete the setup of theroom devices.6.1 - Set the Room Name: this is usually a common name forthe room that will help the Admin of the room quickly identifyit. This name will be used in the web hook reporting thruTeams if enabled by the admin.6.2 - Choose the location of the loudspeakers in the room.For in-ceiling or pendant style, select “Ceiling” and fordirectional loudspeakers, select “Wall.” If your system usesboth types, select the first type of loudspeaker, then followStep 3. Then return to Step 2 to make the selection for theadditional loudspeaker type.6.3 - Choose the QSC loudspeaker model. These should bepre-populated in your file but should be verified.
Deployment GuideMicrosoft Teams Room Certified Bundle:Large room with directional loudspeakers6.4 - Microphone setup: Using the Ctrl/PoE IP address that was configured in Step 3.2, enter it into the Control IP address field. Clickon the TCC2 Device dropdown and select the name of the microphone you are using. Then Select “Out” from the TCC2 Audio Channelselection drop down. You should see the Status illuminate green and say “OK.” Then enter a Dante stream name for the Acoustic EchoCancelation reference that will be sent to the microphone. Once set, you will need to open Dante Controller software and make a crosspoint connection between the AEC reference and the input of the microphone. Please refer to the Dante Controller User Guide for moreinformation.6.5 - Enter the Host Name or IP Address from Step 5.1 of your Teams compute device here, this will allow communication between theCore and Teams Room compute device via the network. The Room Controls UCI (user contol interface) can be selected below, a sampleUCI is selected by default, but this can be changed later to suit your needs.6.6 – If you would like the Core to notify you of parameters that are out ofspec, you can enter your webhook info here. If this will not be used, justleave this space blank.6.7 – With your mobile device on the same network as the Q-SYS Core,scan the QR Code to Load the mobile “Companion App.” From here, youwill follow the step-by-step instruction of the app to complete setup. Youwill need to make a call to a colleague outside of the room to complete theaudio tuning so make sure you have someone available before you start.CompletionOnce you complete the steps on the companion app, the Room Status willshow all devices are working and are in spec. If no signal chain changesare made, the System Status will show “This System is Using CertifiedSettings.” If changes were made to accommodate your rooms uniqueaudio needs the status will say “Using Commissioned Settings.”Congratulations, you have now completed the Certified Microsoft Teams Room setup for your QSC system!QSC and the QSC logo are registered trademarks of QSC, LLC in the U.S. Patent and Trademark office and other countries.qsc.com/microsoftteams1675 MacArthur Boulevard Costa Mesa, CA 92626 Ph: 800/854-4079 or 714/957-7100 Fax: 714/754-6174
Use this guide to connect, set up and commission your new system to the Microsoft Teams Room Device certification standard. Make sure you have the current Q-SYS Designer file, Q-SYS Control for Microsoft Teams Rooms application installer, and the Q-SYS feature license for Teams Rooms before you start. 1. Items included in this bundle